Connect to DSW instances from local terminals or IDEs using SSH for lower latency and higher stability.
Supported instances
| Instance type | Requirement |
|---|---|
| Pay-as-you-go instances in public resource group | Specification cannot start with ecs.ebm |
| Instances using Lingjun resource | No additional restrictions |
Connection limit: PAI automatically configures DNAT rules for each Internet NAT gateway. Each Internet NAT gateway supports up to 100 DNAT rules, allowing up to 100 concurrent connections. For quotas, see Quotas.
Billing
Internet NAT gateway and elastic IP address (EIP) are billed separately and continue to incur charges even when the DSW instance is stopped. Delete these resources promptly when no longer needed.
Public internet access requires an Internet NAT gateway and an elastic IP address (EIP). These are independent cloud products billed separately from the DSW instance.
Prerequisites
Complete these requirements:
-
Pay-as-you-go instance (or Lingjun resource-based instance) that meets the requirements above
-
Internal DNS resolution enabled for the VPC (required for SSH connectivity)
Step 1: Generate SSH key pair
Run this command on your local machine to generate an SSH key pair. Set a passphrase when prompted, or press Enter to skip.
To use remote_ikernel (described in the use case below), do not set a passphrase. Press Enter to skip the prompt.
Option A: Default directory (recommended)
ssh-keygenThis generates a public key (id_rsa.pub) and private key (id_rsa) in the default directory:
| Operating system | Default path |
|---|---|
| Windows | C:\Users\<username>\.ssh |
| Linux | /root/.ssh (root) or /home/<username>/.ssh (regular user) |
| macOS | /Users/<username>/.ssh |
Existing SSH key pairs in this location will be overwritten.
Option B: Custom directory
ssh-keygen -f /your/path/example_rsaThis generates example_rsa.pub and example_rsa in /your/path.
Step 2: Configure SSH parameters
When creating an instance, configure these network and SSH parameters.
For existing instances, click Change Settings, modify the parameters, and click OK.
When creating an instance in the public resource group, configure a Virtual Private Cloud, vSwitch ID, and Security Group. The VPC and security group must be in the same region as the instance.
For more information, see Create a VPC and vSwitch and Manage security groups.
Create a VPC, vSwitch, and security group
-
On the DSW configuration page, click Create VPC. Configure VPC Name, IPv4 CIDR Block, and vSwitch information. Click OK to create the VPC and vSwitch.


-
Return to the DSW configuration page. For VPC Settings, select the VPC from the previous step.
-
Click Create Security Group. Keep default parameters and click Create. Return to the DSW configuration page and select the security group for the Security Group ID setting. Verify the security group allows inbound access on port 22.


Configure SSH settings
Set the following SSH parameters on the DSW configuration page:
| Parameter | Description |
|---|---|
| Enable SSH | Enable this switch. |
| SSH Public Key | Paste the contents of id_rsa.pub from Step 1. Add up to 10 public keys (one per line) to support login from multiple clients. |
| Listener Port | Port SSH listens on inside the instance. Default: 22. This parameter appears under Custom Services after enabling Enable SSH. |
| Service Access Method | Access over VPC: Enabled by default. Allows access from other terminals within the VPC, such as an ECS instance. Access over Internet: Select for public access. Requires an NAT Gateway and an Internet Access Gateway. |
| Internet Access Port | Port for public internet access, corresponding to the -p parameter in the SSH command. Example: 1024. |
| NAT Gateway | Required for public access. Select an Internet NAT gateway for the current VPC. |
| EIP | Required for public access. Select an elastic IP address (EIP) for the current NAT gateway. |
If Internet NAT gateway and EIP do not exist, create them:
-
Click Create NAT Gateway. On the NAT gateway creation page, configure parameters as needed. Then, click Create EIP.


-
On the EIP creation page, configure parameters as needed. Click Buy Now.
-
Return to the NAT gateway creation page. For Elastic IP Address Instance, select the instance from the previous step. Click Purchase Now to create the Internet NAT gateway.
Step 3: Install SSH server (custom images only)
When using official pre-installed images or custom images based on official ones, the SSH server is already installed. Skip this step.
For other custom images, install the SSH server manually:
-
Open the instance.
-
In the DSW Terminal, run:
If the command returns
sudo: command not found, runapt-get install sudofirst, then run the commands above.sudo apt-get update sudo apt-get install openssh-server sudo service ssh start -
Verify SSH server is running:
service ssh status
Step 4: Connect to instance
Find connection endpoints
On the DSW page, click the instance name to open instance details. On the Instance Configuration tab, in the Access Configuration section, find the Public Endpoint and VPC Endpoint.
Connect from a terminal
Public internet access
ssh root@xx.xx.xx.xx -p 1024-p 1024 is the Internet Access Port configured for SSH.
If the private key is not in the default path, specify the location:
ssh -i /your/path/example_rsa root@xx.xx.xx.xx -p 1024VPC access
From another terminal within the same VPC (such as an ECS instance), use the VPC endpoint:
ssh root@dsw-notebook-xxxx.dsw-xxxx.dsw.pai.alibaba.com -p 22If the private key is not in the default path:
ssh -i /your/path/example_rsa root@dsw-notebook-xxxx.dsw-xxxx.dsw.pai.alibaba.com -p 22Connect from VS Code
-
Open VS Code and install the Remote - SSH extension from the Extensions marketplace.

-
Click the icon in the bottom-left corner
 to open the Remote-SSH pop-up. Select Connect to Host... > Add New SSH Host....
 -
Enter the SSH connection command:
If the private key is in the default path:
ssh root@xx.xx.xx.xx -p 1024If the private key is not in the default path:
ssh -i /your/path/example_rsa root@xx.xx.xx.xx -p 1024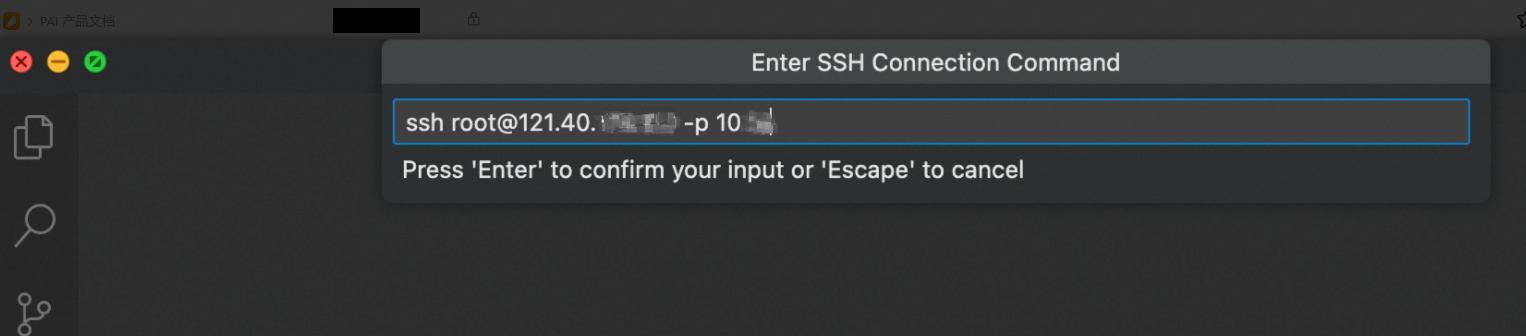
-
Click Open in the bottom-right corner. Successful connection is indicated in the bottom-left corner.

-
Open a directory in the DSW instance for remote development and debugging.

-
During runtime, connect to the kernel in the instance.
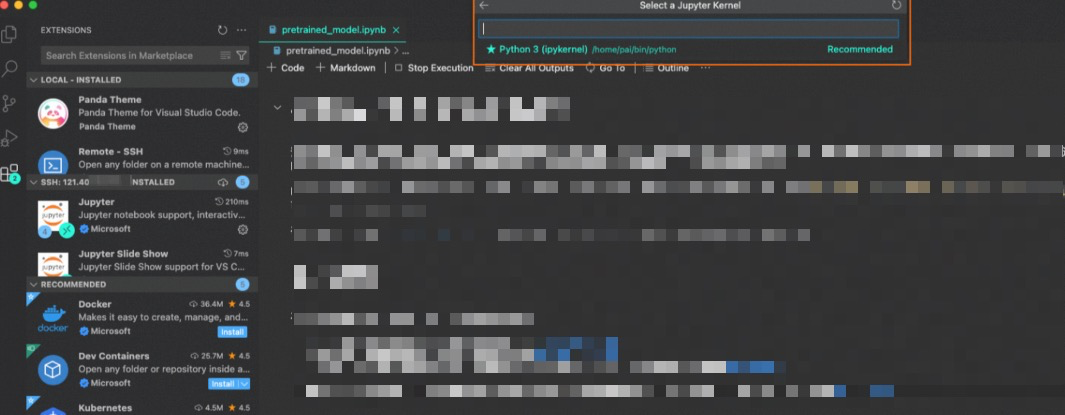
Use case: Run local notebook code on instance
Prerequisites
-
Completed Steps 1--4
-
SSH key pair generated without a passphrase
Steps
-
In the local terminal, install
remote_ikerneland add a remote kernel:Replace
root@*.*.*.*:1024with the actual host address. If the private key is not in the default path, use--host="-i /your/path/example_rsa root@*.*.*.*:1024".pip install remote_ikernel remote_ikernel manage --add \ --kernel_cmd="ipython kernel -f {connection_file}" \ --name="Remote Python" \ --interface=ssh \ --host=root@*.*.*.*:1024Output when the remote kernel is added successfully:
Added kernel ['rik_ssh_root_121_40_*_*_1024_remotepython']: SSH root@121.40.*.*:1024 Remote Python.To view the remote kernel configuration:
remote_ikernel manage --show -
In VS Code, open a notebook file. Click kernel selection in the top-right corner. Search for and select "Remote Python".
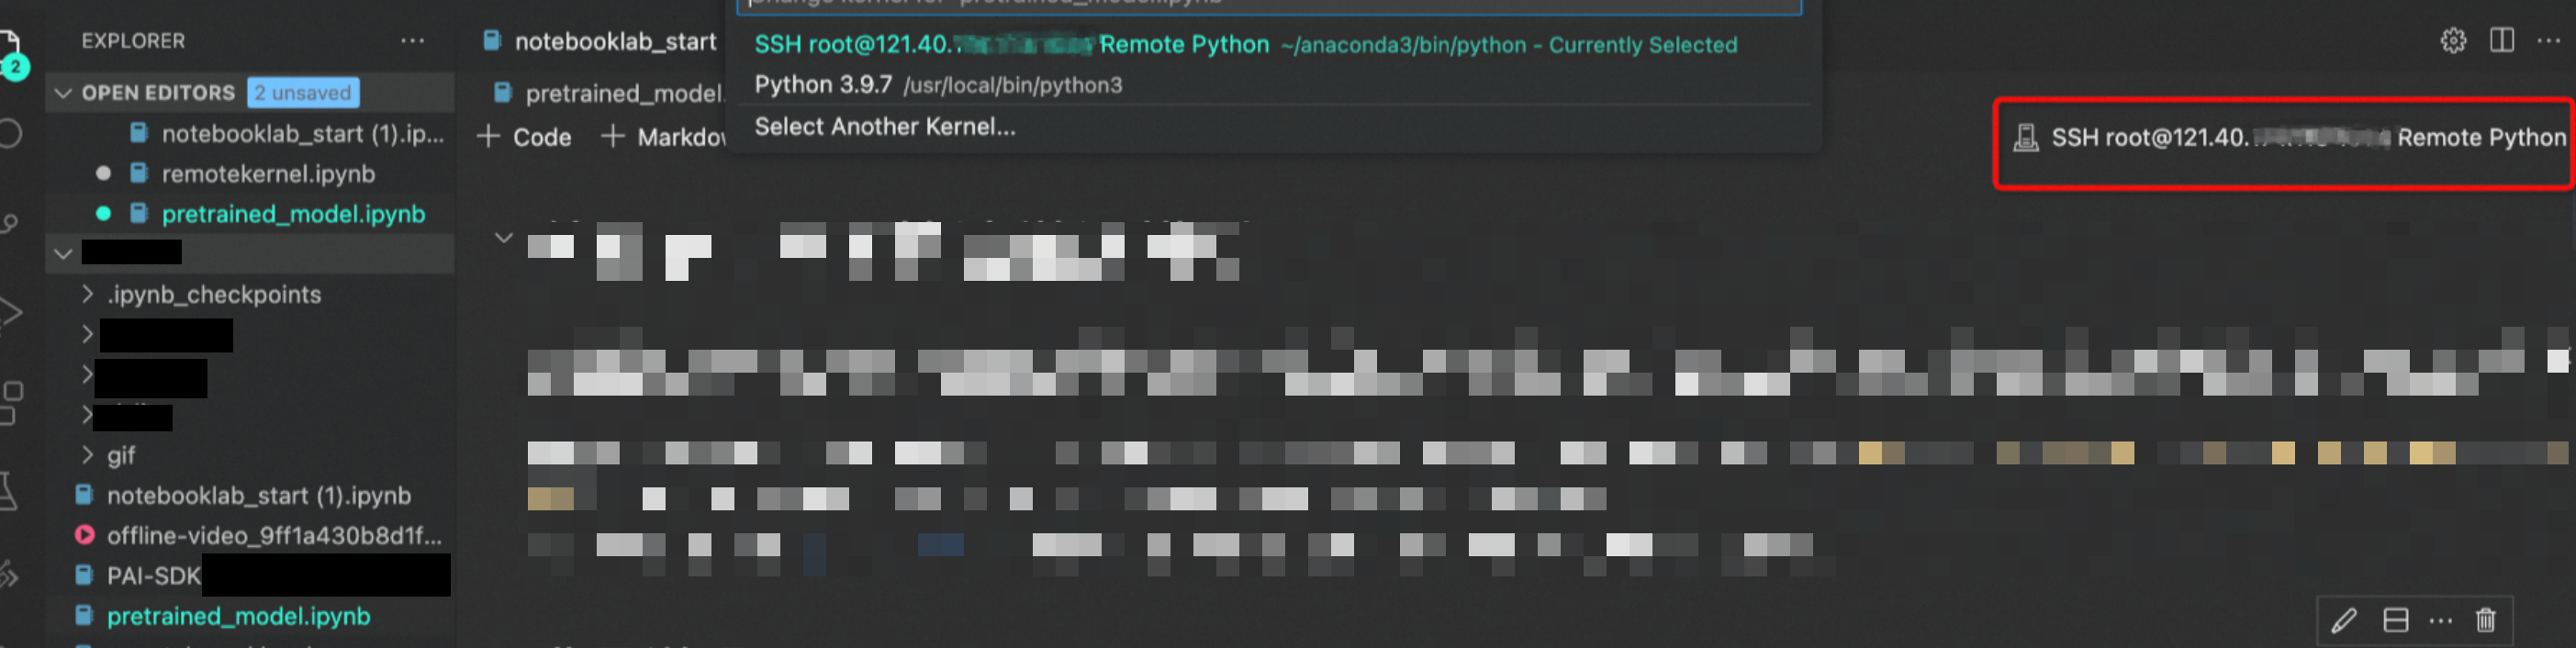
FAQ
Differences between direct SSH and ProxyClient
| Direct SSH (recommended) | ProxyClient | |
|---|---|---|
| Performance | Faster and more stable. Requires VPC and NAT gateway. | No additional network components needed. May be slower and less stable. |
| Supported instances | Pay-as-you-go instances in public resource group (specification cannot start with ecs.ebm). Instances using Lingjun resource. |
All instance types. |
| Authentication | SSH public/private key. | Alibaba Cloud AccessKey first, then SSH public/private key. |
| Access path | Public internet (requires Internet NAT gateway and EIP) or VPC internal network. | Public internet only. |
| How it works | PAI automatically creates a DNAT rule on the NAT gateway to forward public SSH requests to the instance. | PAI's proxy server relays all traffic. |
| Ongoing costs | Internet NAT gateway and EIP incur charges continuously, even when the instance is stopped. Delete them when no longer needed. | No additional costs. |
| Setup guide | This document. | Remote connection: ProxyClient method |
PyCharm and other IDE support
Yes. Any IDE using native SSH protocol is supported. IDEs like PyCharm may automatically download and install server-side components onto the instance. Verify the instance has public internet access for this to work.
Troubleshoot SSH connection failures
SSH connection issues typically stem from network misconfiguration, authentication errors, or missing server-side setup. Identify whether the issue is with the VPC or public network path.
Public connection fails or times out
First, try connecting through the VPC endpoint from within the same VPC. If VPC connection works, the issue is in NAT gateway configuration:
-
Multiple NAT gateways in VPC: Verify the instance's vSwitch routes to the correct NAT gateway. See Deployment solutions for multiple Internet NAT gateways in the same VPC for routing table configuration.
-
Single NAT gateway: Use the Self-service Troubleshooting tool. Enter the local public IP, the instance's EIP, and the public port to analyze reachability.
VPC connection fails
-
SSH server not running: When using custom images, confirm that
openssh-serveris installed, running, and enabled. See Step 3. -
Security group blocking traffic: Verify the security group allows inbound traffic on TCP port 22 from the source IP.
-
If these steps do not resolve the issue, contact your business manager for assistance.
Connection times out (general)
-
Direct SSH over internet: Verify the Internet NAT gateway and security group rules. Check the correct port is open.
-
Direct SSH over VPC: Verify security group rules allow traffic between instances. Try enabling private DNS resolution service for the VPC.
"Permission denied" or "Server refused our key" error
-
Public key mismatch: Verify the public key (
.pubfile content) was copied completely and correctly into the instance's SSH configuration. -
Wrong private key: Verify the SSH command uses the matching private key. If the private key is not in the default location (
~/.ssh/id_rsa), specify the path with the-iflag:ssh -i /path/to/your/private_key root@...
VS Code connection fails
-
Confirm the Remote - SSH extension is installed and enabled.
-
When adding a new host, verify the full SSH command is correct, including user, host, and port (for example,
ssh root@xx.xx.xx.xx -p 1024). -
If VS Code fails, run the same SSH command in the local terminal. Terminal error messages provide more specific diagnostic details.
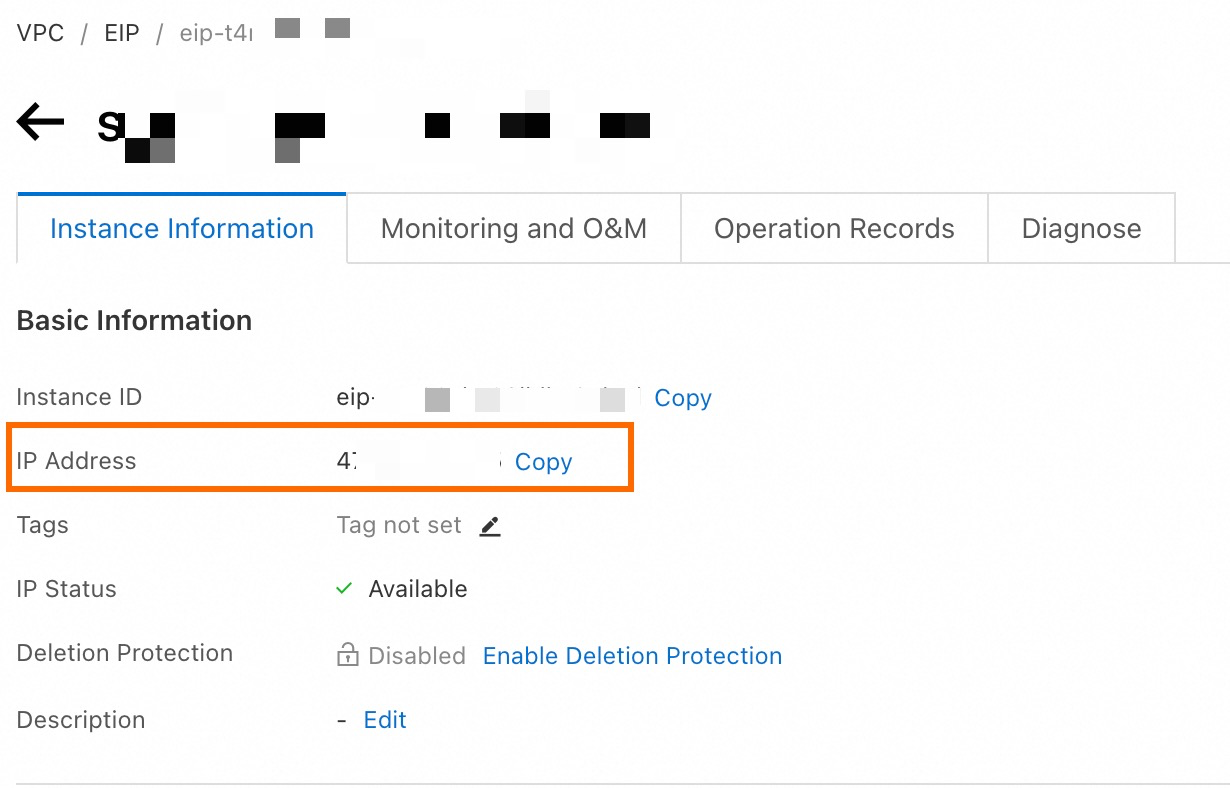
Find public IP address for SSH
The public IP is the elastic IP address (EIP) associated with the Internet NAT gateway:
-
On the DSW instance list page, click the instance name to open the configuration page.
-
In the Network Information section, click the link next to Elastic IP Address. The EIP console opens and displays the IP address.
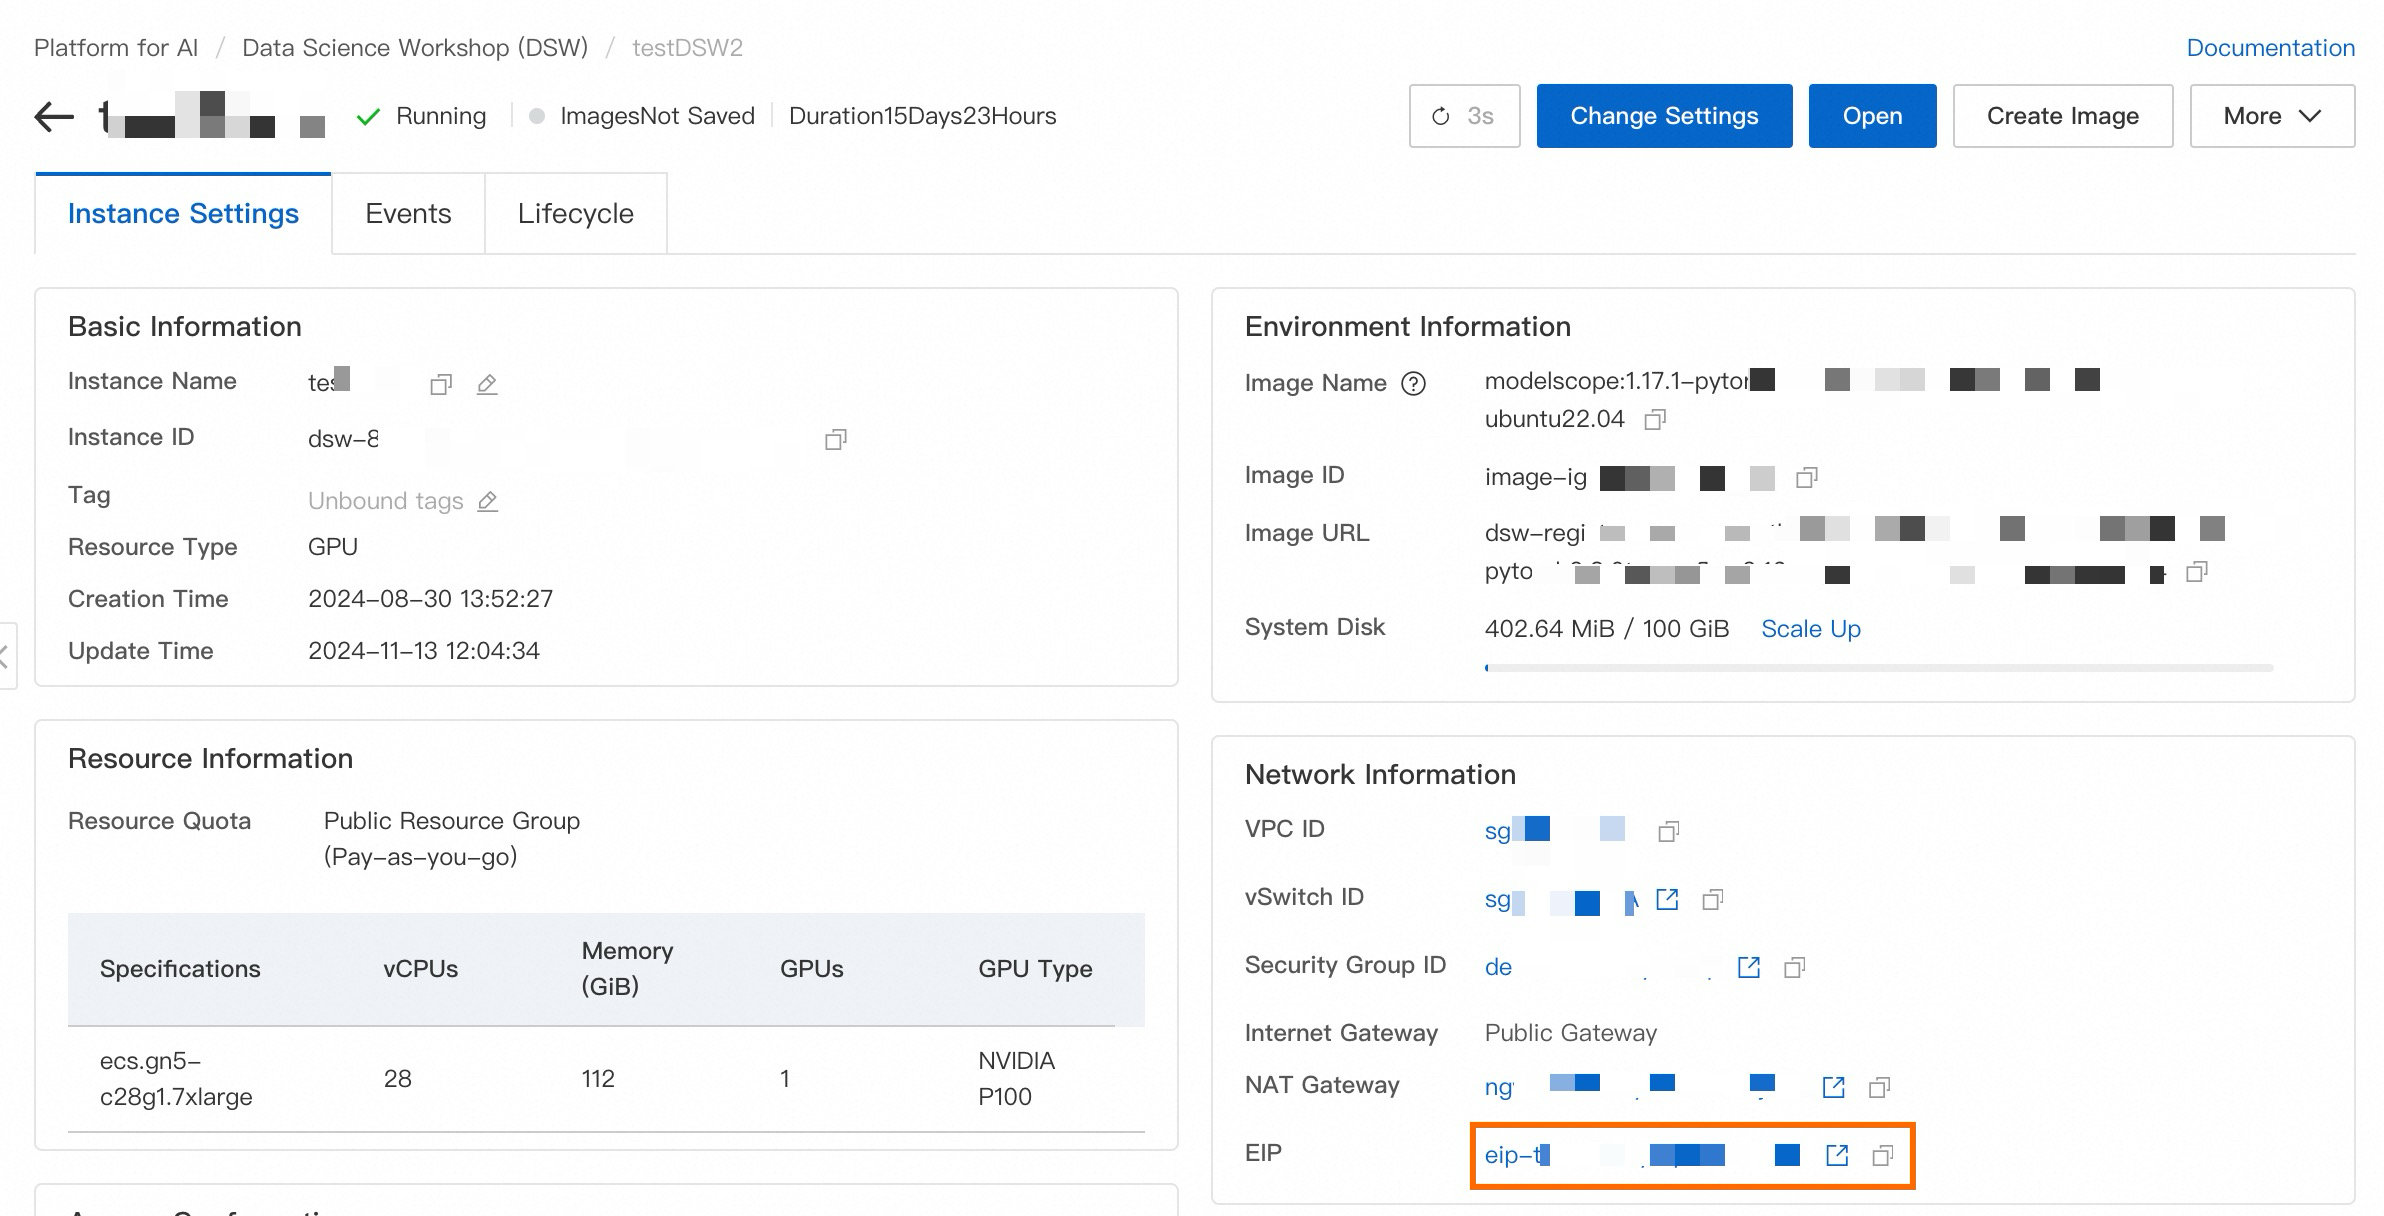
Multiple SSH users on DSW instance
No. DSW does not natively support multiple, isolated user accounts for SSH. By default, all SSH connections use the root user. Creating new users manually within the operating system is not officially supported and may lead to unexpected behavior.
Project files not visible after VS Code connection
The IDE opens the home directory (/root) by default after SSH login. Project files are typically on a separate mounted data disk. In the IDE, use File > Open Folder... to navigate to /mnt/workspace or the appropriate working directory.
References
-
If direct SSH is unsuitable, use the ProxyClient method. ProxyClient requires no additional network components.