Enterprise Distributed Application Service (EDAS) provides a resource search feature that lets you quickly find and access resources using known information, such as resource IDs and names. This topic describes how to use this feature to quickly access your target resources.
Background information
EDAS resources are organized into microservices namespaces, clusters, and applications. Each resource type has sub-resources or properties. It can be difficult to find a parent resource using one of its sub-resources or properties, such as finding an application based on a pod's IP address or an ECS cluster based on an ECS instance. The EDAS resource search feature simplifies this process and helps you quickly access target resources.
You can search for the following resources:
-
A namespace for microservices.
-
Clusters, including ECS clusters, Container Service for Kubernetes (ACK) clusters, and ACK serverless clusters
-
Applications, including applications deployed in ECS clusters, ACK clusters, and ACK serverless clusters
Limits
You must have search permissions to search for resources. For more information, see Access control for search.
Access control for search
The resource search feature supports searching for microservices namespaces, clusters, and applications in EDAS. To protect data security, you must configure search permissions for your account.
The root account does not require authorization.
-
Log on to the EDAS console and switch the authorization mode to RAM authorization. For more information, see Step 4: Switch the authorization to RAM authorization in the EDAS console.
-
In the navigation pane on the left, choose .
-
On the Permission Assistant page, click Create Policy.
-
In the Create Policy wizard, on the Create Custom Policy tab, set Policy Name and Remarks.
-
Add permission statements.
Note-
A policy can contain multiple statements. If a permission is set to Allow in one statement and Deny in another, the deny rule takes precedence.
-
Each new statement can have only one effect: Allow or Deny.
-
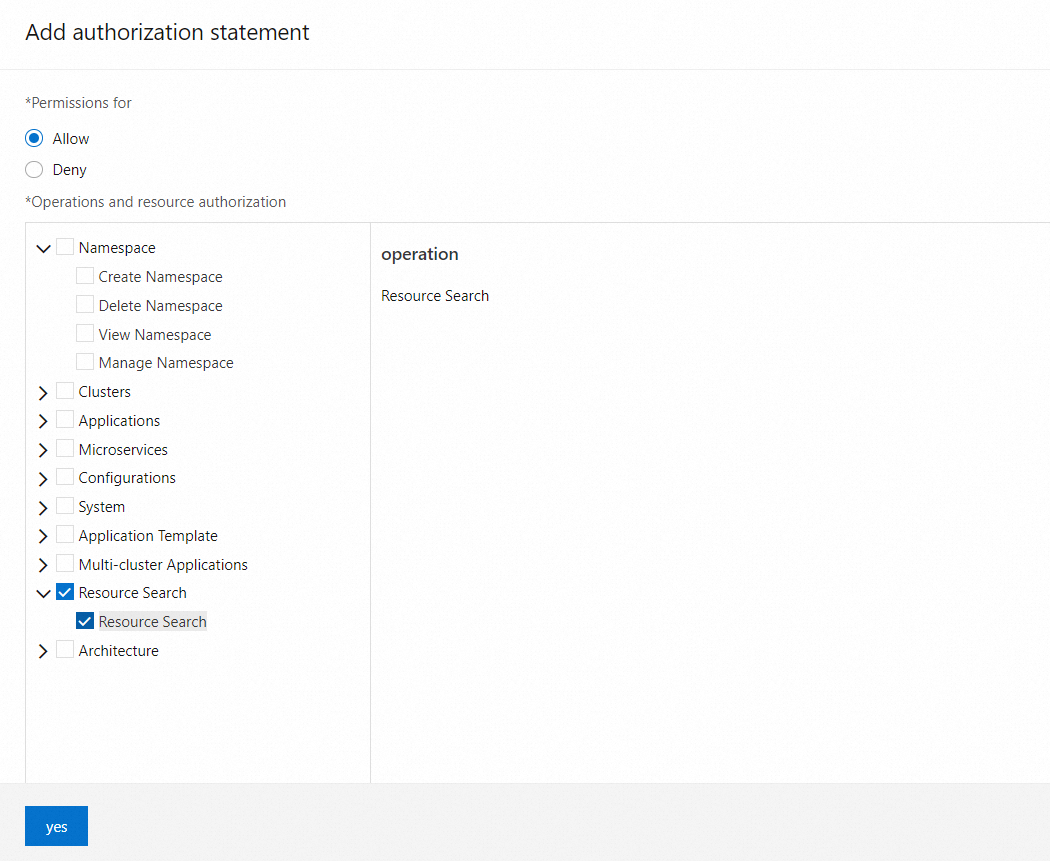
On the Create Custom Policy tab, click Add Statement. In the Add Authorization Statement panel, add a statement for the authorization policy.
EDAS uses a separate permission to control whether a RAM user can search for resources and view the details of the search results. For example, to view application resources in the search results, the RAM user needs view permissions for that application. You can set three types of resource permissions for the RAM user as needed: microservices namespace, cluster, and application.
The following section uses a microservices namespace named
testas an example to describe how to view clusters and manage applications in the namespace.-
For Effect, select Allow.
-
In the left-side permission list, under Operations and Resources, choose .
-
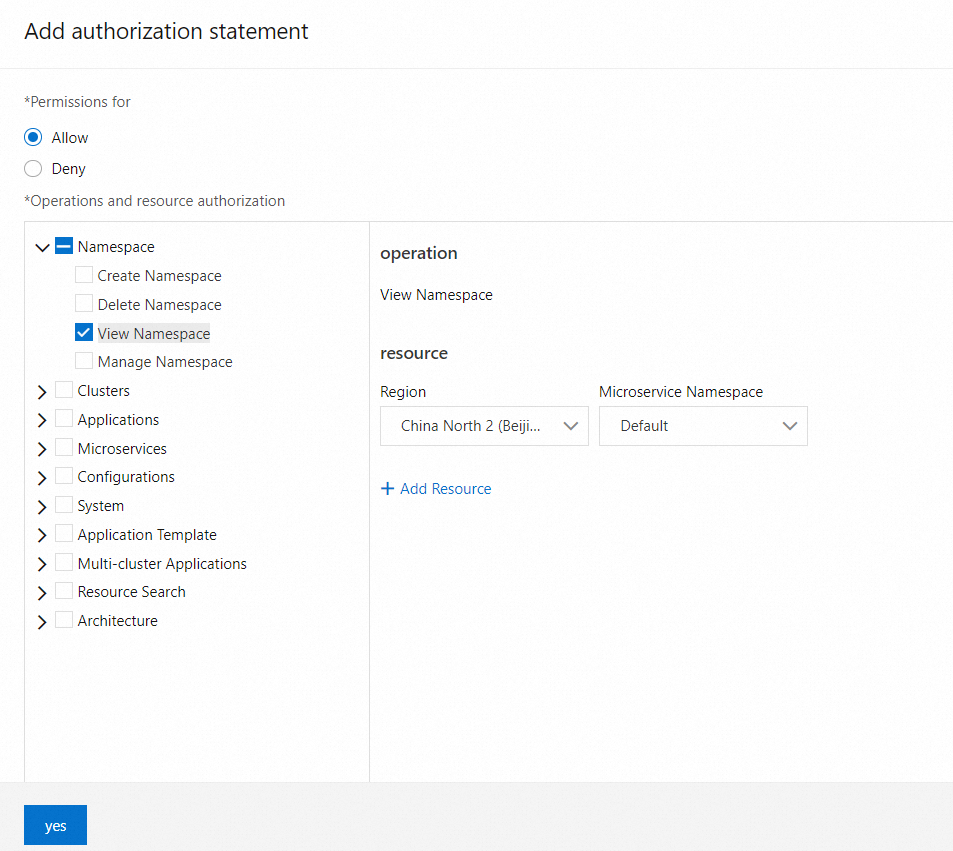
In the Operations and Resources section, choose Namespace > View Namespace from the permission list on the left. In the resource list on the right, select China (Beijing) and test.
This operation allows the RAM user to view the microservices namespace named test. You can grant this permission as needed.
-
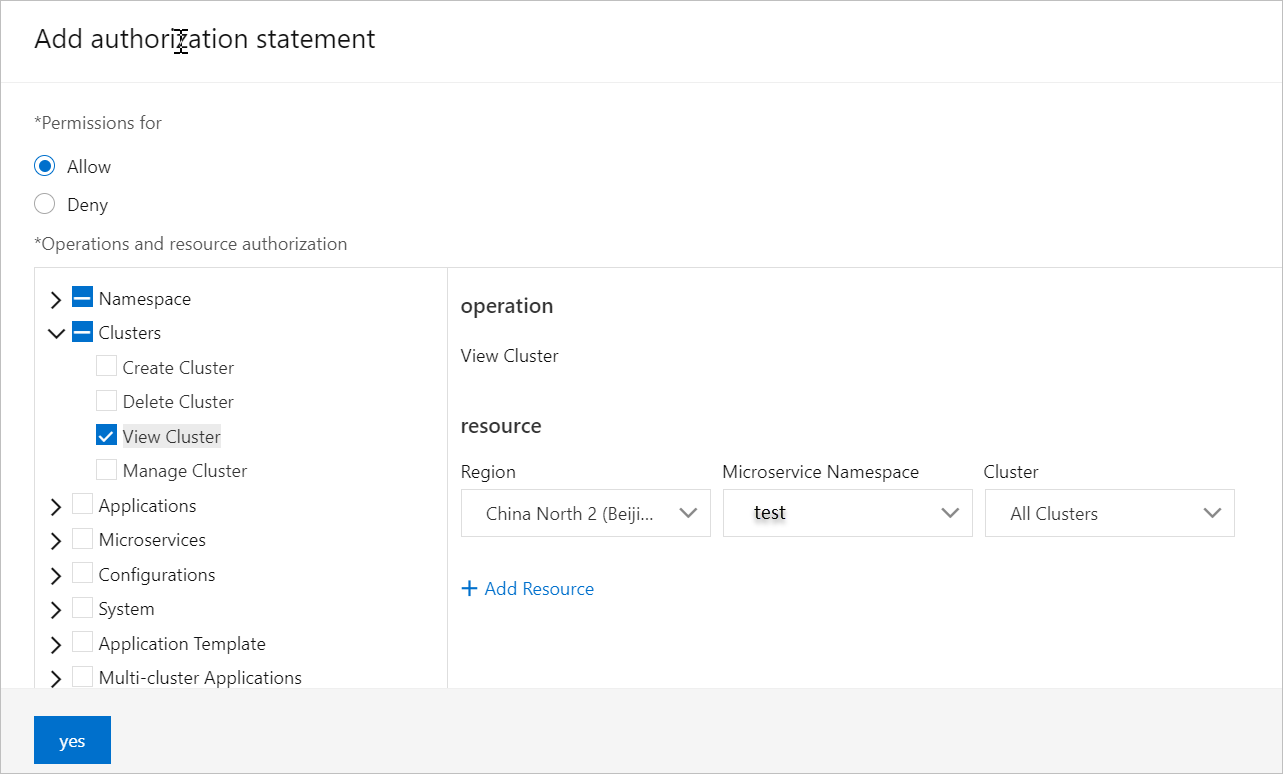
In the Operations and Resources section, from the permission list on the left, choose . From the resource list on the right, select China (Beijing), test, and All Clusters.
This operation allows the RAM user to view all clusters in the microservices namespace named test. You can grant permissions for specific clusters as needed.
-
In the Operations and Resources section, select Application from the permission list on the left. This selects all permissions under Application. In the resource list on the right, select China (Beijing) and test.
This operation grants the RAM user permission to view all applications in the microservices namespace named test. You can grant permissions for specific applications as needed.

-
-
-
On the Preview Policy tab, follow the on-screen instructions to create a custom policy in the Resource Access Management (RAM) console and attach it to the corresponding RAM user. After you create the policy, preview the permissions and click Complete. For more information, see Step 3: Create a RAM user and grant permissions.
The message Policy granted successfully appears. Click Back to List to return to the Permission Assistant page and view your new access policy template.
Search for a resource
-
Log on to the EDAS console.
-
In the navigation pane on the left, click . In the search box that appears, enter a keyword to find the resource.
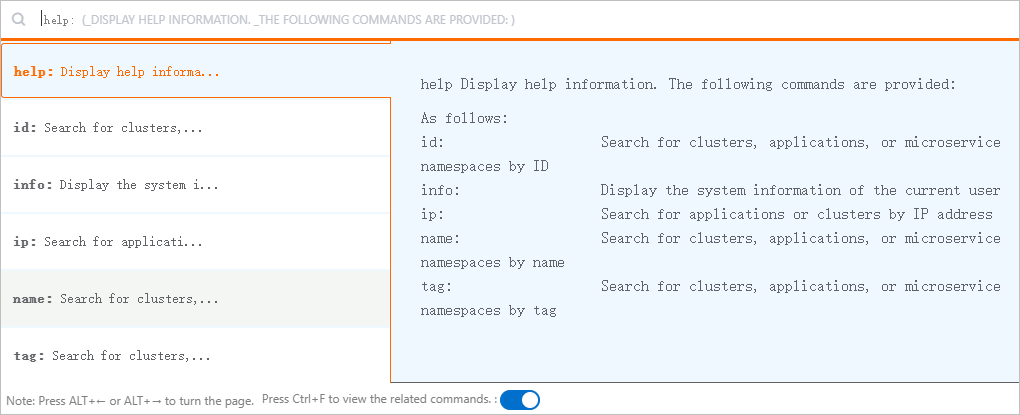
If you know the properties of the resource, you can perform a more specific search using an attribute prefix. The following attribute prefixes are supported:
-
id: The unique identifier of the resource. -
name: The name of the resource. -
ip: The IP address of the resource. -
tag: The tag of the resource.
The search box also supports the following two help commands:
-
help: Provides help information.
-
info: Provides information about the current user.
NoteOn any page in the EDAS console, you can press Ctrl+F to open the resource search box.
-
-
In the search results, click a resource ID to go to the details page for that resource.