Scenario-based networking lets you quickly build a Cloud Enterprise Network (CEN) that connects virtual private clouds (VPCs) across regions. Instead of manually creating each component, the feature automatically provisions CEN instances, transit routers, VPC connections, cross-region connections, associated forwarding, and route learning in a single workflow.
Scenario-based networking supports full communication of VPCs across regions within the same account.
To customize associated forwarding or route learning, see Connect VPCs in the same region or Connect VPCs in different regions.
To connect VPCs that belong to different accounts, see Establish a cross-account VPC-to-VPC connection.
Scenario
This tutorial connects three VPCs: two in China (Hangzhou) and one in China (Shanghai).

Parameter | VPC1 | VPC2 | VPC3 |
Region | China (Hangzhou) | China (Hangzhou) | China (Shanghai) |
CIDR block | 10.0.0.0/16 | 172.16.0.0/16 | 192.168.0.0/16 |
vSwitch1 | Zone J, 10.0.0.0/24 | Zone J, 172.16.0.0/24 | Zone M, 192.168.0.0/24 |
vSwitch2 | Zone K, 10.0.1.0/24 | Zone K, 172.16.1.0/24 | Zone N, 192.168.1.0/24 |
ECS IP | ECS1: 10.0.0.1 | ECS2: 172.16.0.1 | ECS3: 192.168.0.1 |
Before you begin
Make sure the following requirements are met:
You have created the VPCs and vSwitches listed in the scenario above (or equivalent resources in your own environment).
VPC CIDR blocks must not overlap.
For zone-level disaster recovery, each VPC contains vSwitches in at least two different zones.
Each VPC has at least one Elastic Compute Service (ECS) instance deployed, which you will use to verify connectivity.
Step 1: Create the networking configuration
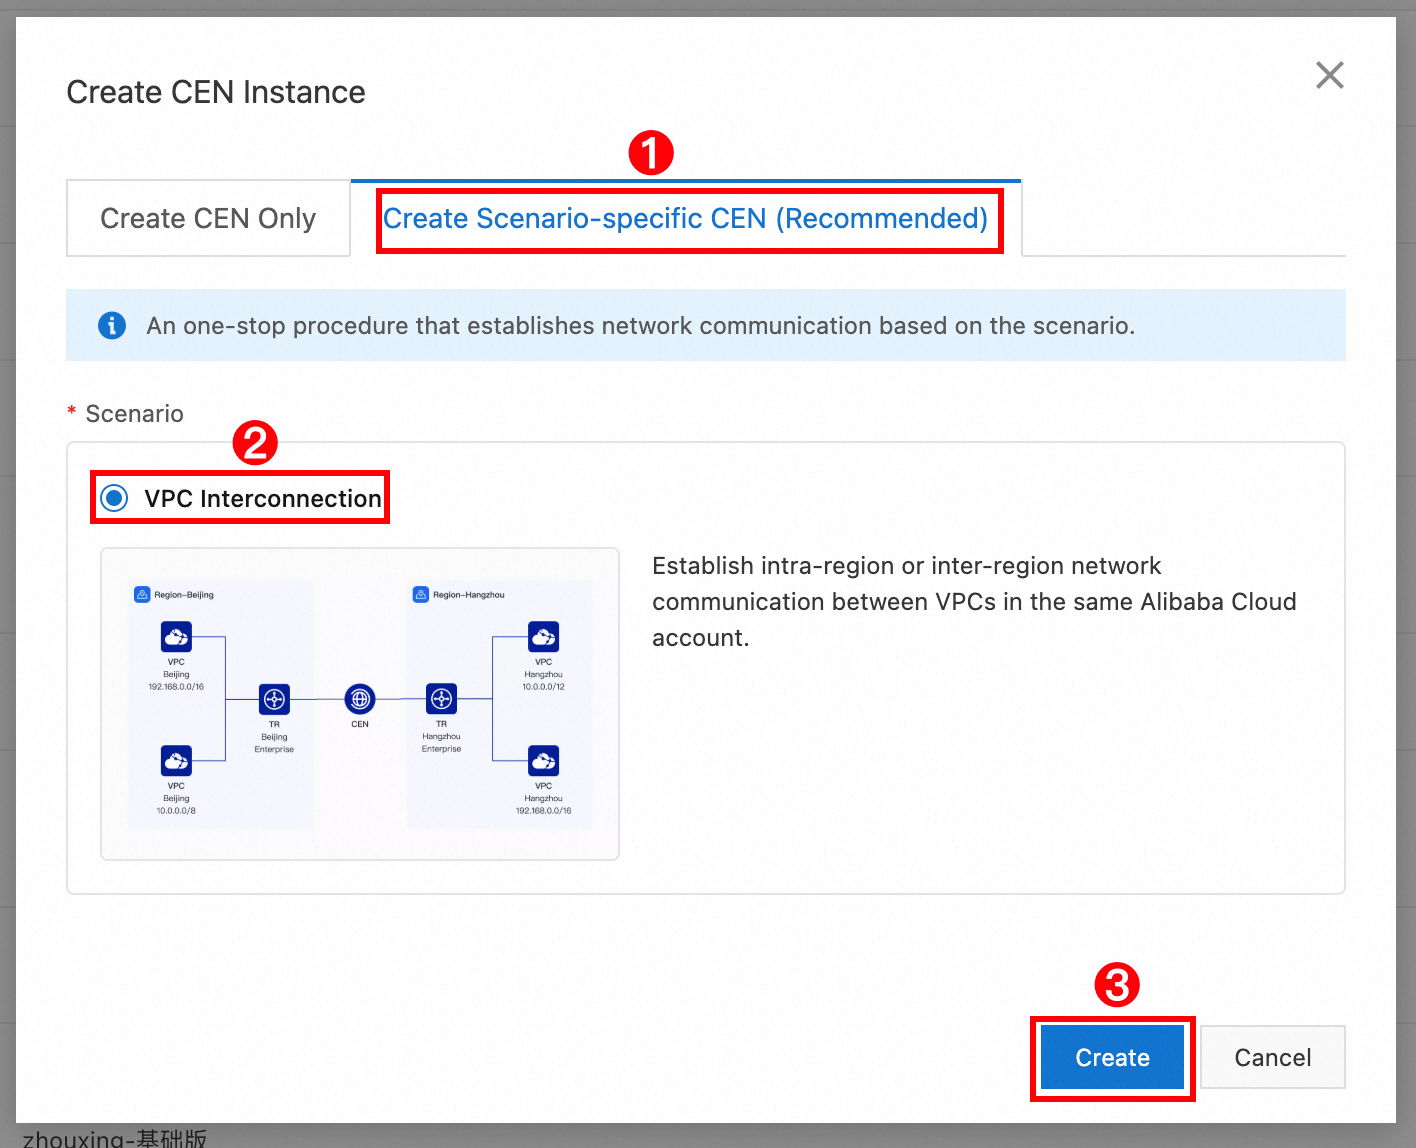
Log on to the CEN console. On the Instances page, click Create CEN Instance.
In the Create CEN Instance dialog box, select Create Scenario-specific CEN (Recommended), choose VPC Interconnection, and click Create.
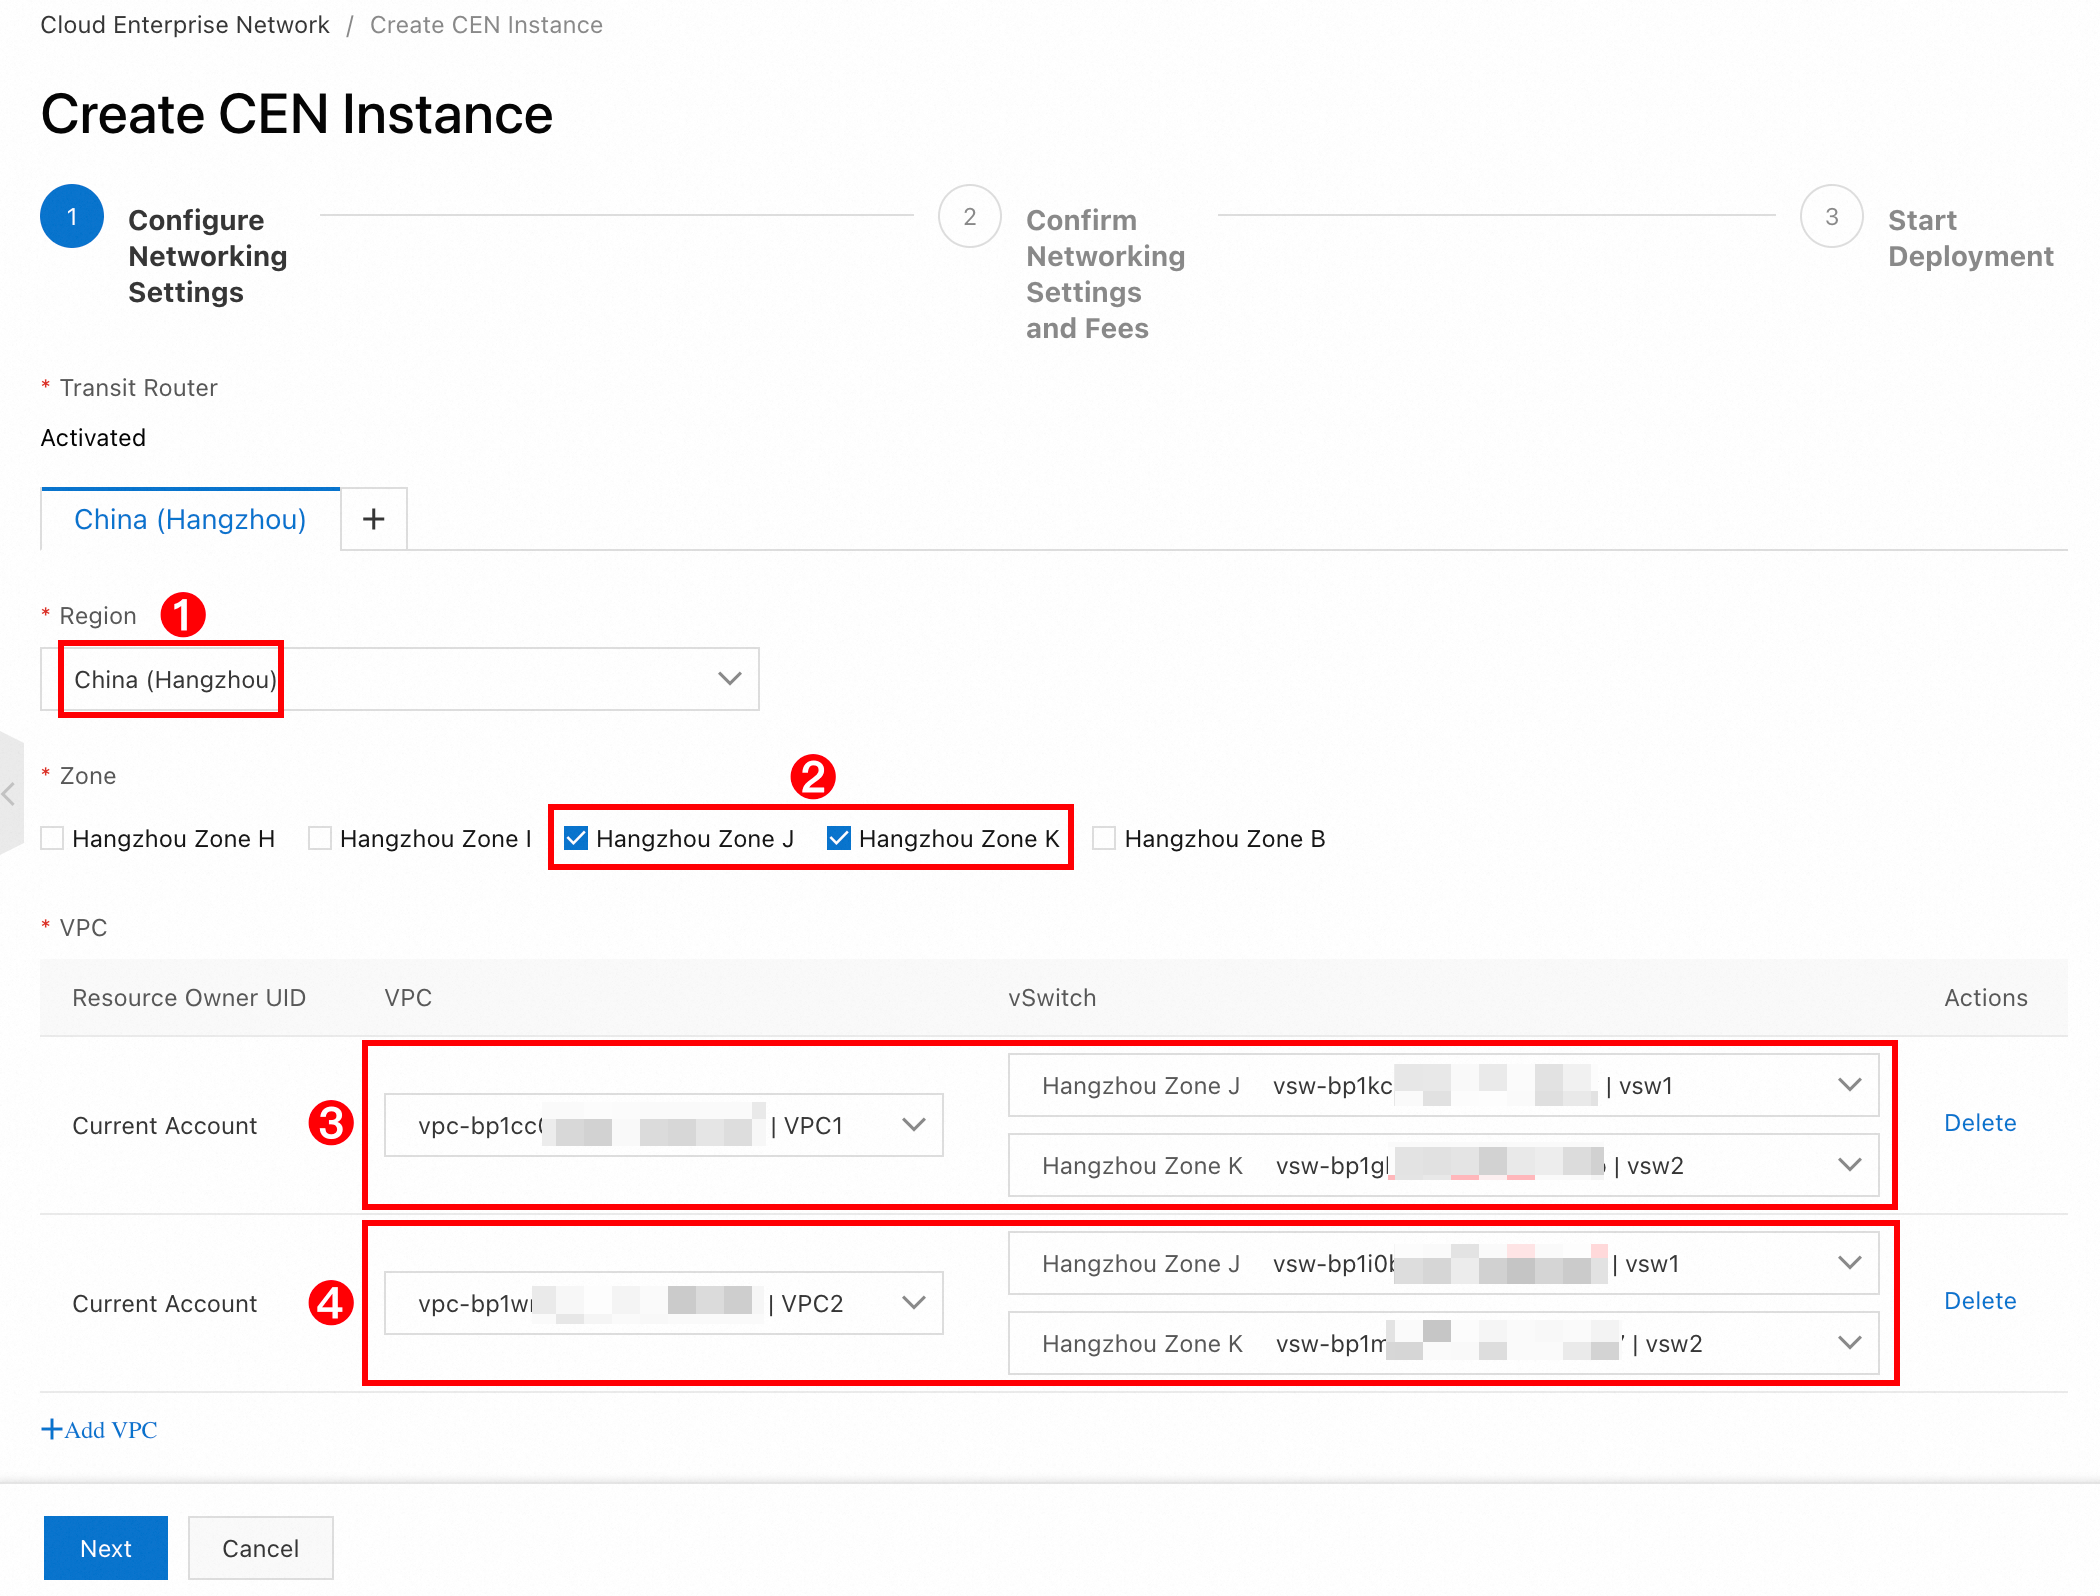
On the tab, configure the China (Hangzhou) region:
Region: Select China (Hangzhou).
Zone: Select Zone J and Zone K.
VPC:
Select VPC1 from the VPC drop-down list and choose two vSwitches.
Click Add VPC, select VPC2 from the drop-down list, and choose two vSwitches.
Click the + icon to the right of the China (Hangzhou) tab to add a new region tab, then configure the China (Shanghai) region:
Region: Select China (Shanghai).
Zone: Select Zone M and Zone N.
VPC: Select VPC3 and choose two vSwitches.
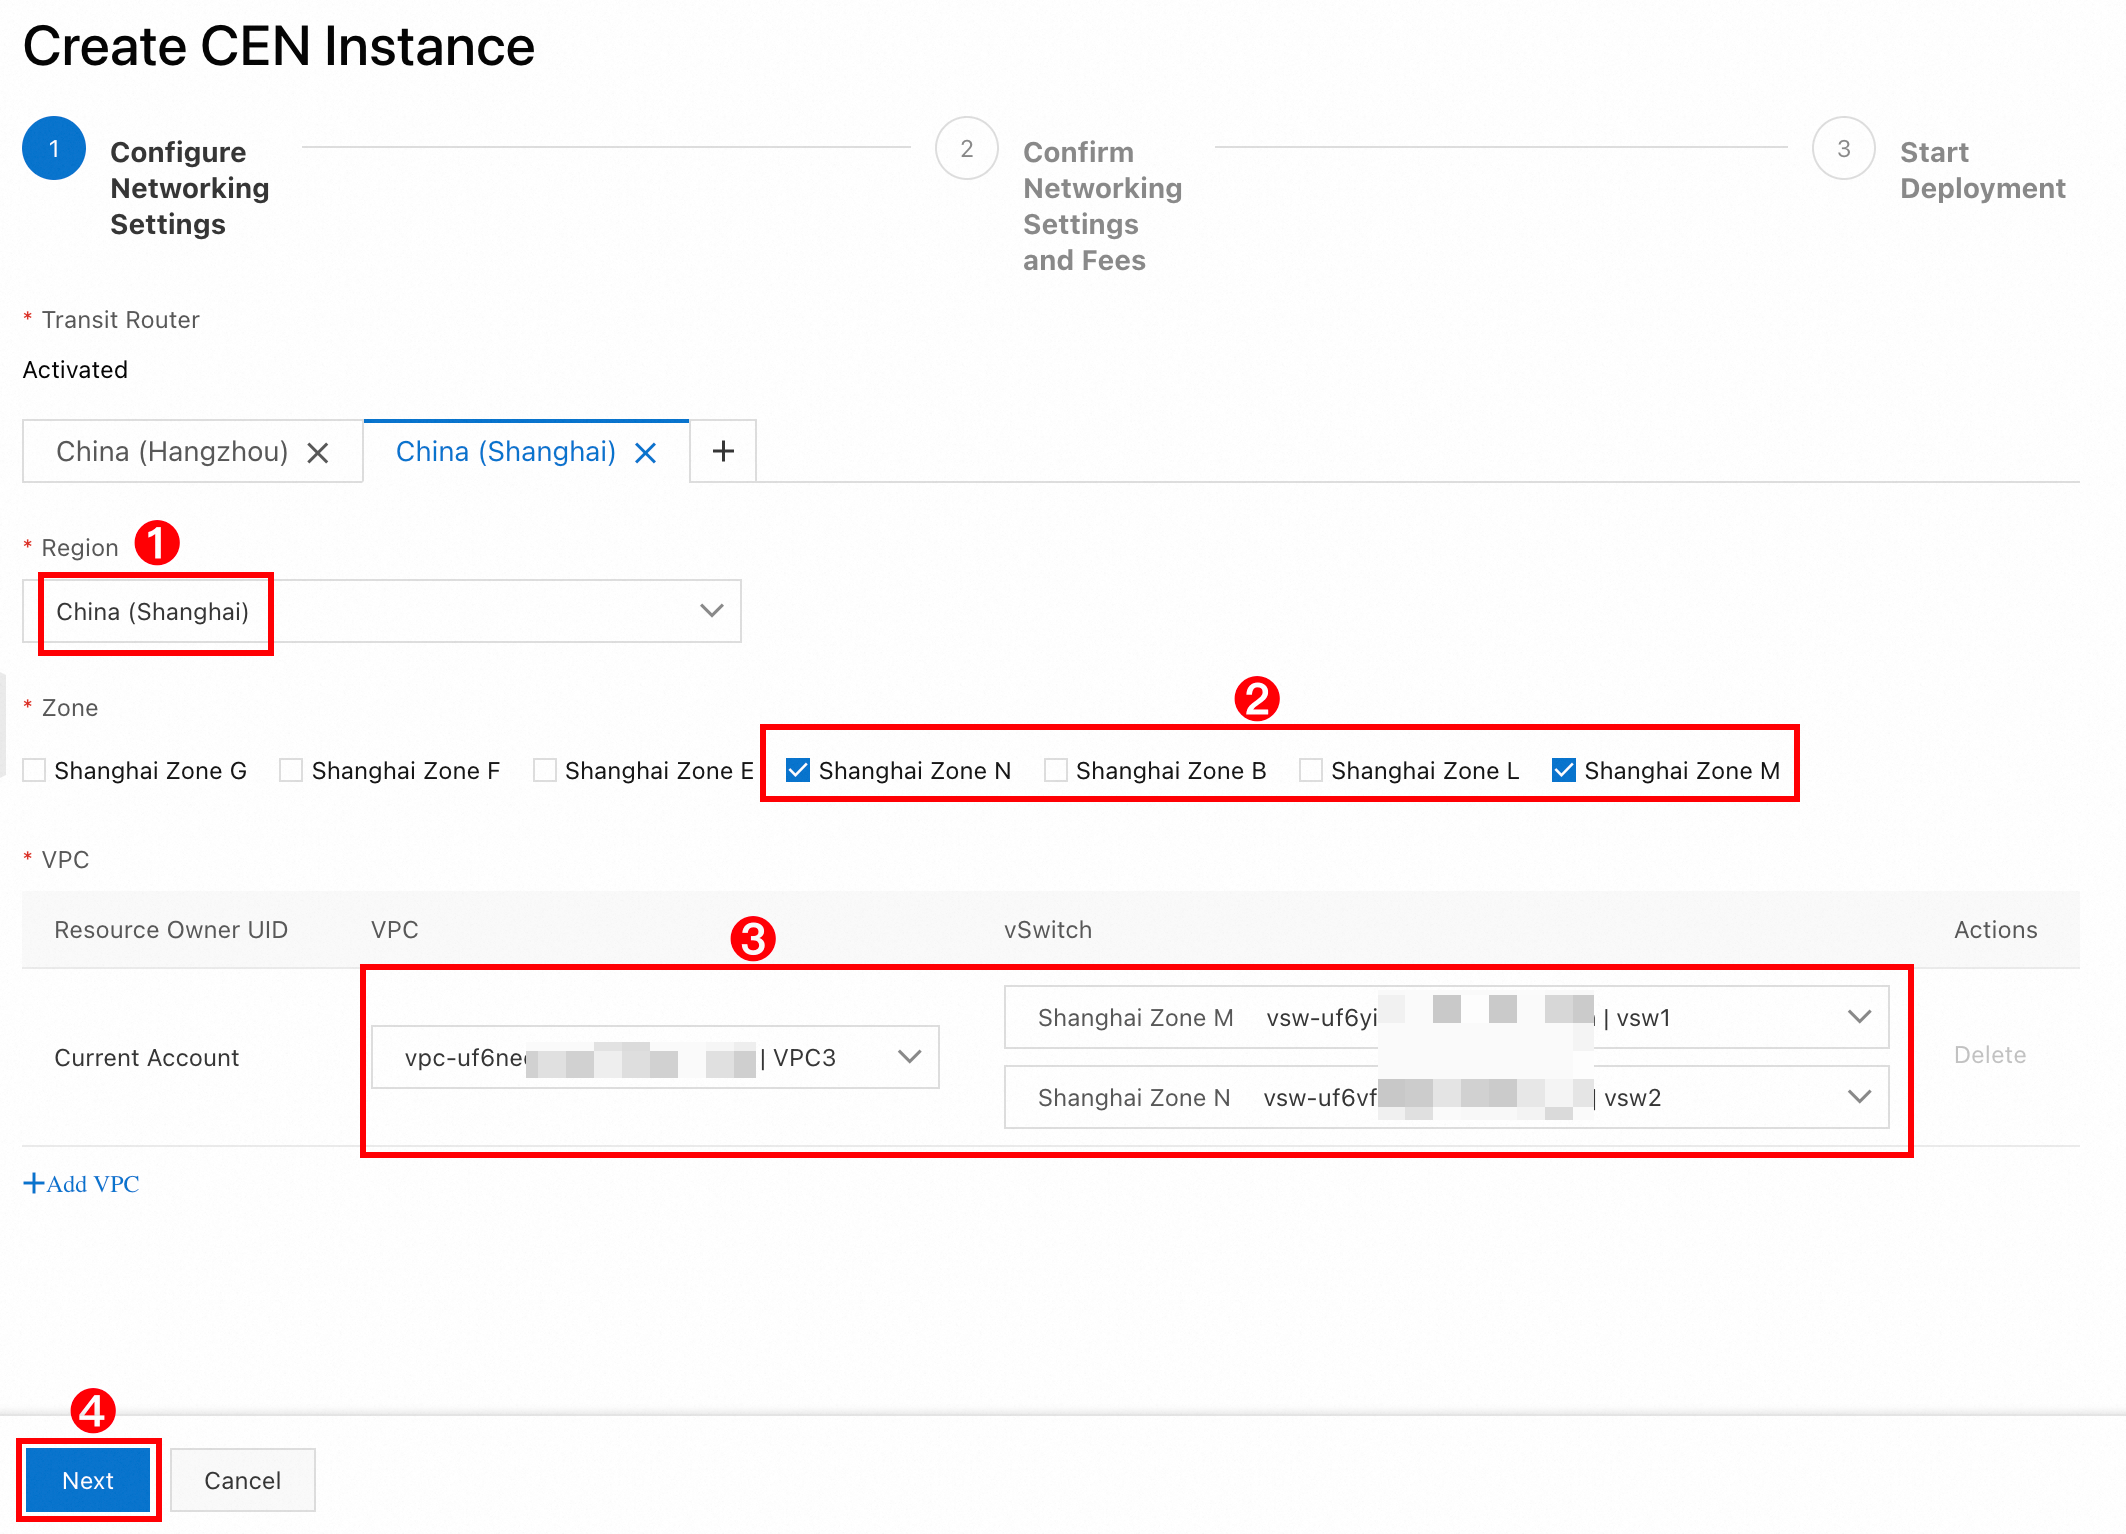
Click Next.
Step 2: Confirm networking settings and fees
On the Confirm Networking Settings and Fees page, review the resources that will be created and the associated costs. The system may take a few minutes to generate the overview.
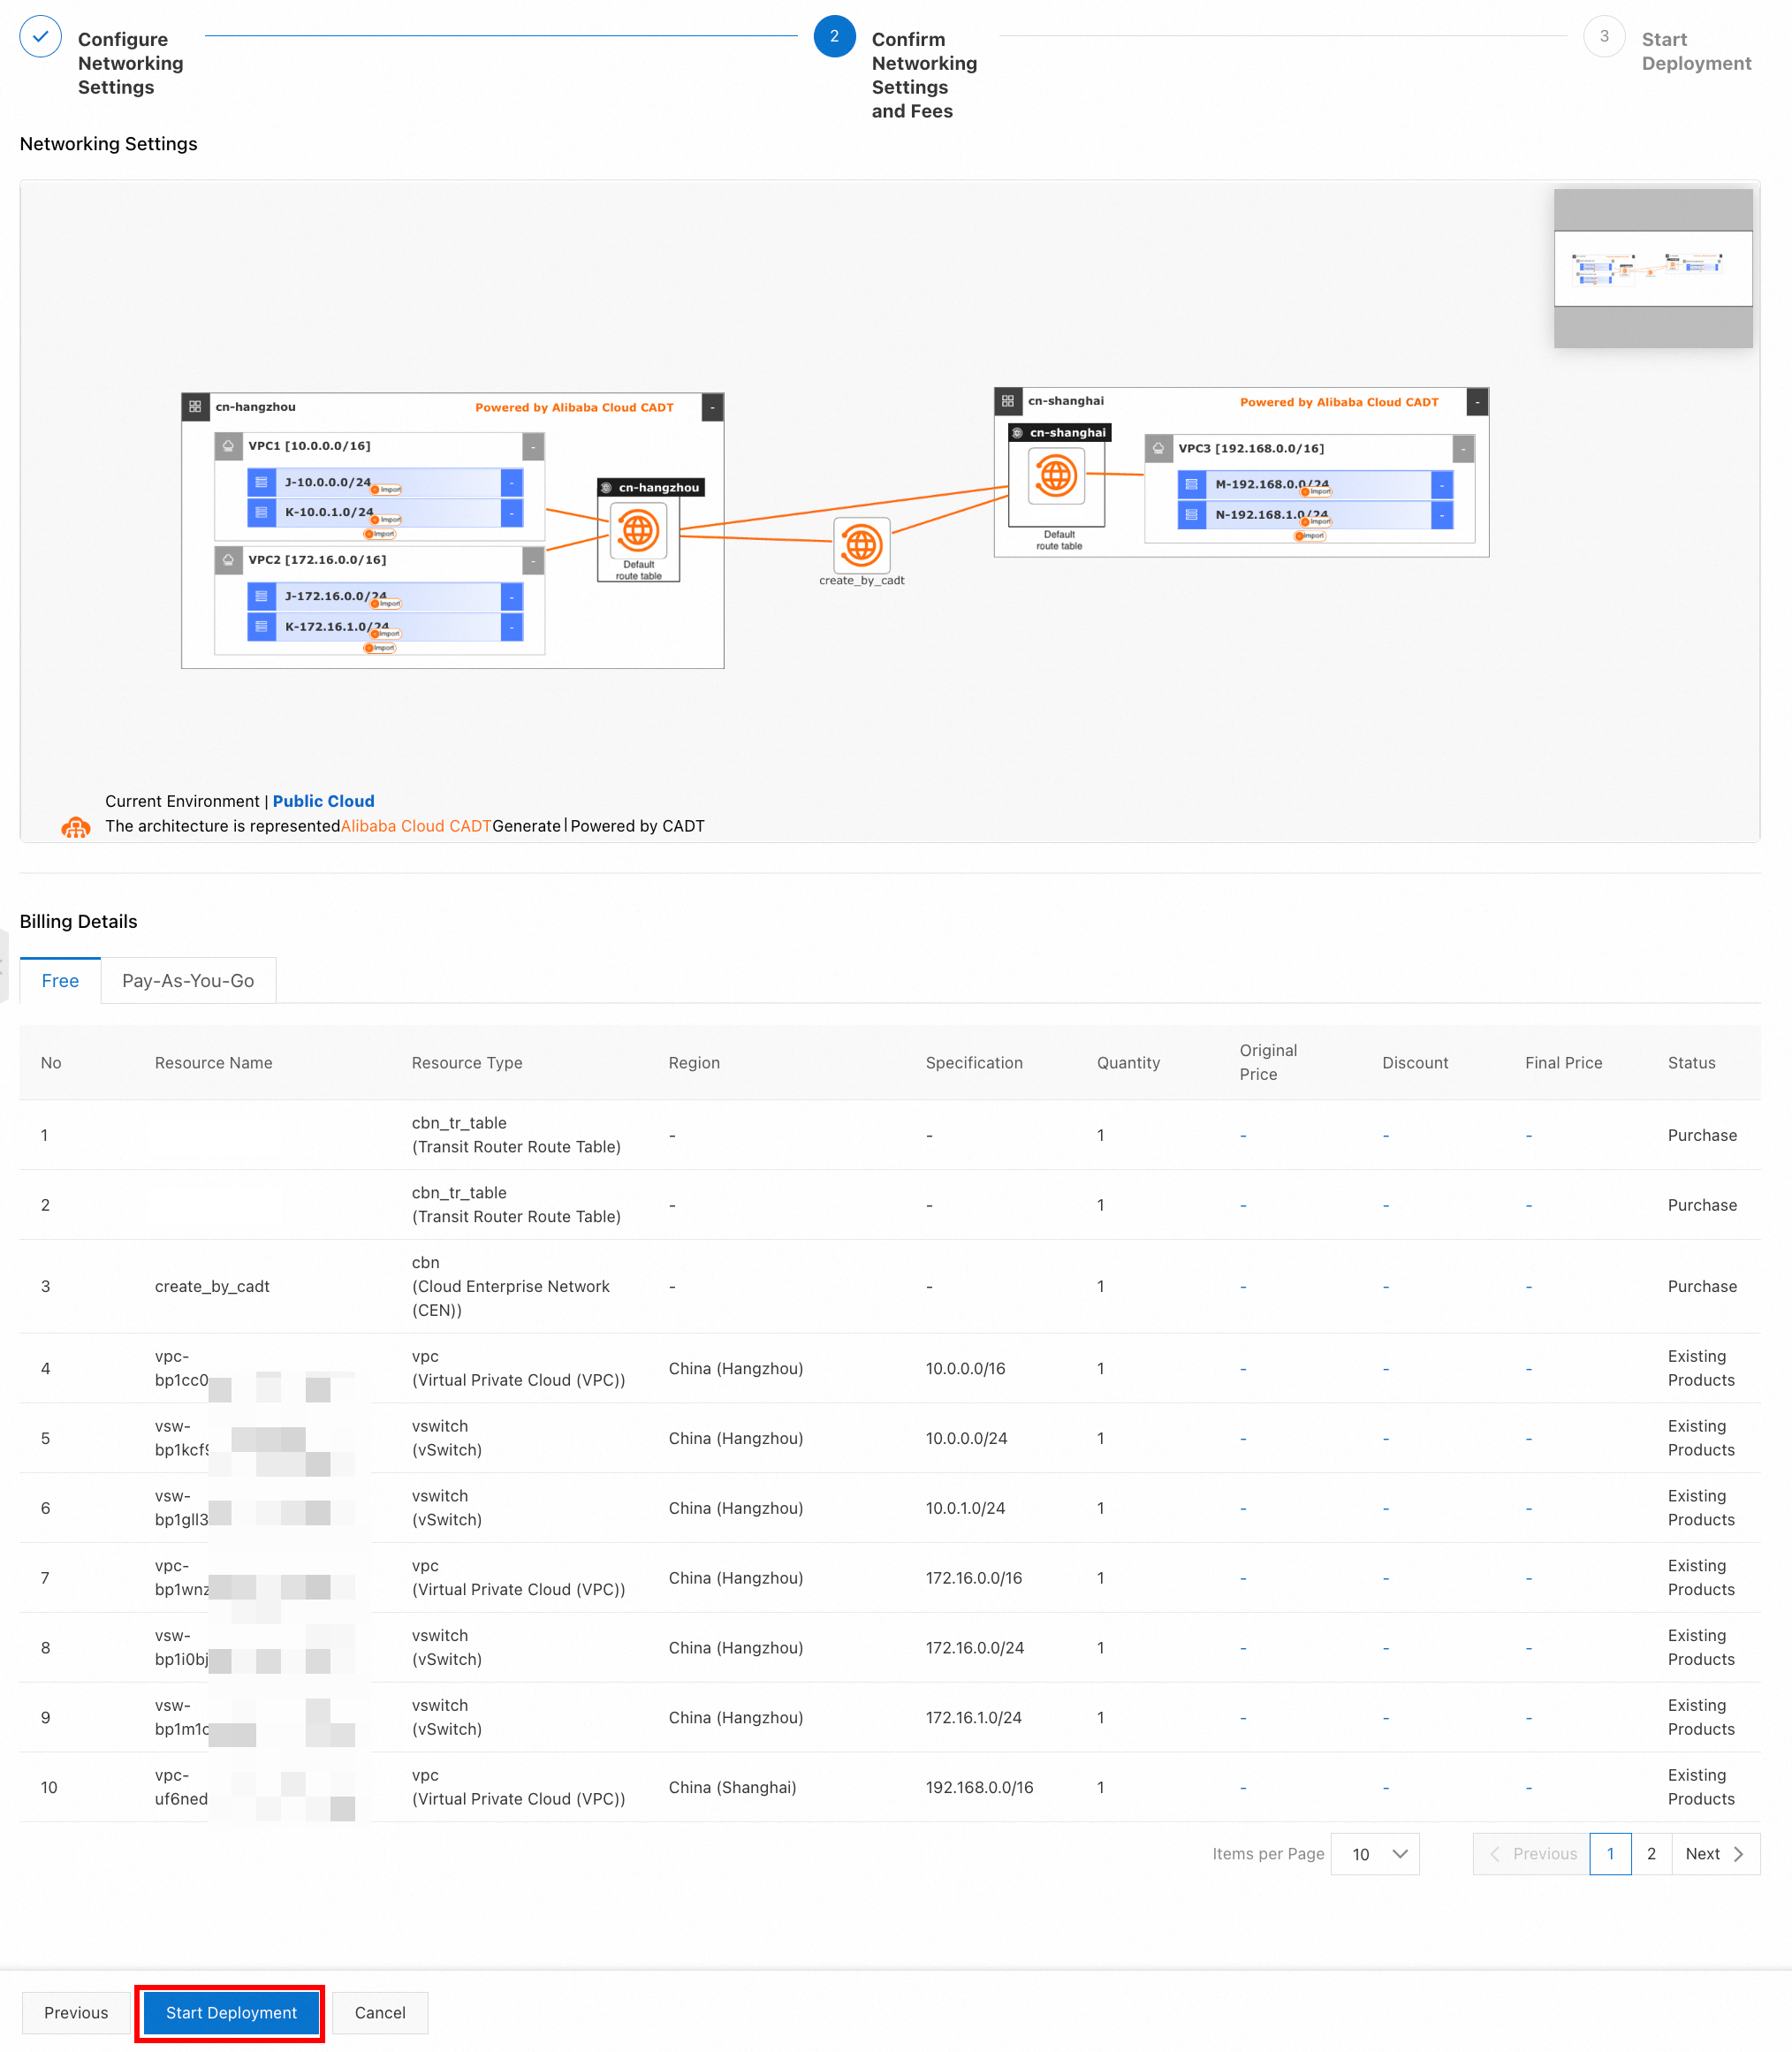
After you verify that all settings are correct, click Start Deployment.
Step 3: Wait for deployment to complete
Deployment takes about 10 minutes. When it finishes, you see a confirmation page:

Click View CEN Instance to see all the resources that were created automatically. Your VPCs are now connected through CEN.

Step 4: Test connectivity
Before you proceed, make sure the security group rules for all three ECS instances allow ICMP traffic. For more information, see Query security group rules and Add security group rules.

Log on to the ECS1 instance and ping ECS2:
ping 172.16.0.1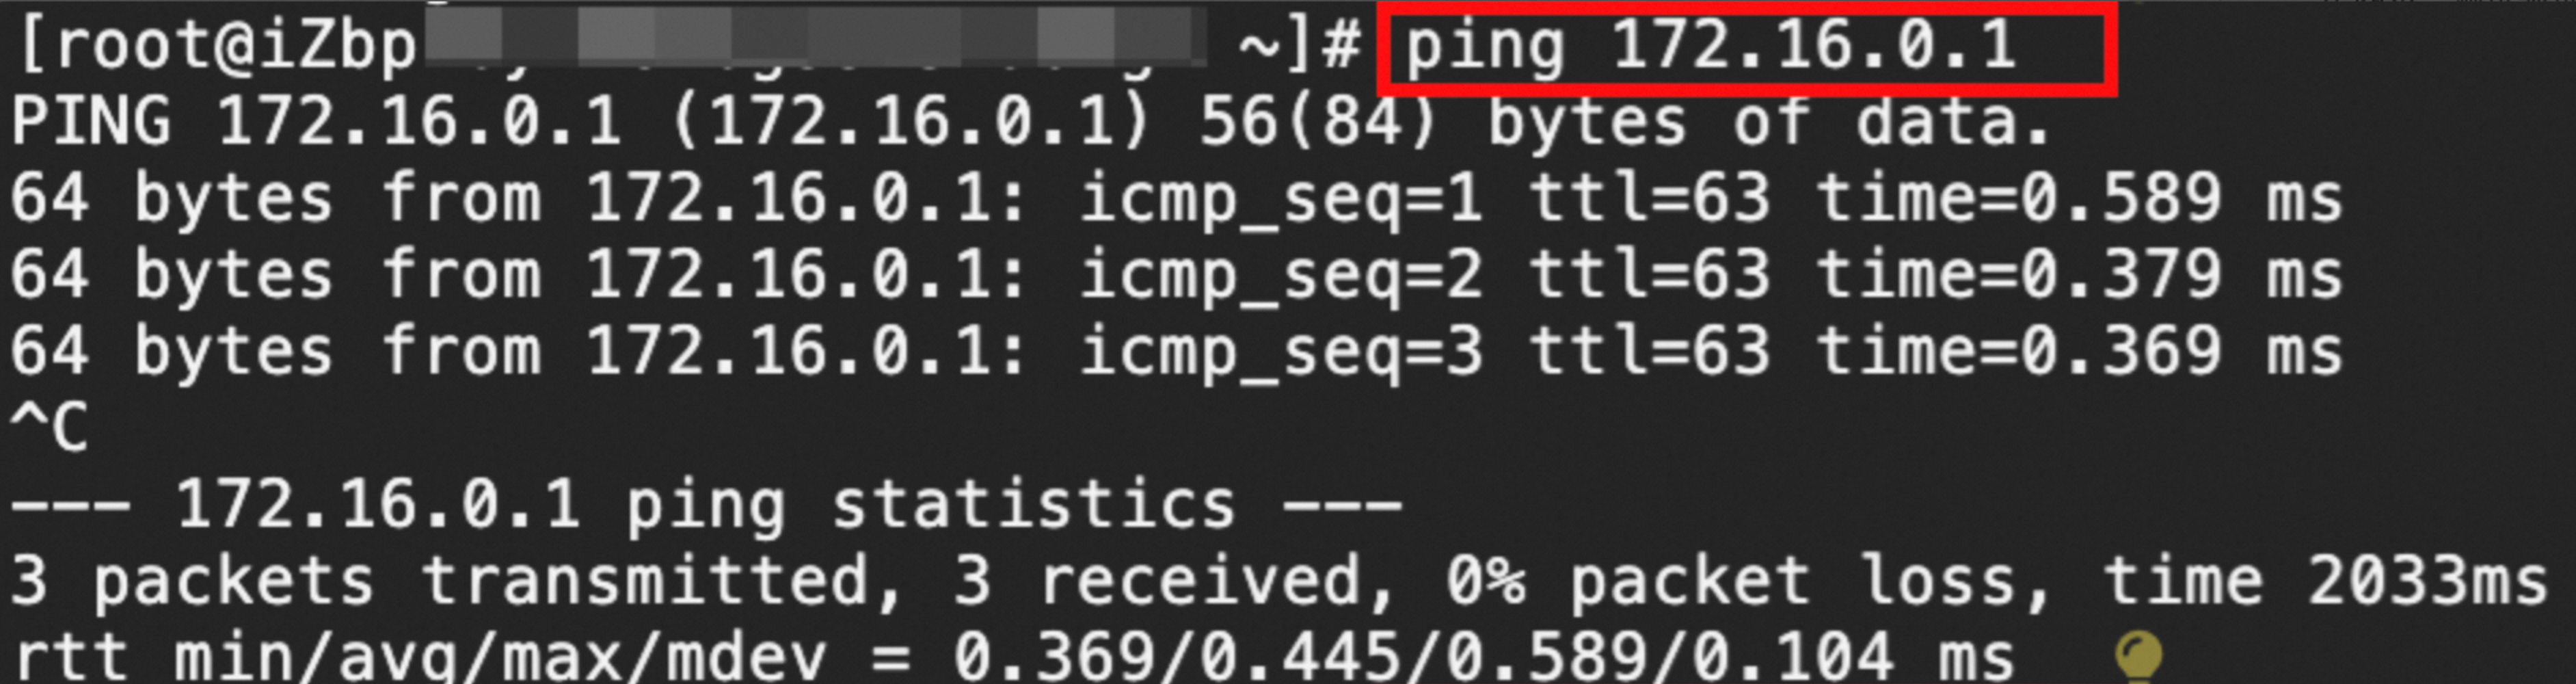
A successful response confirms that VPC1 and VPC2 are connected.
Repeat the test to verify connectivity between VPC1 and VPC3, and between VPC2 and VPC3.
References
For CEN pricing details, see Billing rules.