You can monitor the performance of Python applications that are deployed in an Alibaba Cloud Container Service for Kubernetes (ACK) cluster. These applications include web applications built with frameworks such as Django, Flask, and FastAPI, and artificial intelligence (AI) or large language model (LLM) applications developed with LlamaIndex or Langchain. To use Application Real-Time Monitoring Service (ARMS), install the ack-onepilot component and modify the Dockerfile. ARMS provides application performance monitoring features, including application topology, tracing analysis, API call analysis, anomaly detection, and detailed tracing of large model interactions.
Prerequisites
A namespace is created. For more information, see Manage namespaces and resource quotas. In this example, a namespace named
arms-demois used.The Python runtime is version 3.8 or later.
ARMS is compatible with Python 3.8 and later. If you use an earlier version, connection issues may occur.
ARMS is an application performance management (APM) service from Alibaba Cloud. For more information about application monitoring with ARMS, see What is Application Real-Time Monitoring Service? and What is application monitoring.
Step 1: Install the ack-onepilot component for application monitoring
The old Application Monitoring component arms-pilot is no longer maintained. You can install the new component ack-onepilot to monitor your applications. ack-onepilot is fully compatible with arms-pilot. You can seamlessly install ack-onepilot without the need to modify application configurations. For more information, see How do I uninstall arms-pilot and install ack-onepilot?
Log on to the ACK console. In the left navigation pane, click Clusters.
On the Clusters page, find the one you want to manage and click its name. In the left navigation pane, click Add-ons.
In the Logs and Monitoring section, find ack-onepilot and click Install. In the dialog box that appears, configure the parameters as needed. We recommend using the default values. Then, click OK.
NoteMake sure that the version of ack-onepilot is 3.2.4 or later. By default, the ack-onepilot component supports 1,000 pods. For every 1,000 pods that exceed this limit, increase the CPU resources for ack-onepilot by 0.5 cores and the memory resources by 512 MB.
After installing ack-onepilot, you can upgrade, configure, or uninstall it on the Add-ons page.
Step 2: Authorize ARMS to access resources
To monitor an application deployed in an ACK cluster with no
addon.arms.token, perform the following operations to authorize the ACK cluster to access ARMS. If theaddon.arms.tokenalready exists, no further authorization is needed.NoteIn ACK clusters,
addon.arms.tokenenables ARMS to automatically perform password-free authorization. Normally, ACK managed clusters haveaddon.arms.tokenby default. However, some of the ACK managed clusters created earlier may not includeaddon.arms.token.Check whether the cluster has
addon.arms.token.If
addon.arms.tokendoes not exist, perform the following these steps to manually authorize the cluster to access ARMS resources :Log on to the ACK console. In the left navigation pane, click Clusters.
On the Clusters page, find the target cluster and click its name. In the navigation pane on the left, click Cluster Information.
Click the Basic Information tab. In the Cluster Resources section, click the link to the right side of Worker RAM Role.
On the Permissions tab, click Grant Permission.
Select the AliyunARMSFullAccess policy and click Grant permissions.
To monitor an application deployed in an ACK managed cluster that is connected to an elastic container instance, go to the RAM Quick Authorization page and complete the authorization. Then, restart the pods that are created for ack-onepilot.
Step 3: Integrate the ARMS Python agent into the Dockerfile
Modify the Dockerfile to integrate the ARMS Python agent into your Python application and start the application.
Download the agent installer from the Python Package Index (PyPI) repository.
pip3 install aliyun-bootstrapUse aliyun-bootstrap to install the agent.
# The region ID of the Alibaba Cloud account. ARMS_REGION_ID=xxx aliyun-bootstrap -a installNoteTo install a specific version of the Python agent, run the following command:
# Replace ${version} with the actual version number.
aliyun-bootstrap -a install -v ${version}
For more information about all released versions of the Python agent, see Python agent release notes.
Start the application using the ARMS Python agent.
aliyun-instrument python app.pyBuild the image.
The following code provides a complete example of a Dockerfile:
Step 4: Enable ARMS Application Monitoring for the Python application
Log on to the ACK console. In the left navigation pane, click Clusters.
On the Clusters page, find the cluster you want to manage and click its name. In the left navigation pane, choose .
On the Deployments page, click
 > Edit YAML for the target application.
In the YAML file, add the following
labelsunder `spec.template.metadata`.labels: aliyun.com/app-language: python # Required for Python applications. Specifies that this is a Python application. armsPilotAutoEnable: 'on' armsPilotCreateAppName: "deployment-name" # The display name of the application in ARMS.ImportantIf the version of the ack-onepilot component that you installed is later than 5.0.0, the component automatically downloads and injects the Python agent package during this step. This provides a fully non-intrusive installation experience. If you do not want to use this feature, or if you have already manually installed the Python agent in the container, we recommend that you disable the non-intrusive injection feature for Python using the following label:
labels: aliyun.com/app-language: python # Required for Python applications. Specifies that this is a Python application. armsPilotAutoEnable: 'on' armsPilotCreateAppName: "deployment-name" # The display name of the application in ARMS. armsAutoInstrumentationEnable: "off" # Disables the non-intrusive injection feature for Python applications.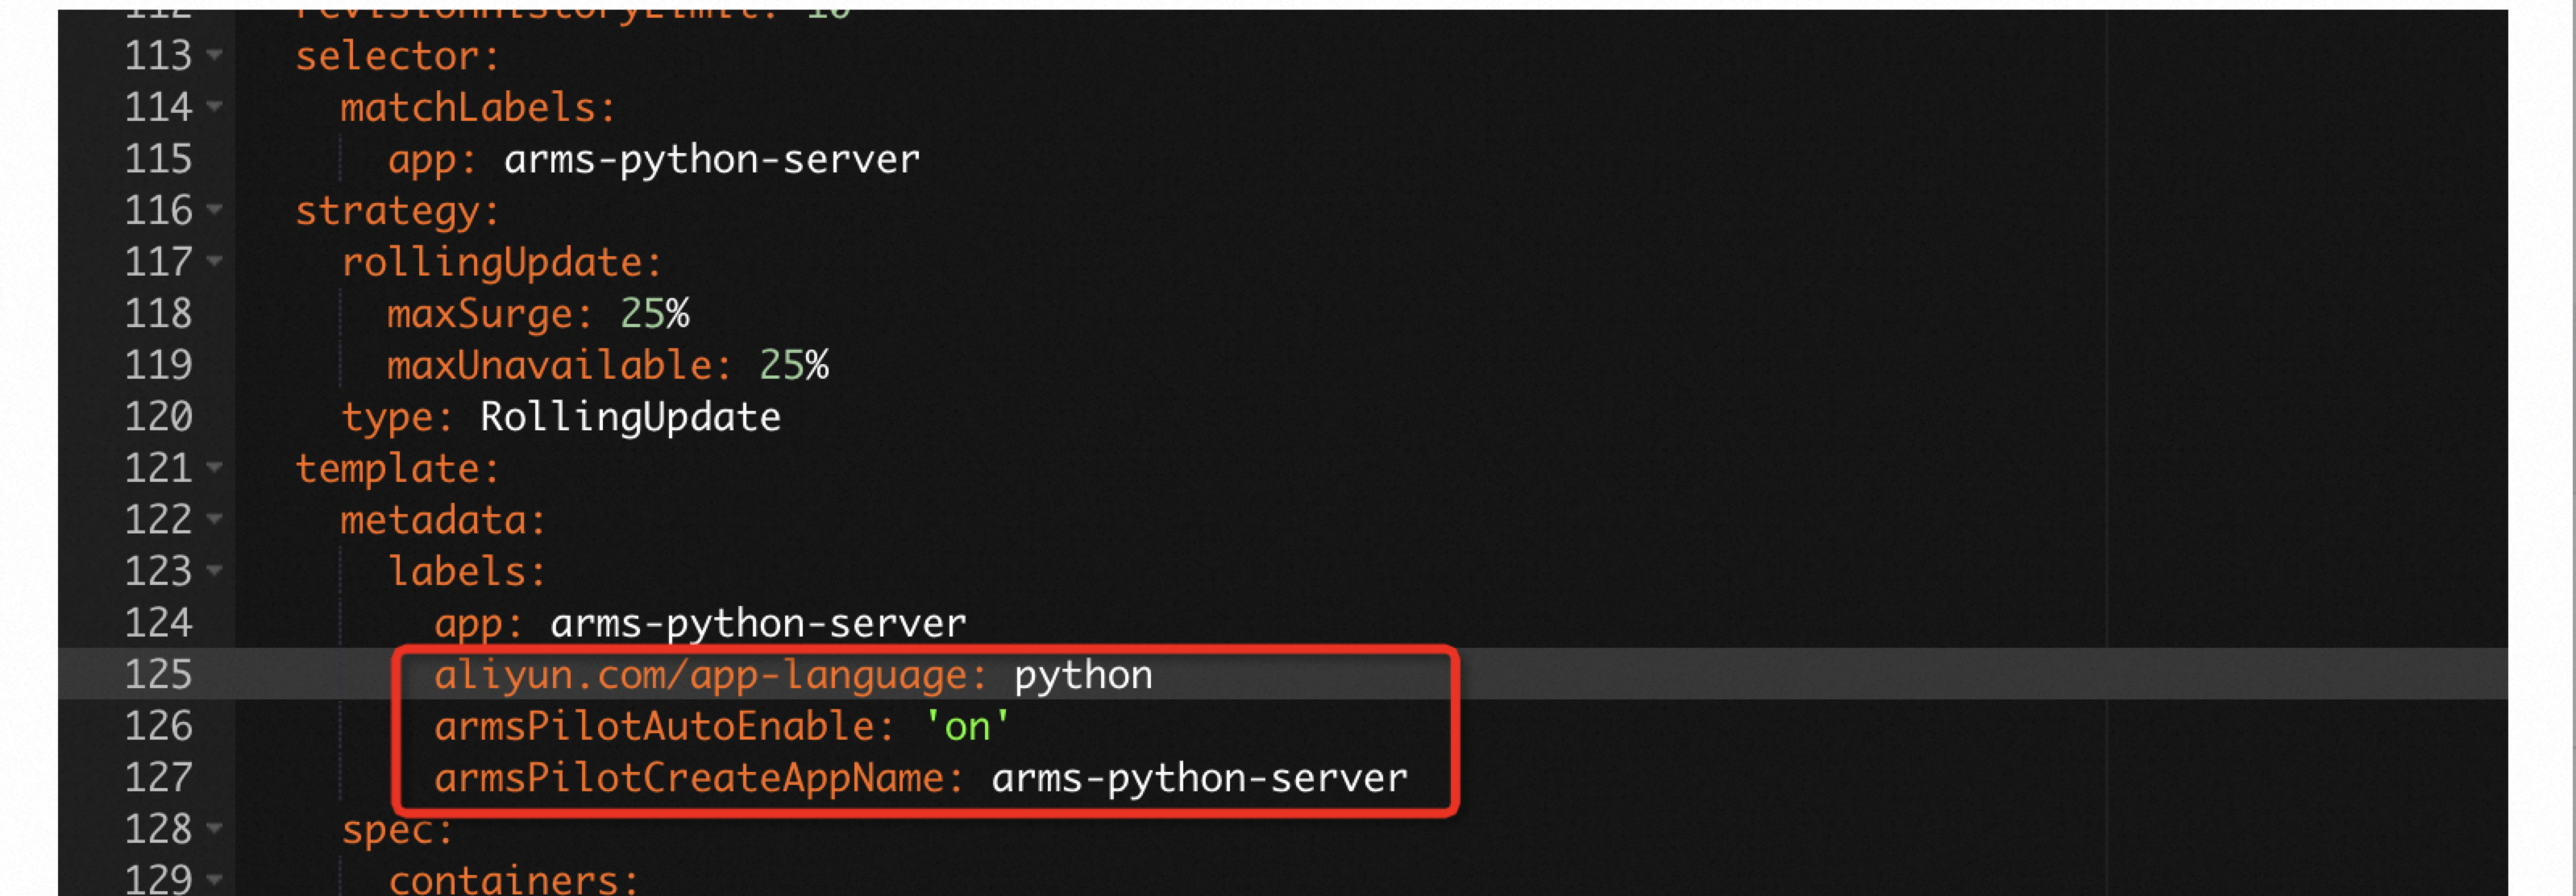
The following code provides a complete YAML template for creating a stateless application (Deployment) and enabling ARMS Application Monitoring:
Step 5: View monitoring details
After about one minute, you can view the Python application and its reported data on the page in the ARMS console.

Click the Application Name to view monitoring details on the application monitoring page in the ARMS console. For more information, see Application Overview.
(Optional) Step 6: Release resources
If you no longer need to use ARMS to monitor your Python application, you can uninstall the ARMS Python agent to stop monitoring. For more information, see Uninstall the Python agent.