By Hitesh Jethva, Alibaba Cloud Tech Share Author. Tech Share is Alibaba Cloud's incentive program to encourage the sharing of technical knowledge and best practices within the cloud community.
Monitoring IT infrastructure is an essential part of any system administrator to maximize availability and minimize disruption, enabling rapid intervention by detecting failures and developing issues. Sensu is one of the free and open source monitoring tool that monitors your servers, services, application, cloud infrastructure simply and efficiently. Sensu is a powerful Next-Generation monitoring framework that is quickly replacing traditional monitoring systems like Zabbix, Icinga, and Nagios. It is written in Ruby, uses RabbitMQ to handle messages and Redis to store data. You can easily integrate Sensu with many modern DevOps stacks, such as Slack, HipChat and IRC. Sensu is very scalable so you can easily monitor hundreds or thousands of servers.
Sensu supports on multiple operating systems such as, Ubuntu, Debian, RedHat, CentOS, FreeBSD, Mac OS, Solaris and Windows.
In this tutorial, we will be installing and configuring Sensu on an Alibaba Cloud Elastic Compute Service (ECS) Ubuntu 16.04 server.
First, Login to your Alibaba Cloud ECS Console. Create a new ECS instance, choosing Ubuntu 16.04 as the operating system with at least 2GB RAM. Connect to your ECS instance and log in as the root user.
Once you are logged into your Ubuntu 16.04 instance, run the following command to update your base system with the latest available packages.
apt-get update -ySensu uses RabbitMQ to handle messages and Redis to store its data. So you will need to install RabbitMQ and Redis on the server instance.
First, install Redis server with the following command:
apt-get install redis-server apt-transport-https -yOnce the Redis is installed, start the Redis service and enable it to start on boot with the following command:
systemctl start redis-server
systemctl enable redis-server
You can check the Redis service with the following command:
service redis-server statusOutput:
● redis-server.service - Advanced key-value store
   Loaded: loaded (/lib/systemd/system/redis-server.service; enabled; vendor preset: enabled)
   Active: active (running) since Mon 2018-10-29 22:09:19 IST; 1min 36s ago
     Docs: http://redis.io/documentation,
           man:redis-server(1)
 Main PID: 24709 (redis-server)
   CGroup: /system.slice/redis-server.service
           └─24709 /usr/bin/redis-server 127.0.0.1:6379

Oct 29 22:09:19 Node1 systemd[1]: Starting Advanced key-value store...
Oct 29 22:09:19 Node1 run-parts[24710]: run-parts: executing /etc/redis/redis-server.post-up.d/00_example
Oct 29 22:09:19 Node1 systemd[1]: Started Advanced key-value store.
Oct 29 22:10:53 Node1 systemd[1]: Started Advanced key-value store.
Before installing RabbitMQ, you will need to install Erlang to your system. Because, RabbitMQ runs on the Erlang runtime.
First, install Erlang repository with the following command:
wget https://packages.erlang-solutions.com/erlang-solutions_1.0_all.deb
dpkg -i erlang-solutions_1.0_all.deb
Next, add Erlang public key to your trusted key list:
wget -O- https://packages.erlang-solutions.com/ubuntu/erlang_solutions.asc | apt-key add -Next, update the repository and install Erlang with the following command:
apt-get update -y
apt-get install socat erlang-nox -y
Next, install RabbitMQ repository with the following command:
echo "deb https://dl.bintray.com/rabbitmq/debian xenial main" | tee /etc/apt/sources.list.d/rabbitmq.list
wget -O- https://www.rabbitmq.com/rabbitmq-release-signing-key.asc | apt-key add -
Next, update the repository and install RabbitMQ with the following command:
apt-get update -y
apt-get install rabbitmq-server -y
Once the installation is completed, start RabbitMQ service and enable it to start on boot with the following command:
systemctl start rabbitmq-server
systemctl enable rabbitmq-server
You can now check the status of RabbitMQ service with the following command:
systemctl status rabbitmq-serverOutput:
● rabbitmq-server.service - RabbitMQ broker
   Loaded: loaded (/lib/systemd/system/rabbitmq-server.service; enabled; vendor preset: enabled)
   Active: active (running) since Mon 2018-10-29 22:29:41 IST; 2min 46s ago
 Main PID: 31381 (beam.smp)
   Status: "Initialized"
   CGroup: /system.slice/rabbitmq-server.service
           ├─31381 /usr/lib/erlang/erts-10.1/bin/beam.smp -W w -A 64 -MBas ageffcbf -MHas ageffcbf -MBlmbcs 512 -MHlmbcs 512 -MMmcs 30 -P 10485
           ├─31470 /usr/lib/erlang/erts-10.1/bin/epmd -daemon
           ├─31612 erl_child_setup 32768
           ├─31629 inet_gethost 4
           └─31630 inet_gethost 4

Oct 29 22:29:34 Node1 rabbitmq-server[31381]:   ##  ##      RabbitMQ 3.7.8. Copyright (C) 2007-2018 Pivotal Software, Inc.
Oct 29 22:29:34 Node1 rabbitmq-server[31381]:   ##########  Licensed under the MPL.  See http://www.rabbitmq.com/
Oct 29 22:29:34 Node1 rabbitmq-server[31381]:   ######  ##
Oct 29 22:29:34 Node1 rabbitmq-server[31381]:   ##########  Logs: /var/log/rabbitmq/rabbit@Node1.log
Oct 29 22:29:34 Node1 rabbitmq-server[31381]:                     /var/log/rabbitmq/rabbit@Node1_upgrade.log
Oct 29 22:29:34 Node1 rabbitmq-server[31381]:               Starting broker...
Oct 29 22:29:41 Node1 rabbitmq-server[31381]: systemd unit for activation check: "rabbitmq-server.service"
Oct 29 22:29:41 Node1 systemd[1]: Started RabbitMQ broker.
Oct 29 22:29:43 Node1 rabbitmq-server[31381]:  completed with 0 plugins.
Oct 29 22:29:58 Node1 systemd[1]: Started RabbitMQ broker.
Next, you will need to create a RabbitMQ vhost and user for Sensu. You can do this by running the following command:
rabbitmqctl add_vhost /sensu
rabbitmqctl add_user sensu sensupassword
rabbitmqctl set_permissions -p /sensu sensu ".*" ".*" ".*"By default, Sensu package is not available in the Ubuntu 16.04 default repository. So, you will need to add Sensu repository to your server.
First, download and add the GPG public key with the following command:
wget -O- https://sensu.global.ssl.fastly.net/apt/pubkey.gpg | apt-key add -Next, add Sensu repository to APT configuration file with the following command:
echo "deb https://sensu.global.ssl.fastly.net/apt sensu main" | tee /etc/apt/sources.list.d/sensu.listNext, update the repository and install Sensu with the following command:
apt-get update -y
apt-get install sensu -y
Once the installation is completed, start Sensu service and enable it to start on boot time with the following command:
systemctl start sensu-server
systemctl enable sensu-server
By default, Sensu configuration files are located at /etc/sensu directory.
Before starting, you will need to configure Sensu for using with RabbitMQ and Redis.
First, create a RabbitMQ file with the following command:
nano /etc/sensu/conf.d/rabbitmq.jsonAdd the following lines:
{
  "rabbitmq": {
    "host": "127.0.0.1",
    "port": 5672,
    "vhost": "/sensu",
    "user": "sensu",
    "password": "sensupassword"
  }
}
Next, create a Redis file with the following command:
nano /etc/sensu/conf.d/redis.jsonAdd the following lines:
{
  "redis": {
    "host": "127.0.0.1",
    "port": 6379
  }
}
Next, create a api.json file:
nano /etc/sensu/conf.d/api.jsonAdd the following lines:
{
  "api": {
    "host": "localhost",
    "bind": "0.0.0.0",
    "port": 4567
  }
}
Save and close the file, when you are finished.
Sensu does not provide any web-based interface to monitor Sensu through a web browser. So, you will need to install Uchiwa dashboard to your server instance.
Uchiwa is a simple dashboard for the Sensu monitoring framework, built with Go and AngularJS. Uchiwa provides an easy mechanism to silence any check for an unlimited period of time.
You can install Uchiwa by just running the following command:
apt-get install uchiwa -yOnce the installation is completed, create an uchiwa configuration file:
nano /etc/sensu/uchiwa.jsonAdd the following lines:
{
  "sensu": [
    {
      "name": "Sensu Server",
      "host": "localhost",
      "port": 4567,
      "timeout": 10
    }
  ],
  "uchiwa": {
    "host": "0.0.0.0",
    "port": 3000,
    "refresh": 10
  }
}
Save and close the file. Then, restart Sensu and Uchiwa service with the following command:
systemctl restart sensu-server
systemctl restart sensu-api
systemctl restart uchiwa
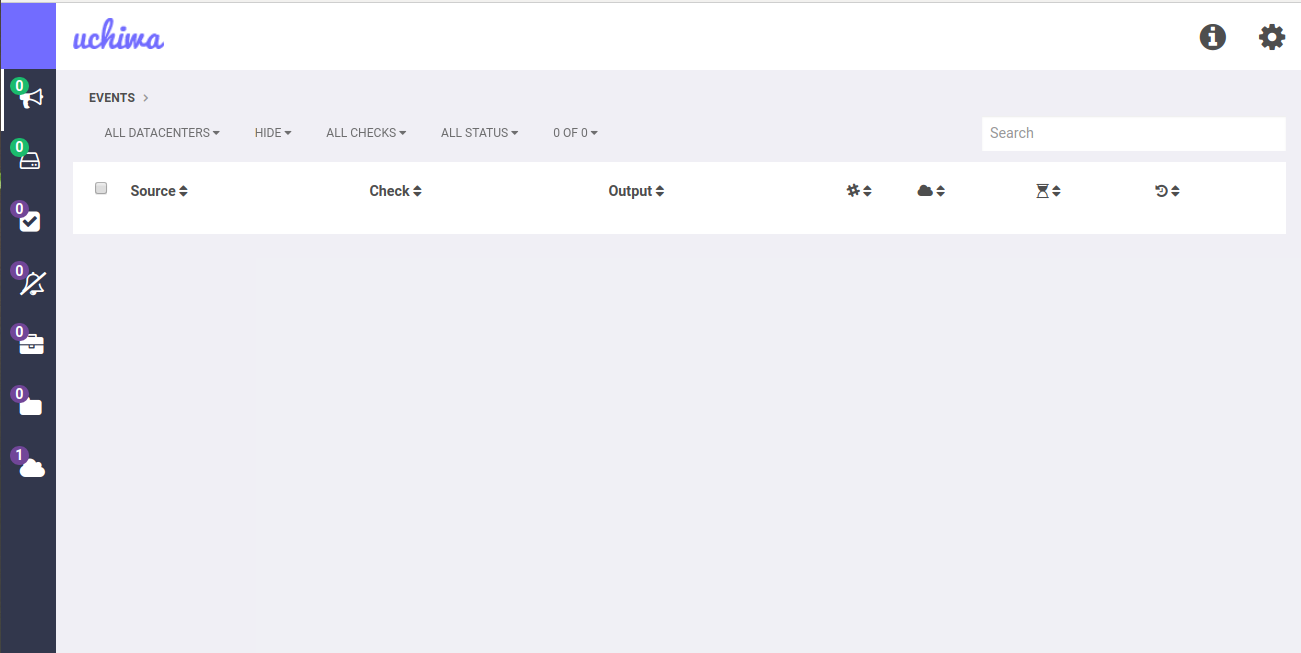
Now, open your web browser and type the URL http://your-server-ip:3000. You will be redirected to the Uchiwa dashboard as shown in the following page:
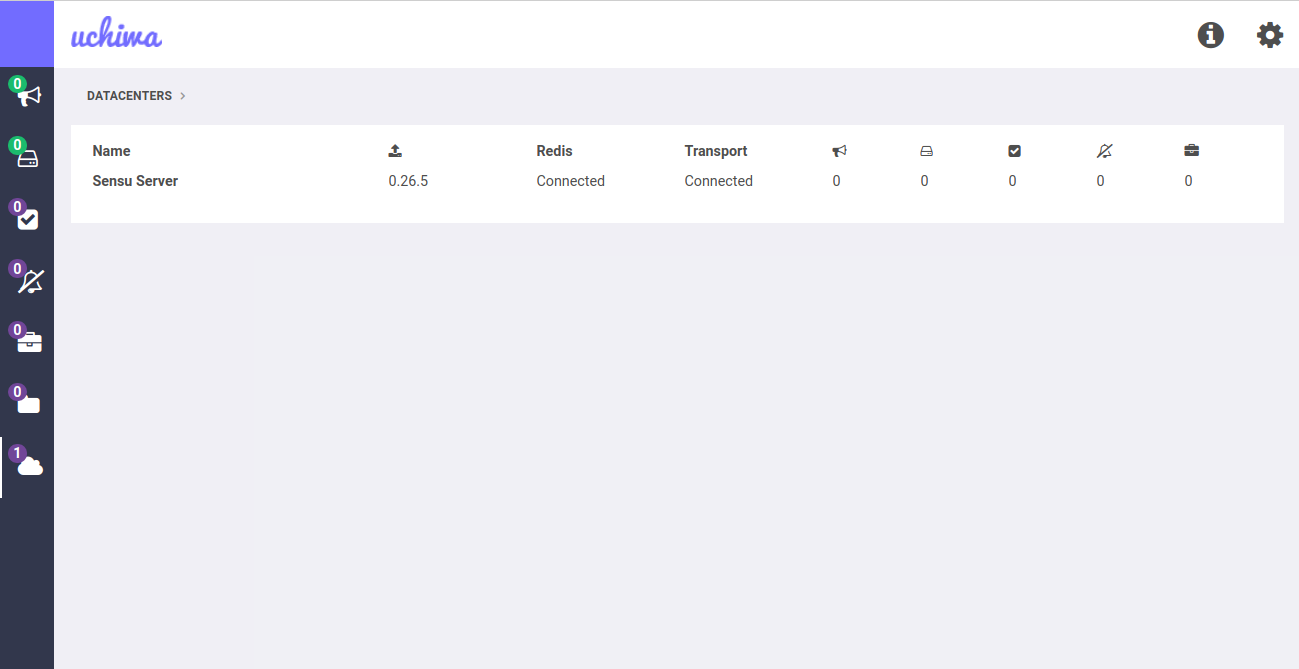
Now, click on the data centers icon in the left pane. You should see the Sensu Server instance as below:
Next, you will need to configure the Sensu server as a client to monitor itself. You can do this by creating client.json file:
nano /etc/sensu/conf.d/client.jsonAdd the following lines:
{
  "client": {
    "name": "sensu-server",
    "address": "127.0.0.1",
    "environment": "Test",
    "subscriptions": [
      "dev",
      "ubuntu"
   ],
    "socket": {
      "bind": "127.0.0.1",
      "port": 3030
    }
Save and close the file. Then, restart the sensu-client service with the following command:
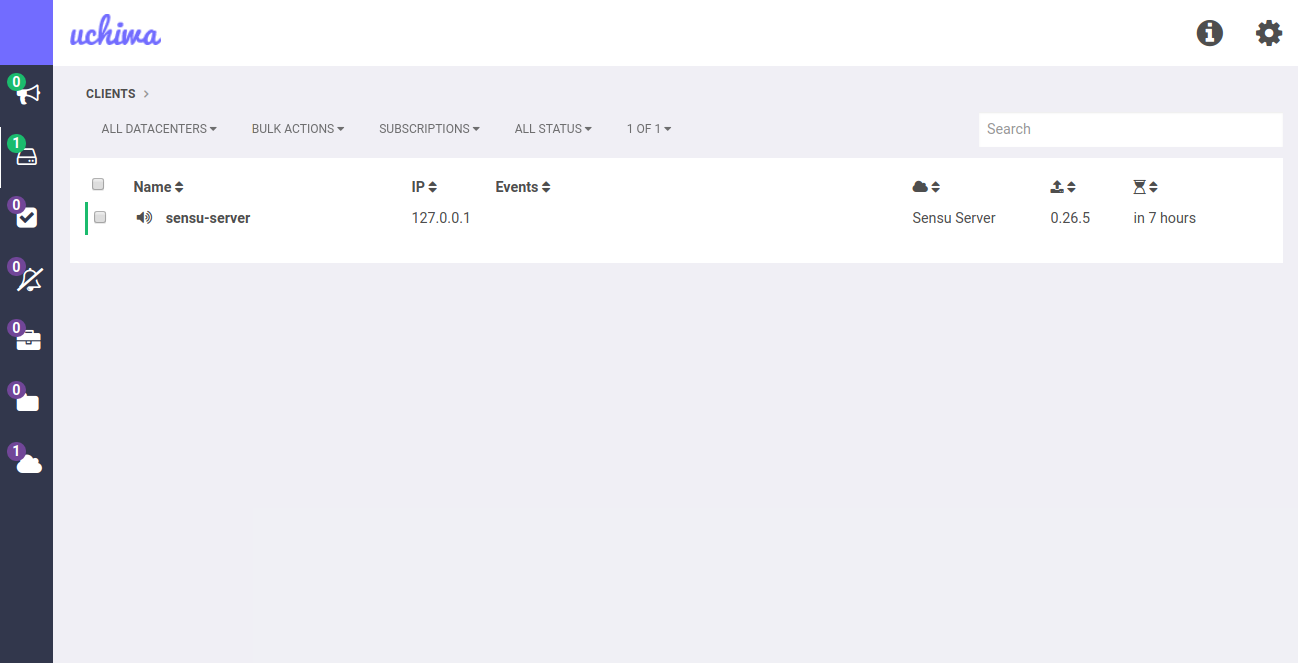
systemctl restart sensu-clientNow, go to the Uchiwa dashboard and click on the clients page. You should see the status of the newly added client in the following page:
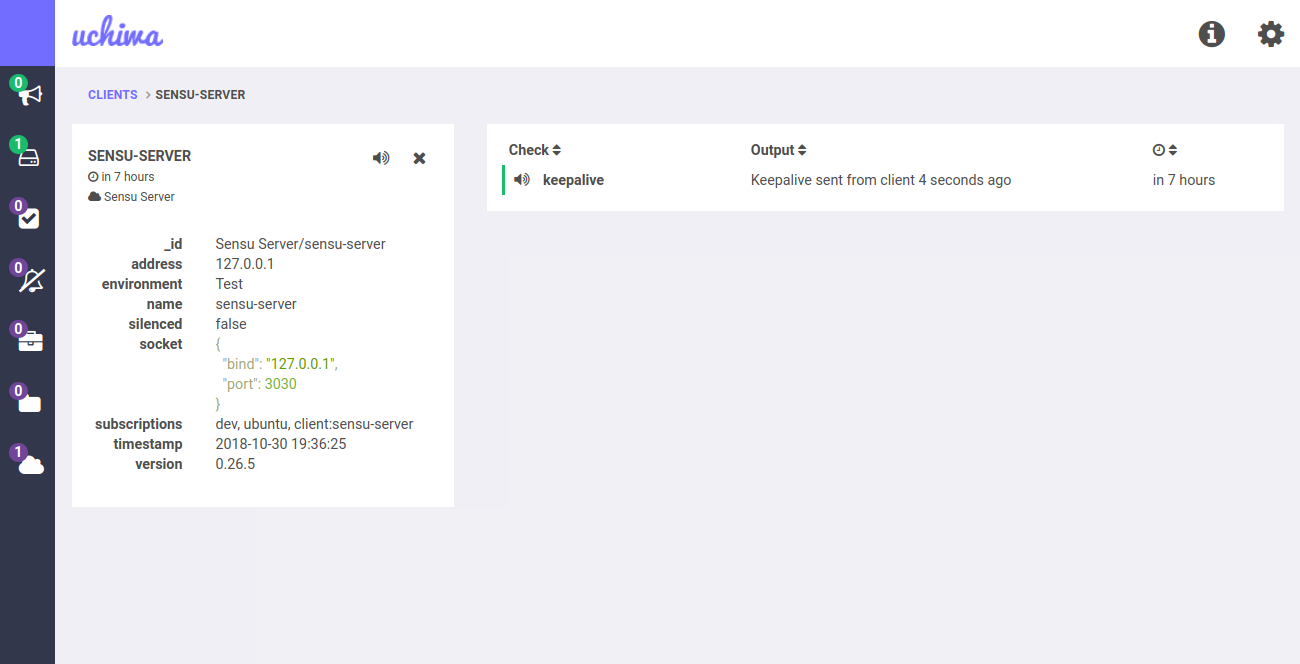
Now, click on the sensu-server. You should see detail information in the following page:
Sensu server is now installed and working fine. It's time to install Sensu client on the Sensu client instance and monitoring it from Sensu server.
By default, Sensu package is not available in the Ubuntu 16.04 default repository. So, you will need to add Sensu repository to your Sensu client instance.
First, download and add the GPG public key with the following command:
wget -O- https://sensu.global.ssl.fastly.net/apt/pubkey.gpg | apt-key add -Next, add Sensu repository to APT configuration file with the following command:
echo "deb https://sensu.global.ssl.fastly.net/apt sensu main" | tee /etc/apt/sources.list.d/sensu.listNext, update the repository and install Sensu with the following command:
apt-get update -y
apt-get install sensu -y
Next, you will need to create a client configuration file for Sensu. You can do this with the following command:
nano /etc/sensu/conf.d/client.jsonAdd the following lines:
{
"client": {
  "name": "Sensu-Client",
  "address": "192.168.0.104",
  "environment": "Test",
  "subscriptions": [
    "web",
    "debian"
  ]
 }
}
Save and close the file, when you are finished.
Next, you will need to configure Sensu client to connect with Sensu transport. You can do this by creating transport.json file:
nano /etc/sensu/conf.d/transport.jsonAdd the following lines:
{
 "transport": {
   "name": "rabbitmq",
   "reconnect_on_error": true
  }
 }
Save and close the file. Then, create a RabbitMQ configuration file:
nano /etc/sensu/conf.d/rabbitmq.jsonAdd the following lines:
{
  "rabbitmq": {
    "host": "192.168.0.101",
    "port": 5672,
    "vhost": "/sensu",
    "user": "sensu",
    "password": "sensupassword"
  }
}
Save and close the file. Then, restart sensu-client service with the following command:
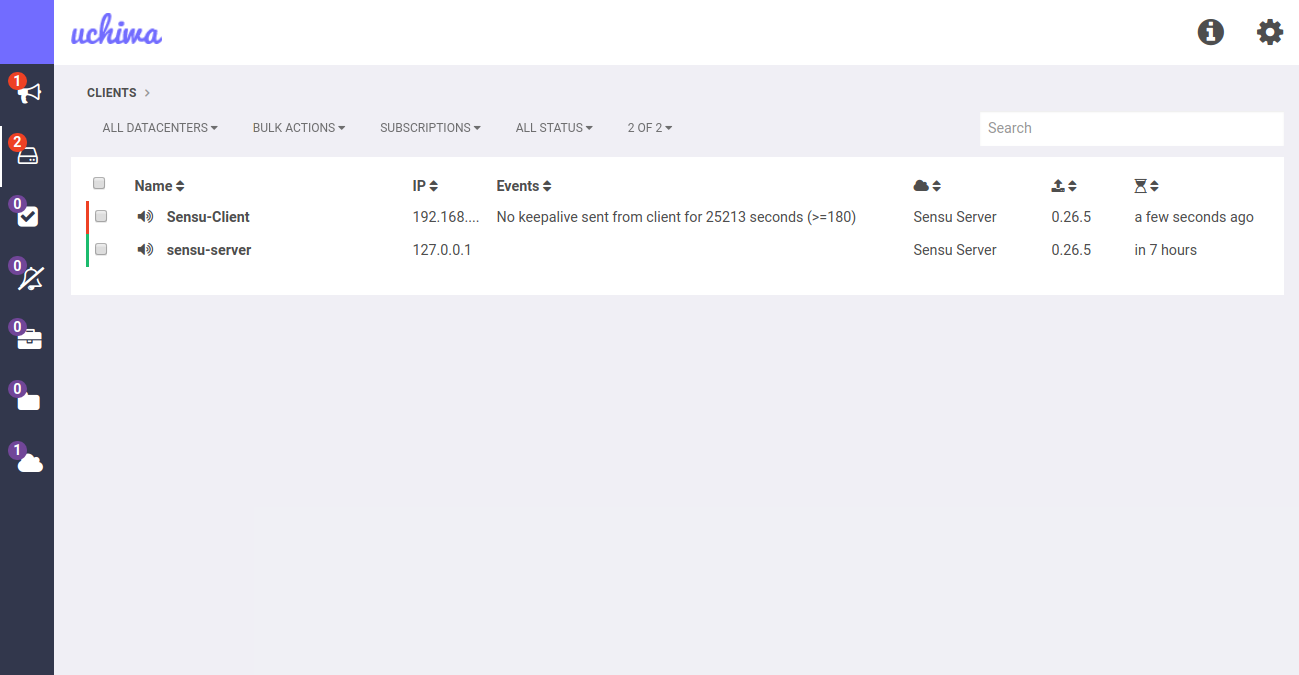
systemctl restart sensu-clientNow, go to the Uchiwa dashboard. You should see the newly added Sensu-Client in the following page:
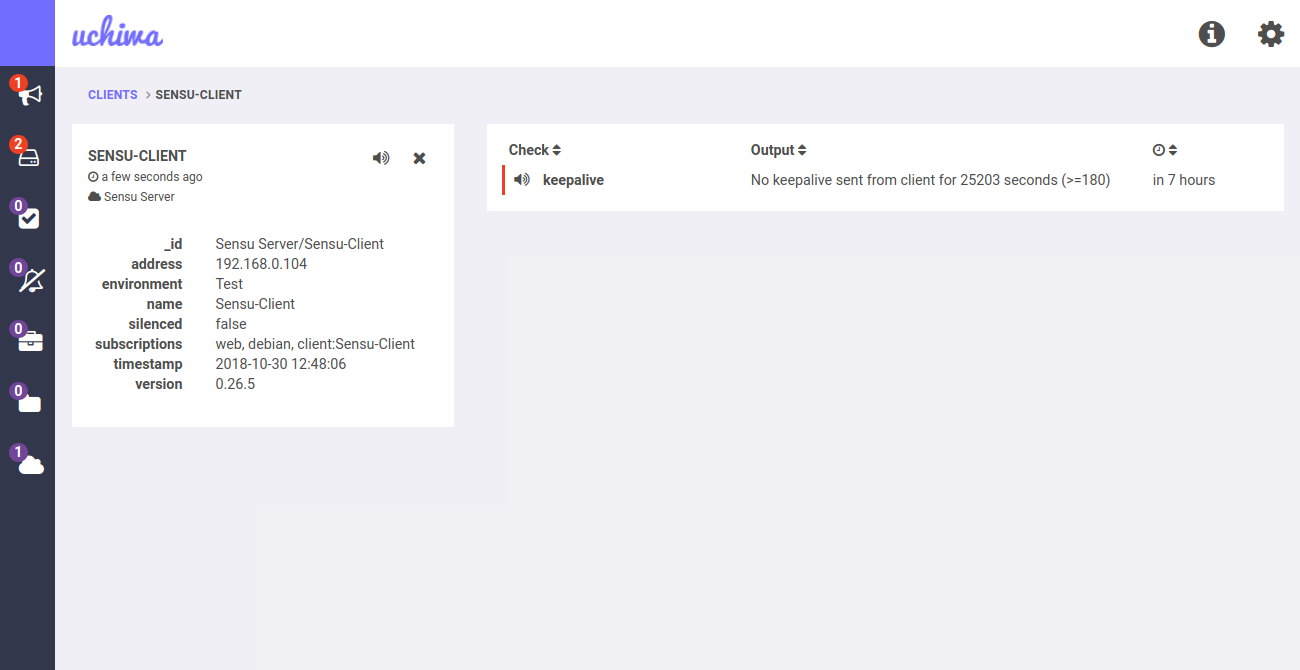
You can see the detail information of the newly added client in the following page:
Sensu server and client is now installed and working fine. Now, we will configure Sensu to monitor Apache and Disk status on Client instance. Sensu uses checks command to monitor specific services.
First, you will need to configure "Subscription checks" for Apache on the Sensu server instance. You can do this by creating the following file:
nano /etc/sensu/conf.d/apache_check.jsonAdd the following lines:
{
  "checks": {
    "apache-status": {
      "command": "check-process.rb -p apache2",
      "subscribers": [
        "web"
      ],
      "interval": 60
    }
  }
}
Save and close the file. Then, restart Sensu service with the following command:
systemctl restart sensu-serverOn the Client Instance, you will need to install Sensu plugins to monitor system resources, services, and application health. You can install it with the following command on the Client instance:
/opt/sensu/embedded/bin/gem install sensu-plugins-process-checks
/opt/sensu/embedded/bin/gem install sensu-plugins-disk-checks
Next, create a client.json file for Apache service check:
nano /etc/sensu/conf.d/client.jsonAdd the following lines:
{
"client": {
  "name": "Sensu-Client",
  "address": "192.168.0.104",
  "environment": "Test",
  "subscriptions": [
    "web",
    "debian"
  ]
 }
}
Save and close the file.
Next, create a configuration file for Disk check with the following command:
nano /etc/sensu/conf.d/disk_check.jsonAdd the following lines:
{
  "checks": {
    "disk-status": {
      "command": "check-disk-usage.rb -w 70 -c 90",
      "standalone": true,
      "interval": 60
   }
 }
}
Save and close the file. Then, restart Sensu client service with the following command:
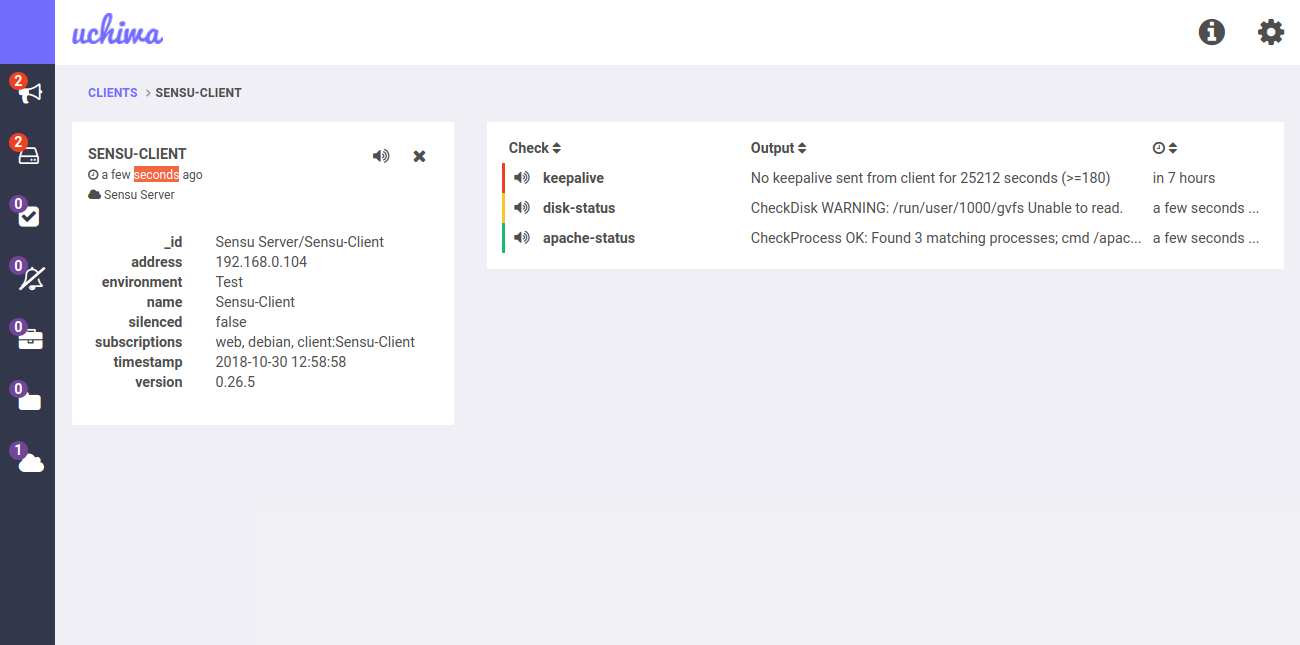
systemctl restart sensu-clientNext, go to the Uchiwa dashboard. You should see the apache-status and disk-status in the following page:
Congratulations! You have successfully installed Sensu server and add remote host into Sensu server. You can now easily add another host and monitor services as per your need.

2,599 posts | 762 followers
FollowAlibaba Clouder - February 13, 2018
Alibaba Clouder - April 23, 2019
Alibaba Clouder - May 7, 2019
Alibaba Clouder - June 4, 2019
Alibaba Clouder - February 13, 2019
Alibaba Clouder - June 11, 2018

2,599 posts | 762 followers
Follow ECS(Elastic Compute Service)
Elastic and secure virtual cloud servers to cater all your cloud hosting needs.
Learn More Marketplace
Marketplace is an online market for users to search and quickly use the software as image for Alibaba Cloud products.
Learn More Application Real-Time Monitoring Service
Build business monitoring capabilities with real time response based on frontend monitoring, application monitoring, and custom business monitoring capabilities
Learn MoreMore Posts by Alibaba Clouder