Function Compute支援API Gateway作為事件來源,即支援將Function Compute設定為API的後端服務。當有請求到達後端服務設定為Function Compute的API Gateway時,會觸發關聯的函數執行一次,Function Compute將執行結果返回給API Gateway。
背景資訊
API Gateway觸發器與HTTP觸發器類似,可應用於搭建Web應用。相較於HTTP觸發器,您可以使用API Gateway進行IP白名單或黑名單設定等進階操作。
API Gateway支援事件函數和Web函數兩種函數類型作為其後端服務,將API Gateway與Function Compute服務對接後,即可通過API形式安全地對外開放函數,並且解決認證、流量控制、資料轉換等問題。
建立事件函數並對接API Gateway
步驟一:建立事件觸發函數
在Function Compute3.0控制台建立事件函數,具體操作步驟請參見建立事件函數。
步驟二:建立後端服務為Function Compute的API
在API Gateway中定義後端服務,並配置後端服務地址來對接Function Compute服務。
登入API Gateway控制台,選擇地區,在左側導覽列選擇API 管理 > 後端服務,單擊右上方建立後端服務,配置如下資訊,單擊確定。

在後端服務頁面,單擊剛剛建立的後端服務,進入後端服務定義頁,選擇線上頁簽,在基本資料處單擊建立,選擇步驟一建立的事件函數,然後單擊發布。

建立分組。
說明建議建立與函數相同地區的API分組,如果不是相同地區,API需要通過公網訪問您的Function Compute服務,這將產生流量費用。若您對資料安全和網路延遲有較高要求,請選擇API與Function Compute為同一地區。
建立並發布API。
重點配置項設定如下,其餘保持預設即可。

配置項
取值樣本
安全認證
無認證
後端配置
使用已有的後端服務
後端服務類型
Function Compute
產品版本
Function Compute3.0
函數類型
事件函數
後端服務
選擇剛才建立的事件函數後端服務。
步驟三:編寫函數代碼
-
登入Function Compute控制台,在左側導覽列,選擇。
-
在頂部功能表列,選擇地區,然後在函数頁面,單擊目標函數。
在函數詳情頁面的代码頁簽,在代碼編輯器中編寫代碼,然後單擊部署代码。
不同語言的範例程式碼如下:
Node.js
module.exports.handler = function(event, context, callback) {
   var event = JSON.parse(event);
   var content = {
     path: event.path,
     method: event.method,
     headers: event.headers,
     queryParameters: event.queryParameters,
     pathParameters: event.pathParameters,
     body: event.body
   // 您可以在這裡編寫您自己的邏輯。
   }
   var response = {
        isBase64Encoded: false,
        statusCode: '200',
        headers: {
          'x-custom-header': 'header value'
        },
        body: content
      };
   callback(null, response)
};
Python
# -*- coding: utf-8 -*-
import json

def handler(event, context):
    event = json.loads(event)
    content = {
        'path': event['path'],
        'method': event['httpMethod'],
        'headers': event['headers'],
        'queryParameters': event['queryParameters'],
        'pathParameters': event['pathParameters'],
        'body': event['body']
    }
    # 您可以在這裡編寫您自己的邏輯。
    rep = {
        "isBase64Encoded": "false",
        "statusCode": "200",
        "headers": {
            "x-custom-header": "no"
        },
        "body": content
    }
    return json.dumps(rep)
PHP
<?php
function handler($event, $context) {
    $event   = json_decode($event, $assoc = true);
    $content = [
        'path'            => $event['path'],
        'method'          => $event['httpMethod'],
        'headers'         => $event['headers'],
        'queryParameters' => $event['queryParameters'],
        'pathParameters'  => $event['pathParameters'],
        'body'            => $event['body'],
    ];

    $rep = [
        "isBase64Encoded" => "false",
        "statusCode"      => "200",
        "headers"         => [
            "x-custom-header" => "no",
        ],
        "body"            => $content,
    ];

    return json_encode($rep);
}
Java
使用Java編程時,必須要實現一個類,需要實現Function Compute預定義的handler,目前有兩個預定義的handler可以實現(任選其一即可)。Function ComputeJava運行環境,請參見編譯部署程式碼封裝。
(推薦)使用PojoRequestHandler<I, O> handler。
import com.aliyun.fc.runtime.Context;
import com.aliyun.fc.runtime.PojoRequestHandler;
import java.util.HashMap;
import java.util.Map;

public class ApiTriggerDemo implements PojoRequestHandler<ApiRequest, ApiResponse> {

    public ApiResponse handleRequest(ApiRequest request, Context context) {
        // 擷取API請求資訊。
        context.getLogger().info(request.toString());
        String path = request.getPath();
        String httpMethod = request.getHttpMethod();
        String body = request.getBody();
        context.getLogger().info("path: " + path);
        context.getLogger().info("httpMethod: " + httpMethod);
        context.getLogger().info("body: " + body);

        // 您可以在這裡編寫您自己的邏輯。

        // API返回樣本。
        Map headers = new HashMap();
        boolean isBase64Encoded = false;
        int statusCode = 200;
        String returnBody = "";
        return new ApiResponse(headers,isBase64Encoded,statusCode,returnBody);
    }
}
兩個
POJO類、ApiRequest類和ApiResponse類定義如下。說明POJO類的set()和get()方法要寫全。import java.util.Map; public class ApiRequest { private String path; private String httpMethod; private Map headers; private Map queryParameters; private Map pathParameters; private String body; private boolean isBase64Encoded; @Override public String toString() { return "Request{" + "path='" + path + '\'' + ", httpMethod='" + httpMethod + '\'' + ", headers=" + headers + ", queryParameters=" + queryParameters + ", pathParameters=" + pathParameters + ", body='" + body + '\'' + ", isBase64Encoded=" + isBase64Encoded + '}'; } public String getPath() { return path; } public void setPath(String path) { this.path = path; } public String getHttpMethod() { return httpMethod; } public void setHttpMethod(String httpMethod) { this.httpMethod = httpMethod; } public Map getHeaders() { return headers; } public void setHeaders(Map headers) { this.headers = headers; } public Map getQueryParameters() { return queryParameters; } public void setQueryParameters(Map queryParameters) { this.queryParameters = queryParameters; } public Map getPathParameters() { return pathParameters; } public void setPathParameters(Map pathParameters) { this.pathParameters = pathParameters; } public String getBody() { return body; } public void setBody(String body) { this.body = body; } public boolean getIsBase64Encoded() { return this.isBase64Encoded; } public void setIsBase64Encoded(boolean base64Encoded) { this.isBase64Encoded = base64Encoded; } }import java.util.Map; public class ApiResponse { private Map headers; private boolean isBase64Encoded; private int statusCode; private String body; public ApiResponse(Map headers, boolean isBase64Encoded, int statusCode, String body) { this.headers = headers; this.isBase64Encoded = isBase64Encoded; this.statusCode = statusCode; this.body = body; } public Map getHeaders() { return headers; } public void setHeaders(Map headers) { this.headers = headers; } public boolean getIsBase64Encoded() { return isBase64Encoded; } public void setIsBase64Encoded(boolean base64Encoded) { this.isBase64Encoded = base64Encoded; } public int getStatusCode() { return statusCode; } public void setStatusCode(int statusCode) { this.statusCode = statusCode; } public String getBody() { return body; } public void setBody(String body) { this.body = body; } }pom.xml檔案如下。
<?xml version="1.0" encoding="UTF-8"?>
<project xmlns="http://maven.apache.org/POM/4.0.0"
         xmlns:xsi="http://www.w3.org/2001/XMLSchema-instance"
         xsi:schemaLocation="http://maven.apache.org/POM/4.0.0 http://maven.apache.org/xsd/maven-4.0.0.xsd">
    <modelVersion>4.0.0</modelVersion>

    <groupId>apiTrigger</groupId>
    <artifactId>apiTrigger</artifactId>
    <version>1.0-SNAPSHOT</version>
    <build>
        <plugins>
            <plugin>
                <groupId>org.apache.maven.plugins</groupId>
                <artifactId>maven-compiler-plugin</artifactId>
                <configuration>
                    <source>1.8</source>
                    <target>1.8</target>
                </configuration>
            </plugin>
        </plugins>
    </build>
    <dependencies>
        <dependency>
            <groupId>com.aliyun.fc.runtime</groupId>
            <artifactId>fc-java-core</artifactId>
            <version>1.0.0</version>
        </dependency>
    </dependencies>
</project>
使用StreamRequestHandler handler。
使用該handler,需要將輸入的
InputStream轉換為對應的POJO類,範例程式碼如下。pom.xml檔案配置與使用PojoRequestHandler<I, O> handler相同。
import com.aliyun.fc.runtime.Context;
import com.aliyun.fc.runtime.StreamRequestHandler;
import com.aliyun.fc.runtime.Context;
import com.google.gson.Gson;
import java.io.*;
import java.util.Base64;
import java.util.HashMap;
import java.util.Map;

public class ApiTriggerDemo2 implements StreamRequestHandler {

    public void handleRequest(InputStream inputStream, OutputStream outputStream, Context context) {
        try {
            // 將InputStream轉化成字串。
            BufferedReader bufferedReader = new BufferedReader(new InputStreamReader(inputStream));
            StringBuffer stringBuffer = new StringBuffer();
            String string = "";
            while ((string = bufferedReader.readLine()) != null) {
                stringBuffer.append(string);
            }
            String input = stringBuffer.toString();
            context.getLogger().info("inputStream: " + input);
            Request req = new Gson().fromJson(input, Request.class);
            context.getLogger().info("input req: ");
            context.getLogger().info(req.toString());
            String bodyReq = req.getBody();
            Base64.Decoder decoder = Base64.getDecoder();
            context.getLogger().info("body: " + new String(decoder.decode(bodyReq)));

            // 您可以在這裡處理您自己的邏輯。

            // 返回結構。
            Map headers = new HashMap();
            headers.put("x-custom-header", " ");
            boolean isBase64Encoded = false;
            int statusCode = 200;
            Map body = new HashMap();
            Response resp = new Response(headers, isBase64Encoded, statusCode, body);
            String respJson = new Gson().toJson(resp);
            context.getLogger().info("outputStream: " + respJson);
            outputStream.write(respJson.getBytes());
        } catch (IOException e) {
            e.printStackTrace();
        } finally {
            try {
                outputStream.close();
                inputStream.close();
            } catch (IOException e) {
                e.printStackTrace();
            }
        }
    }
    class Request {
        private String path;
        private String httpMethod;
        private Map headers;
        private Map queryParameters;
        private Map pathParameters;
        private String body;
        private boolean isBase64Encoded;

        @Override
        public String toString() {
            return "Request{" +
                    "path='" + path + '\'' +
                    ", httpMethod='" + httpMethod + '\'' +
                    ", headers=" + headers +
                    ", queryParameters=" + queryParameters +
                    ", pathParameters=" + pathParameters +
                    ", body='" + body + '\'' +
                    ", isBase64Encoded=" + isBase64Encoded +
                    '}';
        }

        public String getBody() {
            return body;
        }
    }

    // Function Compute需要以以下JSON格式返回對API Gateway的響應。
    class Response {
        private Map headers;
        private boolean isBase64Encoded;
        private int statusCode;
        private Map body;

        public Response(Map headers, boolean isBase64Encoded, int statusCode, Map body) {
            this.headers = headers;
            this.isBase64Encoded = isBase64Encoded;
            this.statusCode = statusCode;
            this.body = body;
        }
    }
}
步驟四:配置函數的入口參數
API Gateway觸發函數執行時,API Gateway的資訊以event的形式作為輸入參數傳給函數,您可以將API Gateway傳入的event資訊作為參數,調試函數代碼編寫是否正確。
-
在函數詳情頁面的代码頁簽,單擊测试函数右側的
 表徵圖,從下拉式清單中,選擇配置测试参数。
 在配置测试参数面板,選擇创建新测试事件或编辑已有测试事件,填寫事件名稱和事件內容,然後單擊確定。
event格式樣本如下所示:
{
    "path":"api request path",
    "httpMethod":"request method name",
    "headers":{all headers,including system headers},
    "queryParameters":{query parameters},
    "pathParameters":{path parameters},
    "body":"string of request payload",
    "isBase64Encoded":"true|false, indicate if the body is Base64-encode"
}
event參數中不同屬性欄位的解釋如下表所示。
參數
類型
描述
path
String
API請求路徑。
httpMethod
String
請求的方法名稱,例如GET、POST、PUT和DELETE等。
headers
Object
包含所有要求標頭資訊,包括系統頭和自訂頭。
queryParameters
Object
查詢參數,通常在 URL 的問號後面以索引值對的形式出現。
pathParameters
Object
路徑參數,通常是 URL 中的一部分,用於標識特定資源。
body
String
請求體。
isBase64Encoded
Boolean
是否對請求體body進行了Base64編碼。
說明如果
isBase64Encoded的值為true,表示API Gateway傳給Function Compute的body內容已進行Base64編碼。Function Compute需要先對body內容進行Base64解碼後再處理。如果
isBase64Encoded的值為false,表示API Gateway沒有對body內容進行Base64編碼,在函數中可以直接擷取body內容。
單擊测试函数。
步驟五:驗證結果
執行完成後,您可以在函数代码頁簽的上方查看執行結果。
Function Compute需要將執行的結果按照以下JSON格式返回給API Gateway,然後由API Gateway解析。返回格式樣本如下:
{
    "isBase64Encoded":true|false,
    "statusCode":httpStatusCode,
    "headers":{response headers},
    "body":"..."
}
事件函數對接API Gateway的格式要求
API Gateway調用Function Compute服務時,會將API的相關資料轉換為Map形式傳給Function Compute服務。Function Compute服務處理後,按照Output Format格式返回statusCode、headers、body等相關資料。API Gateway再將Function Compute返回的內容映射到statusCode、headers、body等位置返回給用戶端。

建立Web函數並對接API Gateway
步驟一:建立Web函數
在Function Compute3.0控制台中建立一個Web函數,具體操作步驟,請參見建立Web函數。
預設為建立的Web函數建立一個HTTP觸發器,複製內網訪問地址供後續使用。

步驟二:建立後端服務
在API Gateway中定義後端服務,並配置後端服務地址來對接Function Compute服務。
登入API Gateway控制台,選擇地區,在左側導覽列選擇API 管理 > 後端服務,單擊右上方建立後端服務,配置如下資訊,單擊確定。

在後端服務頁面,單擊剛剛建立的後端服務,進入後端服務定義頁,選擇線上頁簽,在基本資料處單擊建立,填寫步驟一建立的Web函數的觸發器內網訪問地址,然後單擊發布。

步驟三:建立並發布API
建立API使得外部應用能夠按照指定的方式調用內部的Web函數服務,使用API分組組織和管理多個相關的API介面,便於實施統一的安全性原則和流量控制措施。
登入API Gateway控制台,在左側導覽列選擇API 管理 > 分組管理,單擊建立分組以便對API進行管理。
在建立分組彈框頁面,選擇實例:,輸入分組名稱為
FC-Group,BasePath為/,單擊確定。 說明
說明建議建立與函數相同地區的API分組,如果不是相同地區,API需要通過公網訪問您的Function Compute服務,這將產生流量費用。若您對資料安全和網路延遲有較高要求,請選擇API與Function Compute為同一地區。
在分組列表頁面,單擊目標分組右側操作列的管理API,然後單擊創建 API,配置如下資訊,單擊下一步。

在定義API請求配置頁簽,配置請求Path為
/,其他資訊保持預設,單擊下一步。在定義API後端服務配置頁簽,如圖所示進行配置,單擊下一步。

在定義返回結果配置頁簽,保持系統預設配置,單擊建立,在建立成功之後,在彈出的提示對話方塊單擊發布。
在發布API對話方塊,設定以下配置項,然後單擊發布。

步驟四:建立應用和API授權
應用(APP)是調用API服務時的身份,在步驟三:建立並發布API時,認證方式選擇的是阿里雲APP認證,因此在API發布後,還需要建立APP,並建立APP和API的授權關係,才能夠正常訪問。
登入API Gateway控制台,在左側導覽列選擇API調用> 應用管理。
在應用與授權頁面,單擊右上方建立APP。在建立應用頁面,輸入應用名稱:為
fcApp,單擊確定。單擊已建立好的
fcApp應用程式名稱,進入應用詳情頁面,可以看到阿里雲APP下有兩種認證方式,AppKey和AppCode。AppKey方式有一組AppKey和AppSecret,您可以理解為帳號密碼,調用API的時候需要將AppKey作為參數傳入,AppSecret用於簽名計算,網關會校正這對金鑰組您進行身份認證。
在左側導覽列選擇API 管理> API列表,在API列表頁面,找到已建立好的API,在其操作列選擇
 > 授權。
> 授權。在授權頁面,配置選擇要授權的環境:為線上。搜尋之前建立的應用
fcApp,單擊添加並確定,提示授權成功,即成功授權。
步驟五:驗證結果
下面介紹使用APPCode的認證方式在您的業務系統中調用發行的API,本文以使用Curl命令調用為例。
登入API Gateway控制台,在左側導覽列選擇API調用>應用管理,在應用與授權頁面找到授權的APP,單擊進入擷取APPCode。然後按照以下樣本調用API。
curl -i -X GET "http://fd6f8e2b7bf44ab181a56****-cn-hangzhou.alicloudapi.com" -H "Authorization:APPCODE 7d2b7e4945ce44028ab00***"常見問題
API Gateway觸發函數執行時報502,查看函數日誌,函數已經執行成功了,這是怎麼回事?
API Gateway和Function Compute的對接有格式要求,如果Function Compute返回給API Gateway的結果沒有按規定的格式返回,那麼API Gateway就認為後端服務不可用。關於API Gateway和Function Compute的對接格式要求,請參見觸發器Event格式和驗證結果中Function Compute的返回參數格式。
如何設定返迴響應的content-type?
如圖所示,在API設定的時候可以設定返迴響應的content-type。詳細內容,請參見通過API Gateway對接Function ComputeFC3.0(Web函數)。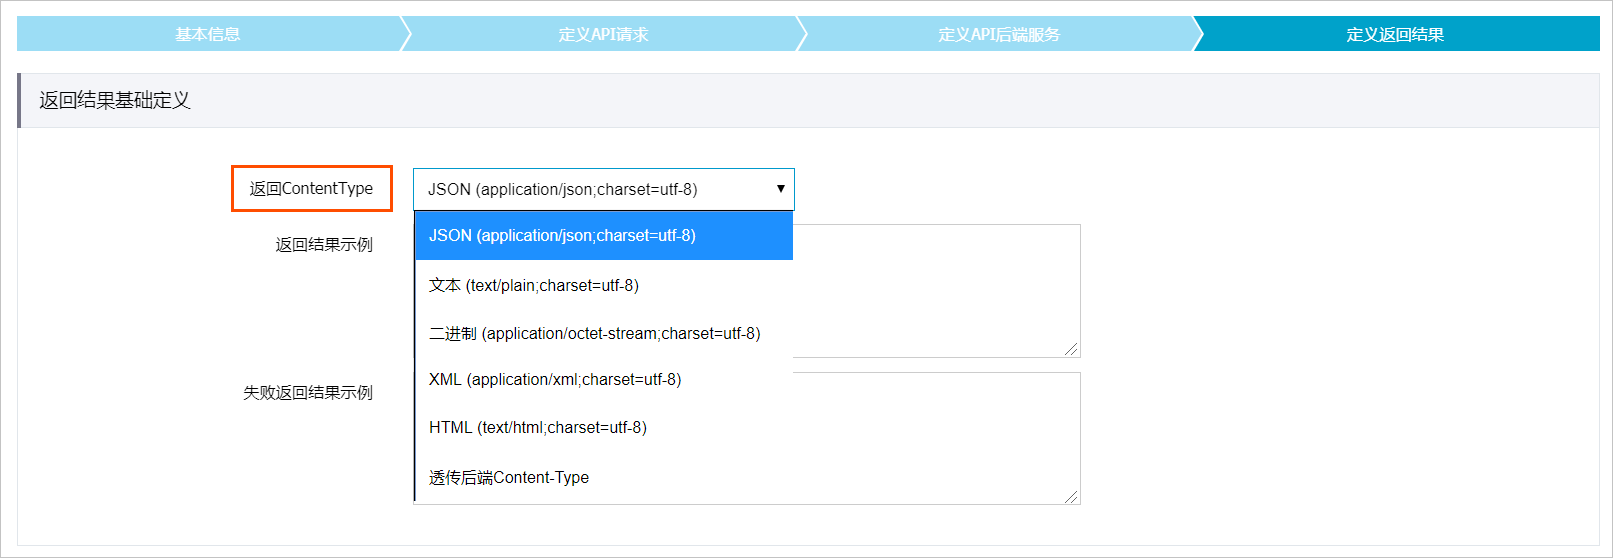
API Gateway觸發Function Compute執行,已經調通的函數,一段時間不調用,再次調用會報503,這是什麼原因?
一段時間不調用後,函數重新調用需要準備執行環境,有冷啟動時延,如果在API Gateway設定的逾時時間內沒有調用完,API Gateway會認為後端服務不可用。延長API Gateway的逾時時間即可解決問題。
為什麼函數中接收到API Gateway傳過來的body是經過了Base64編碼的?
API Gateway對FORM形式的body傳輸是不進行Base64編碼的(使用FORM形式需要在API Gateway選擇入參映射),其他形式body都會進行Base64編碼,避免內容傳輸錯誤或者丟失。建議您在使用時,先判斷event中isBase64是否為true。如果isBase64為true,則body需要在函數中進行解碼。關於API Gateway傳給Function Compute的event格式,請參見觸發器Event格式。