Resource Access Management (RAM) を使用して、ユーザー ID とリソースアクセス権限を管理できます。Alibaba Cloud アカウントと比較して、RAM ユーザーは Tablestore リソースへのより安全なアクセスを提供します。このトピックでは、RAM ユーザーの AccessKey ペアを使用して Tablestore リソースにアクセスする方法について説明します。
背景情報
RAM ユーザーは、実際のエンティティの ID です。Alibaba Cloud アカウント用に RAM ユーザーを作成し、さまざまなリソースにアクセスするための権限を付与できます。
手順
RAM ユーザーの AccessKey ペアを使用して Tablestore にアクセスする前に、RAM ユーザーを作成し、Tablestore にアクセスするための権限を付与する必要があります。その後、RAM ユーザーの AccessKey ペアを使用して、Tablestore リソースにアクセスするためのリクエストを開始できます。
ステップ 1: RAM ユーザーの作成
Alibaba Cloud アカウントまたは管理者権限を持つ RAM ユーザーを使用して、Resource Access Management (RAM) コンソールにログインします。
左側のナビゲーションウィンドウで、 を選択します。
[ユーザー] ページで、[ユーザーの作成] をクリックします。
[ユーザーの作成] ページの [ユーザーアカウント情報] セクションで、次のパラメーターを設定します。
ログオン名: ログオン名は最大 64 文字で、文字、数字、ピリオド (.)、ハイフン (-)、アンダースコア (_) を使用できます。
表示名: 表示名は最大 128 文字です。
タグ:
 をクリックし、タグキーとタグ値を入力します。RAM ユーザーに 1 つ以上のタグを追加できます。これにより、タグに基づいて RAM ユーザーを管理できます。
説明[ユーザーの追加] をクリックすると、複数の RAM ユーザーを同時に作成できます。
[アクセスモード] セクションで、[プログラムによるアクセス] を選択し、[OK] をクリックします。
説明RAM ユーザーとして Alibaba Cloud 管理コンソールにログインしてアクセスする場合は、[コンソールアクセス] を選択します。
[アクション] 列で、[コピー] をクリックして RAM ユーザーに関する情報を保存します。AccessKey ID と AccessKey Secret を個別にコピーできます。
重要RAM ユーザーの AccessKey Secret は、AccessKey ペアを作成したときにのみ表示されます。[ユーザーの作成] ページを閉じると、AccessKey Secret を照会できなくなります。AccessKey Secret を記録し、安全な場所に保管してください。
ステップ 2: RAM ユーザーに Tablestore へのアクセス権限を付与する
RAM ユーザーを作成したら、その RAM ユーザーに Tablestore へのアクセス権限を付与する必要があります。
デフォルトポリシーの使用
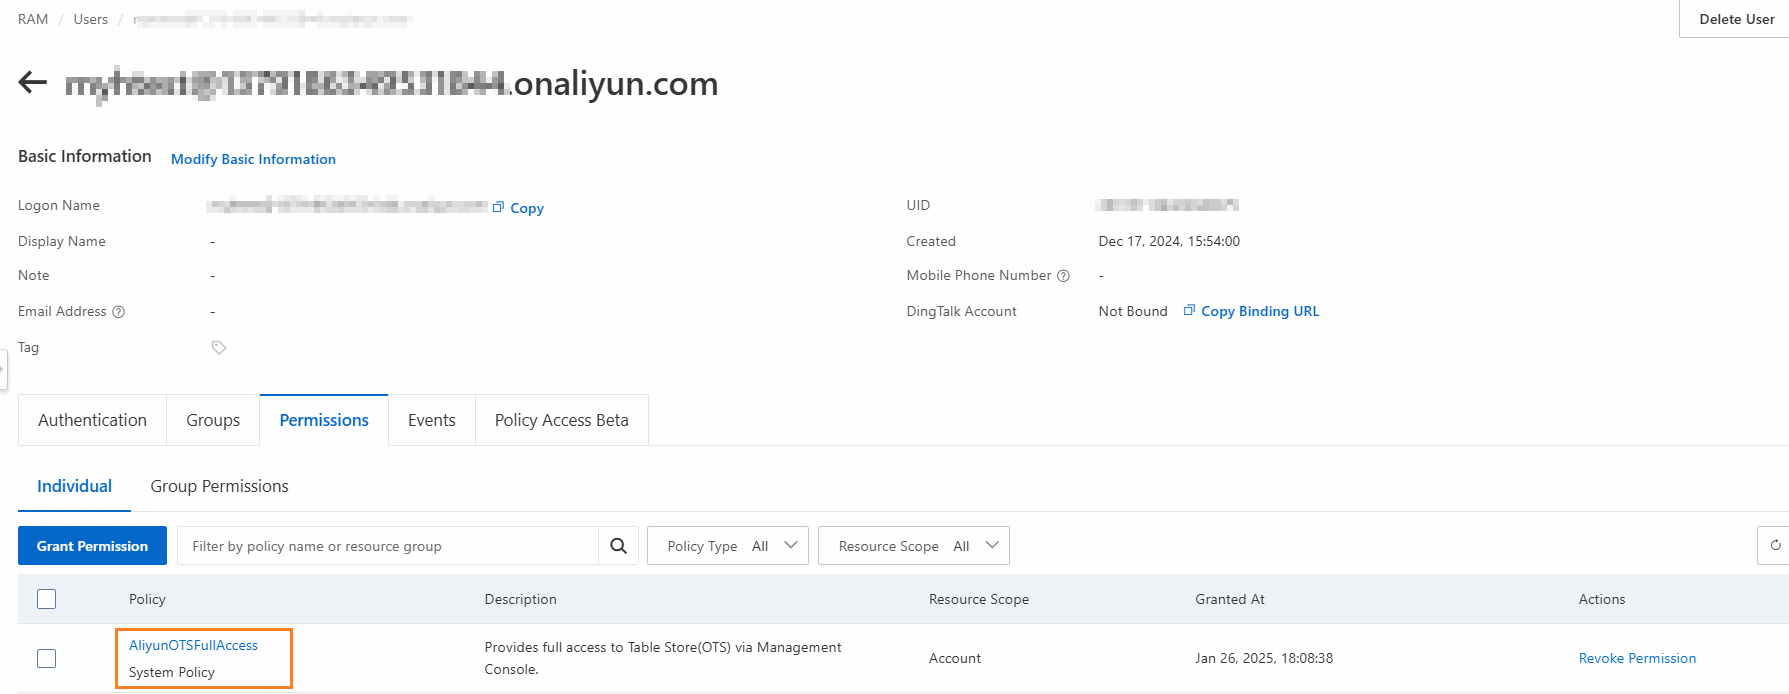
この例では、AliyunOTSFullAccess ポリシーが RAM ユーザーにアタッチされ、Tablestore へのアクセス権限が付与されます。
AliyunOTSFullAccess ポリシーには、Tablestore に対する完全なアクセス権限が含まれています。必要に応じて、次のポリシーを RAM ユーザーにアタッチして特定の権限を付与することもできます。
RAM ユーザーに Tablestore への読み取り専用アクセスを許可するには、
AliyunOTSReadOnlyAccessポリシーを RAM ユーザーにアタッチします。RAM ユーザーに Tablestore への書き込み専用アクセスを許可するには、
AliyunOTSWriteOnlyAccessポリシーを RAM ユーザーにアタッチします。
左側のナビゲーションウィンドウで、 を選択します。
[ユーザー] ページで、ポリシーをアタッチする RAM ユーザーを見つけます。
RAM ユーザーの [アクション] 列で [権限の追加] をクリックします。
[権限の付与] パネルの [ポリシー] セクションで、
AliyunOTSFullAccessを検索して選択します。[権限の付与] をクリックします。
カスタムポリシーの使用
カスタムポリシーを作成します。
左側のナビゲーションウィンドウで、 を選択します。
[ポリシー] ページで、[ポリシーの作成] をクリックします。
[ポリシーの作成] ページで、[JSON] タブをクリックし、ポリシードキュメントにスクリプトを入力して、[OK] をクリックします。
説明次のサンプルスクリプトは、RAM ユーザーに特定のインスタンスへのアクセス権限を付与します。必要に応じてカスタムポリシーのスクリプトを指定できます。たとえば、RAM ユーザーにテーブルへのアクセス権限、API 操作の呼び出し権限、または特定の IP アドレスから、あるいは特定の時点より前にのみ Tablestore にアクセスする権限を付与できます。RAM ポリシーの詳細については、「カスタムポリシーの作成」をご参照ください。
{
  "Version": "1",
  "Statement": [
    {
      "Effect": "Allow",
      "Action": "ots:*",
      "Resource": "acs:ots:*:*:instance/your_instance_name*"
    }
  ]
}
[ポリシーの作成] ダイアログボックスで、
TestRAMPolicyなどのポリシー名を入力し、[OK] をクリックします。
カスタムポリシーを RAM ユーザーにアタッチします。
左側のナビゲーションウィンドウで、 を選択します。
[ユーザー] ページで、カスタムポリシーをアタッチする RAM ユーザーを見つけます。
RAM ユーザーの [アクション] 列で [権限の追加] をクリックします。
[権限の付与] パネルの [ポリシー] セクションで、作成したカスタムポリシーを検索して選択します。
[権限の付与] をクリックします。
[ユーザー] ページで、RAM ユーザーの名前をクリックしてユーザー詳細ページに移動します。ユーザー詳細ページの [権限] タブで、RAM ユーザーにアタッチされているポリシーを表示できます。
ステップ 3: RAM ユーザーの AccessKey ペアを使用して Tablestore にアクセスする
準備
Tablestore コンソールでインスタンスとデータテーブルを作成します。
インスタンスの名前、エンドポイント、および リージョン ID を取得します。
重要デフォルトでは、新しく作成されたインスタンスではインターネットベースのアクセスは無効になっています。インターネット経由でインスタンス内のリソースにアクセスする場合は、インスタンスのインターネットベースのアクセスを有効にする必要があります。
環境変数を設定します。設定が完了したら、コンパイル環境とランタイム環境 (IDE、コマンドラインインターフェイス、その他のデスクトップアプリケーション、バックグラウンドサービスなど) を再起動またはリフレッシュして、最新のシステム環境変数が正常にロードされるようにします。
Linux
コマンドラインインターフェイスで次のコマンドを実行して、環境変数の設定を
~/.bashrcファイルに追加します。echo "export TABLESTORE_ACCESS_KEY_ID='YOUR_ACCESS_KEY_ID'" >> ~/.bashrc echo "export TABLESTORE_ACCESS_KEY_SECRET='YOUR_ACCESS_KEY_SECRET'" >> ~/.bashrc次のコマンドを実行して変更を有効にします。
source ~/.bashrc次のコマンドを実行して、環境変数が有効になっているかどうかを確認します。
echo $TABLESTORE_ACCESS_KEY_ID
echo $TABLESTORE_ACCESS_KEY_SECRET
macOS
ターミナルで次のコマンドを実行して、デフォルトの Shell タイプを確認します。
echo $SHELLデフォルトの Shell タイプに基づいて操作を実行します。
Zsh
次のコマンドを実行して、環境変数の設定を
~/.zshrcファイルに追加します。echo "export TABLESTORE_ACCESS_KEY_ID='YOUR_ACCESS_KEY_ID'" >> ~/.zshrc echo "export TABLESTORE_ACCESS_KEY_SECRET='YOUR_ACCESS_KEY_SECRET'" >> ~/.zshrc次のコマンドを実行して変更を有効にします。
source ~/.zshrc次のコマンドを実行して、環境変数が有効になっているかどうかを確認します。
echo $TABLESTORE_ACCESS_KEY_ID
echo $TABLESTORE_ACCESS_KEY_SECRET
Bash
次のコマンドを実行して、環境変数の設定を
~/.bash_profileファイルに追加します。echo "export TABLESTORE_ACCESS_KEY_ID='YOUR_ACCESS_KEY_ID'" >> ~/.bash_profile echo "export TABLESTORE_ACCESS_KEY_SECRET='YOUR_ACCESS_KEY_SECRET'" >> ~/.bash_profile次のコマンドを実行して変更を有効にします。
source ~/.bash_profile次のコマンドを実行して、環境変数が有効になっているかどうかを確認します。
echo $TABLESTORE_ACCESS_KEY_ID
echo $TABLESTORE_ACCESS_KEY_SECRET
Windows
CMD
CMD で次のコマンドを実行して、環境変数を設定します。
setx TABLESTORE_ACCESS_KEY_ID "YOUR_ACCESS_KEY_ID"
setx TABLESTORE_ACCESS_KEY_SECRET "YOUR_ACCESS_KEY_SECRET"
CMD を再起動した後、次のコマンドを実行して、環境変数が有効になっているかどうかを確認します。
echo %TABLESTORE_ACCESS_KEY_ID%
echo %TABLESTORE_ACCESS_KEY_SECRET%
PowerShell
PowerShell で次のコマンドを実行します。
[Environment]::SetEnvironmentVariable("TABLESTORE_ACCESS_KEY_ID", "YOUR_ACCESS_KEY_ID", [EnvironmentVariableTarget]::User)
[Environment]::SetEnvironmentVariable("TABLESTORE_ACCESS_KEY_SECRET", "YOUR_ACCESS_KEY_SECRET", [EnvironmentVariableTarget]::User)
次のコマンドを実行して、環境変数が有効になっているかどうかを確認します。
[Environment]::GetEnvironmentVariable("TABLESTORE_ACCESS_KEY_ID", [EnvironmentVariableTarget]::User)
[Environment]::GetEnvironmentVariable("TABLESTORE_ACCESS_KEY_SECRET", [EnvironmentVariableTarget]::User)
必要なプログラミング言語用の Tablestore SDK をインストールします。
Java
Maven を使用して Java プロジェクトを管理する場合は、次の依存関係を pom.xml ファイルに追加します。
<dependency> <groupId>com.aliyun.openservices</groupId> <artifactId>tablestore</artifactId> <version>5.17.4</version> </dependency>詳細については、「Tablestore SDK for Java のインストール」をご参照ください。
Go
プロジェクトディレクトリで
go mod init <DIRNAME>コマンドを実行して go.mod ファイルを生成します。次に、次のコマンドを実行して Tablestore SDK for Go をインストールします。説明<DIRNAME>はプロジェクトディレクトリのパスを示します。<DIRNAME> を実際のプロジェクトディレクトリのパスに置き換えてください。go get github.com/aliyun/aliyun-tablestore-go-sdk/tablestore詳細については、「Tablestore SDK for Go のインストール」をご参照ください。
Python
次のコマンドを実行して、pip を使用して Tablestore SDK for Python をインストールします。
sudo pip install tablestore詳細については、「Tablestore SDK for Python のインストール」をご参照ください。
Node.js
npm を使用して次のコマンドを実行し、Tablestore SDK for Node.js をインストールします。
npm install tablestore詳細については、「Tablestore SDK for Node.js のインストール」をご参照ください。
.NET
詳細については、「Tablestore SDK for .NET のインストール」をご参照ください。
PHP
詳細については、「Tablestore SDK for PHP のインストール」をご参照ください。
Wide Column モデル
Wide Column モデルを使用する場合、RAM ユーザーの AccessKey ペアを使用して Wide Column モデルのクライアントを初期化し、リクエストを開始する必要があります。
Java
(推奨) V4 署名の使用
次の Java コードのサンプルは、V4 署名を使用してクライアントを初期化し、インスタンス内のデータテーブルのリストをクエリする方法の例を示しています。
import com.alicloud.openservices.tablestore.ClientConfiguration;
import com.alicloud.openservices.tablestore.SyncClient;
import com.alicloud.openservices.tablestore.core.ResourceManager;
import com.alicloud.openservices.tablestore.core.auth.CredentialsProvider;
import com.alicloud.openservices.tablestore.core.auth.DefaultCredentialProvider;
import com.alicloud.openservices.tablestore.core.auth.DefaultCredentials;
import com.alicloud.openservices.tablestore.core.auth.V4Credentials;
import com.alicloud.openservices.tablestore.model.AlwaysRetryStrategy;
import com.alicloud.openservices.tablestore.model.ListTableResponse;

public class InitClientV4 {
    public static void main(String[] args) {
        // アクセスするインスタンスが存在するリージョンを指定します。例: cn-hangzhou。
        final String region = "yourRegion";
        // インスタンスの名前を指定します。
        final String instanceName = "yourInstanceName";
        // インスタンスのエンドポイントを指定します。
        final String endpoint = "yourEndpoint";
        // 環境変数から AccessKey ID と AccessKey Secret を取得します。
        final String accessKeyId = System.getenv("TABLESTORE_ACCESS_KEY_ID");
        final String accessKeySecret = System.getenv("TABLESTORE_ACCESS_KEY_SECRET");

        // V4 署名を構築します。
        DefaultCredentials credentials = new DefaultCredentials(accessKeyId, accessKeySecret);
        V4Credentials credentialsV4 = V4Credentials.createByServiceCredentials(credentials, region);
        CredentialsProvider provider = new DefaultCredentialProvider(credentialsV4);

        // クライアントを初期化します。
        SyncClient client = new SyncClient(endpoint, provider, instanceName, null, new ResourceManager(null, null));

        /*
        // ClientConfiguration を使用して、デフォルトの構成を変更できます。次の例には、特定のカスタム構成が含まれています。
        ClientConfiguration clientConfiguration = new ClientConfiguration();
        clientConfiguration.setConnectionTimeoutInMillisecond(5000); // 接続を確立するためのタイムアウト期間を指定します。単位: ミリ秒。
        clientConfiguration.setSocketTimeoutInMillisecond(5000); // ソケットのタイムアウト期間を指定します。単位: ミリ秒。
        clientConfiguration.setRetryStrategy(new AlwaysRetryStrategy()); // リトライポリシーを指定します。リトライポリシーを指定しない場合、デフォルトのリトライポリシーが使用されます。
        SyncClient client = new SyncClient(endpoint, provider, instanceName, clientConfiguration, new ResourceManager(null, null));
         */

        // インスタンス内のデータテーブルのリストをクエリし、Tablestore コンソールにリストを表示します。
        ListTableResponse listTableResponse = client.listTable();
        listTableResponse.getTableNames().forEach(System.out::println);

        // Tablestore クライアントをシャットダウンします。
        client.shutdown();
    }
}
V2 署名の使用
次の Java コードのサンプルは、V2 署名を使用してクライアントを初期化し、インスタンス内のデータテーブルのリストをクエリする方法の例を示しています。
import com.alicloud.openservices.tablestore.ClientConfiguration;
import com.alicloud.openservices.tablestore.SyncClient;
import com.alicloud.openservices.tablestore.core.ResourceManager;
import com.alicloud.openservices.tablestore.core.auth.CredentialsProvider;
import com.alicloud.openservices.tablestore.core.auth.DefaultCredentialProvider;
import com.alicloud.openservices.tablestore.core.auth.DefaultCredentials;
import com.alicloud.openservices.tablestore.model.AlwaysRetryStrategy;
import com.alicloud.openservices.tablestore.model.ListTableResponse;

public class InitClientV2 {
    public static void main(String[] args) {
        // インスタンスの名前を指定します。
        final String instanceName = "yourInstanceName";
        // インスタンスのエンドポイントを指定します。
        final String endpoint = "yourEndpoint";
        // 環境変数から AccessKey ID と AccessKey Secret を取得します。
        final String accessKeyId = System.getenv("TABLESTORE_ACCESS_KEY_ID");
        final String accessKeySecret = System.getenv("TABLESTORE_ACCESS_KEY_SECRET");

        // V2 署名を構築します。
        DefaultCredentials credentials = new DefaultCredentials(accessKeyId, accessKeySecret);
        CredentialsProvider provider = new DefaultCredentialProvider(credentials);

        // クライアントを初期化します。
        SyncClient client = new SyncClient(endpoint, provider, instanceName, null, new ResourceManager(null, null));

        /*
        // ClientConfiguration を使用して、デフォルトの構成を変更できます。次の例には、特定のカスタム構成が含まれています。
        ClientConfiguration clientConfiguration = new ClientConfiguration();
        clientConfiguration.setConnectionTimeoutInMillisecond(5000); // 接続を確立するためのタイムアウト期間を指定します。単位: ミリ秒。
        clientConfiguration.setSocketTimeoutInMillisecond(5000); // ソケットのタイムアウト期間を指定します。単位: ミリ秒。
        clientConfiguration.setRetryStrategy(new AlwaysRetryStrategy()); // リトライポリシーを指定します。リトライポリシーを指定しない場合、デフォルトのリトライポリシーが使用されます。
        SyncClient client = new SyncClient(endpoint, provider, instanceName, clientConfiguration, new ResourceManager(null, null));
         */

        // インスタンス内のデータテーブルのリストをクエリし、Tablestore コンソールにリストを表示します。
        ListTableResponse listTableResponse = client.listTable();
        listTableResponse.getTableNames().forEach(System.out::println);

        // Tablestore クライアントをシャットダウンします。
        client.shutdown();
    }
}
Go
次の Go コードのサンプルは、クライアントを初期化し、インスタンス内のデータテーブルのリストをクエリする方法の例を示しています。
package main

import (
	"fmt"
	"os"
	"github.com/aliyun/aliyun-tablestore-go-sdk/tablestore"
)

func main() {
	// インスタンスの名前を指定します。
	instanceName := "yourInstanceName"
	// インスタンスのエンドポイントを指定します。
	endpoint := "yourEndpoint"
	// 環境変数から AccessKey ID と AccessKey Secret を取得します。
	accessKeyId := os.Getenv("TABLESTORE_ACCESS_KEY_ID")
	accessKeySecret := os.Getenv("TABLESTORE_ACCESS_KEY_SECRET")

	// クライアントを初期化します。
	client := tablestore.NewClient(endpoint, instanceName, accessKeyId, accessKeySecret)

	// インスタンス内のデータテーブルのリストをクエリし、Tablestore コンソールにリストを表示します。
	tables, err := client.ListTable()
    if err != nil {
        fmt.Println("Failed to list table")
    } else {
        for _, table := range (tables.TableNames) {
            fmt.Println(table)
        }
    }
}
Python
次の Python コードのサンプルは、クライアントを初期化し、インスタンス内のデータテーブルのリストをクエリする方法の例を示しています。
# -*- coding: utf-8 -*-
import os
from tablestore import OTSClient

# インスタンスの名前を指定します。
instance_name = "yourInstanceName"
# インスタンスのエンドポイントを指定します。
endpoint = "yourEndpoint"
# 環境変数から AccessKey ID と AccessKey Secret を取得します。
access_key_id = os.getenv("TABLESTORE_ACCESS_KEY_ID")
access_key_secret = os.getenv("TABLESTORE_ACCESS_KEY_SECRET")

# クライアントを初期化します。
client = OTSClient(endpoint, access_key_id, access_key_secret, instance_name)

# インスタンス内のデータテーブルのリストをクエリし、Tablestore コンソールにリストを表示します。
resp = client.list_table()
for table_name in resp:
    print(table_name)
Node.js
次の Node.js コードのサンプルは、クライアントを初期化し、インスタンス内のデータテーブルのリストをクエリする方法の例を示しています。
// この例では、パスは相対パスです。必要に応じてパスを変更してください。
var TableStore = require('../index.js');

// インスタンスの名前を指定します。
var instancename = 'yourInstanceName';
// インスタンスのエンドポイントを指定します。
var endpoint = 'yourEndpoint';
// 環境変数から AccessKey ID と AccessKey Secret を取得します。
var accessKeyId = process.env.TABLESTORE_ACCESS_KEY_ID;
var secretAccessKey = process.env.TABLESTORE_ACCESS_KEY_SECRET;

// クライアントを初期化します。
var client = new TableStore.Client({
  accessKeyId: accessKeyId,
  secretAccessKey: secretAccessKey,
  endpoint: endpoint,
  instancename: instancename
});

// インスタンス内のデータテーブルのリストをクエリし、Tablestore コンソールにリストを表示します。
client.listTable({}, function (err, data) {
    if (err) {
        console.log('error:', err);
        return;
    }
    console.log('success:', data);
});
.NET
次の .NET コードのサンプルは、クライアントを初期化し、インスタンス内のデータテーブルのリストをクエリする方法の例を示しています。
using Aliyun.OTS.Request;
using Aliyun.OTS.Response;
using System;

namespace Aliyun.OTS.Samples
{
    public class Sample
    {
        public static void InitializeClient()
        {
            // インスタンスのエンドポイントを指定します。
            string endpoint = "yourEndpoint";
            // インスタンスの名前を指定します。
            string instanceName = "yourInstanceName";
            // 環境変数から AccessKey ID と AccessKey Secret を取得します。
            string accessKeyId = Environment.GetEnvironmentVariable("TABLESTORE_ACCESS_KEY_ID");
            string accessKeySecret = Environment.GetEnvironmentVariable("TABLESTORE_ACCESS_KEY_SECRET");
            OTSClientConfig config = new OTSClientConfig(endpoint, accessKeyId, accessKeySecret, instanceName)
            {
                OTSDebugLogHandler = null,
                OTSErrorLogHandler = null
            };

            try
            {
                // クライアントを初期化します。
                OTSClient client = new OTSClient(config);
                // インスタンス内のデータテーブルのリストをクエリし、Tablestore コンソールにリストを表示します。
                ListTableResponse response = client.ListTable(new ListTableRequest());
                foreach (var tableName in response.TableNames)
                {
                    Console.WriteLine(tableName);
                }
            }
            catch (Exception ex)
            {
                Console.WriteLine("List table failed, exception:{0}", ex.Message);
            }
        }
    }
}
PHP
次の PHP コードのサンプルは、クライアントを初期化し、インスタンス内のデータテーブルのリストをクエリする方法の例を示しています。
<?php
// この例では、パスは相対パスです。必要に応じてパスを変更してください。
require (__DIR__ . '/../../vendor/autoload.php');

use Aliyun\OTS\OTSClient as OTSClient;

// インスタンスの名前を指定します。
$instanceName = "yourInstanceName";
// インスタンスのエンドポイントを指定します。
$endpoint = "yourEndpoint";
// システム環境変数から AccessKey ID と AccessKey Secret を取得します。
$accessKeyId = getenv('TABLESTORE_ACCESS_KEY_ID');
$accessKeySecret = getenv('TABLESTORE_ACCESS_KEY_SECRET');

// クライアントを初期化します。
$client = new OTSClient(array(
    'EndPoint' => $endpoint,
    'AccessKeyID' => $accessKeyId,
    'AccessKeySecret' => $accessKeySecret,
    'InstanceName' => $instanceName,
));

// インスタンス内のデータテーブルのリストをクエリし、Tablestore コンソールにリストを表示します。
$response = $client->listTable (array ());
print json_encode ($response);
時系列モデル
時系列モデルを使用する場合、RAM ユーザーの AccessKey ペアを使用して時系列モデルのクライアントを初期化し、リクエストを開始する必要があります。時系列モデルをサポートしているのは、Tablestore SDK for Java、Tablestore SDK for Go、および Tablestore SDK for Python のみです。
Java
(推奨) V4 署名の使用
次の Java コードのサンプルは、V4 署名を使用してクライアントを初期化し、インスタンス内の時系列テーブルのリストをクエリする方法の例を示しています。
import com.alicloud.openservices.tablestore.ClientConfiguration;
import com.alicloud.openservices.tablestore.TimeseriesClient;
import com.alicloud.openservices.tablestore.core.ResourceManager;
import com.alicloud.openservices.tablestore.core.auth.CredentialsProvider;
import com.alicloud.openservices.tablestore.core.auth.DefaultCredentialProvider;
import com.alicloud.openservices.tablestore.core.auth.DefaultCredentials;
import com.alicloud.openservices.tablestore.core.auth.V4Credentials;
import com.alicloud.openservices.tablestore.model.AlwaysRetryStrategy;
import com.alicloud.openservices.tablestore.model.timeseries.ListTimeseriesTableResponse;

public class InitTimeseriesClientV4 {
    public static void main(String[] args) {
        // アクセスするインスタンスが存在するリージョンを指定します。例: cn-hangzhou。
        final String region = "yourRegion";
        // インスタンスの名前を指定します。
        final String instanceName = "yourInstanceName";
        // インスタンスのエンドポイントを指定します。
        final String endpoint = "yourEndpoint";
        // 環境変数から AccessKey ID と AccessKey Secret を取得します。
        final String accessKeyId = System.getenv("TABLESTORE_ACCESS_KEY_ID");
        final String accessKeySecret = System.getenv("TABLESTORE_ACCESS_KEY_SECRET");

        // V4 署名を構築します。
        DefaultCredentials credentials = new DefaultCredentials(accessKeyId, accessKeySecret);
        V4Credentials credentialsV4 = V4Credentials.createByServiceCredentials(credentials, region);
        CredentialsProvider provider = new DefaultCredentialProvider(credentialsV4);

        // クライアントを初期化します。
        TimeseriesClient client = new TimeseriesClient(endpoint, provider, instanceName, null, new ResourceManager(null, null));

        /*
        // ClientConfiguration を使用して、デフォルトの構成を変更できます。次の例には、特定のカスタム構成が含まれています。
        ClientConfiguration clientConfiguration = new ClientConfiguration();
        clientConfiguration.setConnectionTimeoutInMillisecond(5000); // 接続を確立するためのタイムアウト期間を指定します。単位: ミリ秒。
        clientConfiguration.setSocketTimeoutInMillisecond(5000); // ソケットのタイムアウト期間を指定します。単位: ミリ秒。
        clientConfiguration.setRetryStrategy(new AlwaysRetryStrategy()); // リトライポリシーを指定します。リトライポリシーを指定しない場合、デフォルトのリトライポリシーが使用されます。
        TimeseriesClient client = new TimeseriesClient(endpoint, provider, instanceName, clientConfiguration, new ResourceManager(null, null));
         */

        // インスタンス内の時系列テーブルのリストをクエリし、Tablestore コンソールにリストを表示します。
        ListTimeseriesTableResponse listTimeseriesTableResponse = client.listTimeseriesTable();
        listTimeseriesTableResponse.getTimeseriesTableNames().forEach(System.out::println);

        // Tablestore クライアントをシャットダウンします。
        client.shutdown();
    }
}
V2 署名の使用
次の Java コードのサンプルは、V2 署名を使用してクライアントを初期化し、インスタンス内の時系列テーブルのリストをクエリする方法の例を示しています。
import com.alicloud.openservices.tablestore.ClientConfiguration;
import com.alicloud.openservices.tablestore.TimeseriesClient;
import com.alicloud.openservices.tablestore.core.ResourceManager;
import com.alicloud.openservices.tablestore.core.auth.CredentialsProvider;
import com.alicloud.openservices.tablestore.core.auth.DefaultCredentialProvider;
import com.alicloud.openservices.tablestore.core.auth.DefaultCredentials;
import com.alicloud.openservices.tablestore.model.AlwaysRetryStrategy;
import com.alicloud.openservices.tablestore.model.timeseries.ListTimeseriesTableResponse;

public class InitTimeseriesClientV2 {
    public static void main(String[] args) {
        // インスタンスの名前を指定します。
        final String instanceName = "yourInstanceName";
        // インスタンスのエンドポイントを指定します。
        final String endpoint = "yourEndpoint";
        // 環境変数から AccessKey ID と AccessKey Secret を取得します。
        final String accessKeyId = System.getenv("TABLESTORE_ACCESS_KEY_ID");
        final String accessKeySecret = System.getenv("TABLESTORE_ACCESS_KEY_SECRET");

        // V2 署名を構築します。
        DefaultCredentials credentials = new DefaultCredentials(accessKeyId, accessKeySecret);
        CredentialsProvider provider = new DefaultCredentialProvider(credentials);

        // クライアントを初期化します。
        TimeseriesClient client = new TimeseriesClient(endpoint, provider, instanceName, null, new ResourceManager(null, null));

        /*
        // ClientConfiguration を使用して、デフォルトの構成を変更できます。次の例には、特定のカスタム構成が含まれています。
        ClientConfiguration clientConfiguration = new ClientConfiguration();
        clientConfiguration.setConnectionTimeoutInMillisecond(5000); // 接続を確立するためのタイムアウト期間を指定します。単位: ミリ秒。
        clientConfiguration.setSocketTimeoutInMillisecond(5000); // ソケットのタイムアウト期間を指定します。単位: ミリ秒。
        clientConfiguration.setRetryStrategy(new AlwaysRetryStrategy()); // リトライポリシーを指定します。リトライポリシーを指定しない場合、デフォルトのリトライポリシーが使用されます。
        TimeseriesClient client = new TimeseriesClient(endpoint, provider, instanceName, clientConfiguration, new ResourceManager(null, null));
         */

        // インスタンス内の時系列テーブルのリストをクエリし、Tablestore コンソールにリストを表示します。
        ListTimeseriesTableResponse listTimeseriesTableResponse = client.listTimeseriesTable();
        listTimeseriesTableResponse.getTimeseriesTableNames().forEach(System.out::println);

        // Tablestore クライアントをシャットダウンします。
        client.shutdown();
    }
}
Go
次の Go コードのサンプルは、クライアントを初期化し、インスタンス内の時系列テーブルのリストをクエリする方法の例を示しています。
package main

import (
	"fmt"
	"os"
	"github.com/aliyun/aliyun-tablestore-go-sdk/tablestore"
)

func main() {
	// インスタンスの名前を指定します。
	instanceName := "yourInstanceName"
	// インスタンスのエンドポイントを指定します。
	endpoint := "yourEndpoint"
	// 環境変数から AccessKey ID と AccessKey Secret を取得します。
	accessKeyId := os.Getenv("TABLESTORE_ACCESS_KEY_ID")
	accessKeySecret := os.Getenv("TABLESTORE_ACCESS_KEY_SECRET")

	// クライアントを初期化します。
	client := tablestore.NewTimeseriesClient(endpoint, instanceName, accessKeyId, accessKeySecret)

	// インスタンス内の時系列テーブルのリストをクエリし、Tablestore コンソールにリストを表示します。
	timeseriesTables, err := client.ListTimeseriesTable()
    if err != nil {
        fmt.Println("Failed to list table")
    } else {
        for _, timeseriesTablesMeta := range (timeseriesTables.GetTimeseriesTableMeta()) {
            fmt.Println(timeseriesTablesMeta.GetTimeseriesTableName())
        }
    }
}
Python
次の Python コードのサンプルは、クライアントを初期化し、インスタンス内の時系列テーブルのリストをクエリする方法の例を示しています。
# -*- coding: utf-8 -*-
import os
from tablestore import OTSClient

# インスタンスの名前を指定します。
instance_name = "yourInstanceName"
# インスタンスのエンドポイントを指定します。
endpoint = "yourEndpoint"
# 環境変数から AccessKey ID と AccessKey Secret を取得します。
access_key_id = os.getenv("TABLESTORE_ACCESS_KEY_ID")
access_key_secret = os.getenv("TABLESTORE_ACCESS_KEY_SECRET")

# クライアントを初期化します。
client = OTSClient(endpoint, access_key_id, access_key_secret, instance_name)

# インスタンス内の時系列テーブルのリストをクエリし、Tablestore コンソールにリストを表示します。
response = client.list_timeseries_table()
for tableMeta in response:
    print(tableMeta.timeseries_table_name)