このトピックでは、keyboard control titleコンポーネントを例として使用して、大きなデジタル画面にポップアップ効果を実装します。
手順
最初に DataVコンソール
視覚化アプリケーションを選択し、[編集] をクリックして、[キャンバスエディタ] ページに移動します。
6つの共通タイトルウィジェットをキャンバスに追加し、タイトルテキストの色とウィジェット名を変更します。
6つの共通タイトルコンポーネントのY軸位置を記録します。たとえば、common title-1:160です。
説明共通タイトルウィジェットのx軸位置は1850です。 ウィジェットの初期位置がキャンバスの右側に隠されていることを確認してください。
コンポーネントを右クリックして、すべてのコンポーネントをBlueprint Editorにインポートします。
[論理ノード] タブで、5つのタイマーを追加し、シリアルデータ処理の右側のノードをコンポーネントの [移動] アクションに接続します。
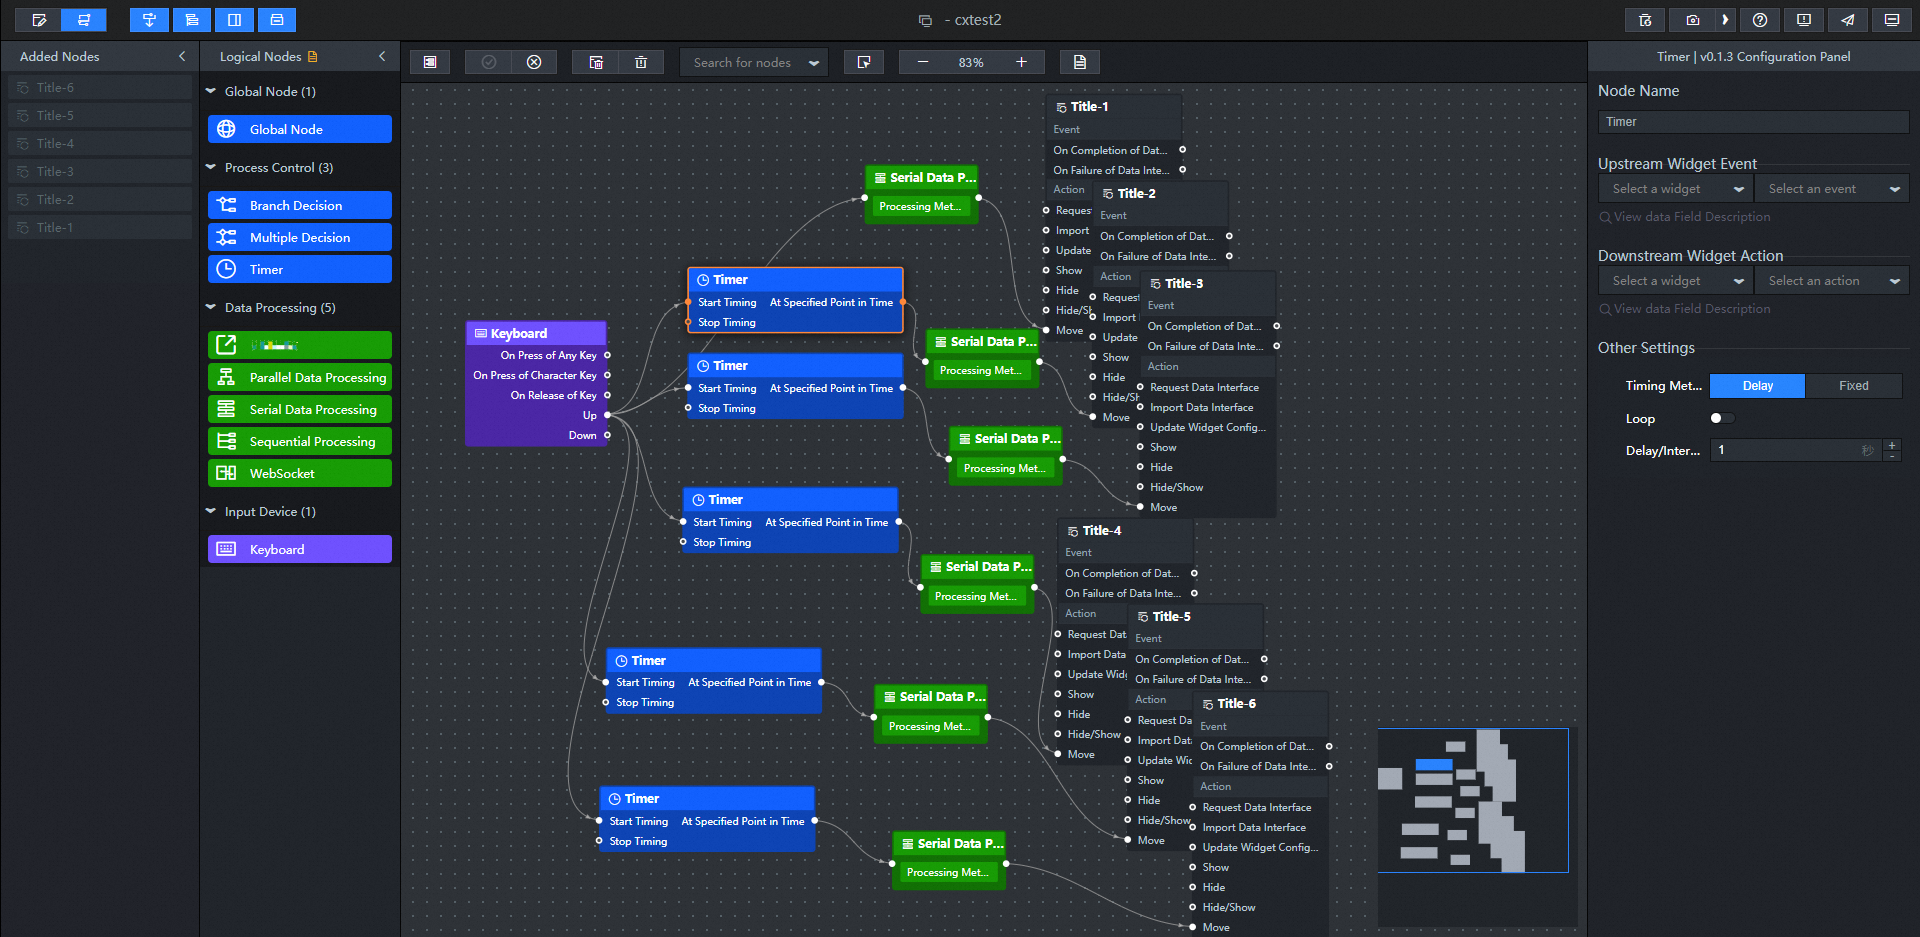
シリアルデータ処理ノードの処理方法を設定します (例: Generic Title -1) 。 残りのコンポーネントのY軸位置を変更するだけです。
return {
  // The positioning type. to indicates absolute positioning, whereas by indicates relative positioning. The default value is to.
  "positionType": "to",
  // The location, which is indicated by the x and y coordinates.
  "attr": {
    "x": -240,// Ensure that the component disappears from the left side of the canvas.
    "y": 160 // The Y-axis information of the initial position of the widget to ensure that the widget moves straight to the left.
  },
  // The animation type.
  "animation": {
    "enable": true,
    // The duration in which animation is displayed.
    "animationDuration": 6000,// Set the movement speed of the widget.
    // The animation curve, which can be set to linear|easeInOutQuad|easeInOutExpo.
    "animationEasing": "linear"
  }
}
タイマーの遅延時間を設定します。 例えば、共通タイトル − 2は、共通タイトル − 1の後に1秒遅延される。 他のコンポーネントは、独自の遅延時間を設定できます。
右上隅の
 アイコンをクリックして、結果をプレビューします。