Configure firewall rules for a Windows ECS instance
Configure Windows Defender Firewall to allow or block applications, ports, and IP addresses on a Windows ECS instance.
Prerequisites
Ensure that you have:
-
An ECS instance running Windows Server.
-
Access to connect to the instance using VNC.
Which configuration to use
| Configuration | What it does | When to use |
|---|---|---|
| Allow an application through the firewall | Opens ports only while the application is running | Your application is blocked by the firewall |
| Allow or block access to specific local ports | Opens or closes a port permanently | Block unused services (for example, deny port 21 if FTP is not needed) |
| Allow or block access from specific IP addresses | Restricts which IP addresses can reach your applications, services, or ports | Limit access to trusted IP addresses only |
Allow an application through Windows Defender Firewall
Allow a specific application to accept inbound connections without permanently opening a port.
-
Connect to your Windows ECS instance using VNC.
-
Go to Start > Control Panel > System and Security > Windows Defender Firewall.
-
In the left-side navigation pane, click Allow an app or feature through Windows Defender Firewall.
-
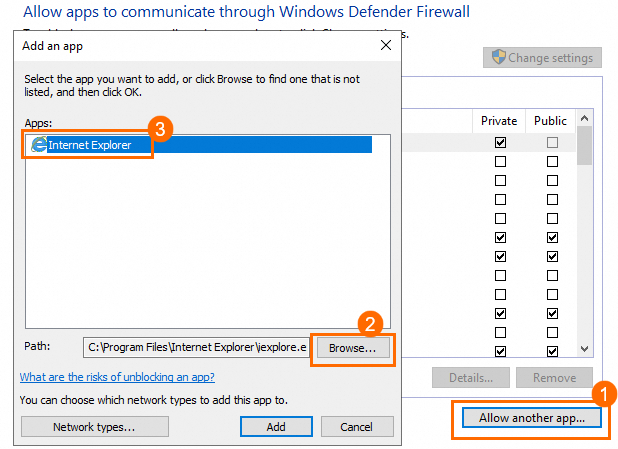
Click Allow another app.
-
In the Add an app dialog box, double-click the application in the Apps section. If the application is not listed, click Browse and locate the application file.
Allow or block access to specific local ports
Create an inbound rule that permanently allows or denies traffic on a specific port — for example, deny port 21 to disable FTP.
This rule keeps a port open or closed permanently. Use it only for ports tied to services you intentionally want to expose or block. For application-specific control, use "Allow an application through Windows Defender Firewall" instead.
-
Connect to your Windows ECS instance using VNC.
-
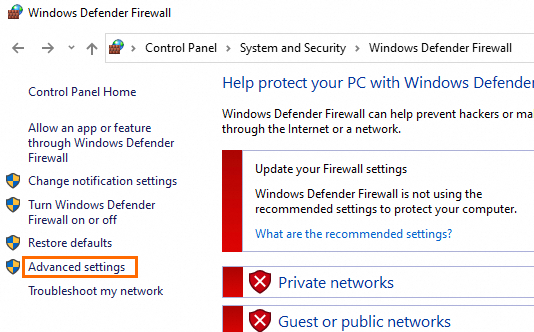
Go to Start > Control Panel > System and Security > Windows Defender Firewall.
-
Click Advanced Settings.
-
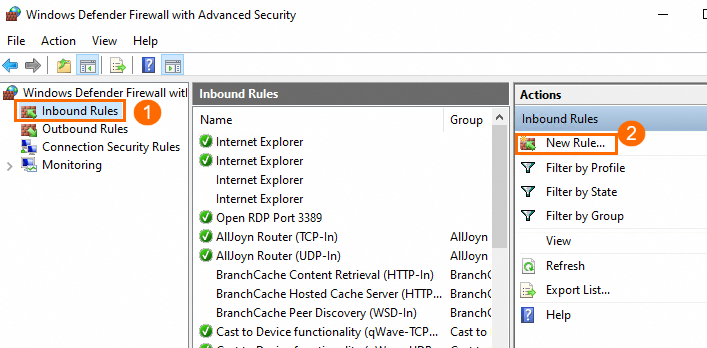
In the left-side navigation pane, click Inbound Rule. In the right-side Actions pane, click New Rule.
-
Complete the rule wizard:
-
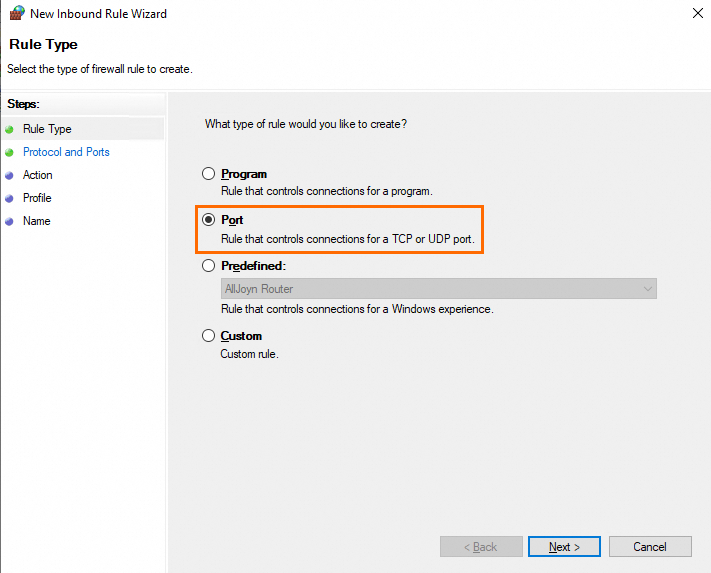
For Rule Type, select Port and click Next.
-
In the Protocol and Ports step, select TCP or UDP, select Specific local ports, enter the port number (for example,
8080), and click Next.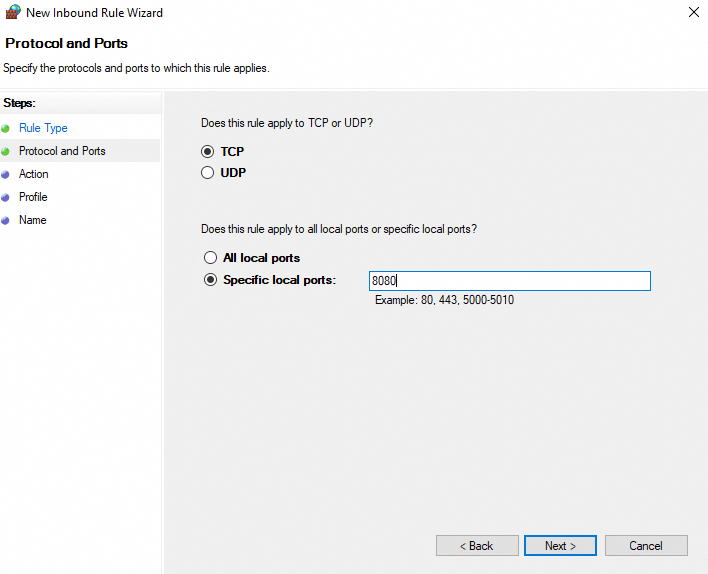
-
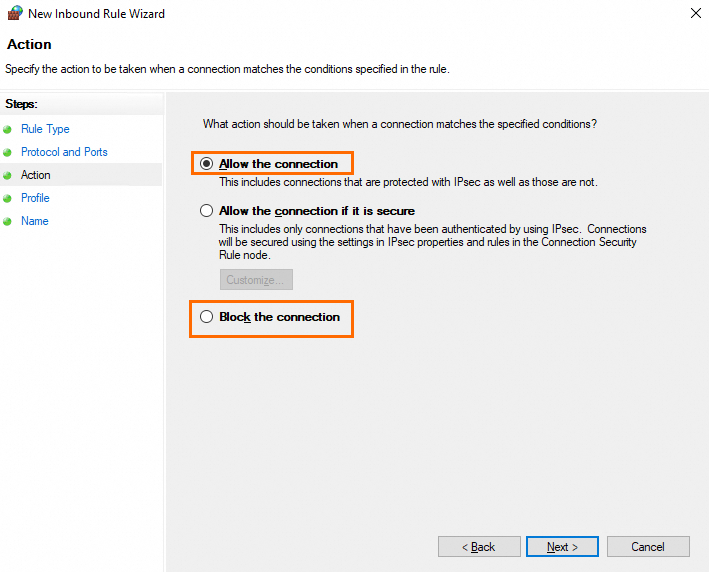
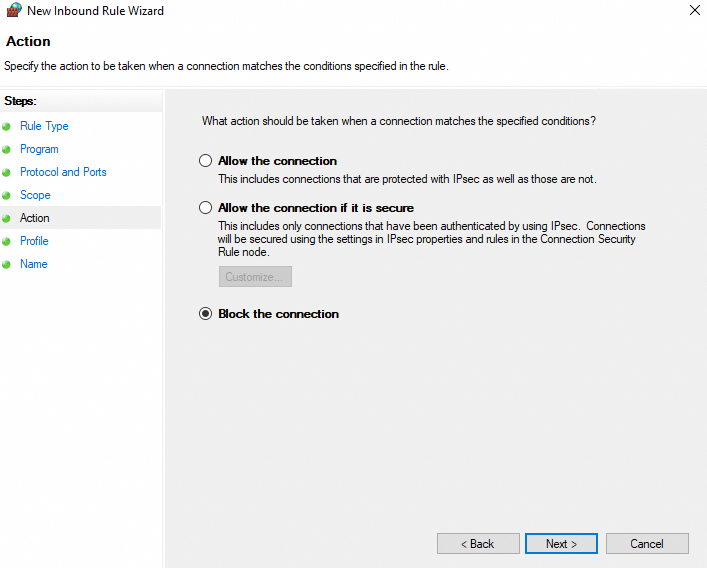
In the Actions step, select Allow the connection or Block the connection, and click Next.

-
In the Configuration File step, select the applicable profiles and click Next.
NoteAll profiles are selected by default. Adjust based on your network environment.
-
In the Name step, enter a rule name and description, then click Completed.
-
Allow or block access from specific IP addresses
Restrict inbound traffic to or from specific IP addresses or CIDR blocks. The rule's action determines the effect:
-
Allow the connection — listed IP addresses can access the covered applications, services, or ports.
-
Block the connection — listed IP addresses cannot access the covered applications, services, or ports.
Apply an IP scope to an existing rule, or configure it when creating a new rule.
Apply an IP scope to an existing inbound rule
Add IP-based filtering to a rule you have already created.
-
Connect to your Windows ECS instance using VNC.
-
Go to Start > Control Panel > System and Security > Windows Defender Firewall.
-
Click Advanced Settings.
-
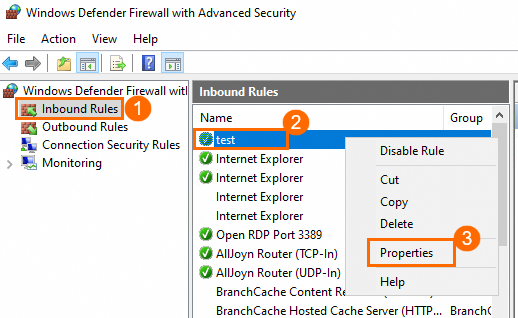
Click Inbound Rules, right-click the rule to update, and select Type.
-
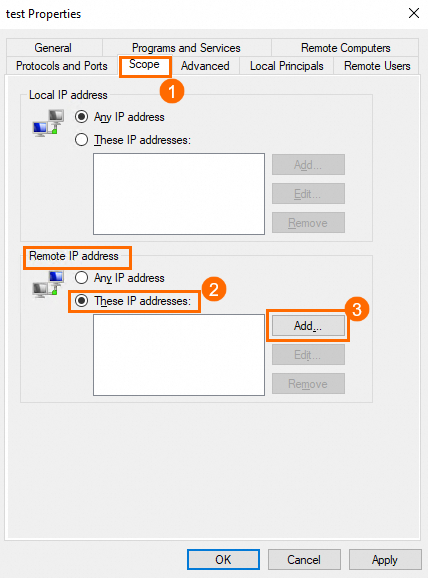
On the Scope tab, under Remote IP address, select These IP addresses and click Add.
-
Enter an IP address or CIDR block (for example, the public IP of your on-premises computer) and click OK.
NoteClick Add again to add more IP addresses or CIDR blocks.
-
Click OK. The rule now applies only to the specified IP addresses or CIDR blocks.

Create a rule with an IP scope
Build a new rule that targets both specific ports and specific IP addresses.
-
Connect to your Windows ECS instance using VNC.
-
Go to Start > Control Panel > System and Security > Windows Defender Firewall.
-
Click Advanced Settings.
-
In the left-side navigation pane, click Inbound Rule. In the right-side Actions pane, click New Rule.
-
Complete the rule wizard:
-
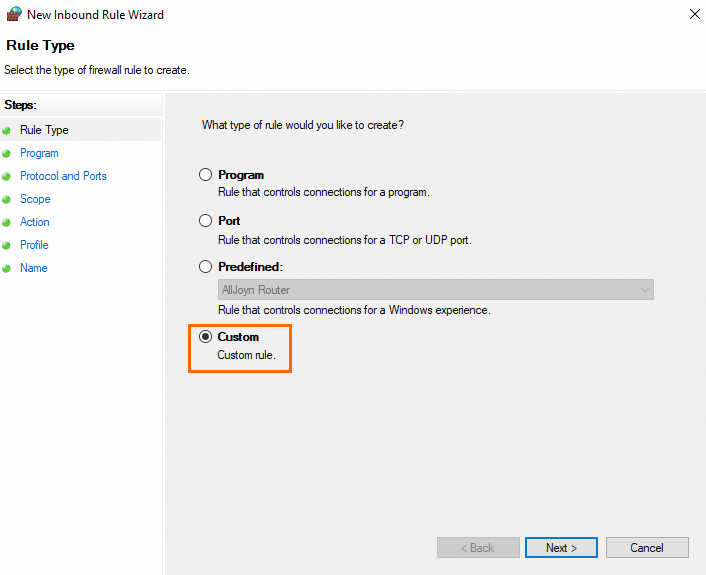
For Rule Type, select Customize and click Next.
-
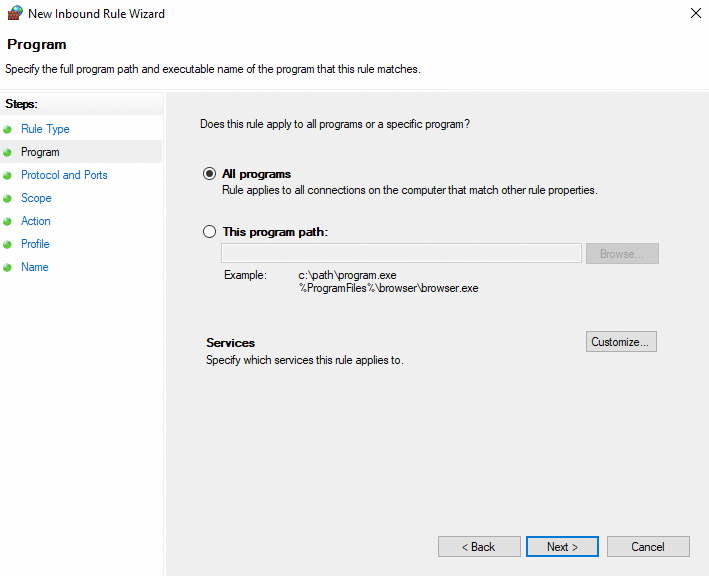
In the Program step, select All programs or This program path, and click Next.
NoteAll programs applies the rule to all programs. This program path applies it to a single program.
-
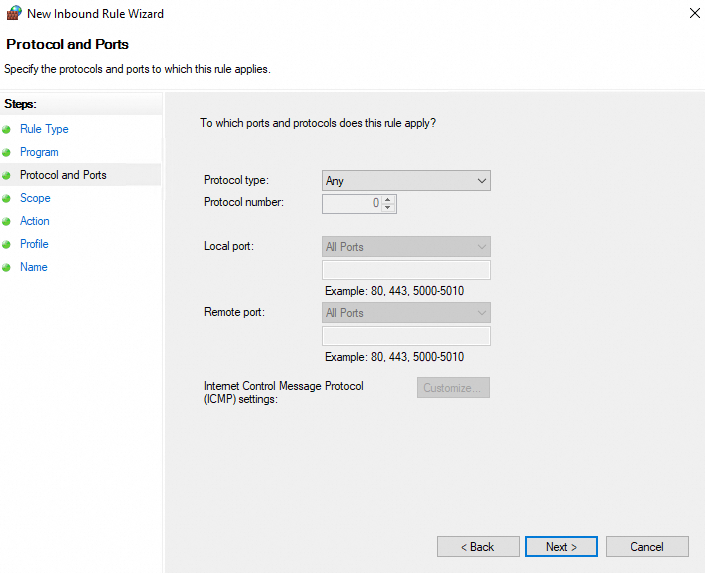
In the Protocol and Ports step, specify the ports and protocols, and click Next.
-
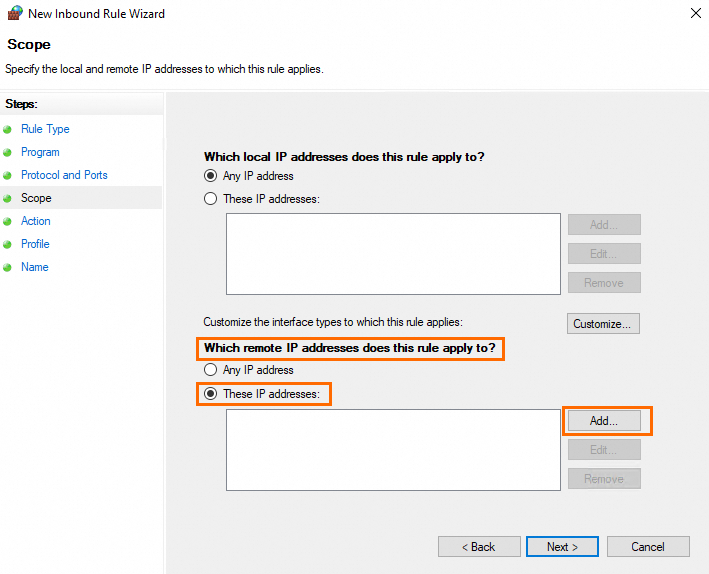
In the Scope step, under Which remote IP addresses does this rule apply to?, select These IP addresses and click Add.
-
Enter an IP address or CIDR block (for example, the public IP of your on-premises computer) and click OK. Click Next.
NoteClick Add again to add more IP addresses or CIDR blocks.
-
In the Actions step, select Allow the connection or Block the connection, and click Next.
-
In the Configuration File step, select the applicable profiles and click Next.
NoteAll profiles are selected by default. Adjust based on your network environment.
-
In the Name step, enter a rule name and description, then click Completed.
-
Next steps
-
If you cannot connect to the instance, add a rule to allow remote connections. See Manage the system firewall of a Windows instance.
-
If the connection still fails after verifying firewall settings, see Troubleshoot remote connection failures to a Windows instance and RDP connection issues.