Once a website is added to WAF, you can configure a whitelist to exempt specific requests from all protection modules, allowing them to access the origin server directly. Whitelists are typically used for traffic that you fully trust, such as scans from internal vulnerability scanners or calls from authenticated third-party APIs.
Prerequisites
You have purchased a WAF instance.
You have added your website to WAF. For more information, see Quick start.
Background information
Website protection in Web Application Firewall (WAF) includes multiple protection modules. By default, access requests to a protected website are checked by all enabled protection modules. If your business involves fully trusted traffic, you can set up a website whitelist. This allows requests that meet the specified conditions to bypass all protection modules and directly access the origin server.
You can also configure granular, module-specific whitelists to bypass detection for specific security components:
Web intrusion prevention whitelist: Bypasses the Protection Rule Engine .
Data security whitelist: Bypasses the Data Leakage Prevention, Webpage Tamper Protection, and Account Security modules.
Bot management whitelist: Bypasses the Bot Threat Intelligence, data Risk Control, Identification of Typical Bot Behavior, and App Protection modules.
Access control/throttling whitelist: Bypasses the HTTP Flood Protection, IP Blacklist, Scan Protection, and Custom Protection Policy modules.
Set up module-specific whitelists as needed. Granular rules follow the principle of least privilege, offering a higher level of security compared to broad website-wide whitelists.
Procedure
Log on to the WAF console.
In the top navigation bar, select the resource group and the region (Chinese Mainland or Outside Chinese Mainland) of the WAF instance.
In the left navigation pane, choose .
In the upper part of the Website Protection page, select your target domain name from the Switch Domain Name drop-down list.

In the upper-right corner of the page, click Website Whitelist.
Create a website whitelist.
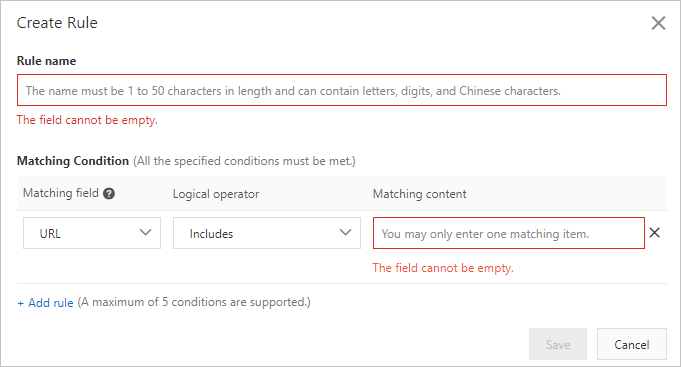
On the Website Whitelist page, click Create.
In the Create Rule dialog box, configure the following parameters.
Parameter
Description
Rule Name
Enter a name for the rule.
Match Condition
Define the conditions for the whitelist. Click Add Condition to add up to five conditions. If you specify multiple conditions, a request matches the rule only if all conditions are met (AND logic).
For more information about the match condition fields, see Fields in match conditions.
Click Save.
After a website whitelist rule is added, it takes effect automatically. You can view the new rule in the rule list and disable, edit, or delete the rule as needed.