Manage licenses
ApsaraVideo MediaBox SDK integrates Push SDK, Short Video SDK, ApsaraVideo Player SDK, and Queen SDK. It provides unified license authorization and management for all platforms. This topic describes how to purchase, bind, and renew a license, apply for a trial, and modify the application information associated with the license.
Starting February 14, 2025 (V7.0.0 and later), the mobile ApsaraVideo Player SDK offers a Professional Edition in addition to the Standard Edition. To obtain the Professional Edition, contact our sales team. For authorization instructions, see Integrate a license.
When your spending on ApsaraVideo VOD, ApsaraVideo Live, and Intelligent Media Services (IMS) reaches a certain amount, you are eligible for a free one-year license for the Professional Edition of the ApsaraVideo Player SDK. For more information, see Player SDK pricing.
The Professional Edition license for the mobile ApsaraVideo Player SDK is only compatible with V7.0.0 and later. Before obtaining a license, check the SDK version in your application.
Authorize a license
Step 1: Create an application
Log on to the ApsaraVideo VOD console, go to My Licenses, select the Application Management tab, and click Create Application.

Enter the application details based on the selected platform.
Web: Enter the Application Name and the corresponding Web Domain Name.
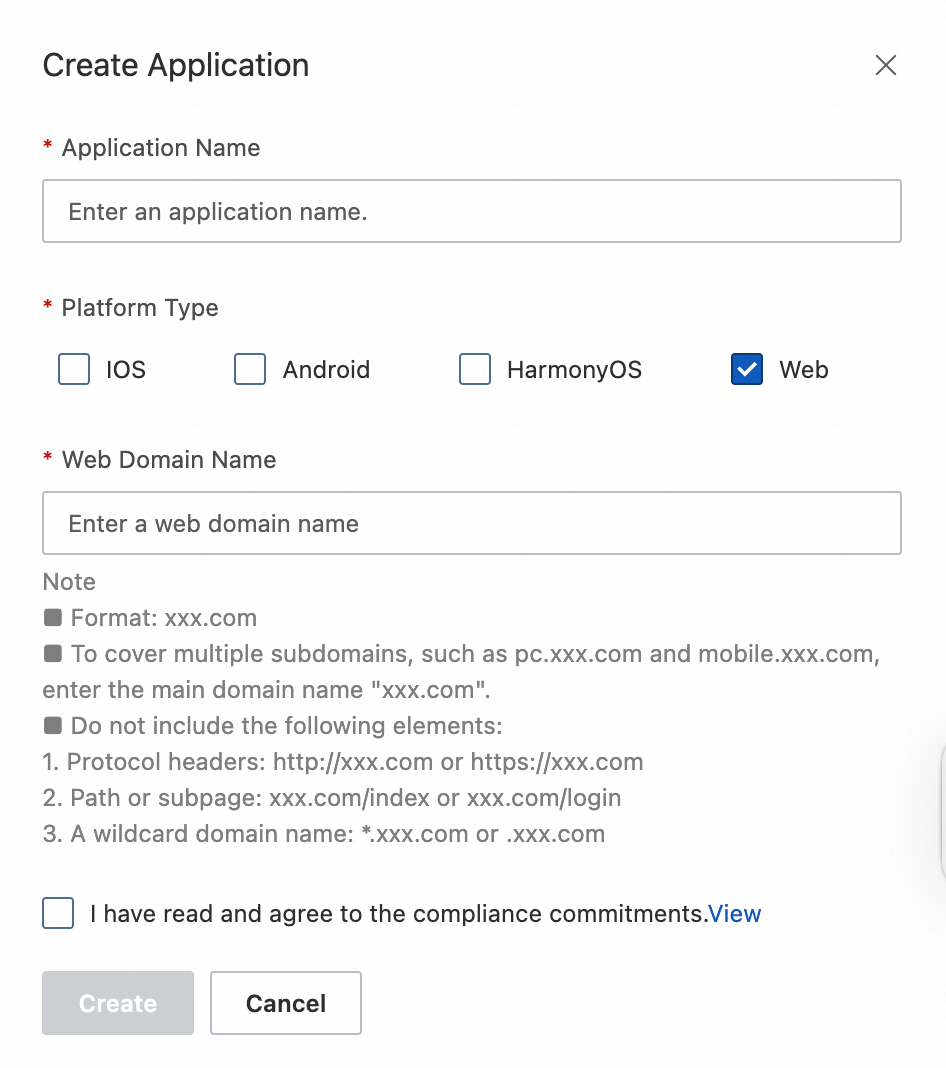
Notes on web domain name:
Correct format example:
aliyun.com.ImportantTo authorize multiple subdomains, such as
pc.aliyun.comandmobile.aliyun.com, enter only the root domain:aliyun.com.Incorrect format examples:
Including a protocol:
http://aliyun.comorhttps://aliyun.comIncluding a path or subpage:
aliyun.com/indexoraliyun.com/loginUsing a wildcard domain name:
*.aliyun.comor.aliyun.com
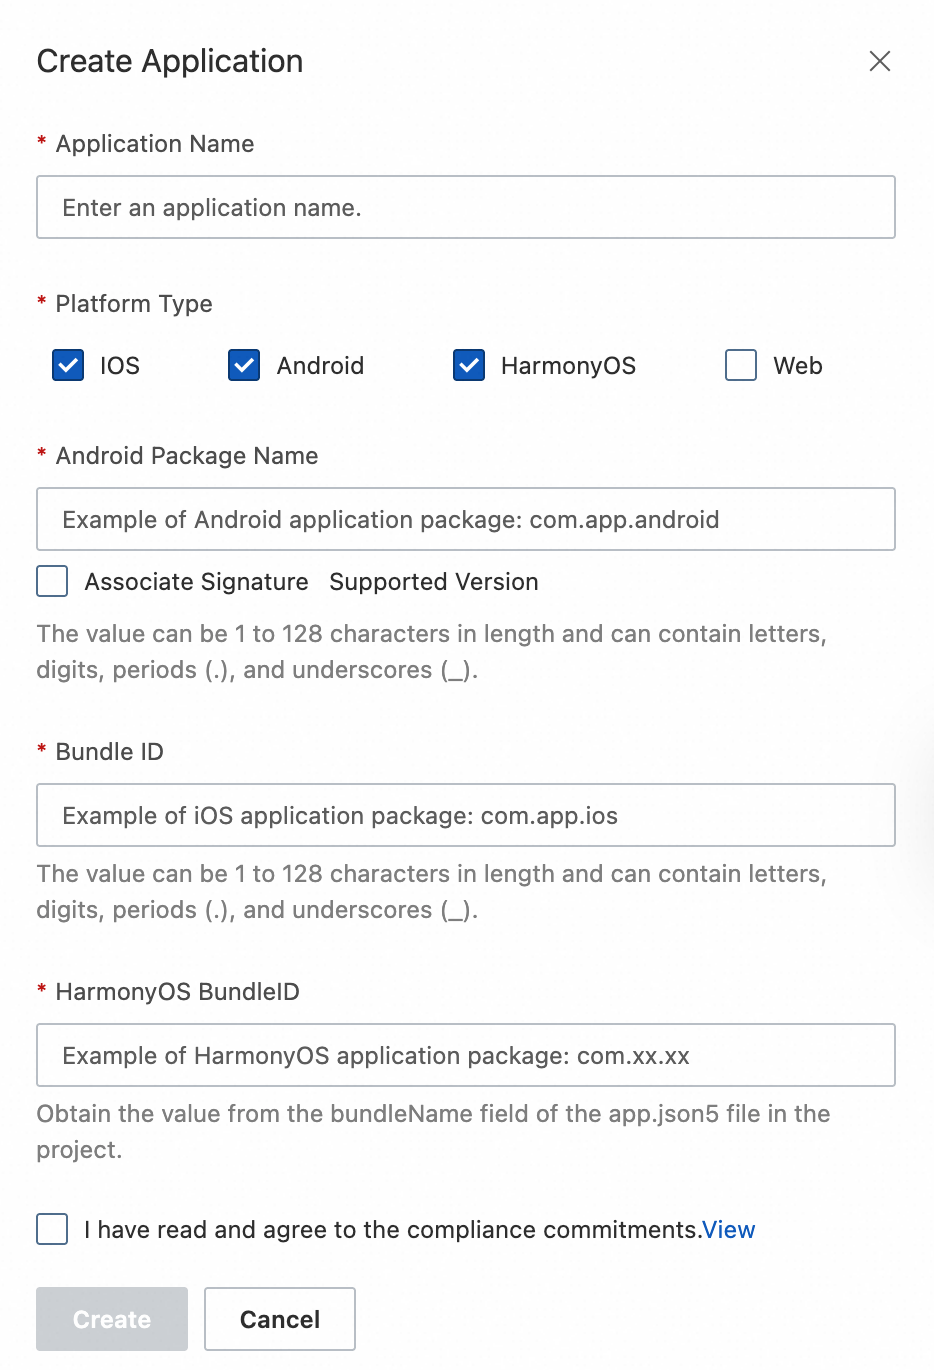
Mobile: Select the platform, enter the Application Name, and provide the corresponding Android Package Name, iOS Bundle ID, and HarmonyOS Bundle ID.
Bind an Android application signature
NoteThis field is required if you select Android for Platform Type and check Associate Signature.
Binding the signature improves security and prevents other applications with the same package name from using your license.
Newer SDK versions do not require a bound signature. These versions include ApsaraVideo MediaBox SDK V1.7.0 and later, ApsaraVideo Player SDK V5.5.2 and later, Push SDK V4.4.9 and later, and Short Video SDK V3.36.0 and later.
You can obtain the MD5 value of your Android application signature in two ways:
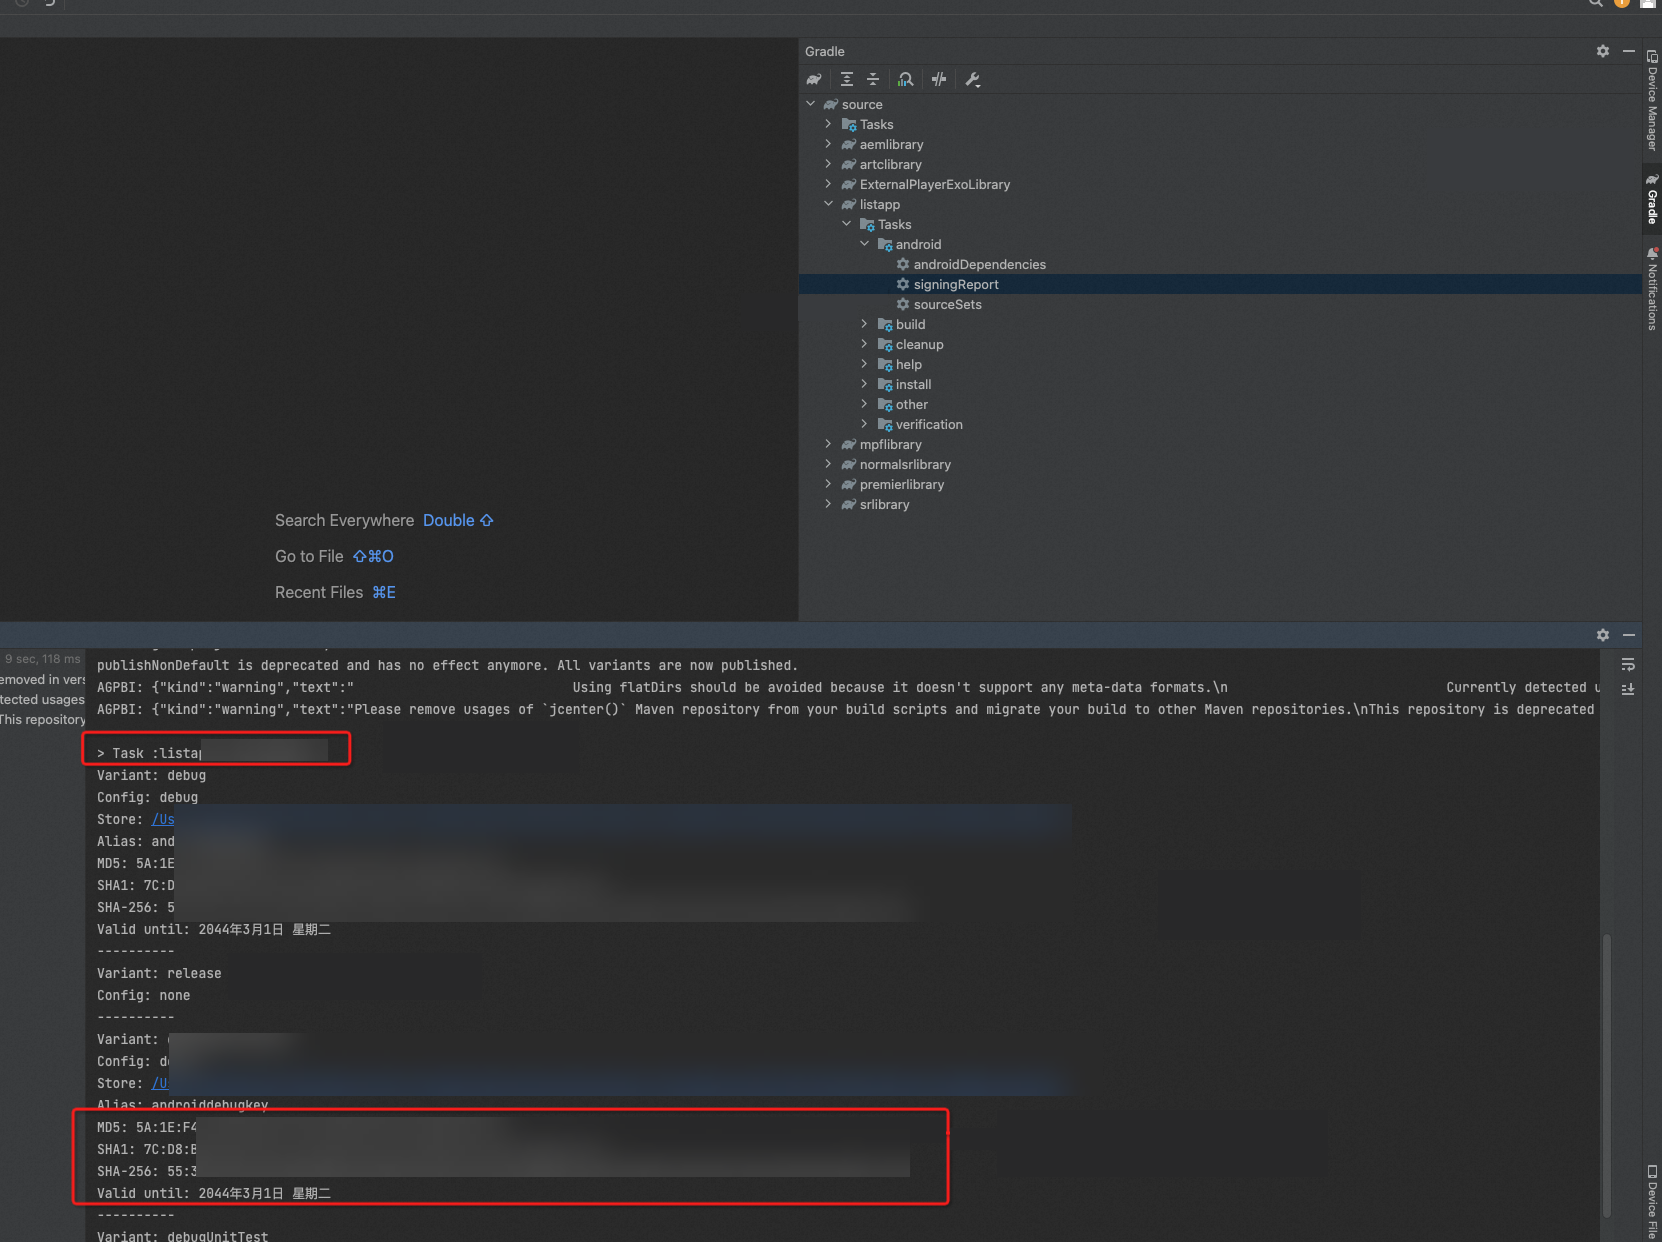
From the command line: Run the following command to view the MD5 value of the corresponding signature.
keytool -v -list -keystore your.keystoreFrom Android Studio: In the right-hand sidebar, click the Gradle tab and navigate to Tasks > android > signingReport. If you use this method, you must convert the MD5 value to lowercase and remove the colons.
Step 2: Purchase a license
If you have purchased a license, proceed to Step 3: Associate a license.
Return to the My Licenses page, select the Instance tab, and click License Purchase.

On the ApsaraVideo MediaBox SDK purchase page, select the SDK and feature modules you need. SDKs must be purchased separately. Place a separate order for each SDK. Confirm your selections and complete the purchase.
ImportantTo ensure correct license activation, purchase each SDK in a separate order.

After payment, return to the Instance tab. The purchased license will be listed.

Step 3: Associate a license
Return to the My Licenses page, select the License Management tab, and click Associate License.
On the Associate License page, select the application and the corresponding SDK license order. After confirming the information, click Associate.
NoteEach license order can be bound to a single application.
After the binding is successful, return to the License Management tab. You will see the name of the associated application and its authorization information.


Step 4: Obtain authorization information
On the License Management tab, locate the target application.
Confirm that the authorization information is correct. Click Download Certificate to download the license certificate file. Save the License Key to integrate into your application. To configure the license file, see Configure a License.

Apply for a trial license
Submit an application for a trial license. We typically process the applications within one to two business days.
Renew a license
Method 1: Renew from the License Management page
Go to My Licenses in the ApsaraVideo VOD console.
Select the License Management tab. Find and save the Instance ID bound to the target application.
ImportantIf the Instance ID is empty or an error occurs during renewal, use Method 2 or submit a ticket to renew.
Renewal applies to the entire license order. If your order includes multiple SDKs, the renewal process applies to all of them at once. You cannot modify the configuration during renewal. If you have any questions, submit a ticket for assistance.
Go to the Resource Renewal page in the Expenses and Costs console. Use the saved Instance ID to search for your order, then click Renew in the Actions column.
On the SDK renewal page, confirm your current configuration and the purchase duration. Then, click Buy Now to complete the renewal. We recommend selecting Auto-renewal to prevent service interruptions due to expiration.


Method 2: Purchase a new license and bind it to your application
If you have purchased an SDK license and its instance ID is empty, or if an error occurs during renewal, purchase a new license from the bug page before your current license expires. After the purchase, follow the instructions in Step 3: Associate a license. This will prevent business disruptions caused by SDK call failures.
Modify application information associated with a license
If your application information changes, you can modify it in the console.
Modifying an application identifier, such as a package name, causes authentication to fail for applications using the original identifier. You must download and replace the license certificate file. Proceed with caution.
Log on to the ApsaraVideo VOD console.
In the left navigation pane, choose .
Click the Application Management tab, find the target application, then click Edit.
You can modify the application name, platform, Android application signature MD5 hash, and application identifiers such as the package name.
Click Modify to save the changes.