This topic shows you how to create a simple workflow that executes an HTTP request in the CloudFlow console.
Background
A CloudFlow workflow defines the business logic and details required for its execution. For example, an order management workflow might include steps such as creating an order, processing a payment, reserving inventory, shipping products, and sending notifications. After a workflow is created, you can run it multiple times, typically with different inputs for each execution. For example, each time a customer places an order, the order management workflow runs with the order details as input. CloudFlow provides a variety of control primitives to define business logic, including serial and parallel task execution, conditional execution, and parallel execution of tasks for a set of data items.
Procedure
Log on to the CloudFlow console. In the top navigation bar, select a region.
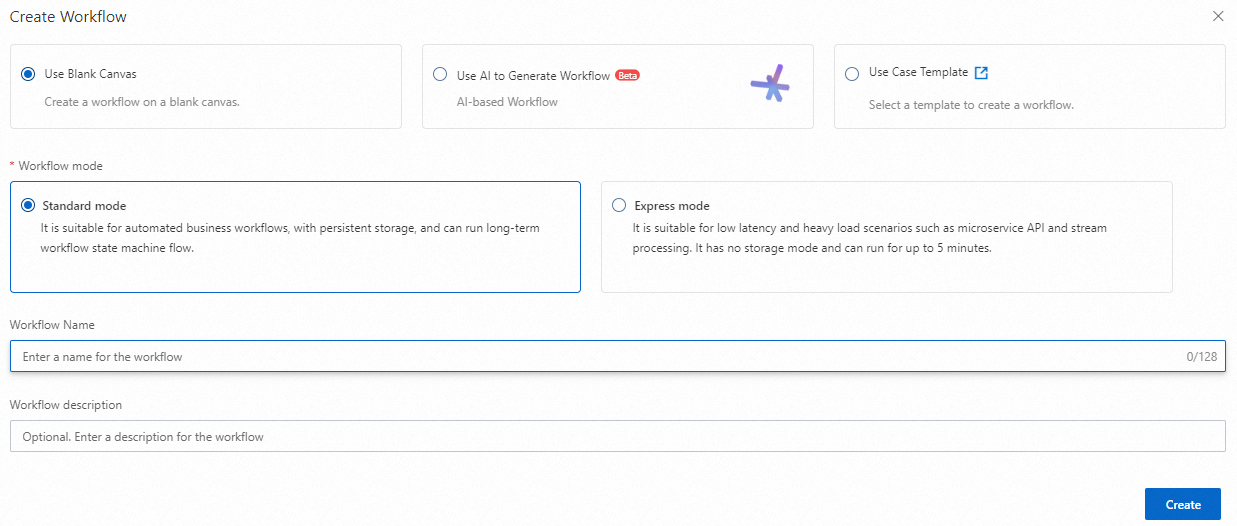
On the Workflows page, click Create Workflow.
In the Create Workflow dialog box that appears, select Use a blank canvas, select a Workflow Mode, set the Workflow Name and Description, and then click Create.
This example uses a Standard Workflow. For more information about the workflow modes that CloudFlow supports, see Standard Workflow and Express Workflow.
On the CloudFlow Studio page, from the states panel, drag the Request state node onto the canvas. When a horizontal or vertical line appears, release the mouse to place the node in the workflow.

Click the Request node and configure its Basic Settings, Input Settings, Output Settings, and Error Handling.
The following table describes the key parameters in Basic Settings. You can use the default values for the other parameters. For more information about Input Settings, Output Settings, and Error Handling, see Procedure.
Parameter
Description
Example
Invocation Parameters
Request Method: The HTTP request method, such as GET.
Request URL:
If you select a fixed value, this is the complete URL for the HTTP request.
If you select an expression, you can use
formatto construct the URL.
Headers: Optional. The HTTP request headers, such as
Content-TypeandAuthorization.Body: Optional. The request body data, for POST methods.
Query: Optional. The query parameters.
NoteYou can also define invocation parameters by using YAML on the Switch to YAML Editing tab.
Parameters:
      method: POST
      url.$: format("http://www.{}.com","aliyun")
      body: {}
      headers:
        Content-Type: multipart/form-data
Next State
The next state for the workflow to transition to. Changes take effect in real time.
Hello World
(Optional) On the Workflow Configuration tab, configure the execution role. Then, click Save and Exit.
If you already have a RAM role, you can select it directly. If this is your first time using CloudFlow, you must first create a role. For more information, see Create an execution role.
NoteThe workflow in this example invokes an HTTP request and does not require a role. If your workflow integrates with other cloud services, you must configure a role with the required permissions.
Related documents
You can also create a workflow by using an SDK or an API. For more information, see Create a workflow.
CloudFlow provides a variety of state nodes to help you build workflows more easily and efficiently. For more information, see State transitions.