This topic describes how to use the time-based schedule feature of Serverless Workflow to execute a workflow and invoke functions of Function Compute.
Execution process
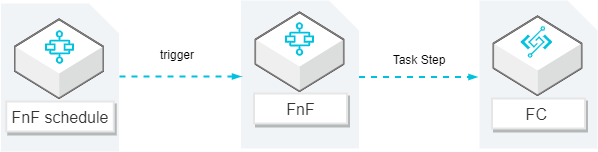
The execution process of a schedule for a workflow consists of the following steps:
In Serverless Workflow, define a task step that invokes a function in Function Compute.
In Serverless Workflow, create a time-based schedule. Both the workflow and the function in the workflow are executed on the schedule.
Procedure
Log on to the Serverless Workflow console.
In the top navigation bar, select a region.
In the left-side navigation pane, click Application Center.
On the Application Center page, click Create Application.
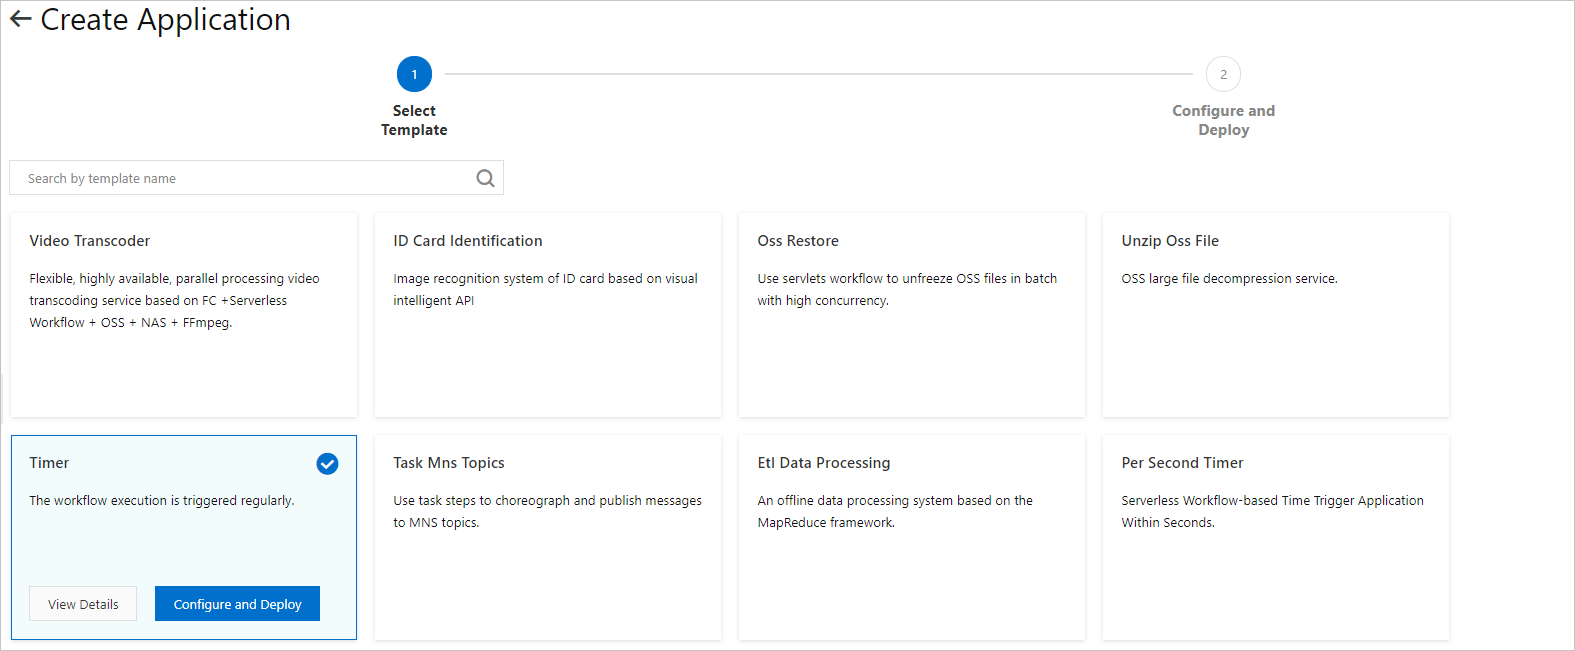
On the Select Template step of the Create Application page, select the Timer template and click Configure and Deploy.
On the Configure and Deploy step, configure parameters, and then click Deploy.
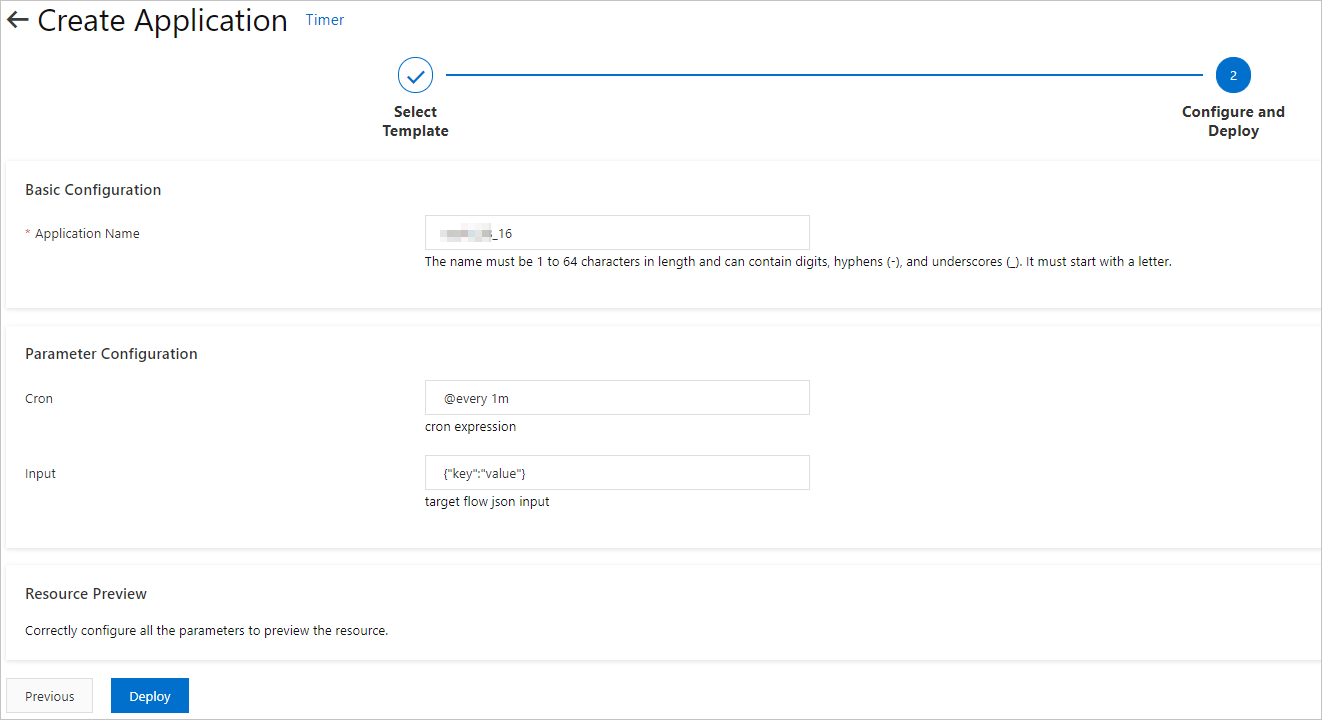
The following table describes the parameters.
Parameter
Description
Application Name
The name of the application, which must be unique in an account.
NoteYour application is a custom Resource Orchestration Service (ROS) resource. You can log on to the ROS console to view the application.
Cron
The cron expression to execute the workflow on a specified schedule. For more information, see Parameters for time-based schedules.
Input
The input of the workflow that is executed on a specified schedule. The input must be in the JSON format. This parameter is left empty by default. For more information, see Input format.
After the application is deployed, all the resources created by this application are displayed.
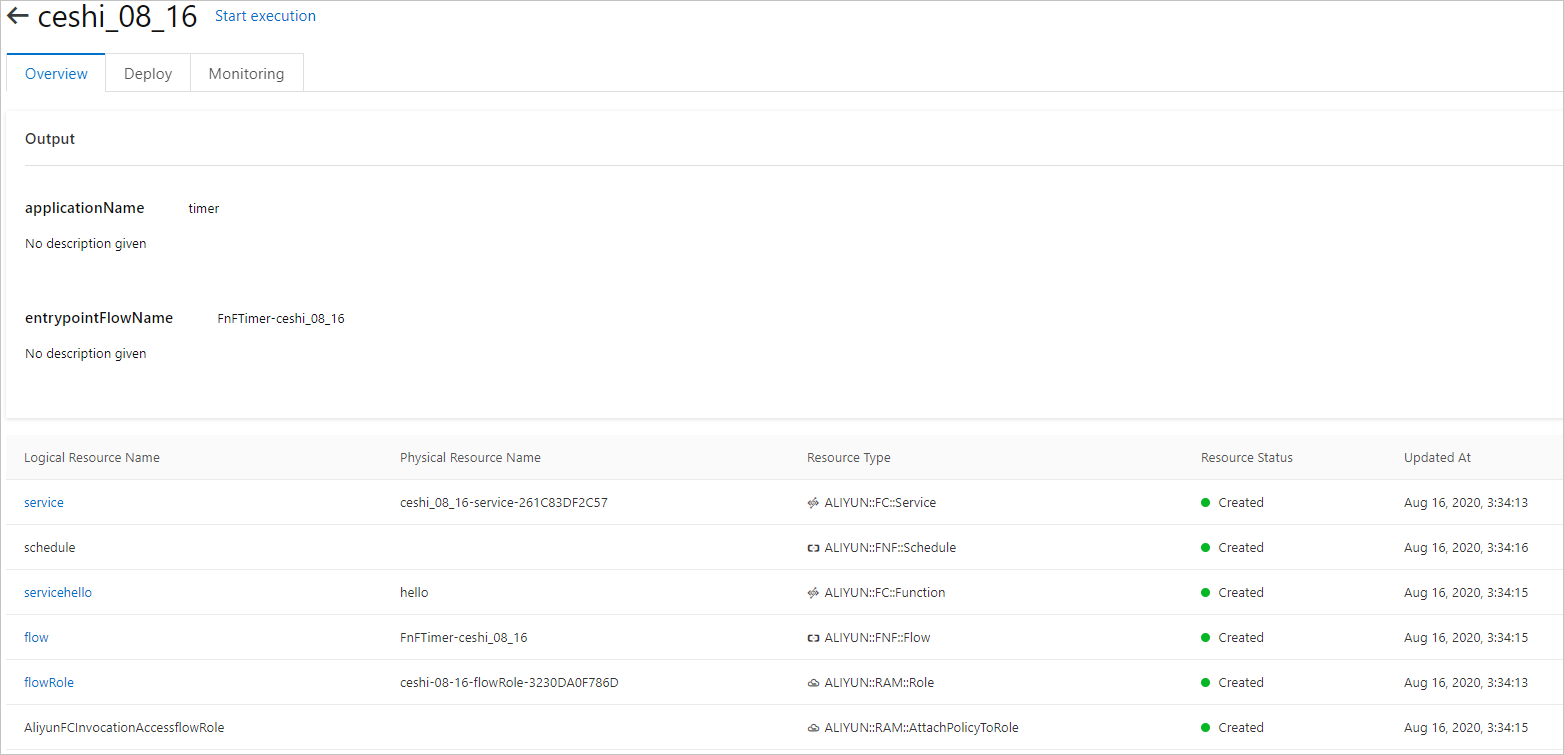
Role of the RAM user: AliyunFCInvocationAccessflowRole with the function call permission and flowRole with the flow permission.
Function Compute resources: service and the servicehello function.
Serverless Workflow resources: Workflow and time-based schedule (ALIYUN::FNF::Schedule).
After the application is created, click OK to execute the workflow.

You are redirected to the Flows page. In the dialog box that appears, specify Execution Name (optional) and Input (optional), and then click Start Execution.

Execution Name: Enter a name for the execution. The name must be 1 to 128 characters in length and can contain letters, digits, underscores (_), and hyphens (-). It cannot start with a hyphen (-).
Input (optional): The value must be in the JSON format.
The following code provides a sample workflow definition when you use task steps to invoke the
hellofunction of Function Compute. For more information, see Task steps.version: v1 type: flow steps: # task step to invoke FC function hello - type: task name: hello resourceArn: acs:fc:::services/service-CD946B9A9F36/functions/helloYou can modify the definition of the workflow to implement your business logic. For more information, see Modify a workflow.