Set schedules to automatically start and stop your SAE applications. Stopped applications do not incur fees for computing resources.
For one-off batch operations (not on a schedule), see Perform batch operations on applications.
Prerequisites
Before you begin, ensure that you have:
A RAM user with administrative rights in the RAM console
Step 1: Grant SAE permissions to OOS
The scheduled start and stop feature runs on CloudOps Orchestration Service (OOS). This is a one-time setup: create an OOSServiceRole RAM role and grant it the AliyunSAEFullAccess permission so OOS can manage SAE on your behalf.
Log on to the RAM console as a RAM user with administrative rights.
In the left-side navigation pane, choose Identities > Roles.
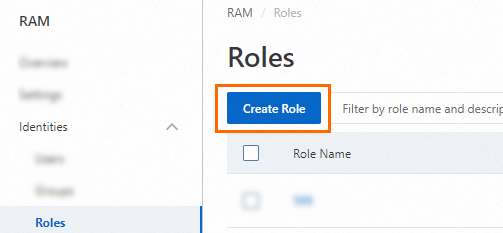
On the Roles page, click Create Role.
On the Create Role page, set Principal Type to Cloud Service. In the Principal Name field, search for OOS, select CloudOps Orchestration Service, and click OK.
In the dialog box, enter
OOSServiceRolefor Role Name. On the Permissions tab, click Grant Permission. In the Policy area, search for and selectAliyunSAEFullAccess, then click Grant permissions.
Step 2: Create a scheduled start and stop rule
In SAE Namespaces, select a region from the drop-down list at the top of the page, then click the target Namespace to open its details page.
In the left-side navigation pane, click Scheduled Start and Stop Rules. On the Scheduled Start and Stop Rules page, click Create Scheduled Start and Stop Rule.
In the Create Scheduled Start and Stop Rule panel, configure the following parameters and click OK.
| Parameter | Description |
|---|---|
| Rule Name | A custom name for the rule. |
| Trigger | The action to perform on schedule: Batch Start Applications starts applications in the namespace; Batch Stop Applications stops them. |
| Frequency | Execute Only Once: runs once at the specified date and time. Scheduled Execution: runs on a recurring schedule defined by a cron expression. |
| Pre-execution Notification Configuration | A DingTalk chatbot webhook URL. SAE sends a notification to the chatbot before each scheduled task runs, so you stay informed of upcoming operations and maintenance (O&M) actions. The custom keyword for the DingTalk chatbot must be set to SAE. For instructions, see Obtain the webhook URL of a DingTalk chatbot. |
| Triggered Applications | Start/Stop All Applications: applies to all applications in the namespace — the system scans the latest application list before each run. Start/Stop Some Applications: select specific application types and names from the drop-down list. |
After the rule is created, it appears on the Scheduled Start and Stop Rules page. From there, you can Disable, Edit, or Delete existing rules.
Write a cron expression
Use cron expressions to define flexible recurring schedules. A cron expression has five space-separated fields:
| Field | Value range | Notes |
|---|---|---|
| Minute | 0–59 | |
| Hour | 0–23 | 0 = midnight |
| Day of month | 1–31 | |
| Month | 1–12 or JAN–DEC | This field cannot be modified. |
| Day of week | 1–7 or Sun–Sat | 1 = Sunday, 7 = Saturday |
Examples
| Schedule | Cron expression |
|---|---|
| At 22:30, Monday through Friday | 30 22 ? * 2,3,4,5,6 |
| At midnight on the 5th, 15th, and 25th of each month | 0 0 5,15,25 * ? |
Syntax rules
Specify a schedule by day of month or day of week — not both. Set the unused field to
?(no specific value). For example, to run on the 1st and 2nd of each month, set day of week to?.Use half-width characters only (for example,
*and?, not their full-width equivalents).Separate multiple values with commas (
,). For example,3,5,7orTue,Thu,Satin the day of week field triggers on Tuesday, Thursday, and Saturday.Use a hyphen (
-) to specify a range. For example,2-6in the day of week field means Monday through Friday.
[1, 7]is the value range for day of week. Entering1,7triggers the rule on Sunday and Saturday only — it does not specify a range.
What's next
To adjust an existing rule's schedule or scope, click Edit on the Scheduled Start and Stop Rules page.
To temporarily suspend a rule without deleting it, click Disable.