A Resource Access Management (RAM) role with an identity provider (IdP) as its trusted principal enables federated single sign-on (SSO). This allows users from your IdP to assume the role and access Alibaba Cloud resources using Security Assertion Markup Language (SAML) 2.0 or OpenID Connect (OIDC).
Create a RAM role for a SAML IdP
To enable role-based SSO using SAML 2.0, create a RAM role that establishes a trust relationship with your SAML IdP.
Prerequisites
You have created a SAML IdP.
Procedure
Log on to the RAM console as a RAM administrator.
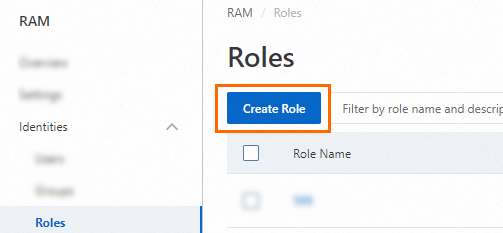
In the left-side navigation pane, choose .
On the Roles page, click Create Role.
In the upper-right corner of the Create Role page, click Switch to Policy Editor.

Configure the trust policy for your SAML IdP. You can use the Visual Editor or JSON Editor.
Visual Editor
In the Principal section, set the principal type to Identity Provider, select SAML, and choose your IdP from the dropdown list.


Jason Editor
In the
Principalelement, specify the ARN of your SAML IdP in theFederatedfield. In theConditionelement, set thesaml:recipientto the Alibaba Cloud SSO endpoint:https://signin.alibabacloud.com/saml-role/sso.{ "Version": "1", "Statement": [ { "Effect": "Allow", "Principal": { "Federated": "acs:ram::100*******0719:saml-provider/Azure-AD" }, "Action": "sts:AssumeRole", "Condition": { "StringEquals": { "saml:recipient": [ "https://signin.alibabacloud.com/saml-role/sso" ] } } } ] }
In the Create Role dialog box, enter a Role Name and click OK.
Create a RAM role for an OIDC IdP
To implement role-based SSO using OIDC, you must create a RAM role for an OIDC IdP.
Prerequisites
You have created an OIDC IdP.
Procedure
Log on to the RAM console as a RAM administrator.
In the left-side navigation pane, choose .
On the Roles page, click Create Role.
In the upper-right corner of the Create Role page, click Switch to Policy Editor.
Configure the trust policy for your OIDC IdP. You can use the Visual Editor or JSON Editor.
Visual Editor
In the Principal section, set the principal type to Identity Provider, select OIDC, and choose your IdP from the dropdown list.

Script editor
In the
Principalelement, specify the ARN of your OIDC provider in theFederatedfield. In theConditionelement, specify the issuer (oidc:iss) and audience (oidc:aud) to validate the OIDC token.{ "Version": "1", "Statement": [ { "Effect": "Allow", "Principal": { "Federated": "acs:ram::100*******0719:oidc-provider/xiyun****" }, "Action": "sts:AssumeRole", "Condition": { "StringEquals": { "oidc:iss": [ "https://dev-xxxxxx.okta.com" ], "oidc:aud": [ "0oa294vi1vJoClev****" ] } } } ] }
Add conditions to the trust policy.
The following table describes the OIDC-specific condition keys that you can use to validate claims in the OIDC token.
Condition key
Description
Required
Example
oidc:issThe issuer of the OIDC token. The value of this condition must match the
issclaim in the token. It must be the issuer URL you specified when creating the OIDC IdP.Yes
https://dev-xxxxxx.okta.com
oidc:audThe audience of the OIDC token. The value of this condition must match the
audclaim in the token. The value can be one or more of the client IDs that you specified for the OIDC IdP.Yes
0oa294vi1vJoClev****
oidc:subThe subject of the OIDC token. The value of this condition must match the
subclaim in the token, which typically represents a unique user ID. You can specify up to 10 subjects.No
00u294e3mzNXt4Hi****
In the Create Role dialog box, enter a Role Name and click OK.
What to do next
After the role is created, you must grant it permissions. A role has no permissions by default.