Configure role-based SSO between Okta and Alibaba Cloud by using OIDC. Applications in Okta can then access Alibaba Cloud resources through temporary STS credentials.
Prerequisites
Register an OIDC application in Okta and obtain its issuer URL and client ID. This example uses the following values:
-
Issuer URL: https://dev-xxxxxx.okta.com
-
Client ID: 0oa294vi1vJoClev****
Step 1: Create an OIDC identity provider
Create an OIDC identity provider named TestOidcProvider. Set the IdP URL to https://dev-xxxxxx.okta.com and the Client ID to 0oa294vi1vJoClev****.
-
Log on to the RAM console as a RAM administrator.
-
In the left-side navigation pane, choose .
-
On the Role-based SSO tab, click the OIDC tab, and then click Create IdP.
-
On the Create IdP page, configure the identity provider.
Parameter
Description
IdP Name
The name must be unique within your Alibaba Cloud account.
Issuer URL
Provided by your external IdP. Must start with
https, follow standard URL format, and exclude query strings (?), fragments (#), and user credentials (@).Obtain Fingerprint
Configure the HTTPS CA certificate thumbprint from your external IdP to prevent issuer URL hijacking or tampering.
After you enter the Issuer URL and click Get Fingerprint, Alibaba Cloud calculates the thumbprint automatically. For security, also calculate it locally (get the thumbprint of an OIDC IdP by using OpenSSL) and compare. If the values differ, the issuer URL may be compromised — verify the URL and enter the correct thumbprint.
NoteBefore rotating a certificate on your IdP, add the new certificate's thumbprint to your OIDC IdP configuration. Wait at least one day, then rotate the certificate. After confirming you can obtain an STS token with the new certificate, remove the old thumbprint.
Client ID
Your external IdP assigns a client ID when you register an application. This ID appears in the
audclaim of issued OIDC tokens. During OIDC-to-STS token exchange, Alibaba Cloud verifies theaudclaim against this client ID — role assumption succeeds only if they match.Add multiple client IDs if multiple applications access Alibaba Cloud. Maximum: 50.
Earliest Issuance Time Allowed
OIDC tokens issued before this time limit cannot be exchanged for STS tokens.
Default value: 12 hours. Valid values: 1 to 168 hours.
Note
A description for the identity provider.
-
Click Create IdP.
Step 2: Create a RAM role for OIDC
Create a RAM role named testoidc and select the TestOidcProvider identity provider from Step 1.
-
Log on to the RAM console as a RAM administrator.
-
In the left-side navigation pane, choose .
-
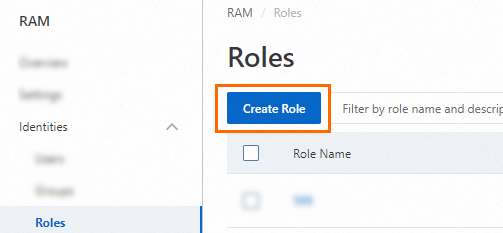
On the Roles page, click Create Role.
-
In the upper-right corner of the Create Role page, click Switch to Policy Editor.

-
In the policy editor, specify the OIDC identity provider.
Two modes are available:
-
Visual Editor
In the Principal section, specify the OIDC identity provider.


-
Script editor
In the
Principal'sFederatedfield, specify the OIDC provider and configureCondition.{ "Version": "1", "Statement": [ { "Effect": "Allow", "Principal": { "Federated": "acs:ram::100*******0719:oidc-provider/xiyun****" }, "Action": "sts:AssumeRole", "Condition": { "StringEquals": { "oidc:iss": [ "https://dev-xxxxxx.okta.com" ], "oidc:aud": [ "0oa294vi1vJoClev****" ] } } } ] }
-
-
Supported service-level conditions:
Condition key
Description
Required
Example
oidc:issThe OIDC issuer URL. The
issclaim in the token must match this value.Use
StringEqualswith your OIDC provider's issuer URL.Yes
https://dev-xxxxxx.okta.com
oidc:audThe OIDC audience. The
audclaim in the token must match this value.Use
StringEqualswith one or more client IDs from your OIDC provider.Yes
0oa294vi1vJoClev****
oidc:subThe OIDC subject. Restricts which principals can assume the role.
The
subclaim in the token must match this condition. Supports any string condition operator with up to 10 values.No
00u294e3mzNXt4Hi****
-
In the Create Role dialog box, enter a Role Name and click OK.
Step 3: Grant permissions to the RAM role
Grant the testoidc RAM role from Step 2 the required permissions to access Alibaba Cloud resources.
-
Log on to the RAM console as a RAM administrator.
-
In the left-side navigation pane, choose .
-
On the Roles page, click the name of the target RAM role.
-
On the Permissions tab, find the target policy and click Revoke Permission in the Actions column.
You can also select multiple policies and click Revoke Permission at the bottom of the policy list to revoke multiple permissions in bulk.
-
On the Revoke Permission dialog box, click Revoke Permission.
Step 4: Obtain an OIDC token from Okta
Alibaba Cloud does not support console sign-in with OIDC. Use programmatic access instead. Obtain an OIDC token from Okta through a standard OAuth 2.0 flow such as the Authorization Code Flow.
Obtain an OIDC token from Okta by following the official tutorial: Sign users in to your SPA using redirect and Auth JS.
-
Follow the Okta tutorial to create an application and configure the project.
-
Test the project in a browser. The application redirects you to the Okta sign-in page. After you sign in and complete MFA, you are redirected to
index.html, which displays the ID token and its parsed claims:{ "idToken": "eyJraWQiOiItbUF****", "claims": { "sub": "00uxbq0z40UYy9bm****", "name": "ssotest01", "email": "ssotest01@exampledomain.com", "ver": 1, "iss": "https://dev-xxxxxx.okta.com", "aud": "0oaxbqhfrfBl5lk2****", "iat": 1762841679, "exp": 1762845279, "jti": "ID.WYtCLmLKOlMcEh0uIe1jWH9T6M1JmotCvX3hIgLK6mA", "amr": [ "mfa", "otp", "pwd", "okta_verify" ], "idp": "00oxbpgns1TnfLFg****", "nonce": "Xp0PTyQzw9ltYBY7SfhxG2ijt1wgi2jK6XLZOGbeQJQ79d0ScWYoHE5twl0QAklA", "preferred_username": "ssotest01@exampledomain.com", "auth_time": 1762841677, "at_hash": "wztv8ALAo2Au56Om3dya7w" }, "expiresAt": 1762845279, "scopes": [ "openid", "profile", "email" ], "authorizeUrl": "https://dev-xxxxxx.okta.com/oauth2/v1/authorize", "issuer": "https://dev-xxxxxx.okta.com", "clientId": "0oaxbqhfrfBl5lk2****" }NoteVerify that the following claims match the OIDC identity provider configuration from Step 1: create an OIDC identity provider in Alibaba Cloud. Mismatched values cause the AssumeRoleWithOIDC API call to fail.
-
iss: Must exactly match the issuer URL.
-
aud: Must exactly match the client ID.
-
-
Copy the
idTokenvalue from the page.
Step 5: Exchange OIDC token for STS token
Call AssumeRoleWithOIDC to exchange the OIDC token from Step 4 for an STS token.
Sample request:
package demo;
import com.aliyun.auth.credentials.provider.AnonymousCredentialProvider;
import com.aliyun.sdk.service.sts20150401.models.*;
import com.aliyun.sdk.service.sts20150401.*;
import com.google.gson.Gson;
import darabonba.core.client.ClientOverrideConfiguration;
import java.util.concurrent.CompletableFuture;


public class AssumeRoleWithOIDC {
  public static void main(String[] args) throws Exception {

    // Anonymous access method (requires API support)
    AnonymousCredentialProvider provider = AnonymousCredentialProvider.create();

    // Configure the Client
    AsyncClient client = AsyncClient.builder()
      .region("cn-hangzhou") // Region ID
      .credentialsProvider(provider)
      // Override client-level configurations, such as the endpoint and HTTP request parameters.
      .overrideConfiguration(
        ClientOverrideConfiguration.create()
        // For the endpoint, see https://api.aliyun.com/product/Sts
        .setEndpointOverride("sts.cn-hangzhou.aliyuncs.com")
      )
      .build();

    String idToken = "eyJraWQiOiItbUF****"; // OIDC id token
    // Parameter settings for API request
    AssumeRoleWithOIDCRequest assumeRoleWithOIDCRequest = AssumeRoleWithOIDCRequest.builder()
      .OIDCToken(idToken)
      .roleArn("acs:ram::173305794806****:role/testoidc")
      .OIDCProviderArn("acs:ram::173305794806****:oidc-provider/Okta")
      .roleSessionName("test-oidc-session")
      .build();
    // Asynchronously call the API.
    CompletableFuture<AssumeRoleWithOIDCResponse> response = client.assumeRoleWithOIDC(assumeRoleWithOIDCRequest);
    // Synchronously get the return value of the API request
    AssumeRoleWithOIDCResponse resp = response.get();
    System.out.println("RequestId: " + resp.getBody().getRequestId());
    System.out.println("Assume role ARN: " + resp.getBody().getAssumedRoleUser().getArn());
    System.out.println("Credentials AccessKeyId: " + resp.getBody().getCredentials().getAccessKeyId());
    System.out.println("Credentials AccessKeySecret: " + resp.getBody().getCredentials().getAccessKeySecret());
    System.out.println("Success response: " + new Gson().toJson(resp.getBody()));

    // Finally, close the client
    client.close();
  }

}
Sample response:
RequestId: 5EB6E605-15EA-5D96-941D-2C62DC99****
Assume role ARN: acs:ram::173305794806****:role/testoidc/test-oidc-session
Credentials AccessKeyId: STS.NZXMTBGTTHLW74AMVYKou****
Credentials AccessKeySecret: FdrYjJwTCfFfMdY4APdHsjGL9fH5RSZCtRyYMJED****
Success response:
{
    "assumedRoleUser": {
        "arn": "acs:ram::173305794806****:role/testoidc/test-oidc-session",
        "assumedRoleId": "30048007026011****:test-oidc-session"
    },
    "credentials": {
        "accessKeyId": "STS.NZXMTBGTTHLW74AMVYKou****",
        "accessKeySecret": "FdrYjJwTCfFfMdY4APdHsjGL9fH5RSZCtRyYMJED****",
        "expiration": "2025-11-11T08:01:03Z",
        "securityToken": "CAISwwJ1q6Ft5B2yfSjI****"
    },
    "OIDCTokenInfo": {
        "clientIds": "0oaxbqhfrfBl5lk2****",
        "expirationTime": "2025-11-11T07:14:39Z",
        "issuanceTime": "2025-11-11T06:14:39Z",
        "issuer": "https://dev-xxxxxx.okta.com",
        "subject": "00uxbq0z40UYy9bm****",
        "verificationInfo": "Success"
    },
    "requestId": "5EB6E605-15EA-5D96-941D-2C62DC99****"
}
The Credentials object contains the STS token.
Step 6: Use the STS token to access resources
Use the STS token from Step 5 to access Alibaba Cloud resources within the role's permissions.