An event represents a user interaction or business process your app tracks — for example, user registration, product browsing, adding items to a cart, or completing a payment.
Overview
Events are the core unit of behavioral data in Quick Tracking. Each event has a name, a type, a set of properties, and a scope that determines which applications report it. Before collecting any data, define and manage your events here.
Two visibility states determine whether an event appears in analysis:
Managed events: Events you have defined and configured in the system. These are ready to use in reports.
Unmanaged events: Events that have been reported by your applications but not yet configured. You can promote an unmanaged event to managed directly from this list.
Manage events
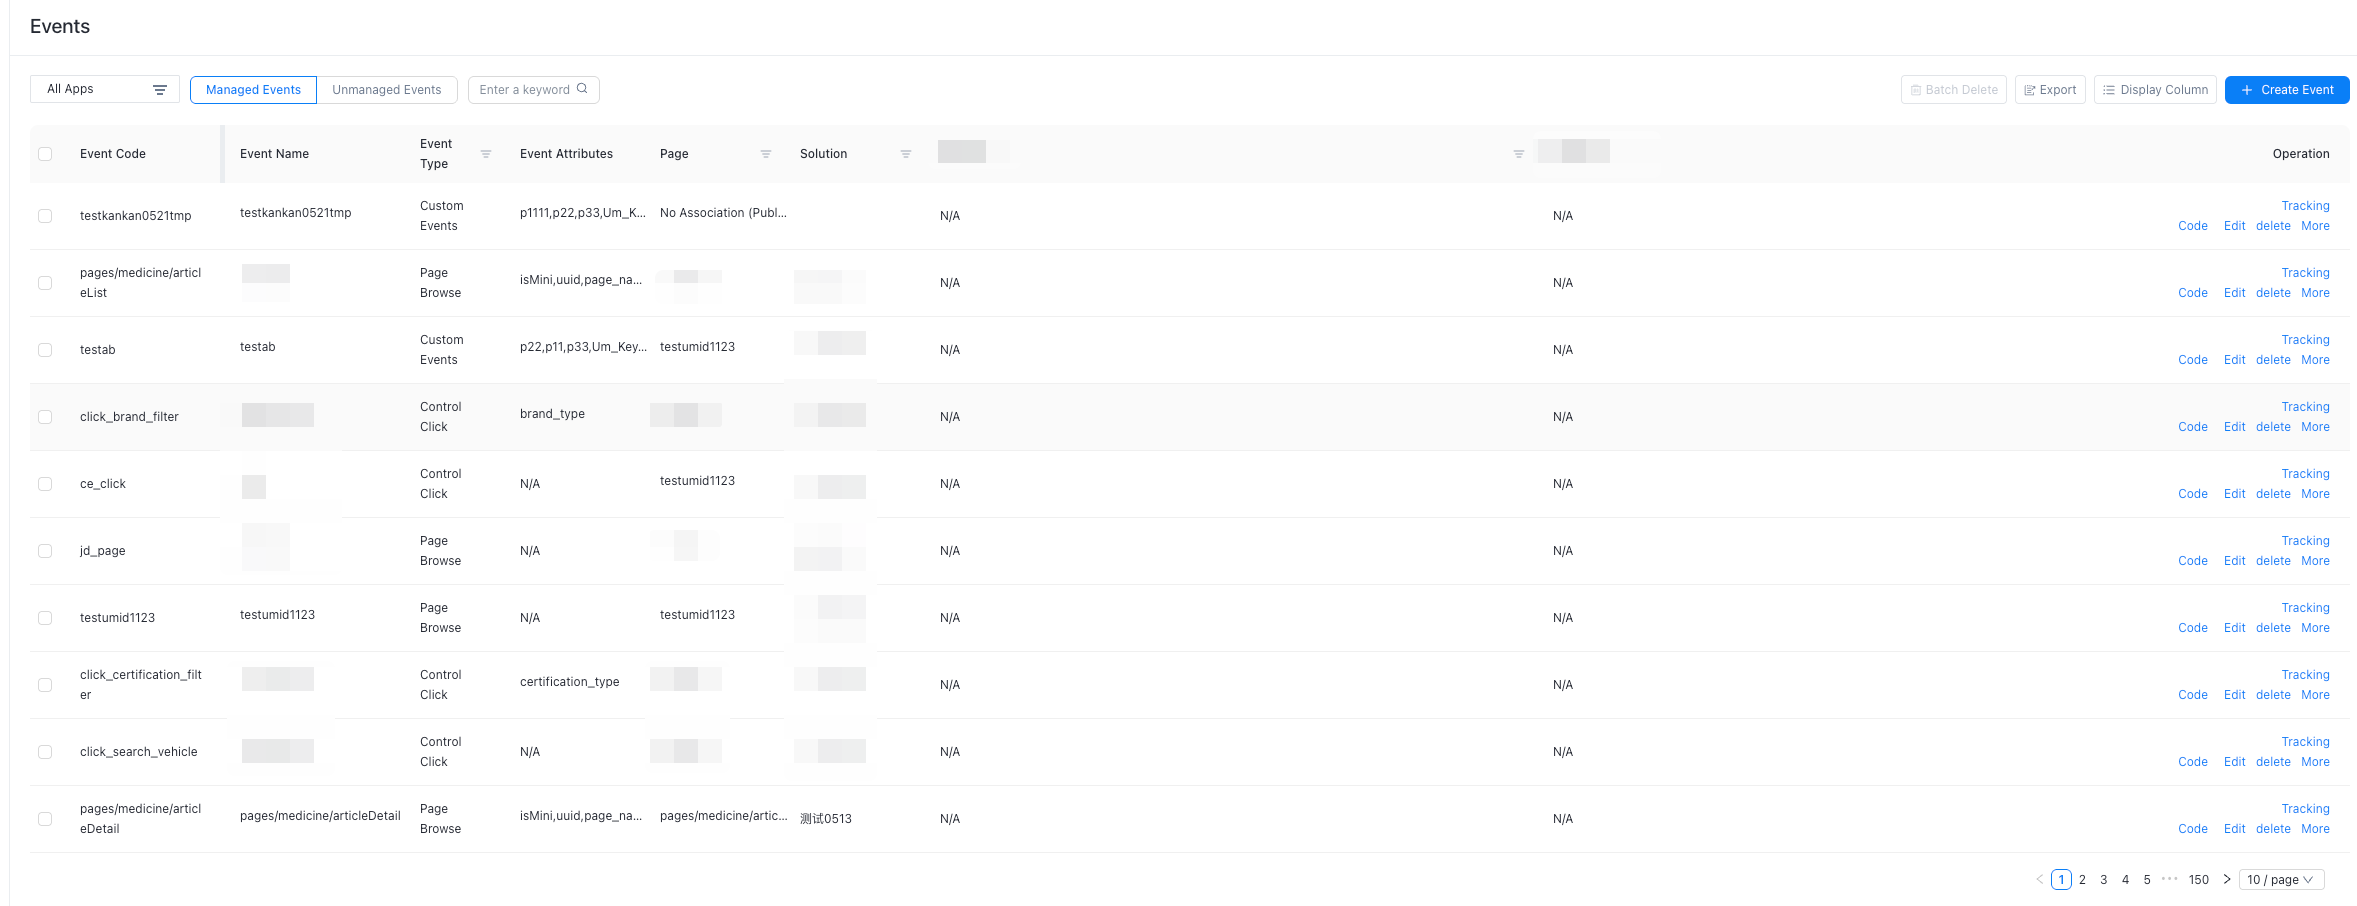
Event list layout
|
Area |
Description |
|
Organization filter |
Switch between organizations. The event list updates to show all events in the selected organization. |
|
Application filter |
Filter events by application. By default, events from all applications in the current organization are shown. |
|
Event type toggle |
Switch between Managed events and Unmanaged events. |
|
Search |
Search for events by keyword. |
|
Action bar |
Create, import, export, and delete events. |
|
Event list |
Displays event details. Click Select display column to choose which fields appear. |
Create a page event
Hover over the New event button to reveal the event type options.
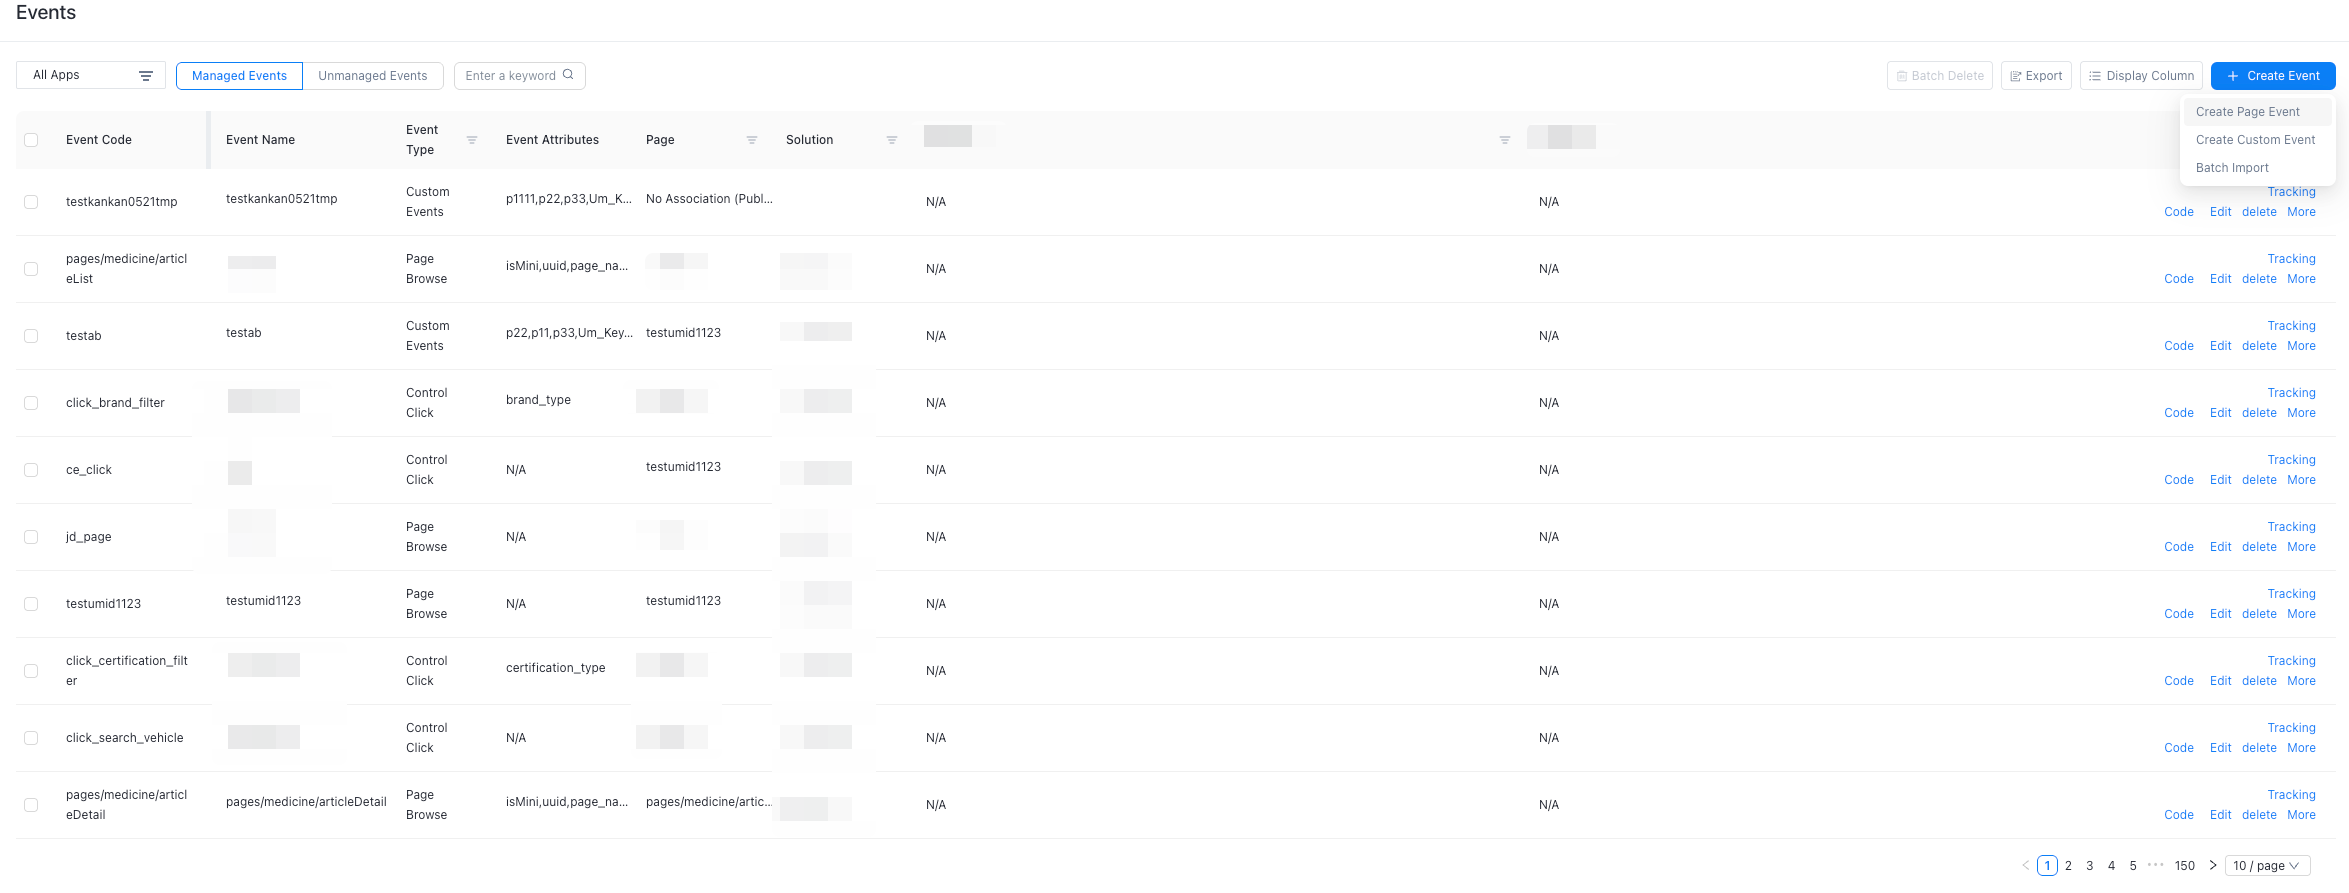
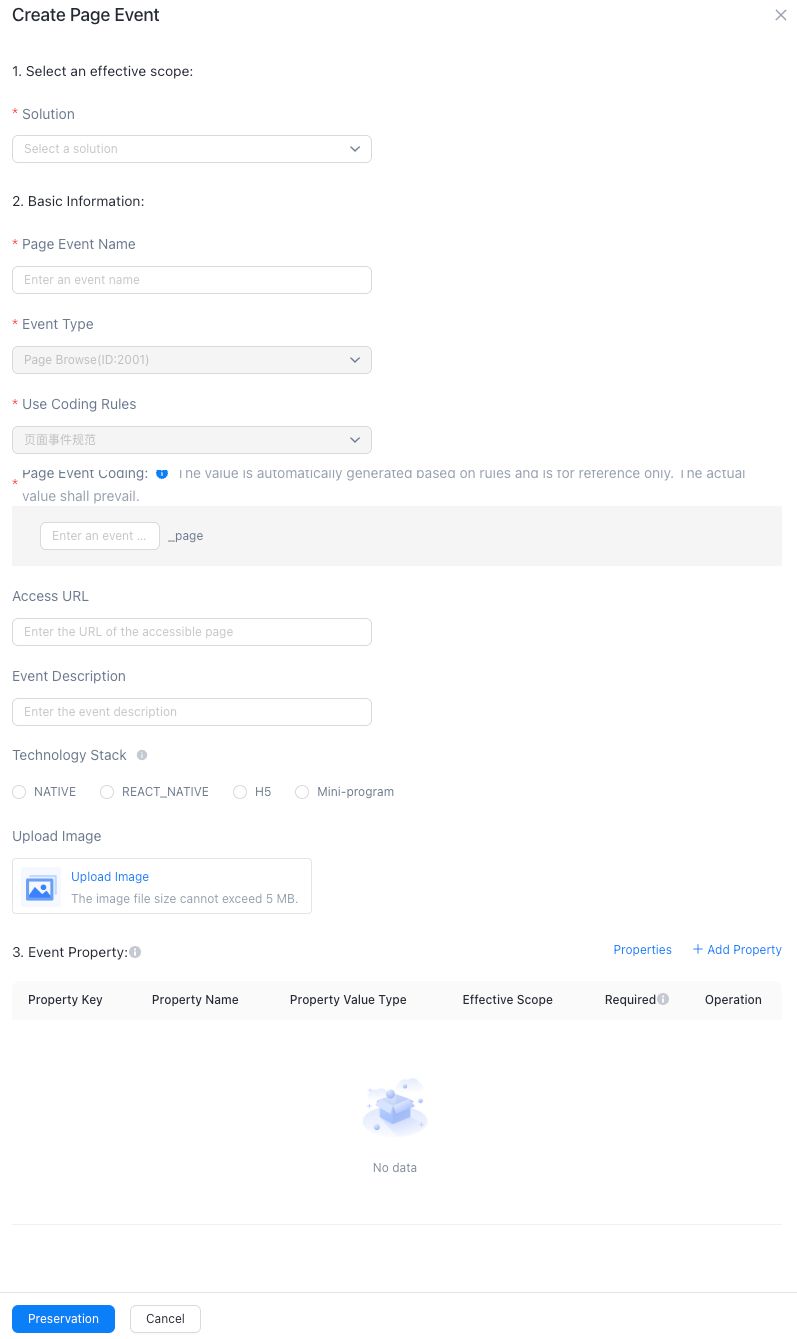
Click New page event. Fill in the fields described below.
|
Field |
Description |
|
Scope |
Defaults to the entire organization. Turn off the toggle to select specific applications instead. |
|
Plan |
The tracking plan this event belongs to. Create plans in Plan management before selecting one here. |
|
Event name |
A unique identifier and display name for the event. |
|
Event type |
Set to Page view by default for page events. |
|
Event properties |
Properties attached to this event. Properties must be defined in Property management before you can add them here. For details, see Property Management. |
After you complete the required fields, click Save to create the page event.
Create a custom event
The creation flow is the same as for page events, with two differences:
Public event setting
Decide whether the event is a public event:
No (default): The event belongs to a specific page. Select the plan and the page under that plan.
Yes: The event becomes a public event and is not tied to any specific page.
Public events are useful when the same interaction (for example, a share button click) appears on multiple pages. Rather than duplicating event configuration for each page, define it once as a public event and reuse it across pages.
Event type
For custom events, select from three types:
Click event
Impression event
Custom event
Batch import events
Use batch import to add or update many events at once instead of creating them one by one.
Click Batch import. On the import page, download the event template.
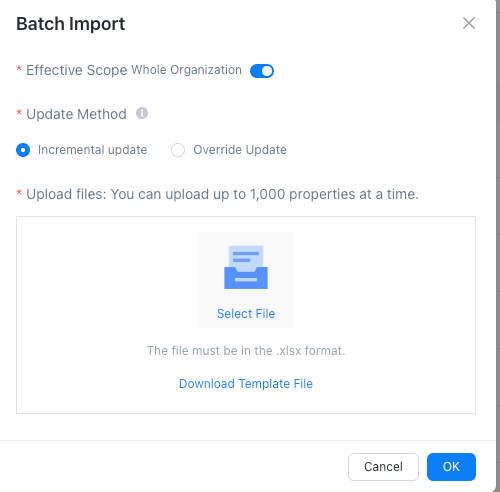
Choose an update method: Incremental update or Overwrite update.
|
Update method |
Behavior when an uploaded event matches an existing managed event |
|
Incremental update |
Merges the new scope and event properties into the existing ones. Existing values are preserved and new values are added. |
|
Overwrite update |
Replaces the existing scope and event properties with the values from the uploaded file. |
Fill in the template. The fields match those in the manual creation form. The template uses the following platform columns: Native, React Native, Mini Program, and H5.

Upload the completed template. Select the scope and the tracking plan, then click OK to import the events.