Basic SDK information
SDK | The version number. | The md5 value. | The app package name. |
QuickTracking iOS SDK | Latest version: 1.6.6.PX Update logs: iOS SDK update logs | 4670509ae0c6ec3373147d380fd89530 | com.quicktracking.sdk.ios.QTCommon |
1 Quick integration
In the background of QuickTracking, dedicated integration code is generated for each App, which can be integrated according to the guidance in the product. Check whether you have used the Umeng + SDK. If you have used the SDK, change the SDK file path in a timely manner. For more information, see 1.6 in this document.
1.1 into the product background 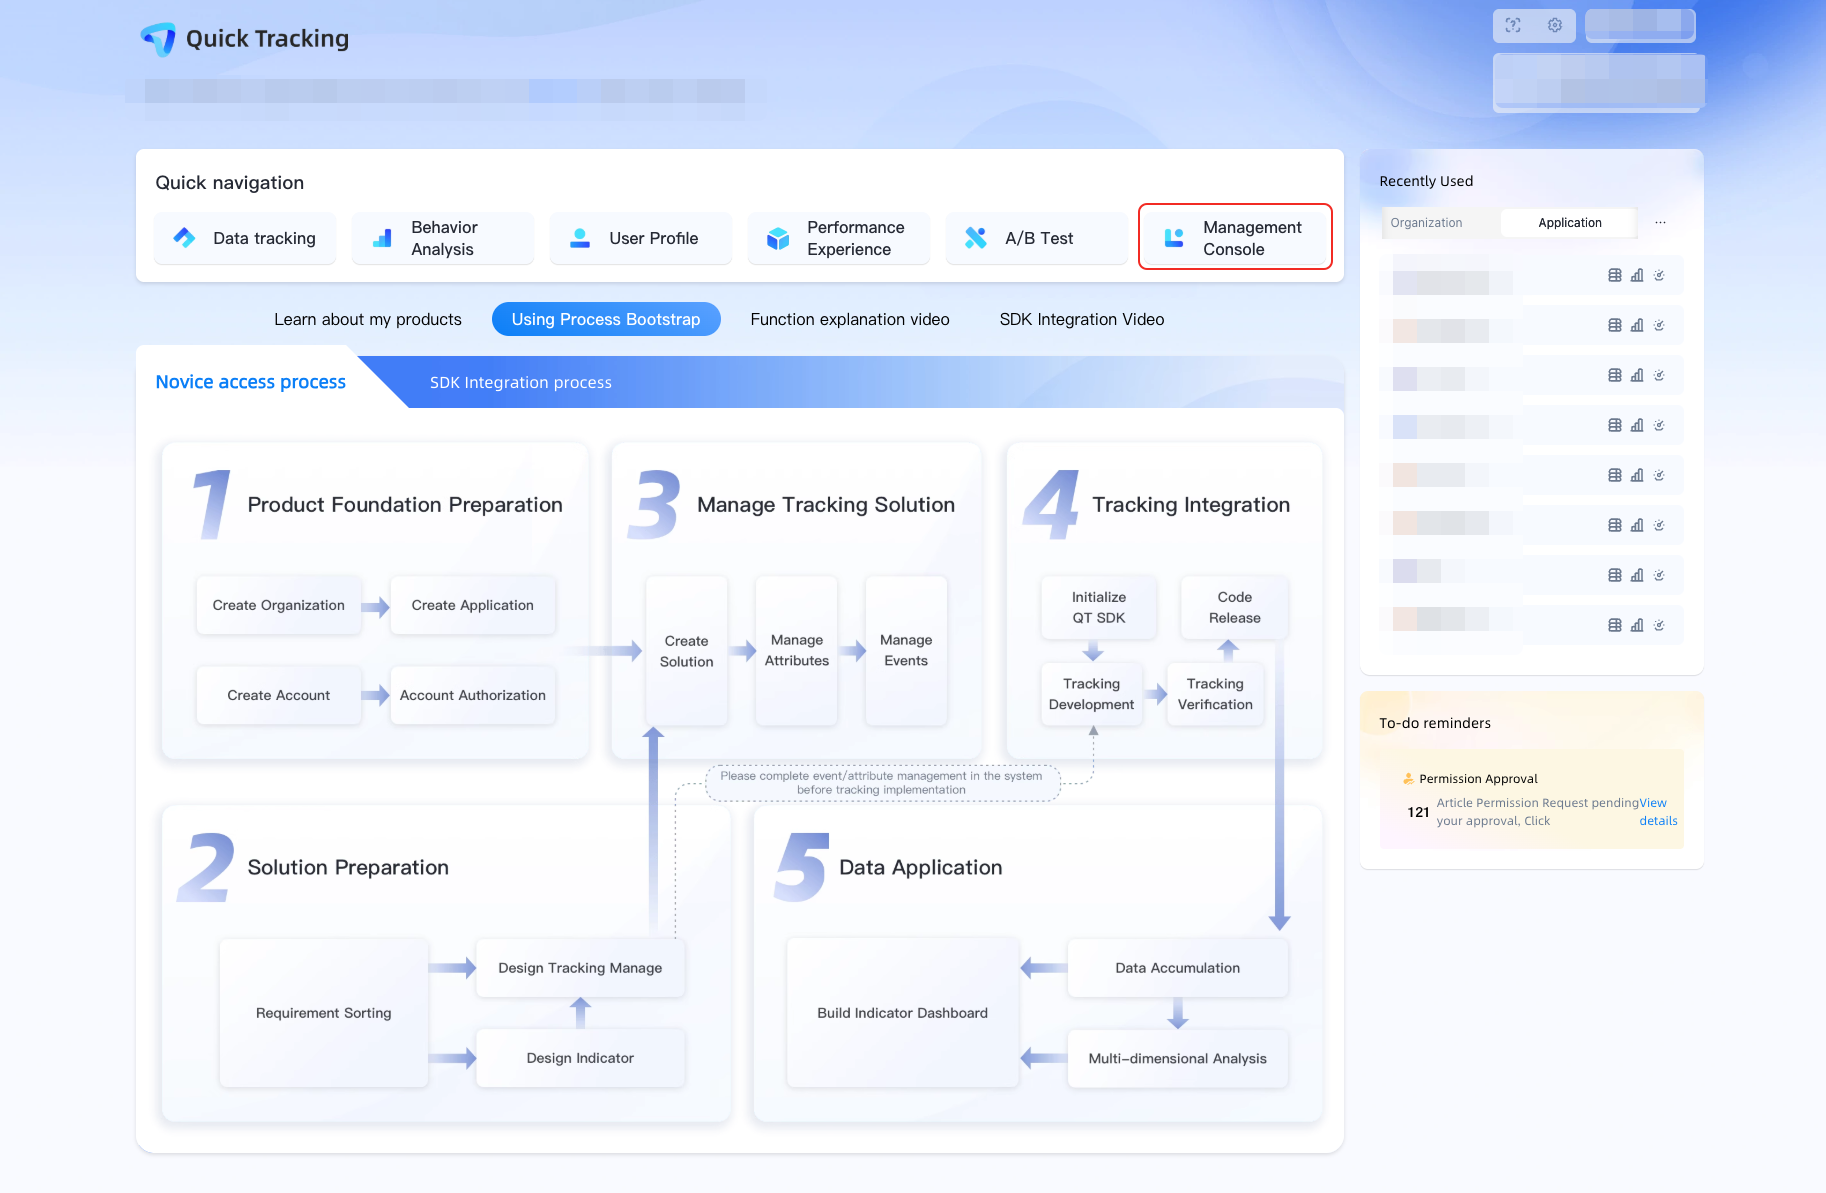
1.2 Find Application Organization 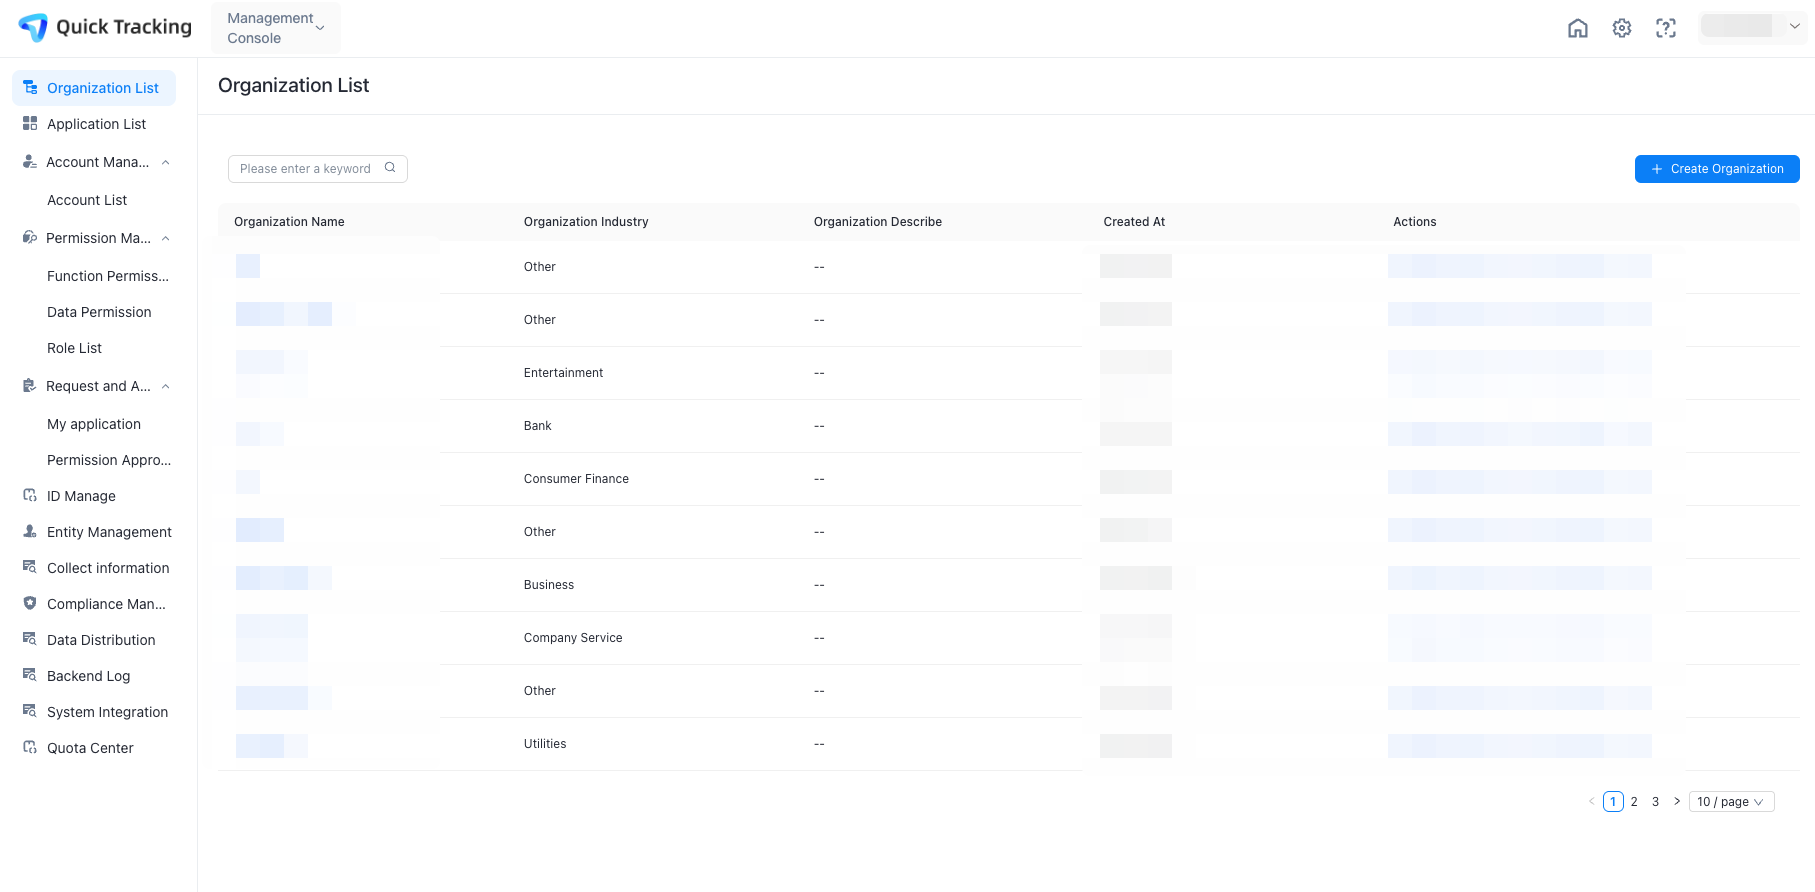
1.3 find application 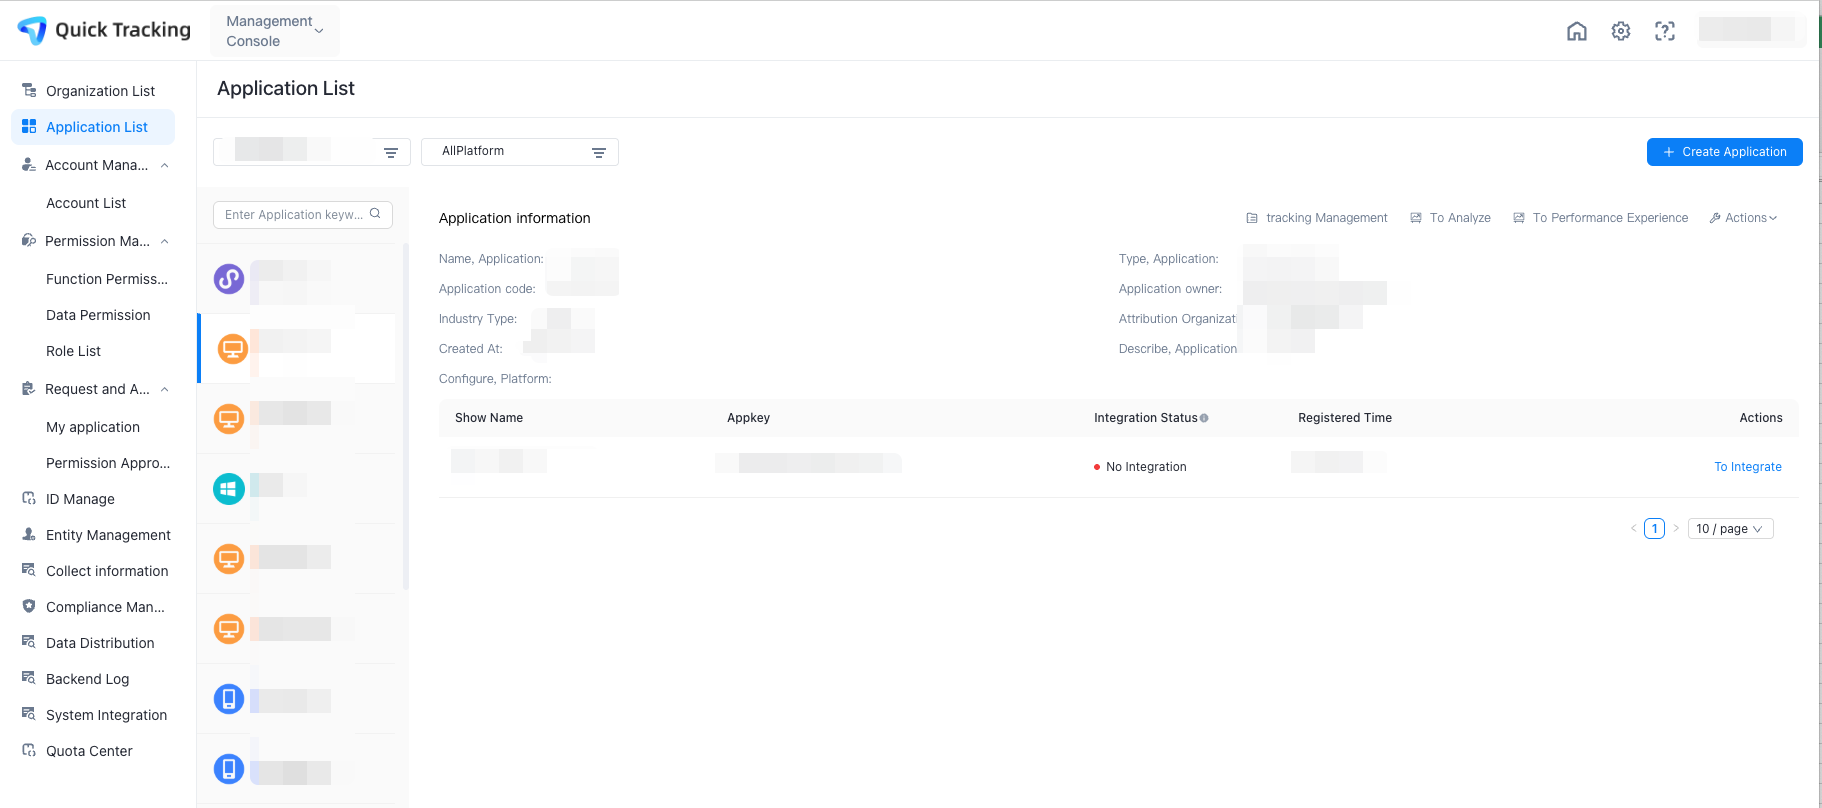
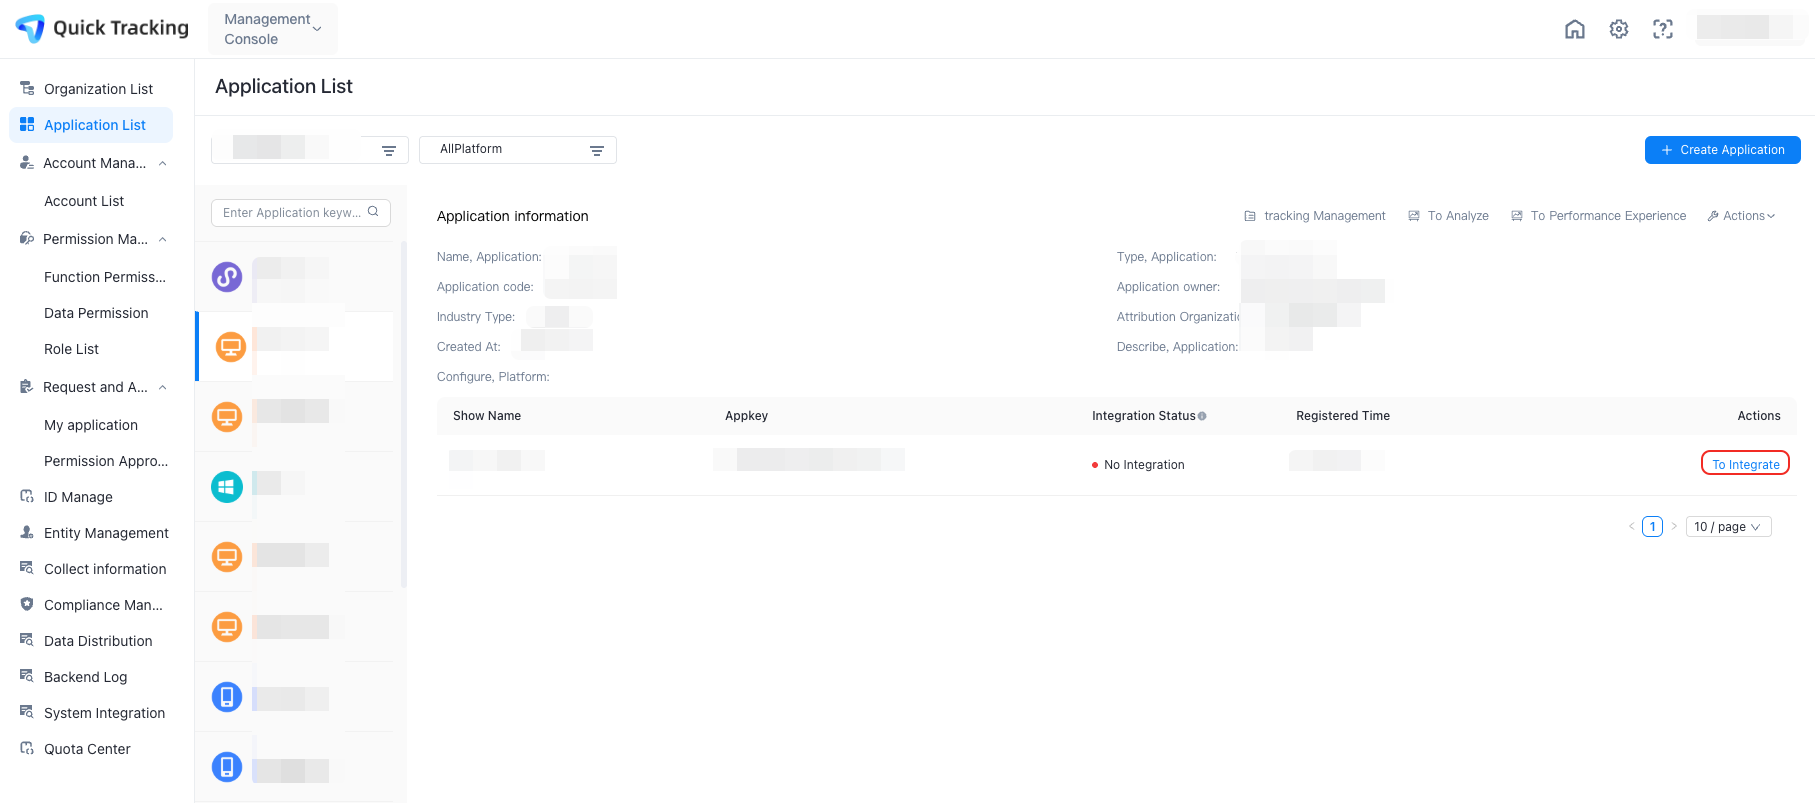
1.4 click "To Integrate"
1.5 Click to obtain the exclusive integration code

1.6 check whether it conflicts with Umeng + SDK
Note that you need to check whether you have already used the Umeng + SDK. If you have already used it, be sure to set the change SDK file path.
Change the SDK file path mode:
You have integrated the Umeng + SDK. You need to integrate the QT SDK: Add [QTConfigure resetStorePath];
You have integrated the QT SDK. If you need to integrate the Youmeng SDK, add [UMConfigure resetStorePath] to the front of all the code of QT and Youmeng. This is at least earlier than the receiving domain name.
If is not called based on the preceding logic, Umeng + SDK and QT SDK use the same storage path, resulting in log confusion. The specific logic is: which SDK initialization method is called first, reset the file path of another SDK, for example, call [QTConfigure resetStorePath] for the first initialized Umeng + SDK;, if it is the first initialized QT SDK, you need to call [UMConfigure resetStorePath];
Note: If you reset the path of the QT SDK, the key values of the feature information store that are actively set for the SDK, such as the user account and application version, will change. If you need to use these fields for business processing, we recommend that you reset these fields. We recommend that you configure these fields when you integrate the QT SDK for the first time to avoid data loss.
2 Integration code details
If the preceding page cannot be reached due to specific reasons, you need to view the document before you can integrate it. The specific integration code is as follows:
2.1 Parameter Preparation
appkey: obtained from the application list
Collection domain name: obtained in the "Management Console-Collect Information" module
2.2 introduce the SDK
If you run the pod setup command on the terminal, it takes a long time to pull the latest pod library.
$ pod setupCocoapods integration can flexibly configure the required SDK. If the project target is named "QuickTrackingDemo", the following SDK can be added, such as the format of Podfile root directory the project:
target 'QuickTrackingDemo' do
pod '<Quick Tracking SDK name>'
end
Note: We recommend that you use the pod update command to directly update new items because the pod search command may fail to find new items.
Quick Tracking Base Library
//QuickTracking statistical analysis SDK
pod 'QTCommon', '~> 1.6.6.PX'// Specify the version number.

// You can add the UMCCommonLog in the basic Logstore to the project for development and debugging.
pod 'UMCCommonLog'
Note: UMCCommonLog is used to debug the SDK and related features during the development phase. You can remove the SDK before you publish the app.
2.3 manual integration
Dependent libraries:
Obtain the operator ID by
CoreTelephony.framework

libz.tbd Data Compression

libsqlite3.tbd Data Cache

SystemConfiguration.framework to determine the network status

libc++.tbd C++ Standard Library
Engineering configuration:
Select and download the SDK functional components. Decompress the. zip file to obtain the corresponding component package, such as QTCommon.framework.
Xcode
File->Add Files to"Your Project", select the downloaded component package->Addin the pop-up Panel. (Note: check "Copy items if needed")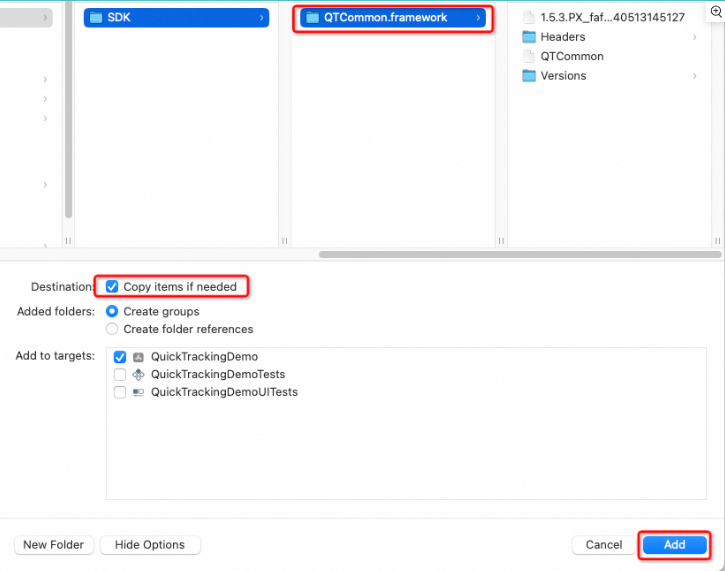
Add the dependency library, in the project settings
target-> tab General ->Linked Frameworks and Librariesas follows:

In Targets->BuildSettings, you Other Linker Flags add-ObjC. You must add this item. Note that C is written, not C.
2.4 introducing header files
#import <QTCommon/QTCommon.h>
# import <UMCommonLog/UMCommonLogManager.h> // You need to add
the
3. Verify the configuration of the tag
Add your URL Scheme to the project. The URL Scheme is located in the project settings target -> tab Info ->URL Types. The scheme:atm.yourappkey. Call function [QTMobClick handleUrl:url] in AppDelegate to receive URL
AppDelegate calls:
- (BOOL)application:(UIApplication *)application openURL:(nonnull NSURL *)url options:(nonnull NSDictionary<UIApplicationOpenURLOptionsKey,id> *)options
{
    if ([QTMobClick handleUrl:url]) {

      return YES;
    }

    return YES;
}
SceneDelegate calls:
- (void)scene:(UIScene *)scene willConnectToSession:(UISceneSession *)session options:(UISceneConnectionOptions *)connectionOptions {

    for (UIOpenURLContext *context in connectionOptions.URLContexts) {
        [QTMobClick handleUrl:context.URL];
    }
}

- (void)scene:(UIScene *)scene openURLContexts:(NSSet<UIOpenURLContext *> *)URLContexts {

    [QTMobClick handleUrl:URLContexts.allObjects.firstObject.URL];
}
4 IDFA description
[Quick Tracking] By default, the SDK collects the IDFA identifier to analyze and verify data more accurately. For the case that the application itself does not obtain idfa, it is recommended to configure the application as follows when submitting it to the AppStore: (to avoid being rejected by Apple on the grounds that "the application does not contain advertising functions but obtains advertising identifier IDFA".)
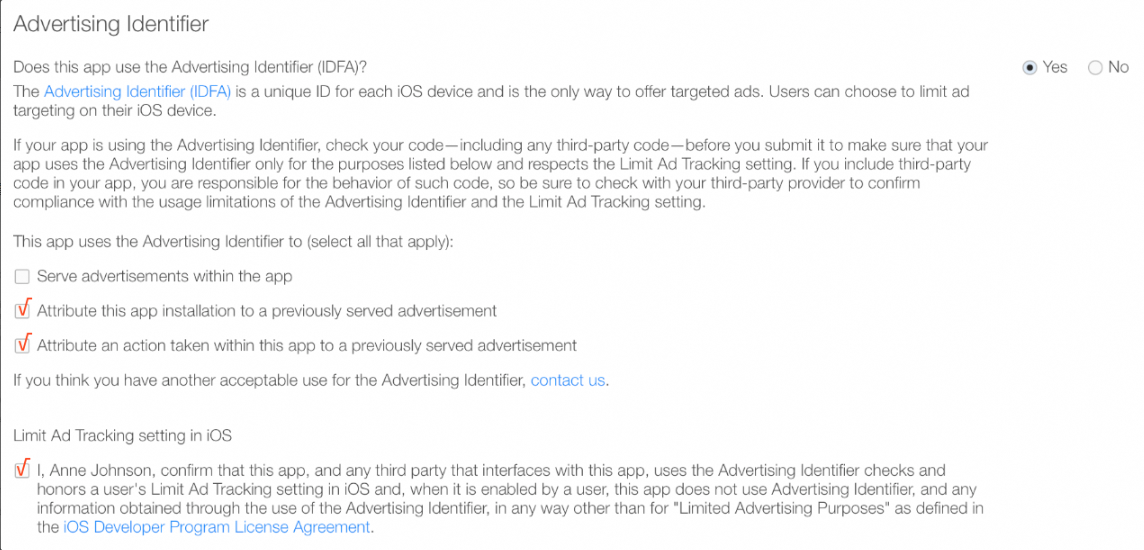
The Quick Tracking SDK does not actively apply for the IDFA permission. If your app does not apply for the IDFA permission, Quick Tracking does not trigger the pop-up window of the client permission application. Therefore, you must configure the application in your app.
If the user does not agree to collect IDFA, set a custom field or return an empty string. For more information, see 2.1 Device ID Settings. In this way, the Quick Tracking SDK does not collect IDFA.