This topic describes how to add a form and manage the data entered into it.
Prerequisites
You have created a data form. For more information, see Create a form.
Limits
Form developers and project administrators can manage all data. Users who submit data can manage only the data that they submit.
If the form is not shared with you or you have only the public URL of the form, you cannot manage the data in the form.
Entry point
On the Quick BI homepage, follow the steps shown in the following figure to go to the Data Form Management page.

On the Data Form Management page, select the data form to which you want to add data and click the
 icon.
icon.
Add a single data record
You can add a single data record on the Data Management page. Perform the following steps:
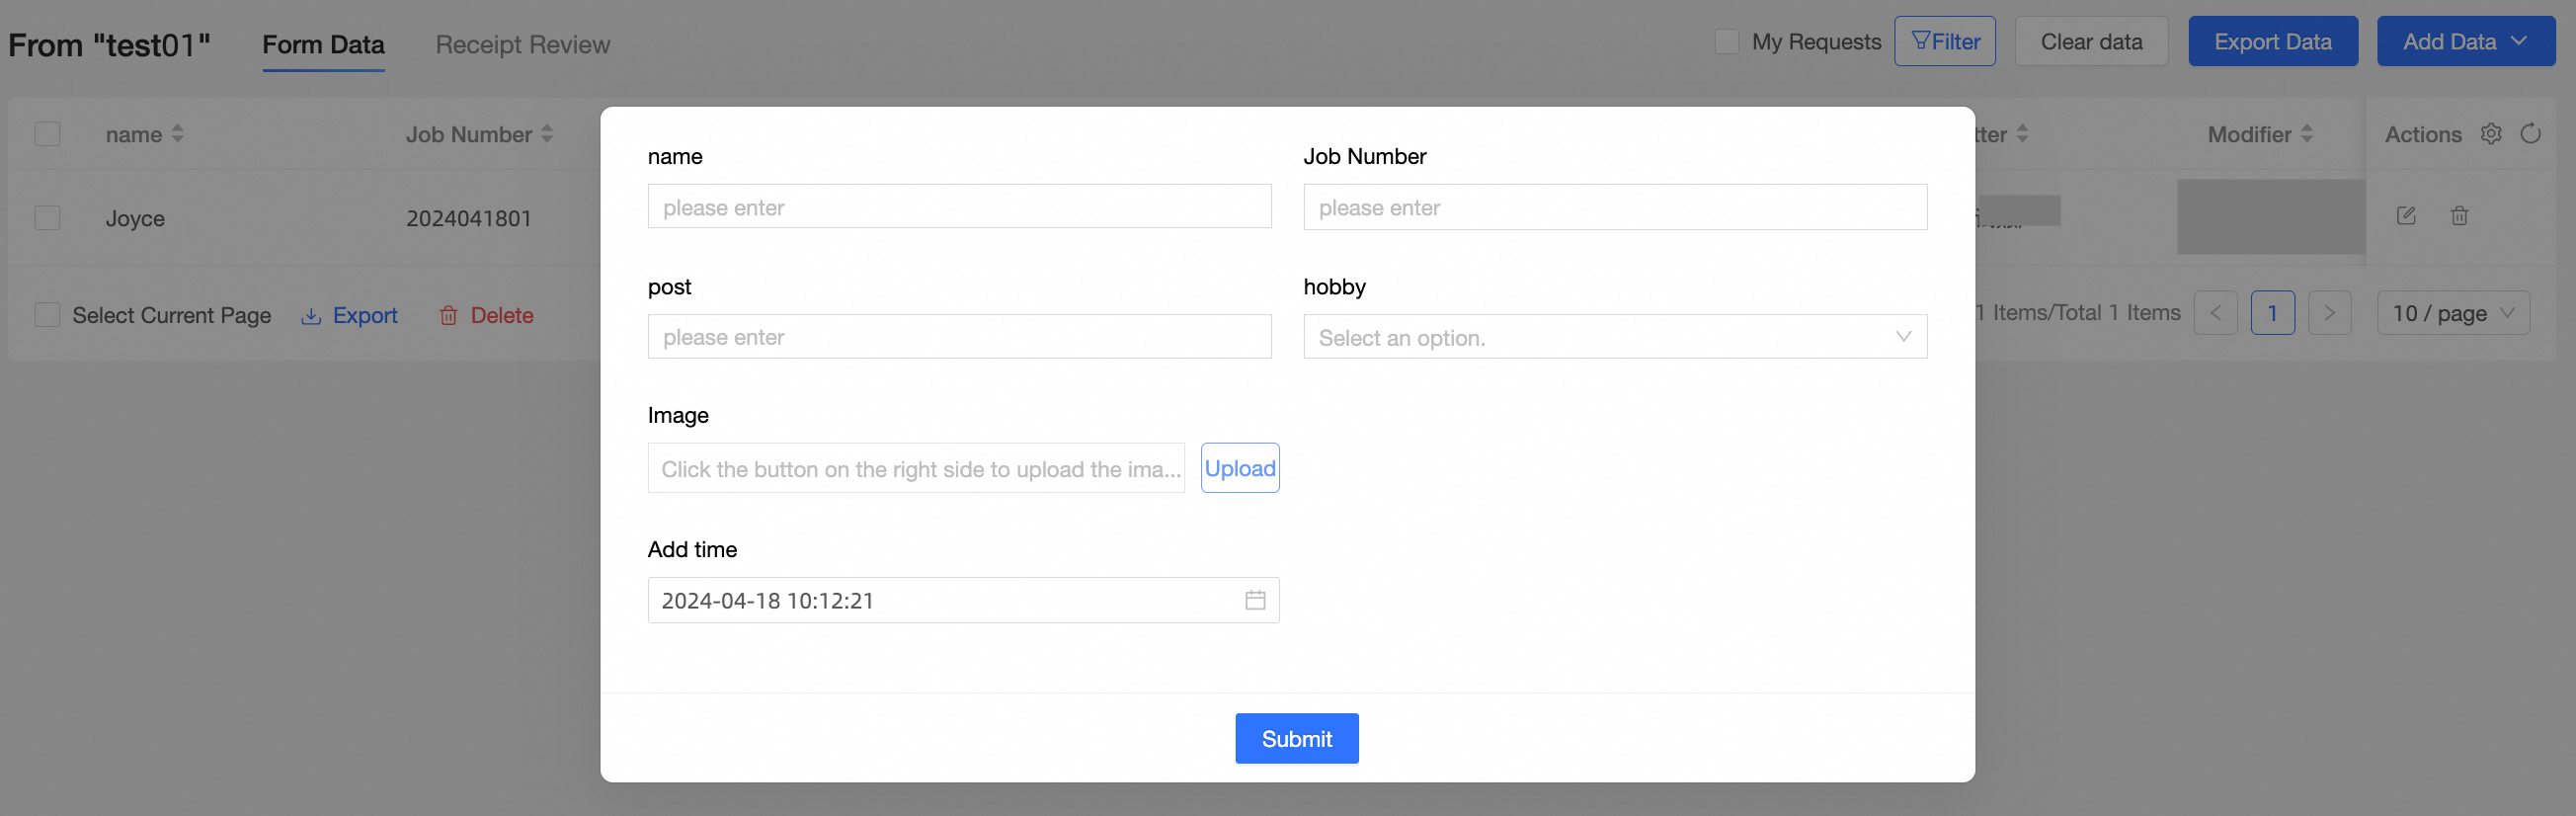
On the Data Management page, click Add Data and select Add a Single Record.

On the Add Form page, enter the data and click Submit.
Import multiple data records at a time
To process a large amount of data, you can import multiple records at once instead of adding them individually.
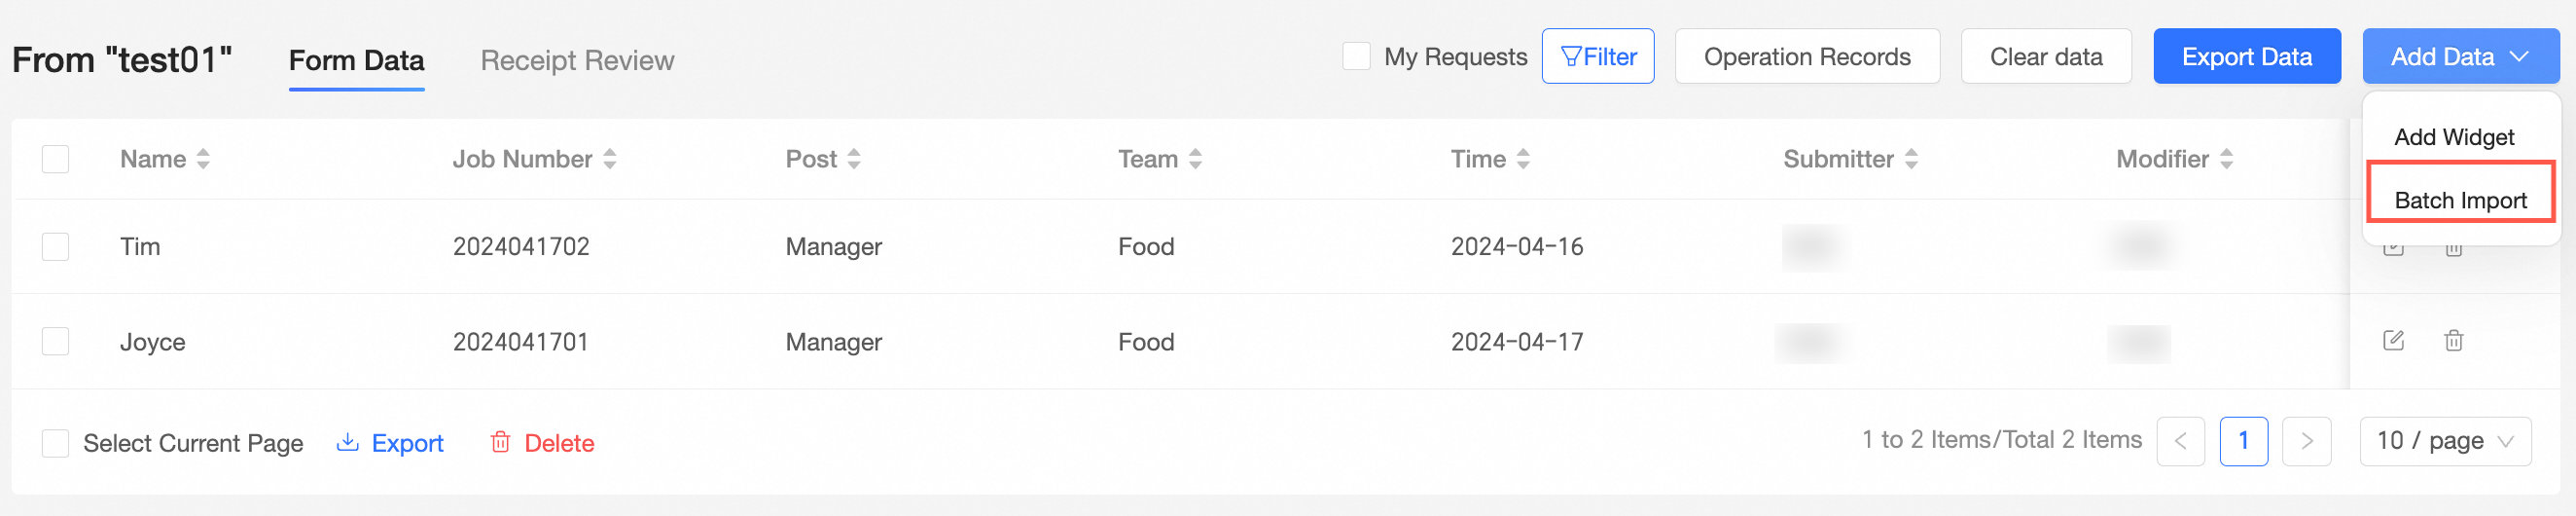
On the Data Management page, click Add Data and select Import Multiple Records.
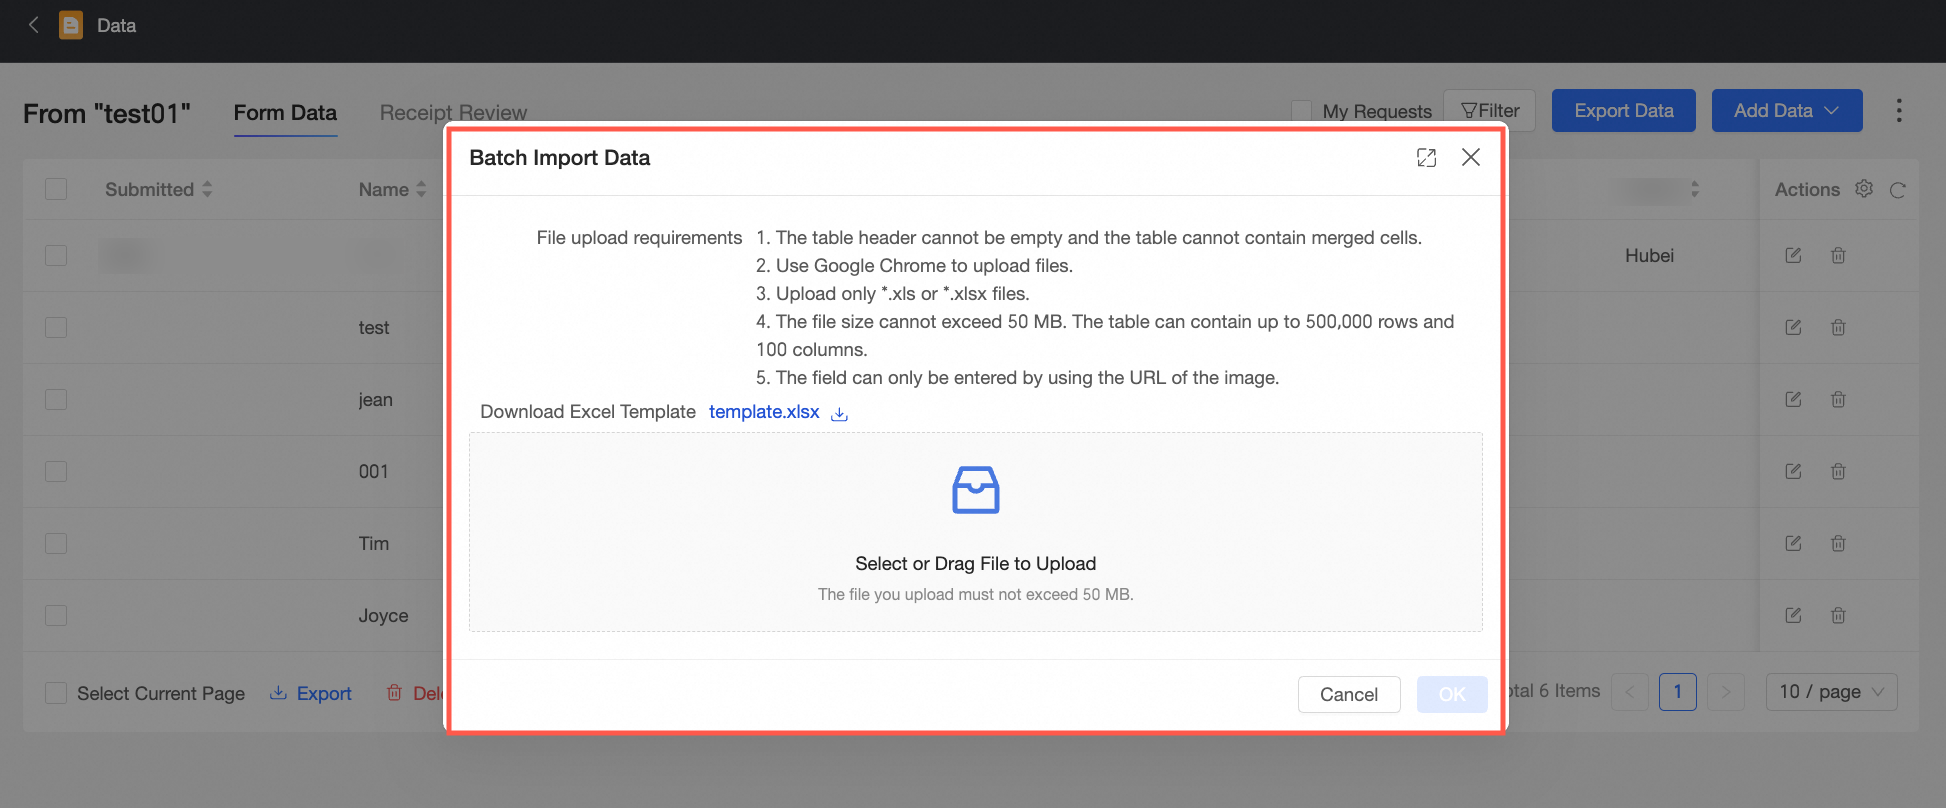
On the Import Multiple Records page, read the Upload File Requirements, click the
 icon to download the Excel template, and then fill in the template based on the requirements.
Select or drag the file to the target area and click the preview box to preview the content of the uploaded file. After you confirm that the content is correct, click OK to submit the data.
If you have edit permission for the form, you can click the
 option to preview and re-edit the uploaded content. For more information, see Globally Configure Collaborative Authorization.
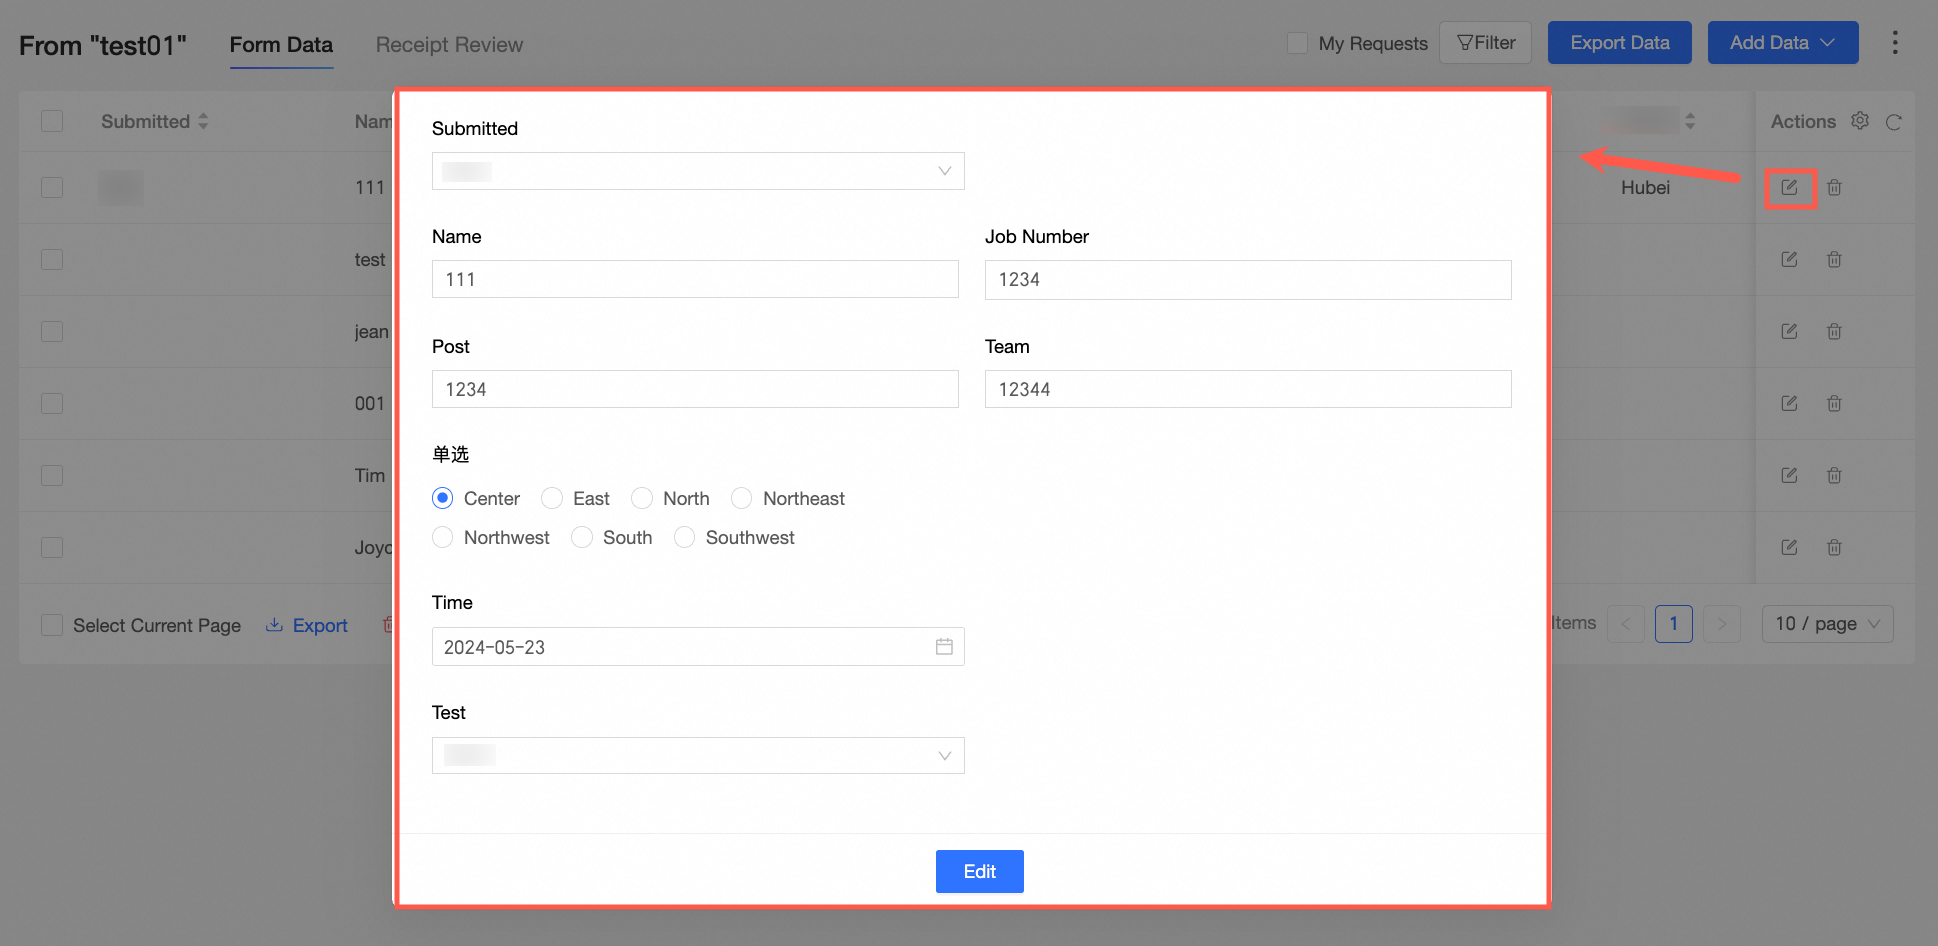 Note
NoteWhen you import multiple data records at a time, the files that you upload must meet the following requirements:
The table header and content cannot be empty, and the file cannot contain merged cells.
Use the Chrome browser to upload the file.
Only XLS and XLSX files are supported.
The file size cannot exceed 50 MB. The number of rows cannot exceed 500,000 and the number of columns cannot exceed 100.
For image fields, only image links can be imported.
If the file contains numeric values, you must manually set the cell format to Number in Excel.
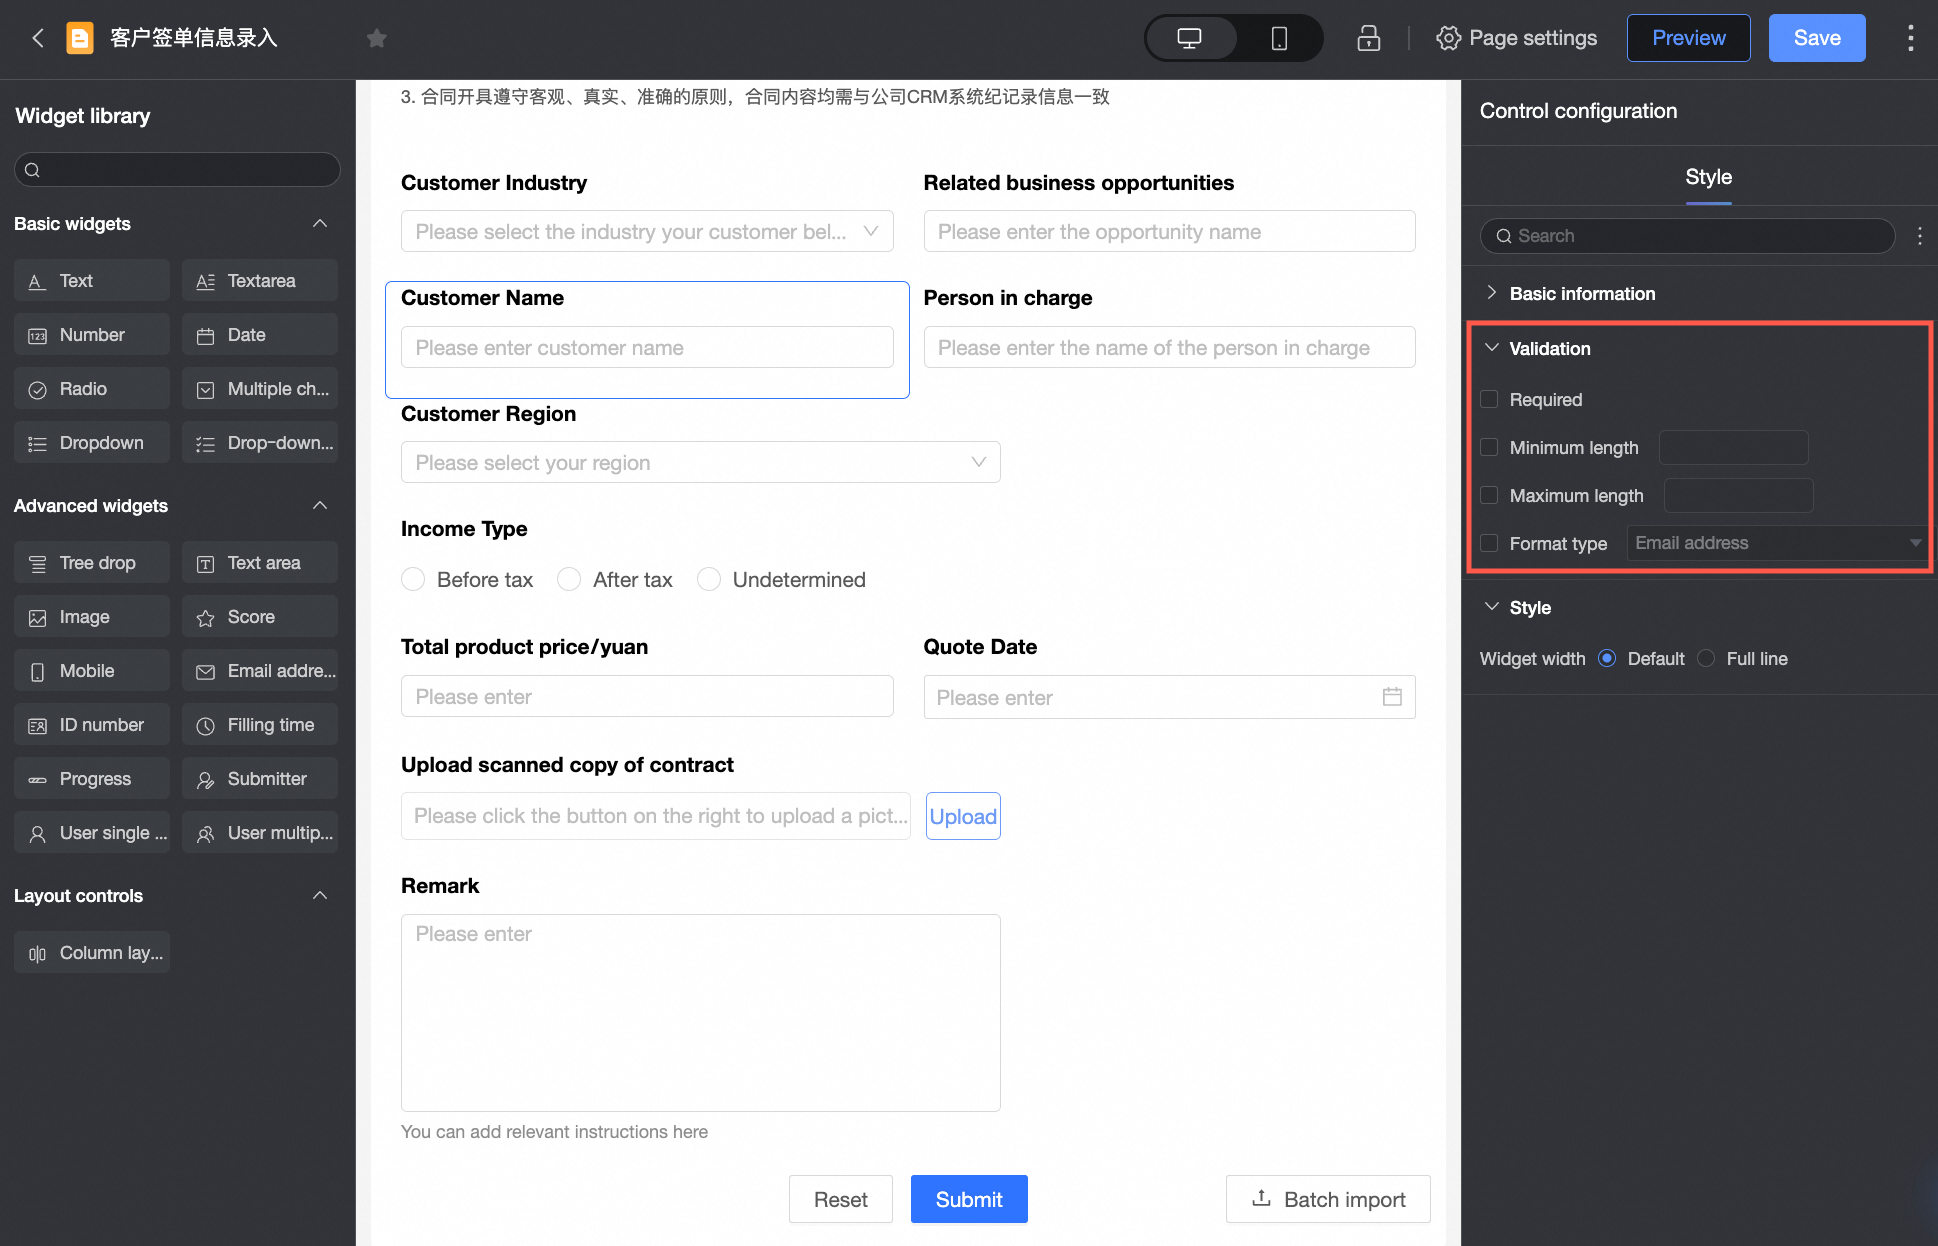
If you enable Rule Validation for Batch Import in the Advanced settings of the data form page, the system validates the imported data based on the static validation rules configured for the controls.
Ensure that the content in the file complies with the validation settings of the corresponding controls. Otherwise, the data cannot be imported. For example, if the validation rule for a text control that stores employee email addresses is set to "Must be in email format", the email addresses in the uploaded file must be in a valid email format. Otherwise, the data validation fails. For more information about the validation rules for batch import, see Validation rules for batch import.
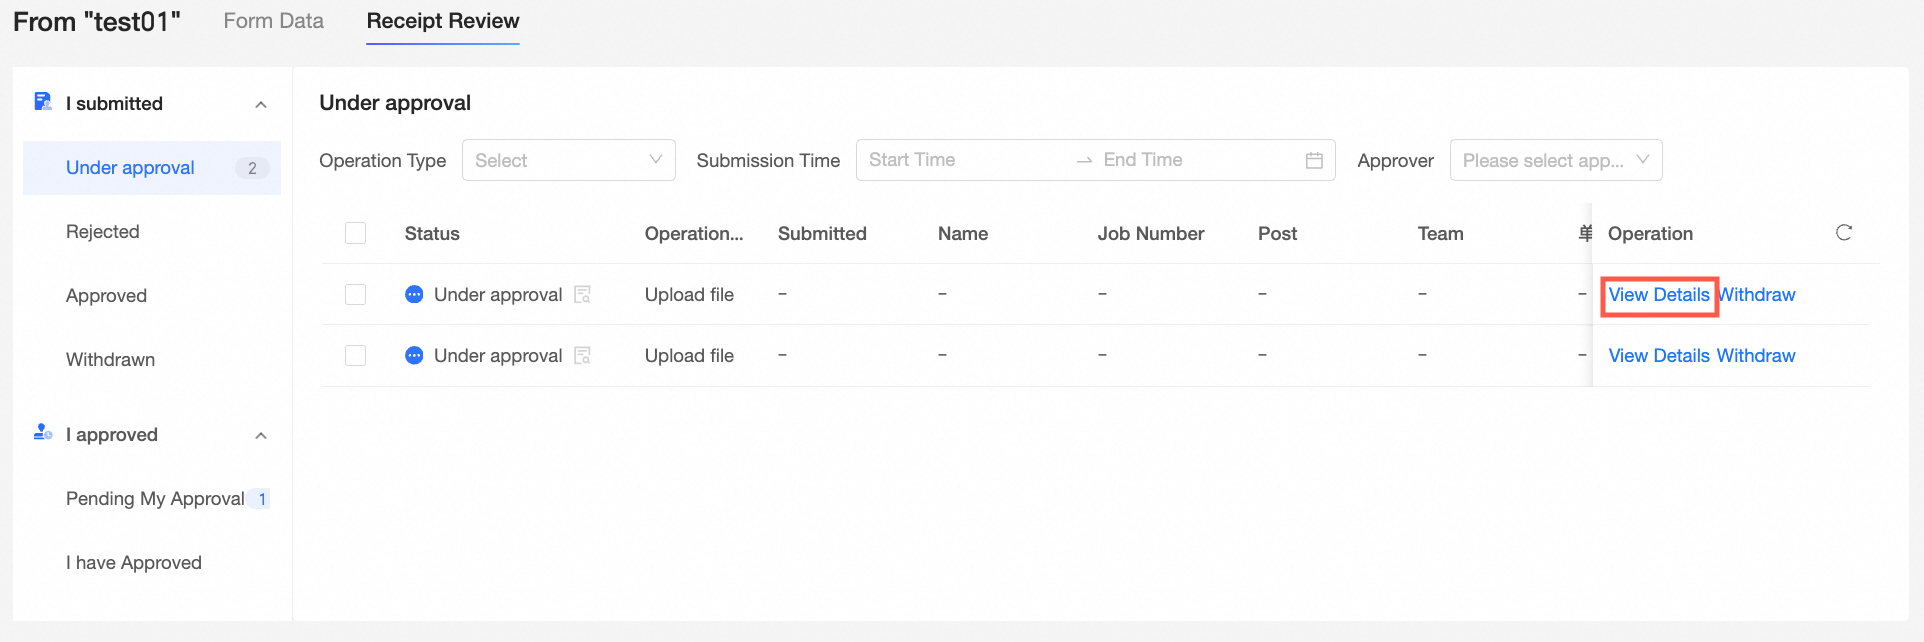
If Entry approval is enabled for the form and multiple approvers are not configured, the approval process starts after you upload the file and click OK. If multiple approvers are configured, you must select the approvers before the approval process starts.
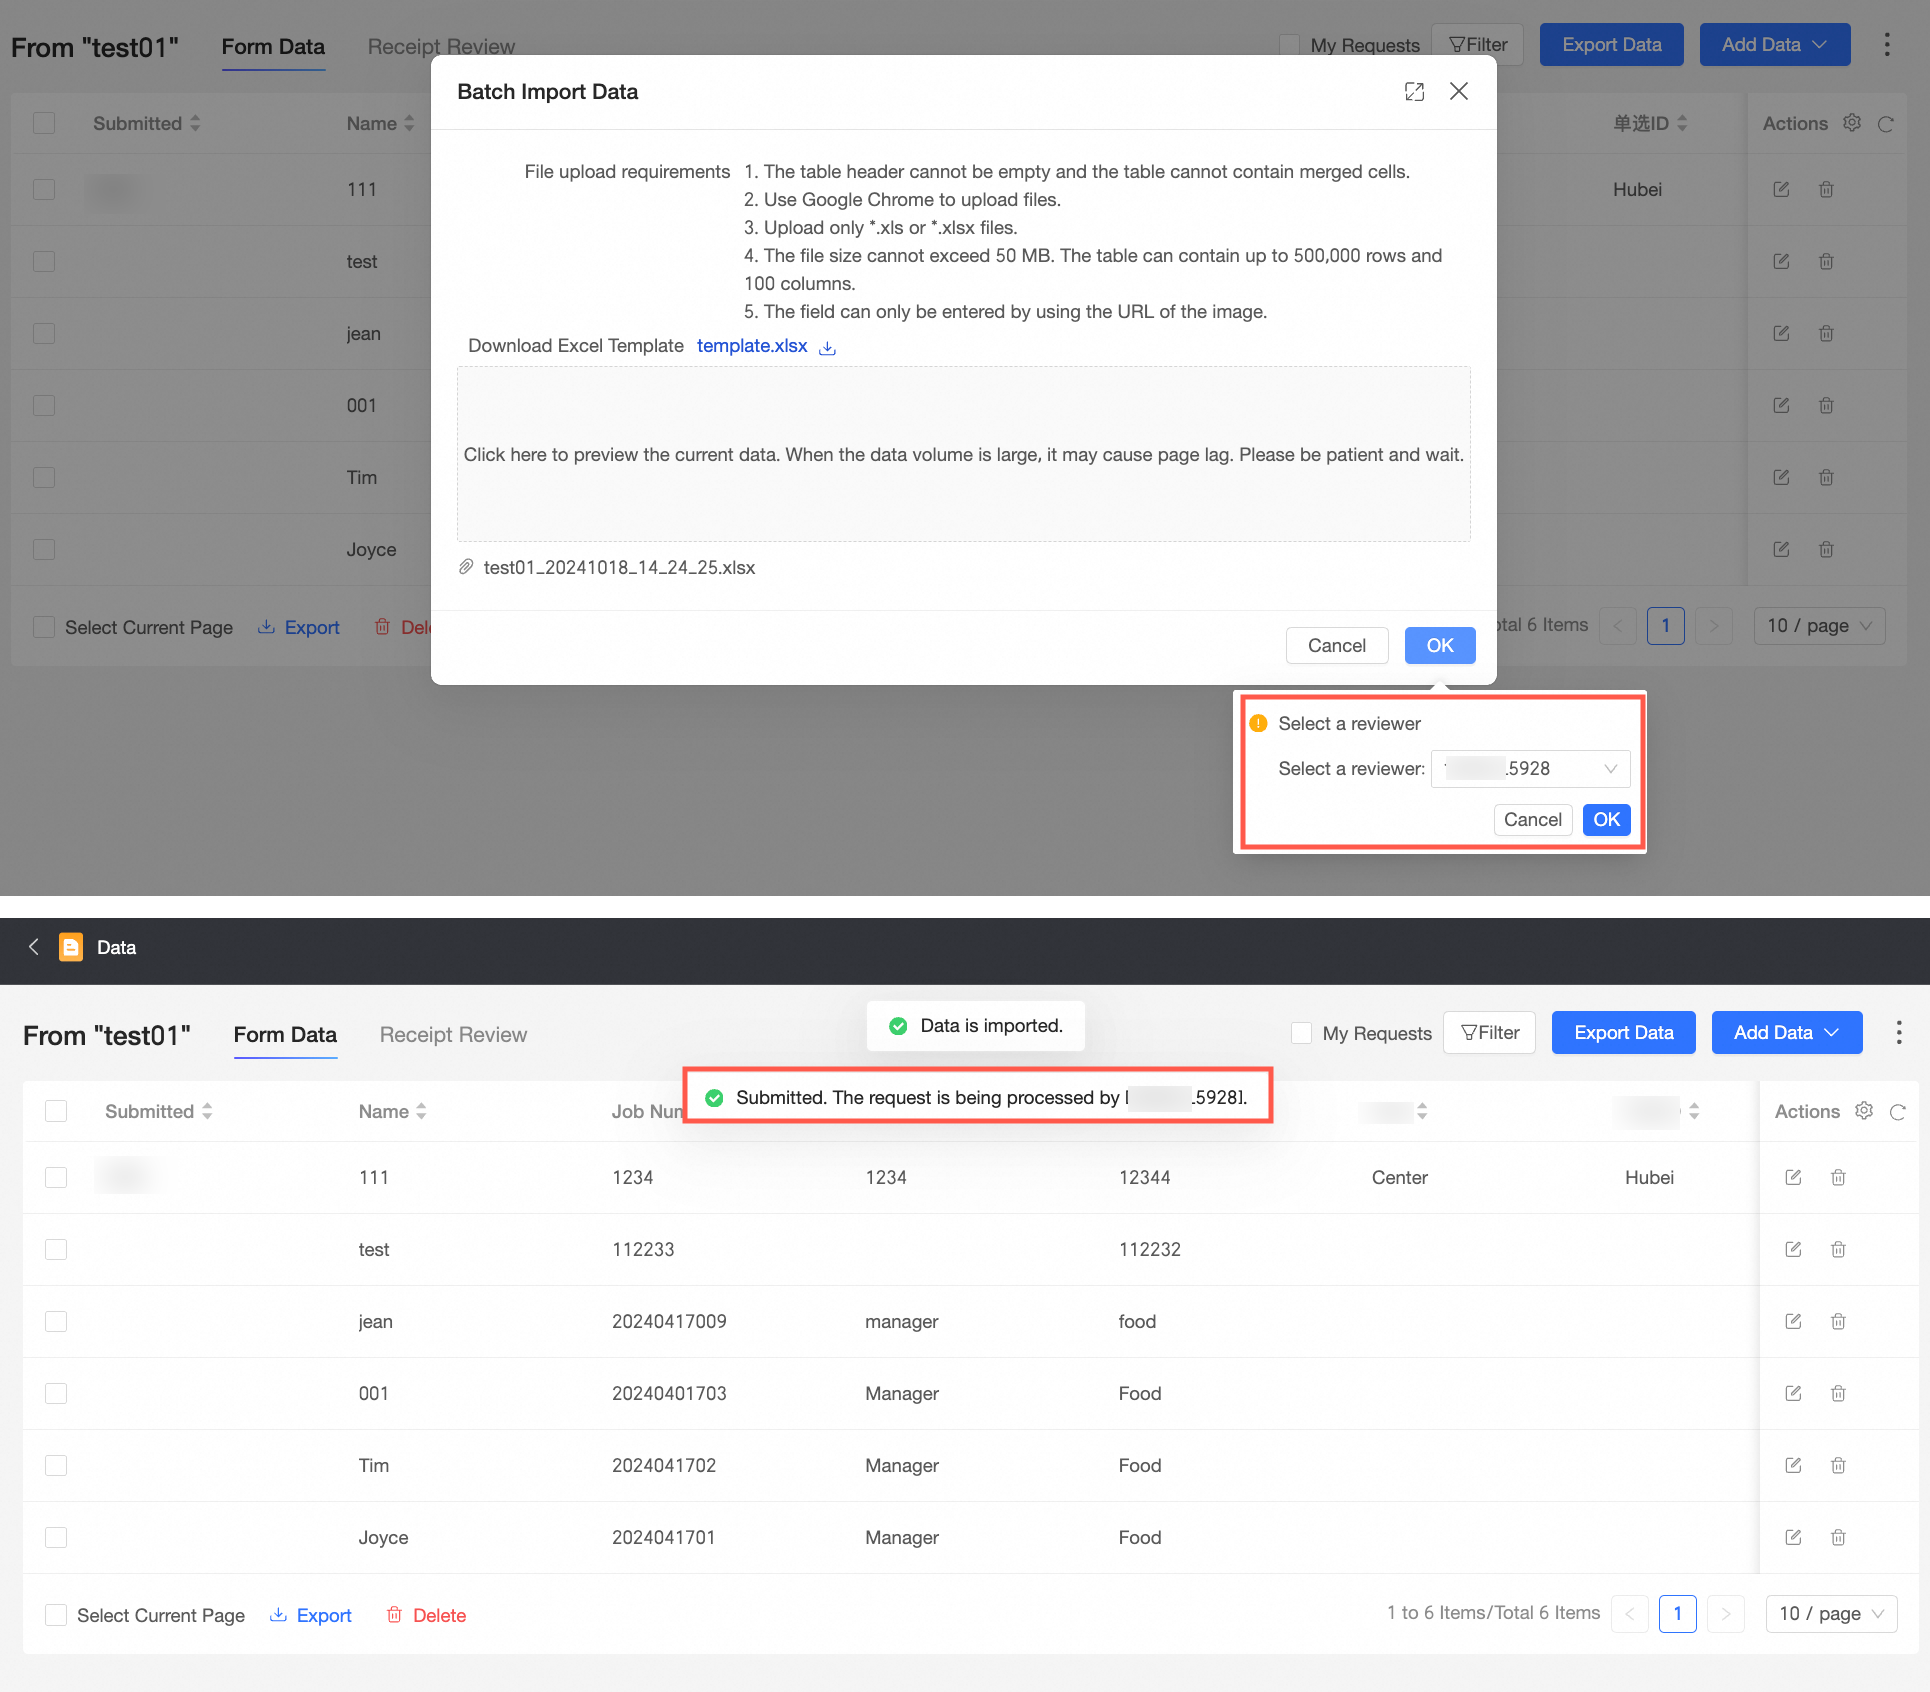
After the data is submitted, you are redirected to the approval page where you can view the approval information. For more information, see Entry approval.
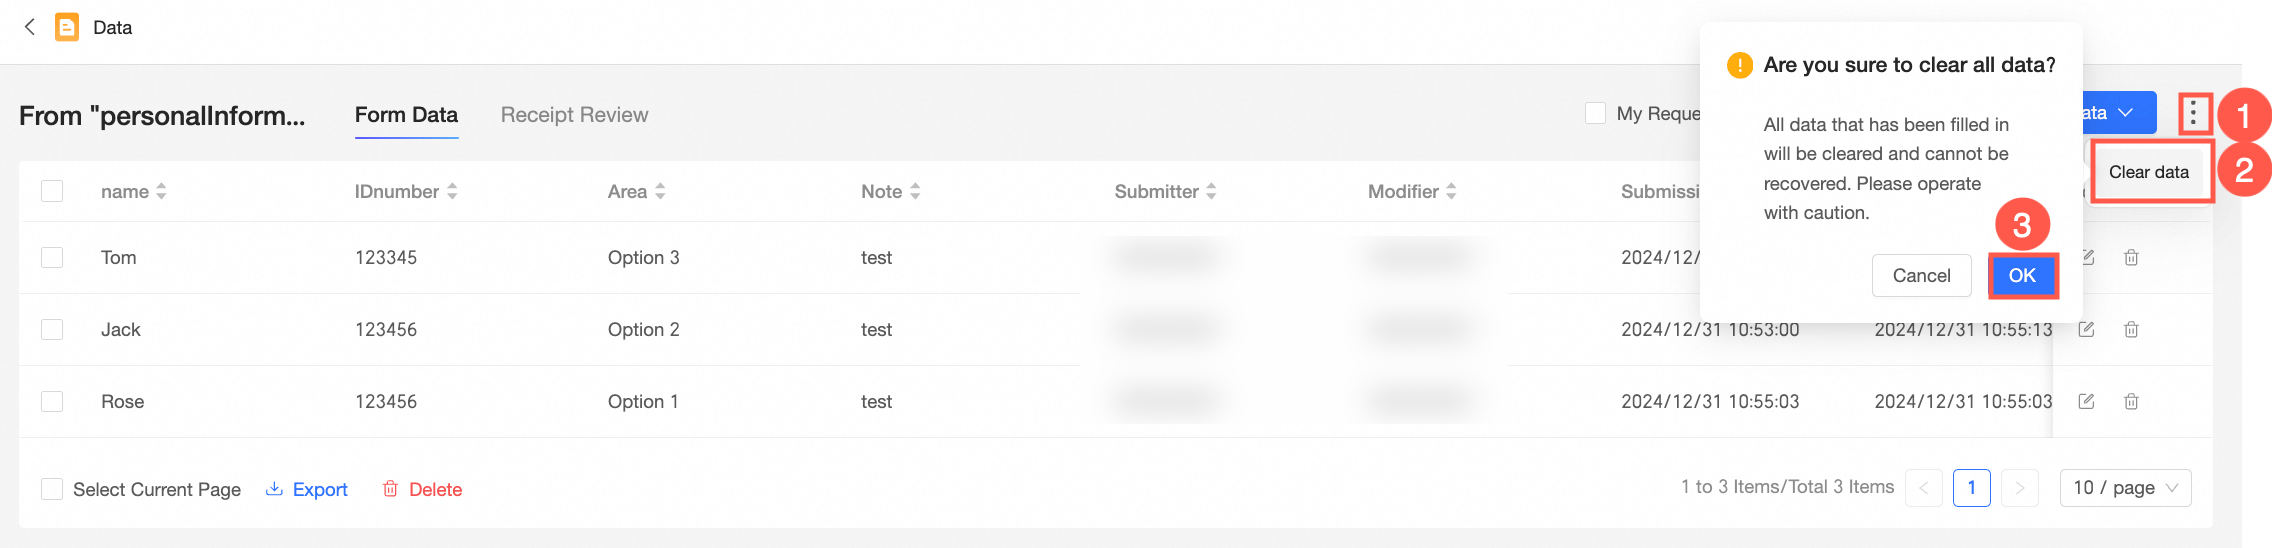
Clear data
On the Data Management page, click Clear Data.
In the confirmation dialog box that appears, click Confirm to clear all data.
Export data
On the Data Management page, click Export Data.
On the Export page, configure the following parameters.
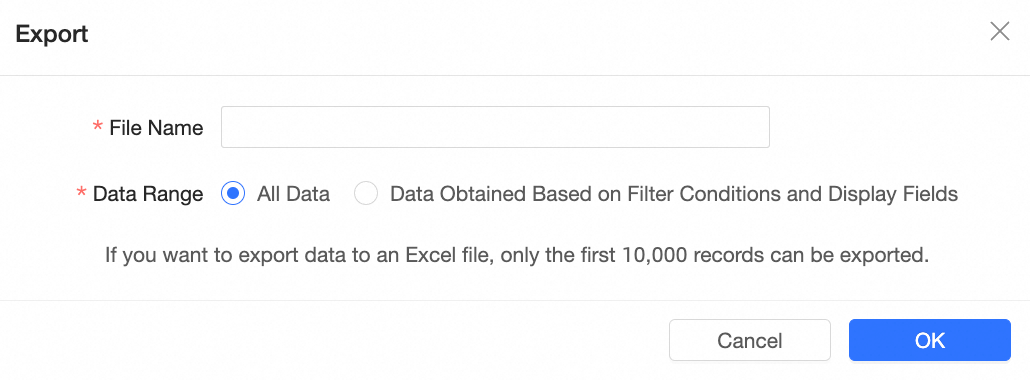
Export Name: Enter a custom name for the exported Excel file.
Import Content: Supports two export scenarios:
All Data: Exports all data records. If the number of data records exceeds 10,000, only the first 10,000 records are exported.
Data Filtered By Query Conditions And Display Fields: Exports only the data records that match the current query conditions and display fields.
Click OK.
Query the data in a form
On the Form Data tab of the Data Management page, click Filter, and select Submitter, Modifier, Submission Time, and Modification Time.
NoteYou can filter by hour, minute, and second for Submission Time and Modification Time.
Click Query.

Reset filters
You can use the reset feature to clear all filter criteria at once.
On the Data Management page, go to the Form Data tab.
Click Reset to clear the content in the filters.

Edit filters
You can edit the filters to configure which filter fields are displayed.
On the Form Data tab of the Data Management page, click the
 icon.
icon.In the Edit Filters list, you can perform the following operations:
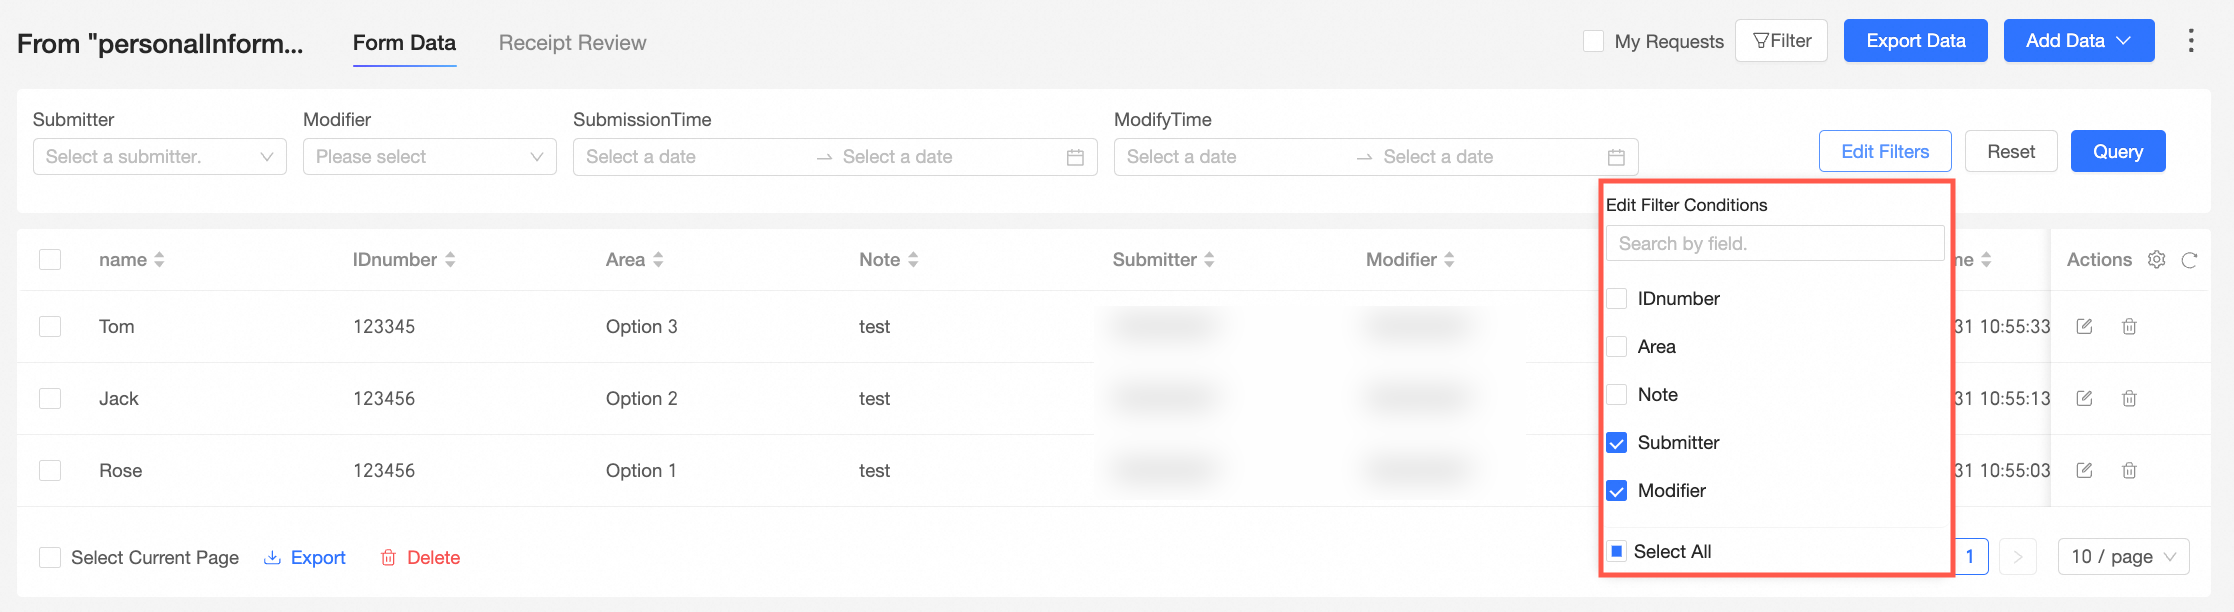
Click Select All to display all filters.
Select the filters that you want to display.
NoteSubmitter, Modifier, Submission Time, and Modification Time are selected by default.
Set display fields
You can set the fields that you want to display in the data form.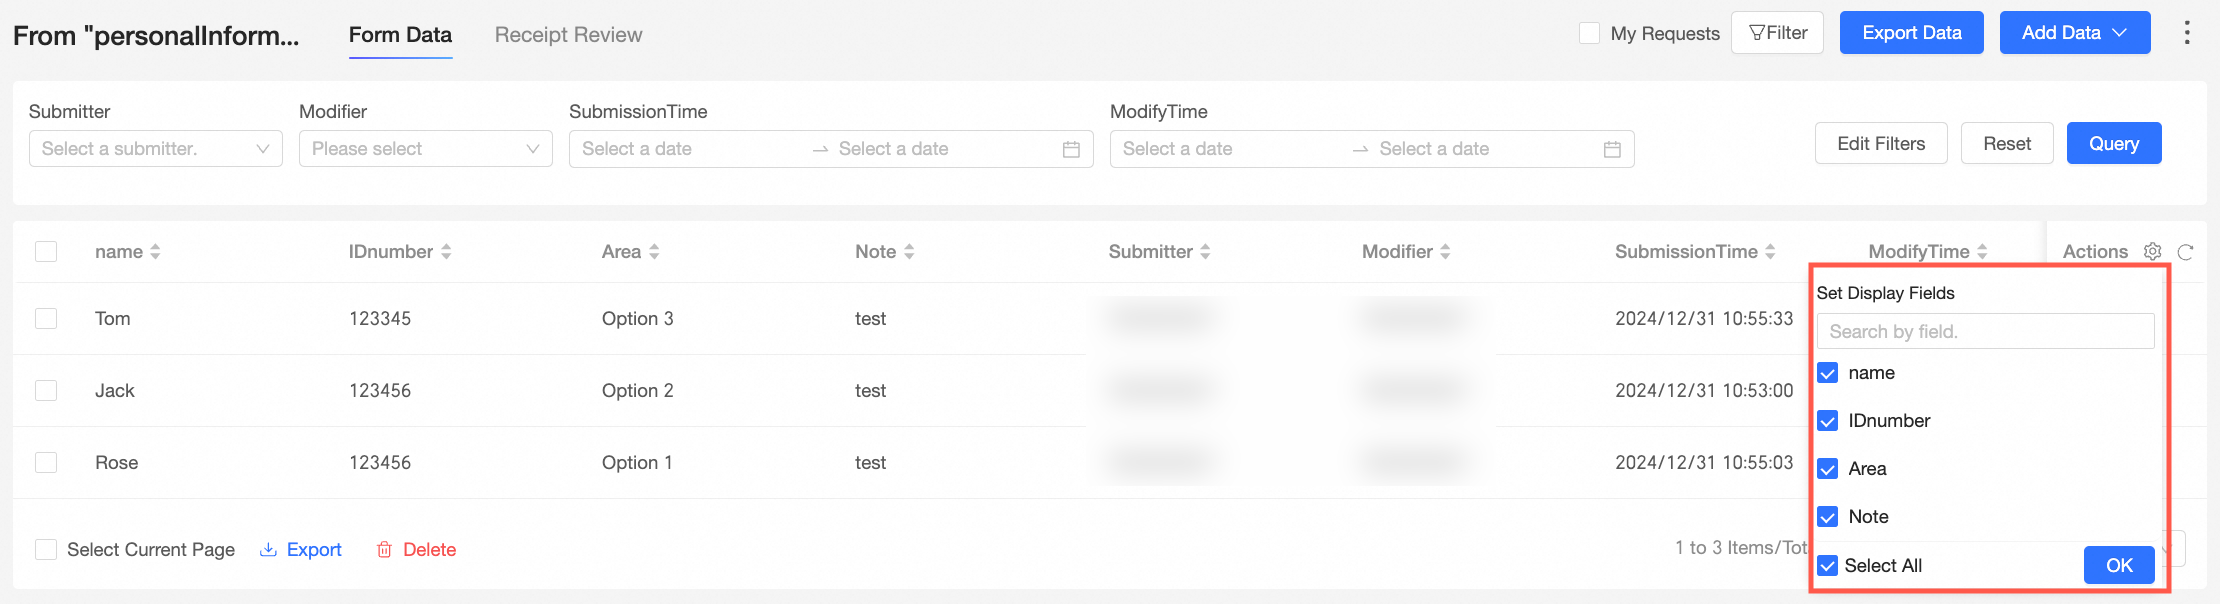
On the Data Management page, on the Form Data tab, click the
 icon.
icon.In the Set Display Fields list, you can perform the following operations:
Click Select All to display all fields.
NoteBy default, all fields are displayed.
Clear the check box next to a field to hide it from the data form.
Edit data in a form
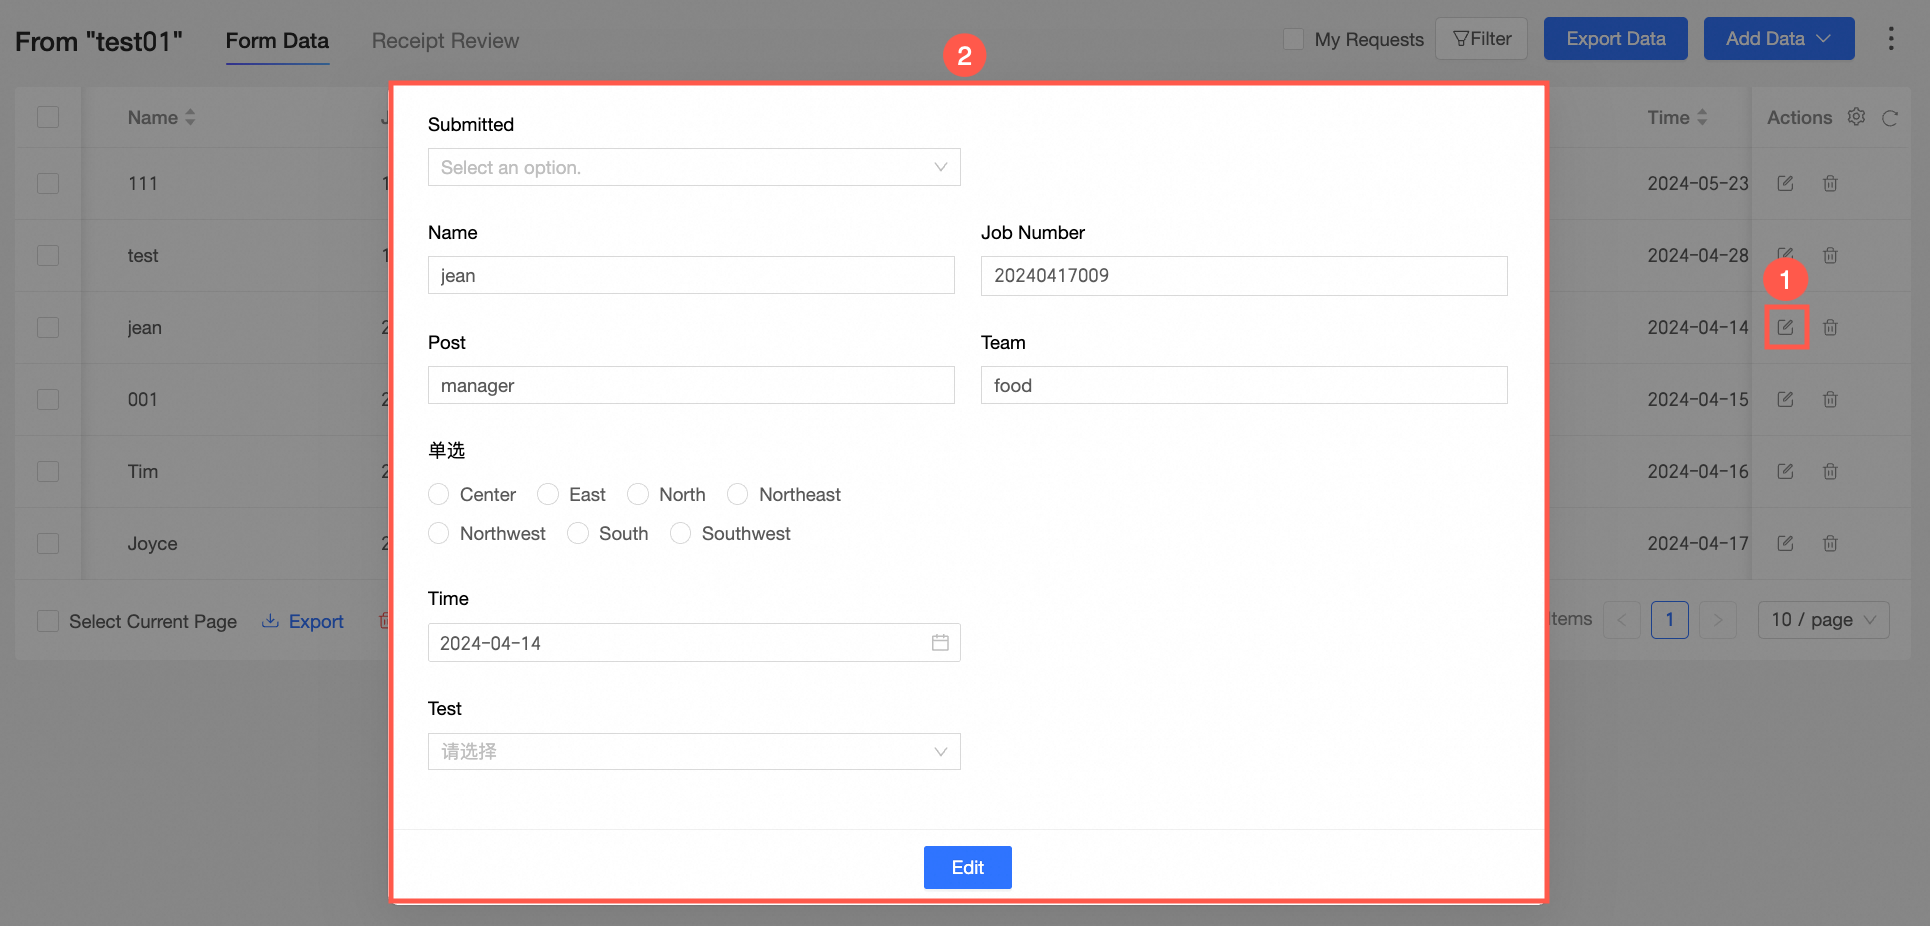
On the Form Data tab of the Data Management page, find the target record and click the
 icon in the Actions column.
On the Edit Data Form page, make the changes and click Modify.
(Optional) After you edit the data, you can view the related operation logs. For more information, see View operation logs.
Export data from a form
You can select the data that you want to export.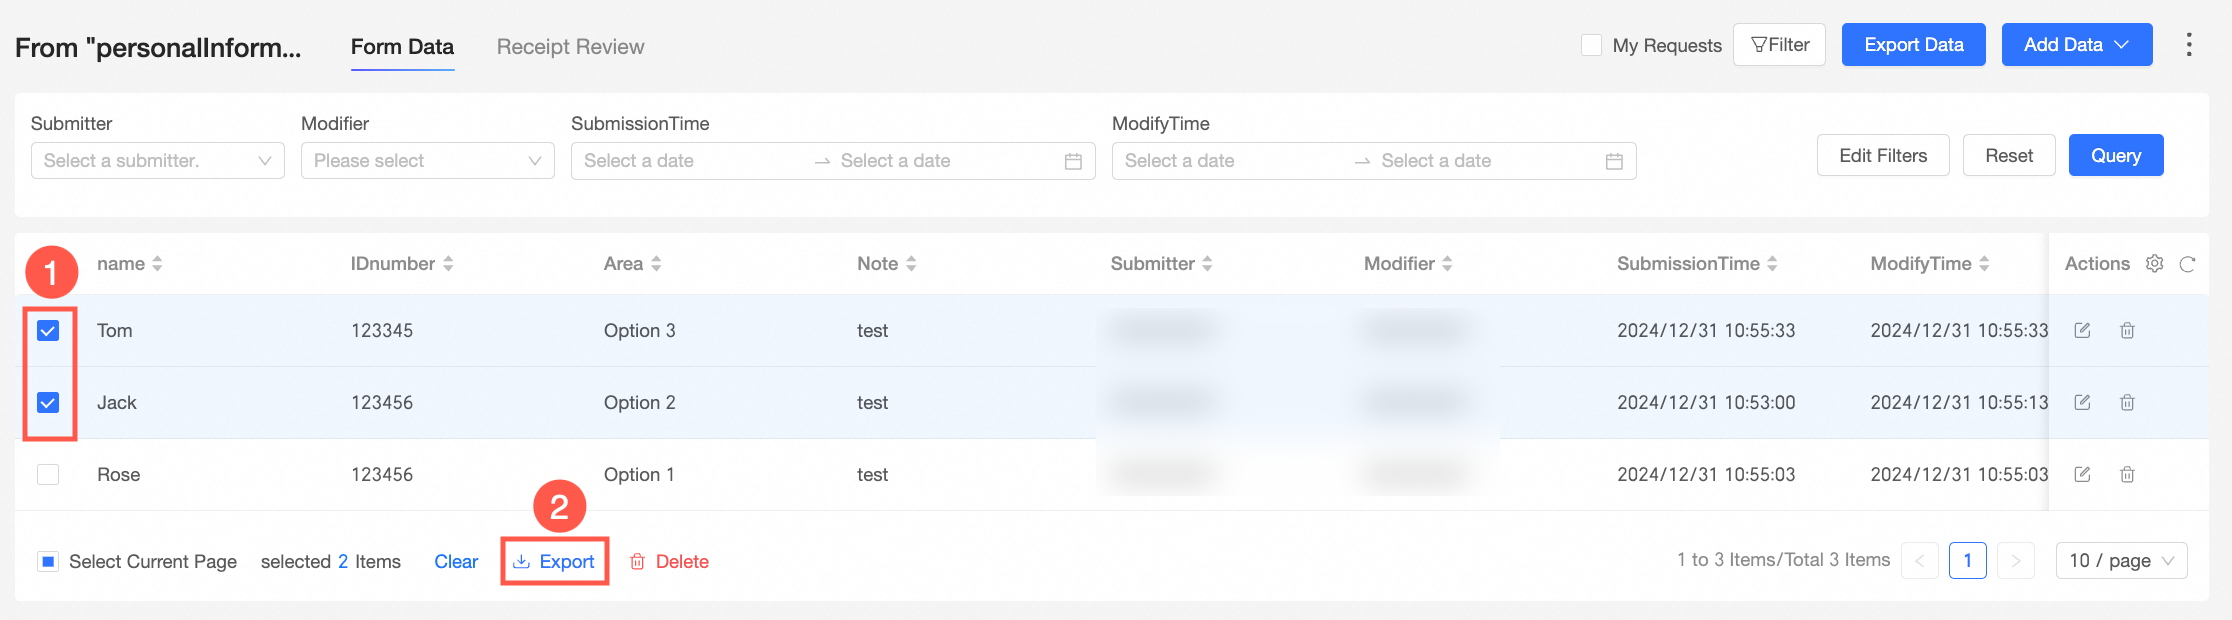
On the Data Management page, on the Form Data tab, find and select the target data from the form list.
Click the
 icon to export the selected data.
You can also select all data and click the
icon to export all data.
Delete data from a form
You can select the data that you want to delete.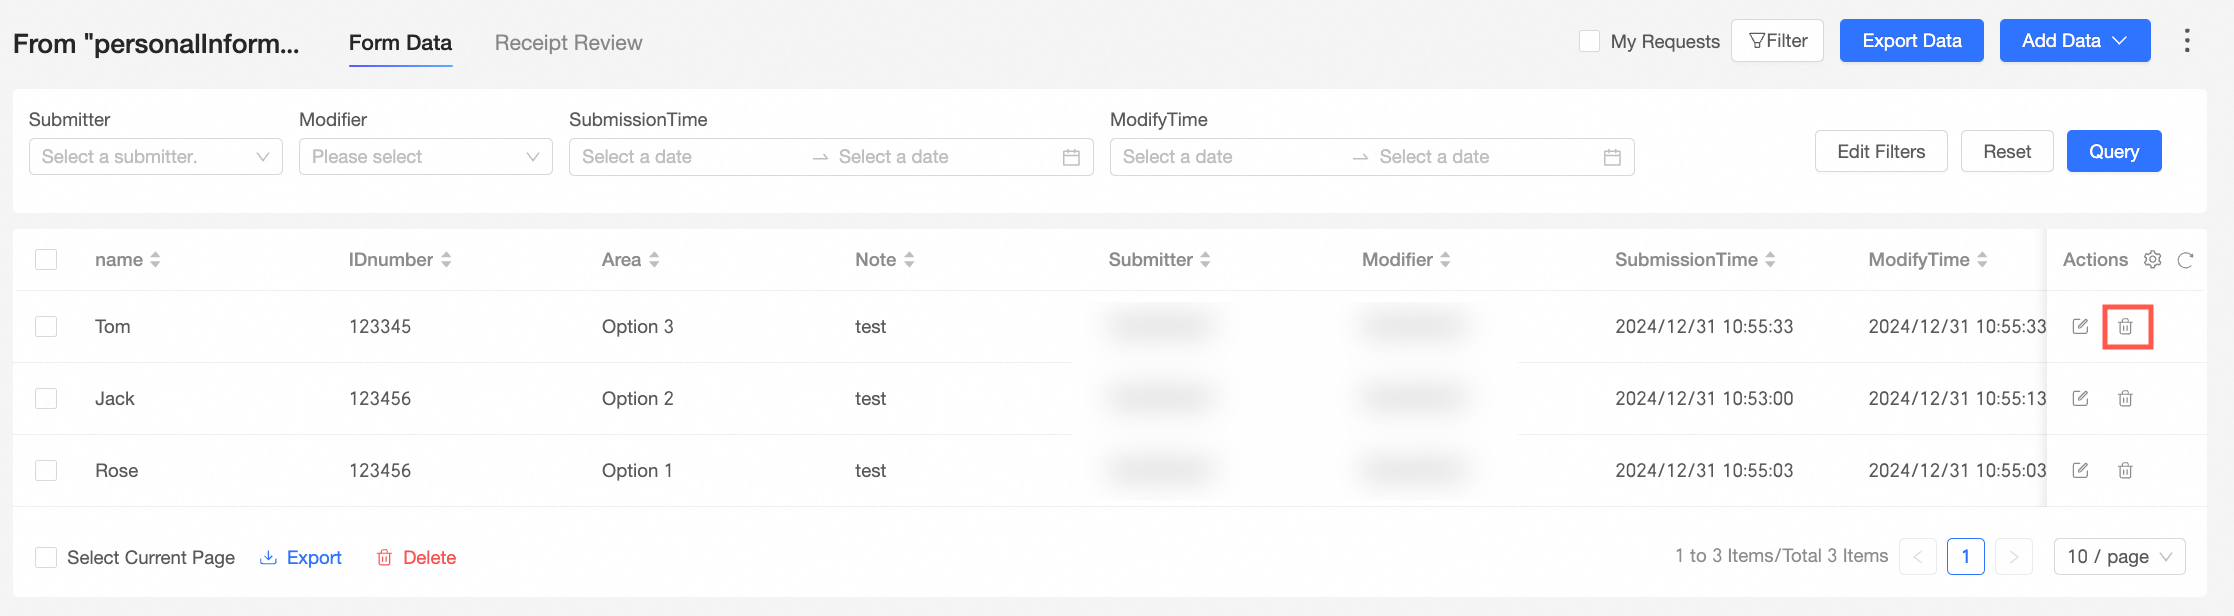
On the Data Management page, on the Form Data tab, find the data you want to delete from the list and click the
 icon in the **Operation** column.
You can also select multiple data records that you want to delete and click the
 icon to delete all the selected data.
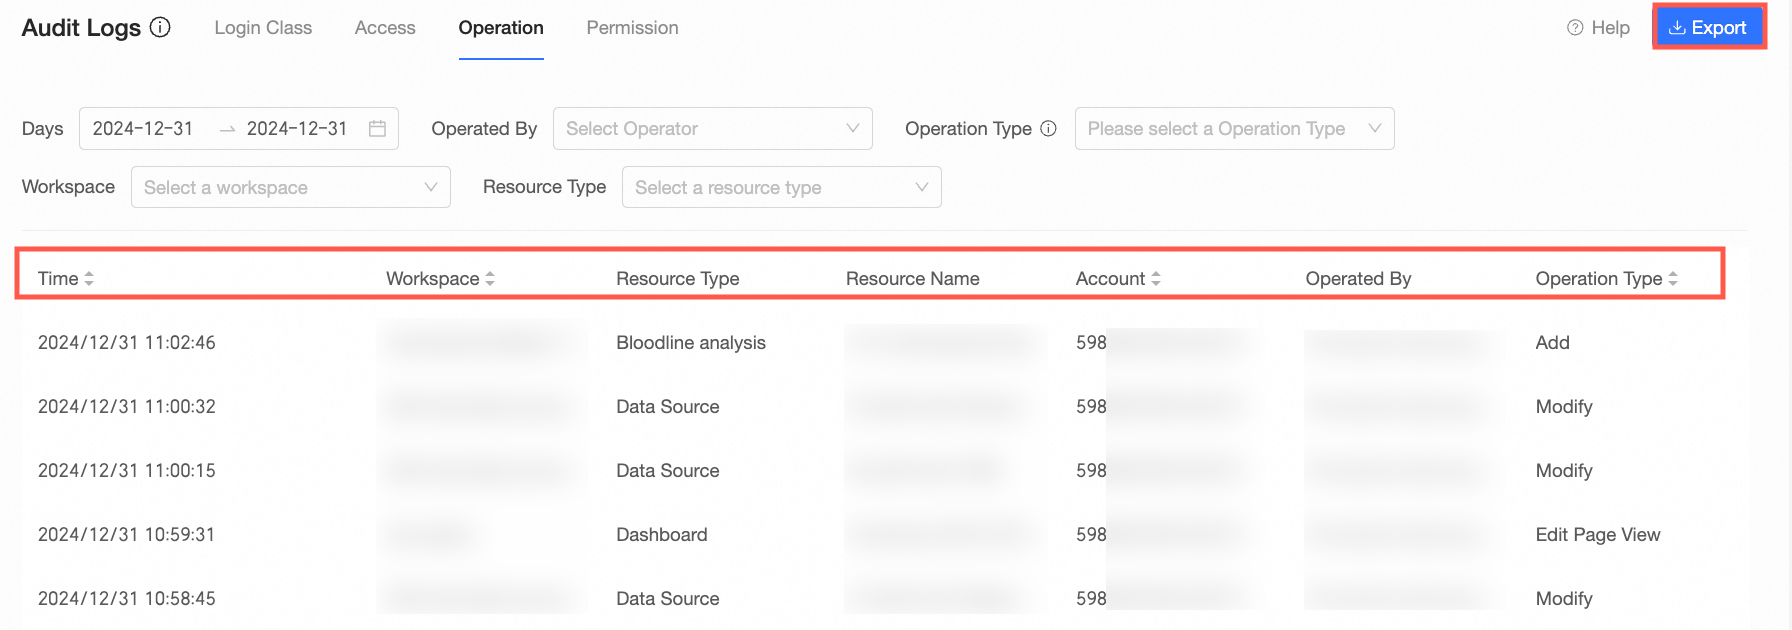
View operation logs
After you perform operations such as adding a single data record, importing multiple data records at a time, or editing data in a form on the Data Management page, you can view the operation logs for the data form by navigating to Organization Management > Audit Log. The following steps describe how to view operation logs:
On the Organization Management page, choose Artificial Intelligence for IT Operations > Audit Log from the navigation pane on the left.
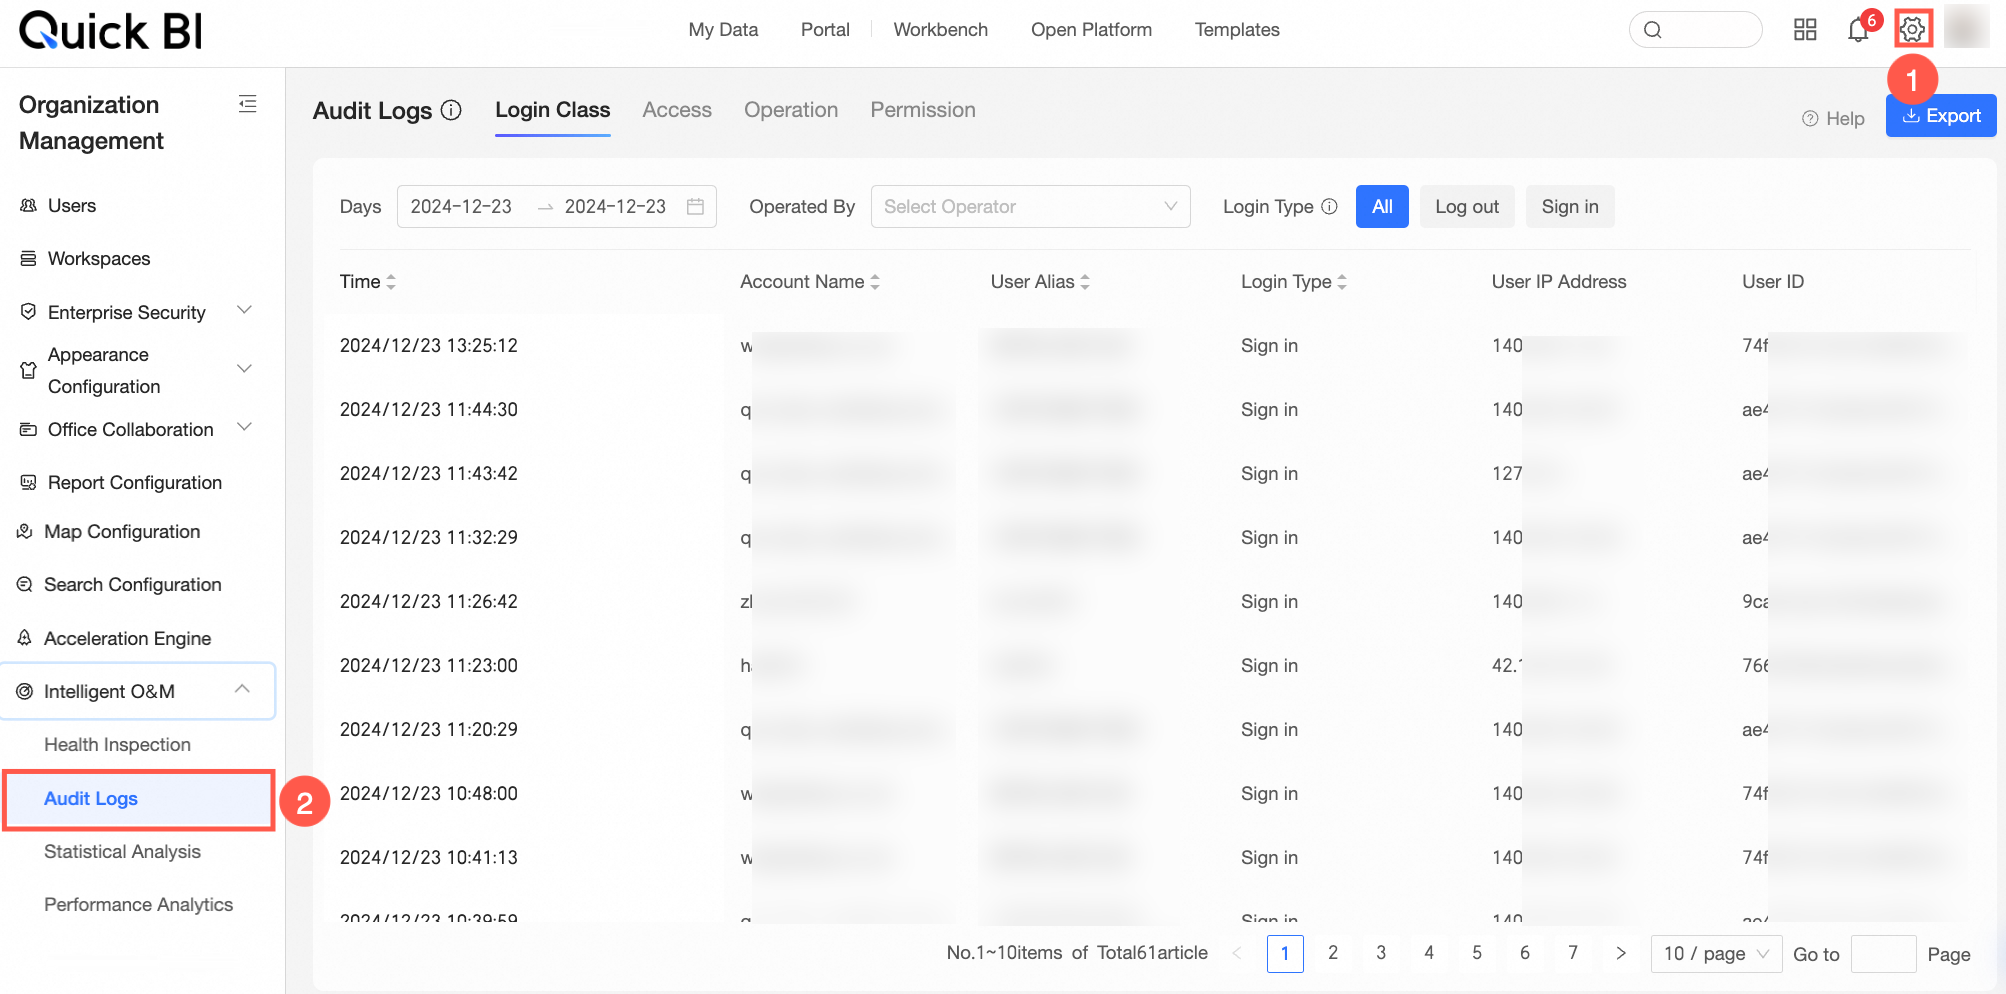
Switch to the Operation Type tab, specify the date range, resource type, workspace, and other filter conditions as needed, and then click Query.

The operation log list displays information such as the operation time, operator, and operation type. You can also click the Export button in the upper-right corner to export all operation logs on the current page.