Create a data source to connect Quick BI to a Huawei Cloud PostgreSQL database.
Prerequisites
-
You have created a Huawei Cloud PostgreSQL database.
-
You have the username and password for the Huawei Cloud PostgreSQL database.
Limitations
This data source supports PostgreSQL 8.2 and later.
Procedure
-
Add IP addresses to the whitelist.
To connect to the Huawei Cloud PostgreSQL database, add the Quick BI IP addresses to the database whitelist.
-
Create the data source.
-
Log on to the Quick BI console.
-
Follow these steps to add the data source:
-
Go to the data source creation page. For more information, see Create a data source.
-
On the Huawei Cloud Database tab, select the PostgreSQL data source.

-
-
-
In the Configure Connection dialog box, set the following parameters.
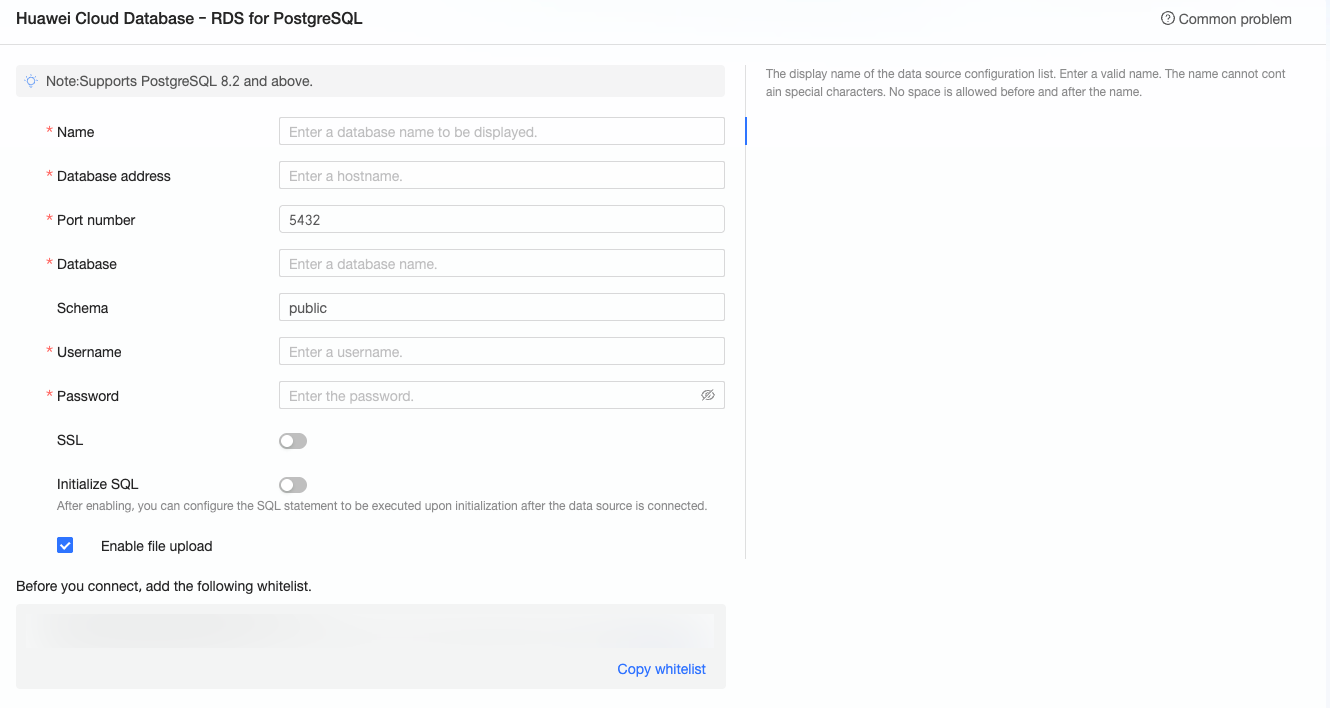
Parameter
Description
display name
The display name of the data source in the Quick BI console.
Do not use special characters or leading/trailing spaces.
database address and port
The public IP address of the PostgreSQL instance. To obtain this address, log on to the Huawei Cloud console, go to the basic information page of the instance, and bind an elastic IP address. You can then find the address on the elastic IP address page.
database
The name of the database to connect to.
schema
The name of the schema in the PostgreSQL database.
username and password
The username and password for the PostgreSQL database.
SSL
Select this option to enable SSL encryption for data in transit.
initial SQL
SQL statements that run automatically after a connection is established.
Only SET statements are allowed. Separate multiple statements with semicolons (;).
Enable file upload
Enables file uploads to this data source.
-
Click test connection to verify the connection parameters.

-
If the connection test is successful, click OK to add the data source.
Next steps
After the data source is created, you can build datasets for analysis.
-
To add data tables or use custom SQL from the PostgreSQL database, see Create a dataset.
-
To add visual charts and analyze data, see Create a dashboard and Overview of visual charts.
-
To perform a drill-down analysis of the data, see Step 3: Configure and display drill-down actions.