Quick BI supports DingTalk robot channels for pushing alert notifications to DingTalk groups. Create a robot channel once and reuse it across multiple metric alerts, instead of configuring the same webhook repeatedly.
Prerequisites
You have added a DingTalk robot to the target DingTalk group.
Background information
When you configure metric alerts and set the Alert Method to DingTalk Group, you must provide a Robot Webhook and Key. Rather than configuring the same robot for each metric individually, you can add an enterprise robot channel once and select it when setting up alerts.
Get the enterprise robot webhook URL
The following steps use DingTalk for PC as an example.
Preparation
-
Go to the DingTalk Open Platform to create an internal enterprise application.
-
Enter the Application Name and Application Description to create a DingTalk group push robot.
-
Click Robot and Message Push Feature and enable the robot configuration. Configure the name, icon, summary, description, and message receiving mode, and then click Publish.
Procedure
-
Select the target DingTalk group and click the
 icon in the upper-right corner.
 -
In the Group Settings panel, click Robot.

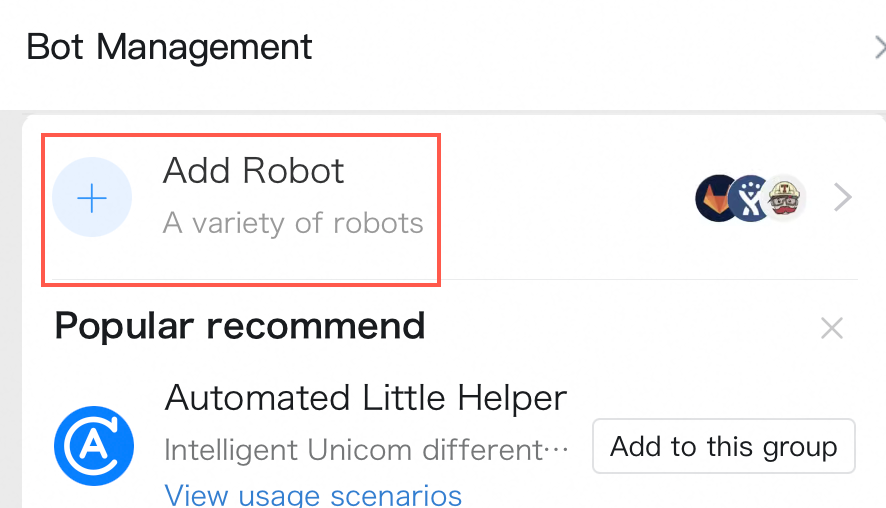
-
On the Robot Management page, click Add Robot.
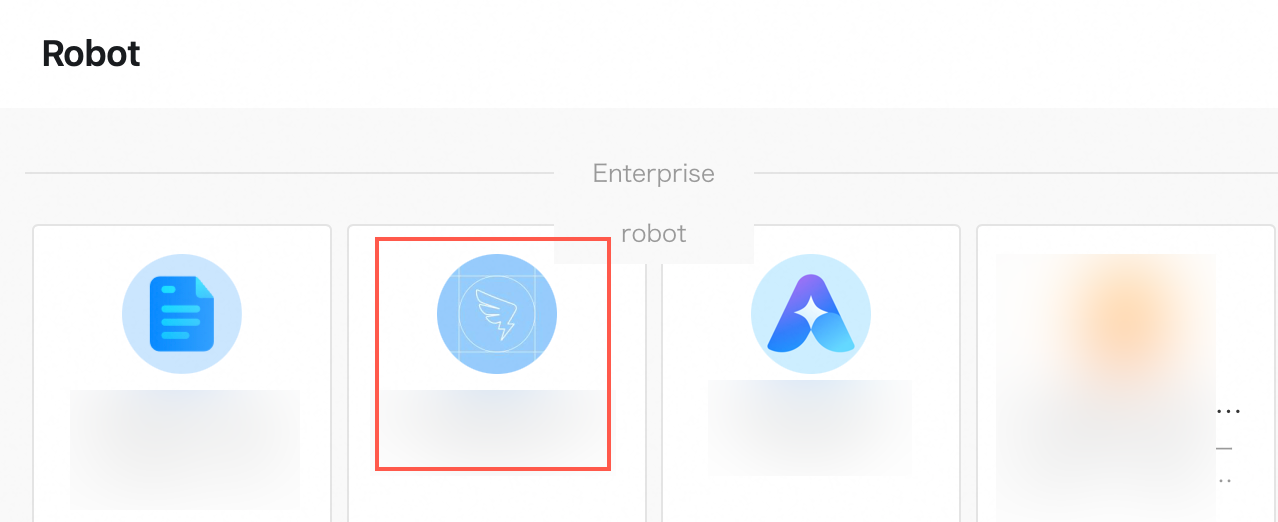
-
In the Enterprise Robot list on the Robot Management page, find the robot you created in the preparation steps. Click the robot to select it.
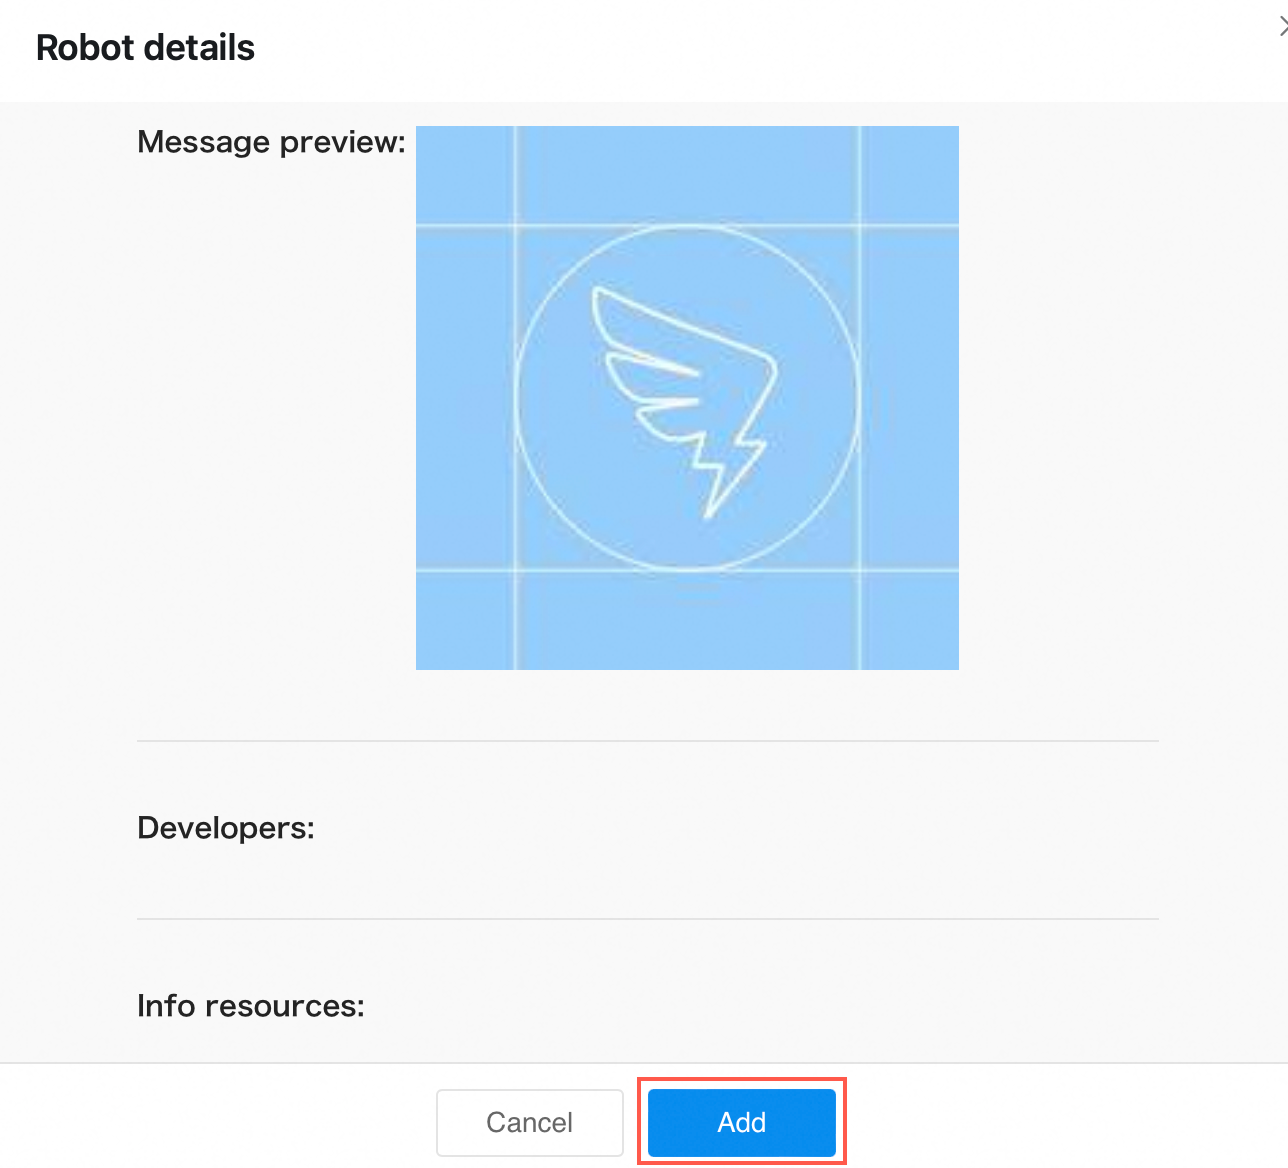
-
In the Robot Management dialog box, click Add.
-
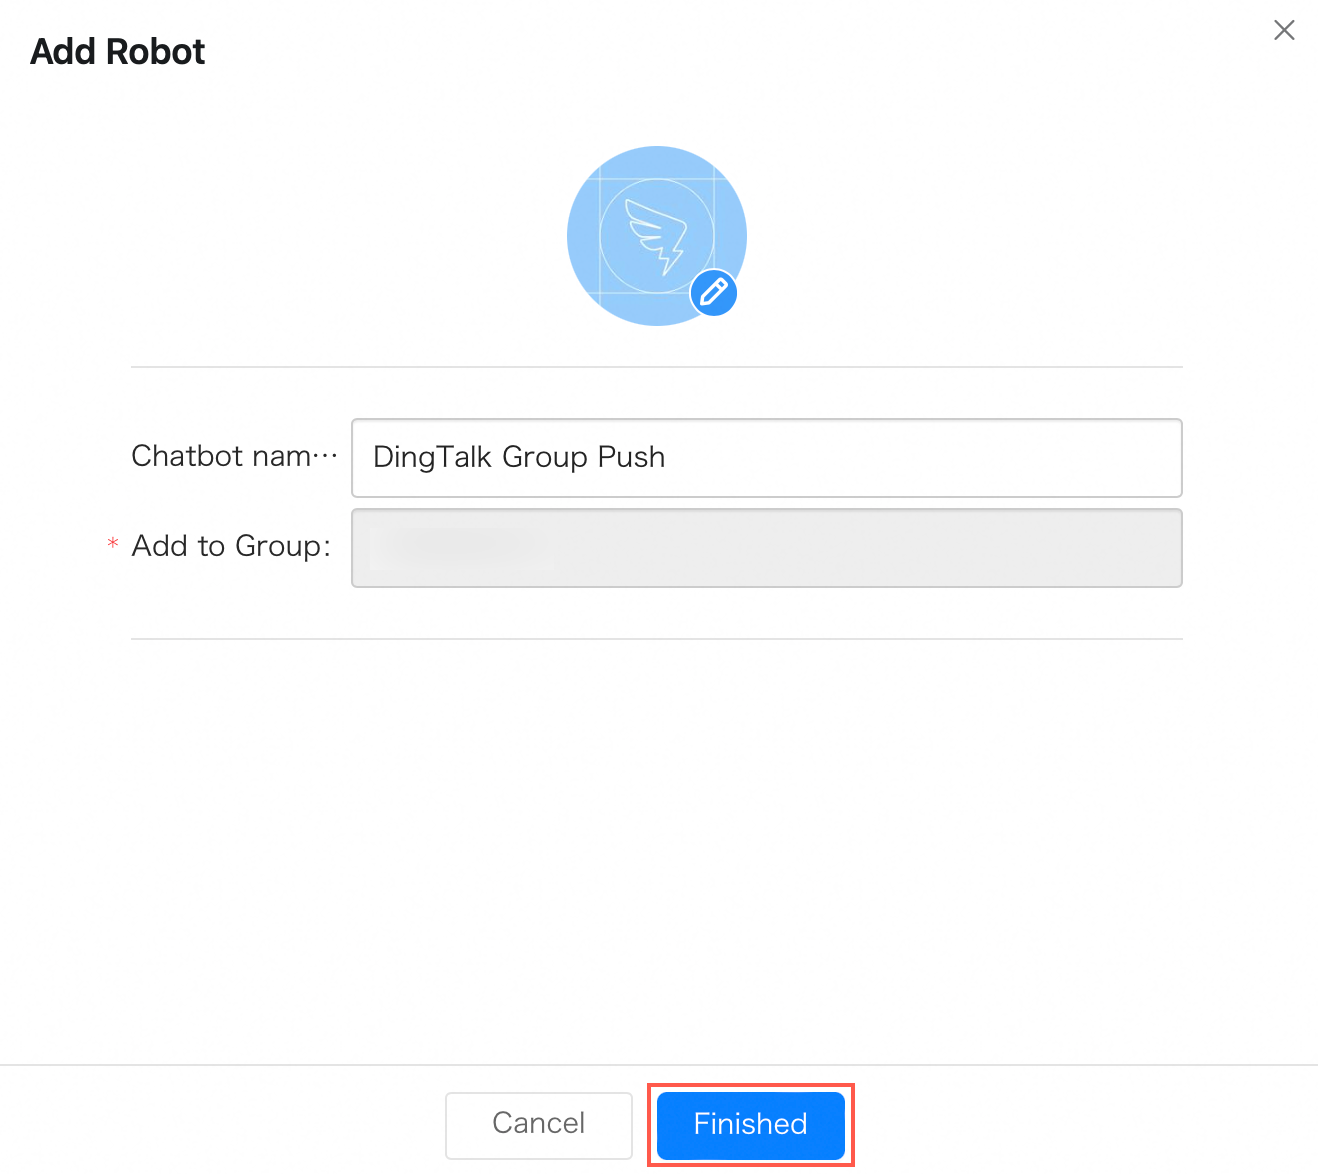
In the Add Robot dialog box, click Finish.
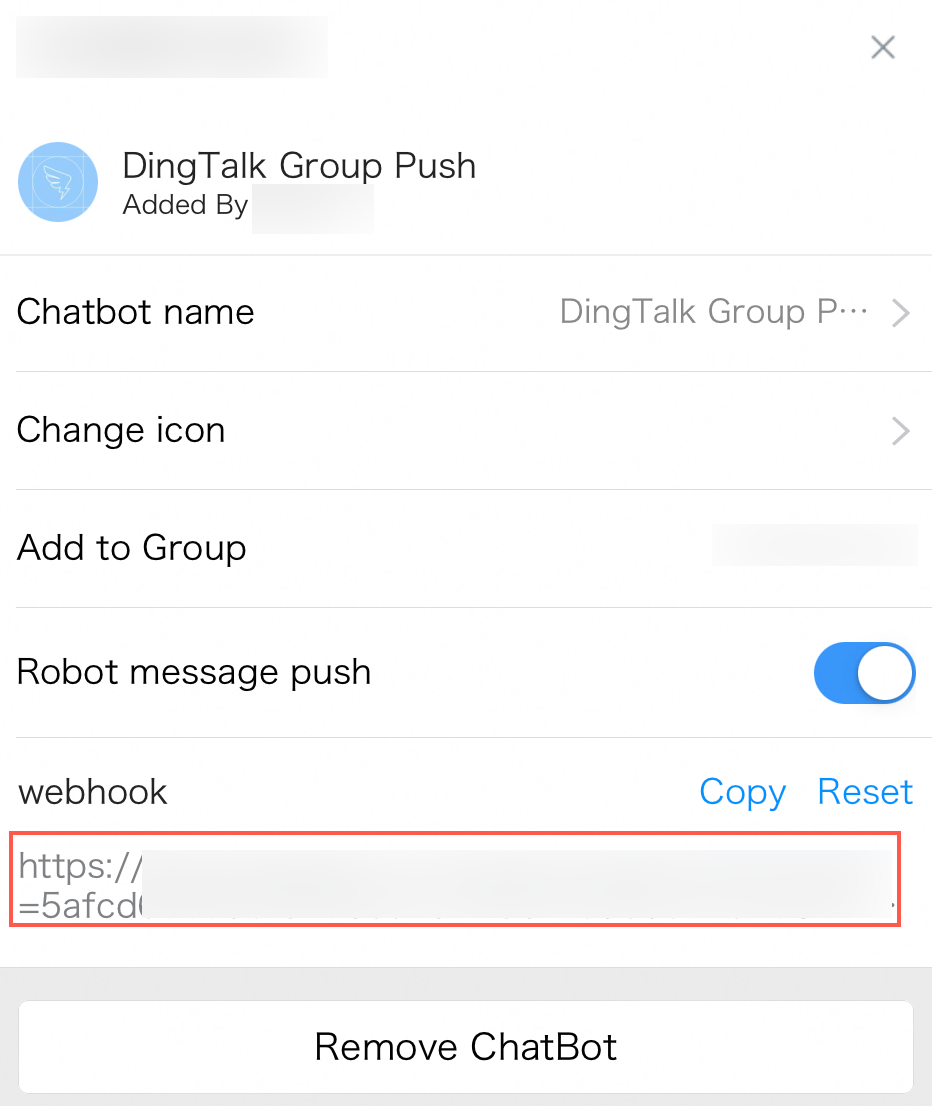
-
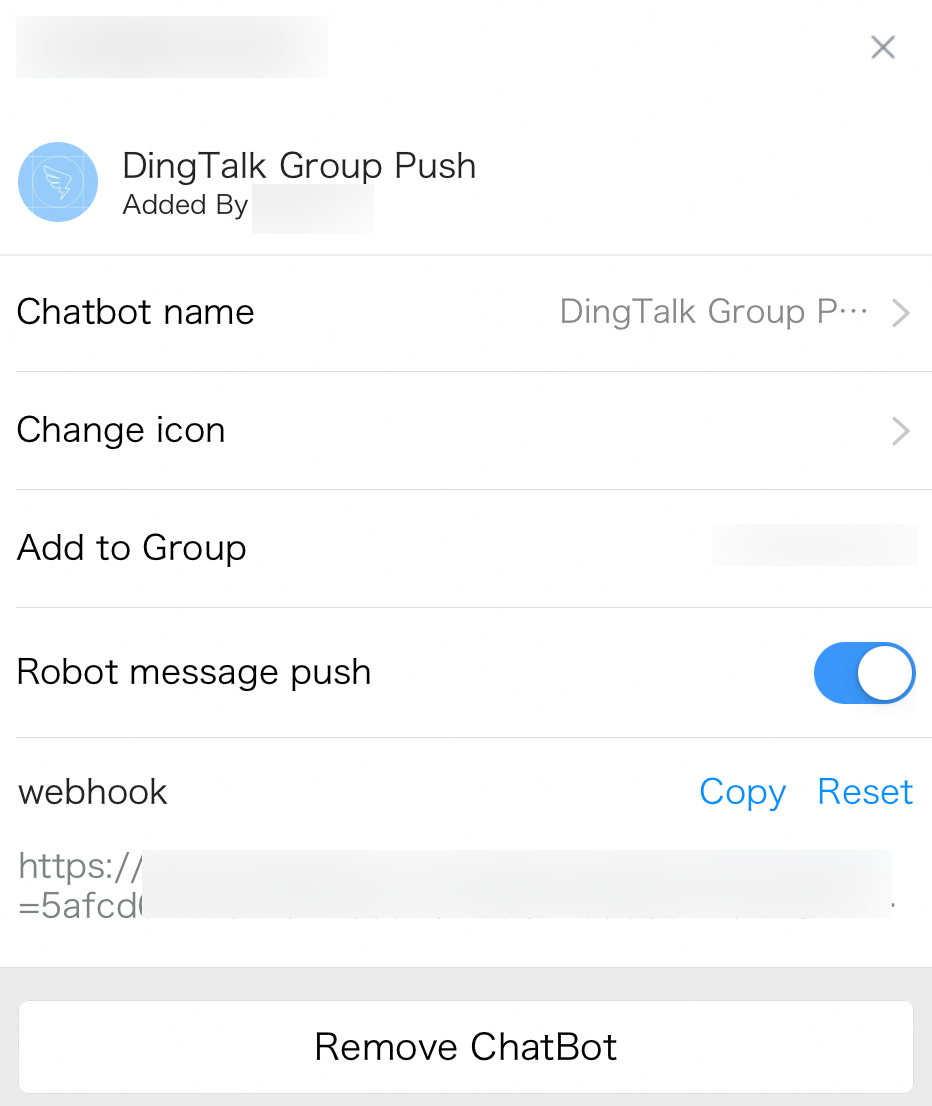
After the robot is created, you can manage it on the Robot Management page. You can enable or disable message push, copy the Webhook Link, or delete the robot.
Create a DingTalk robot channel
-
Log on to the Quick BI console.
-
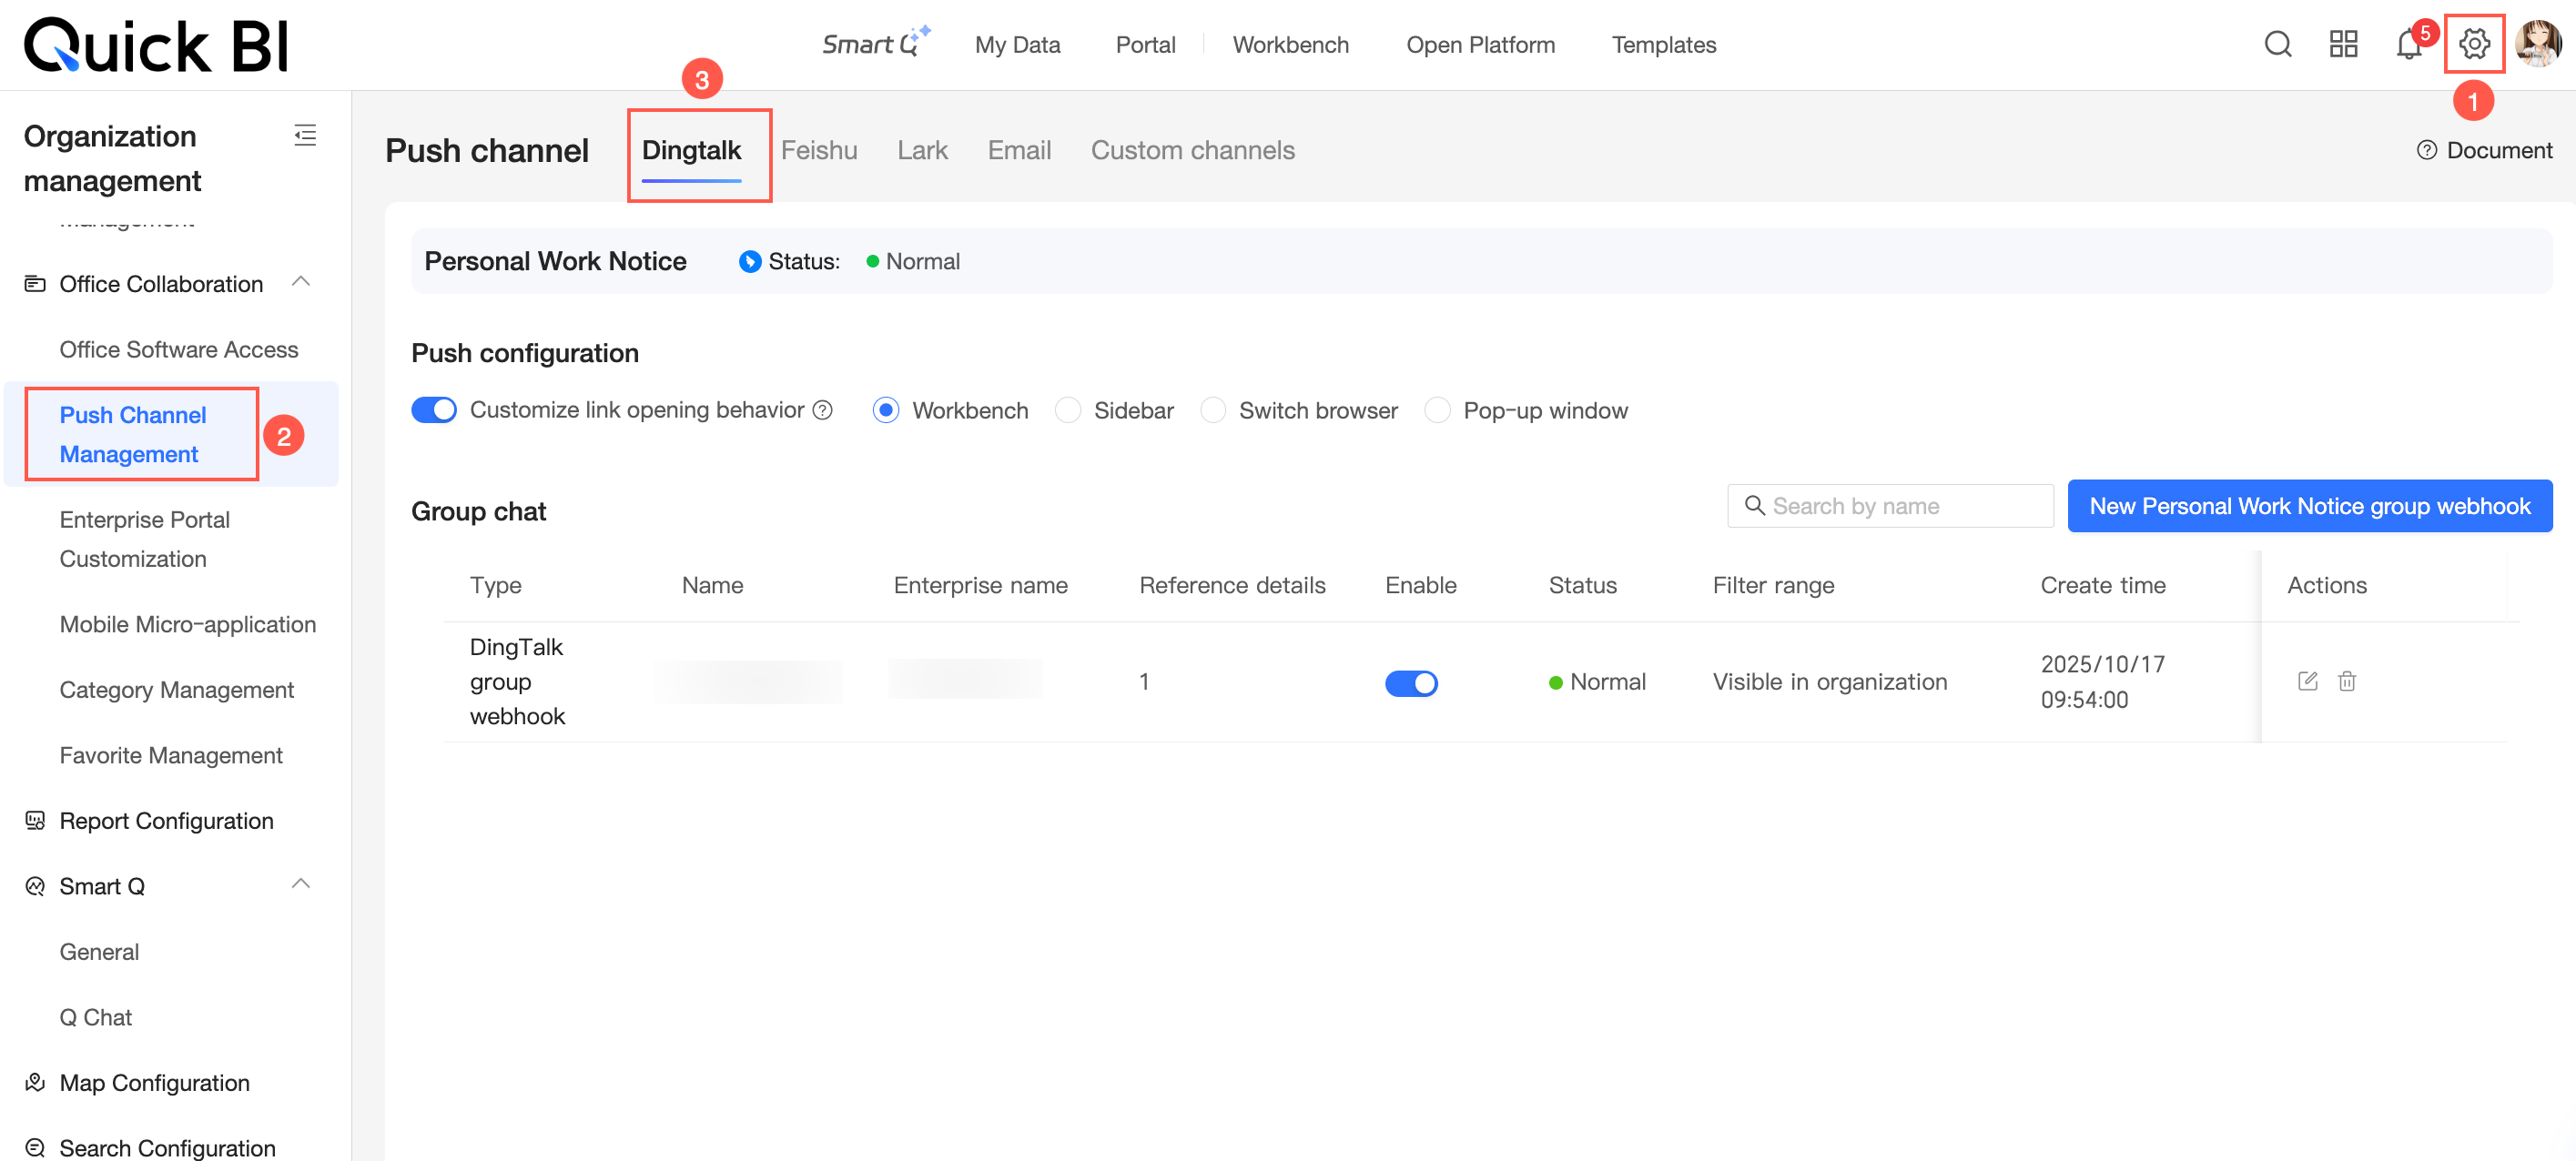
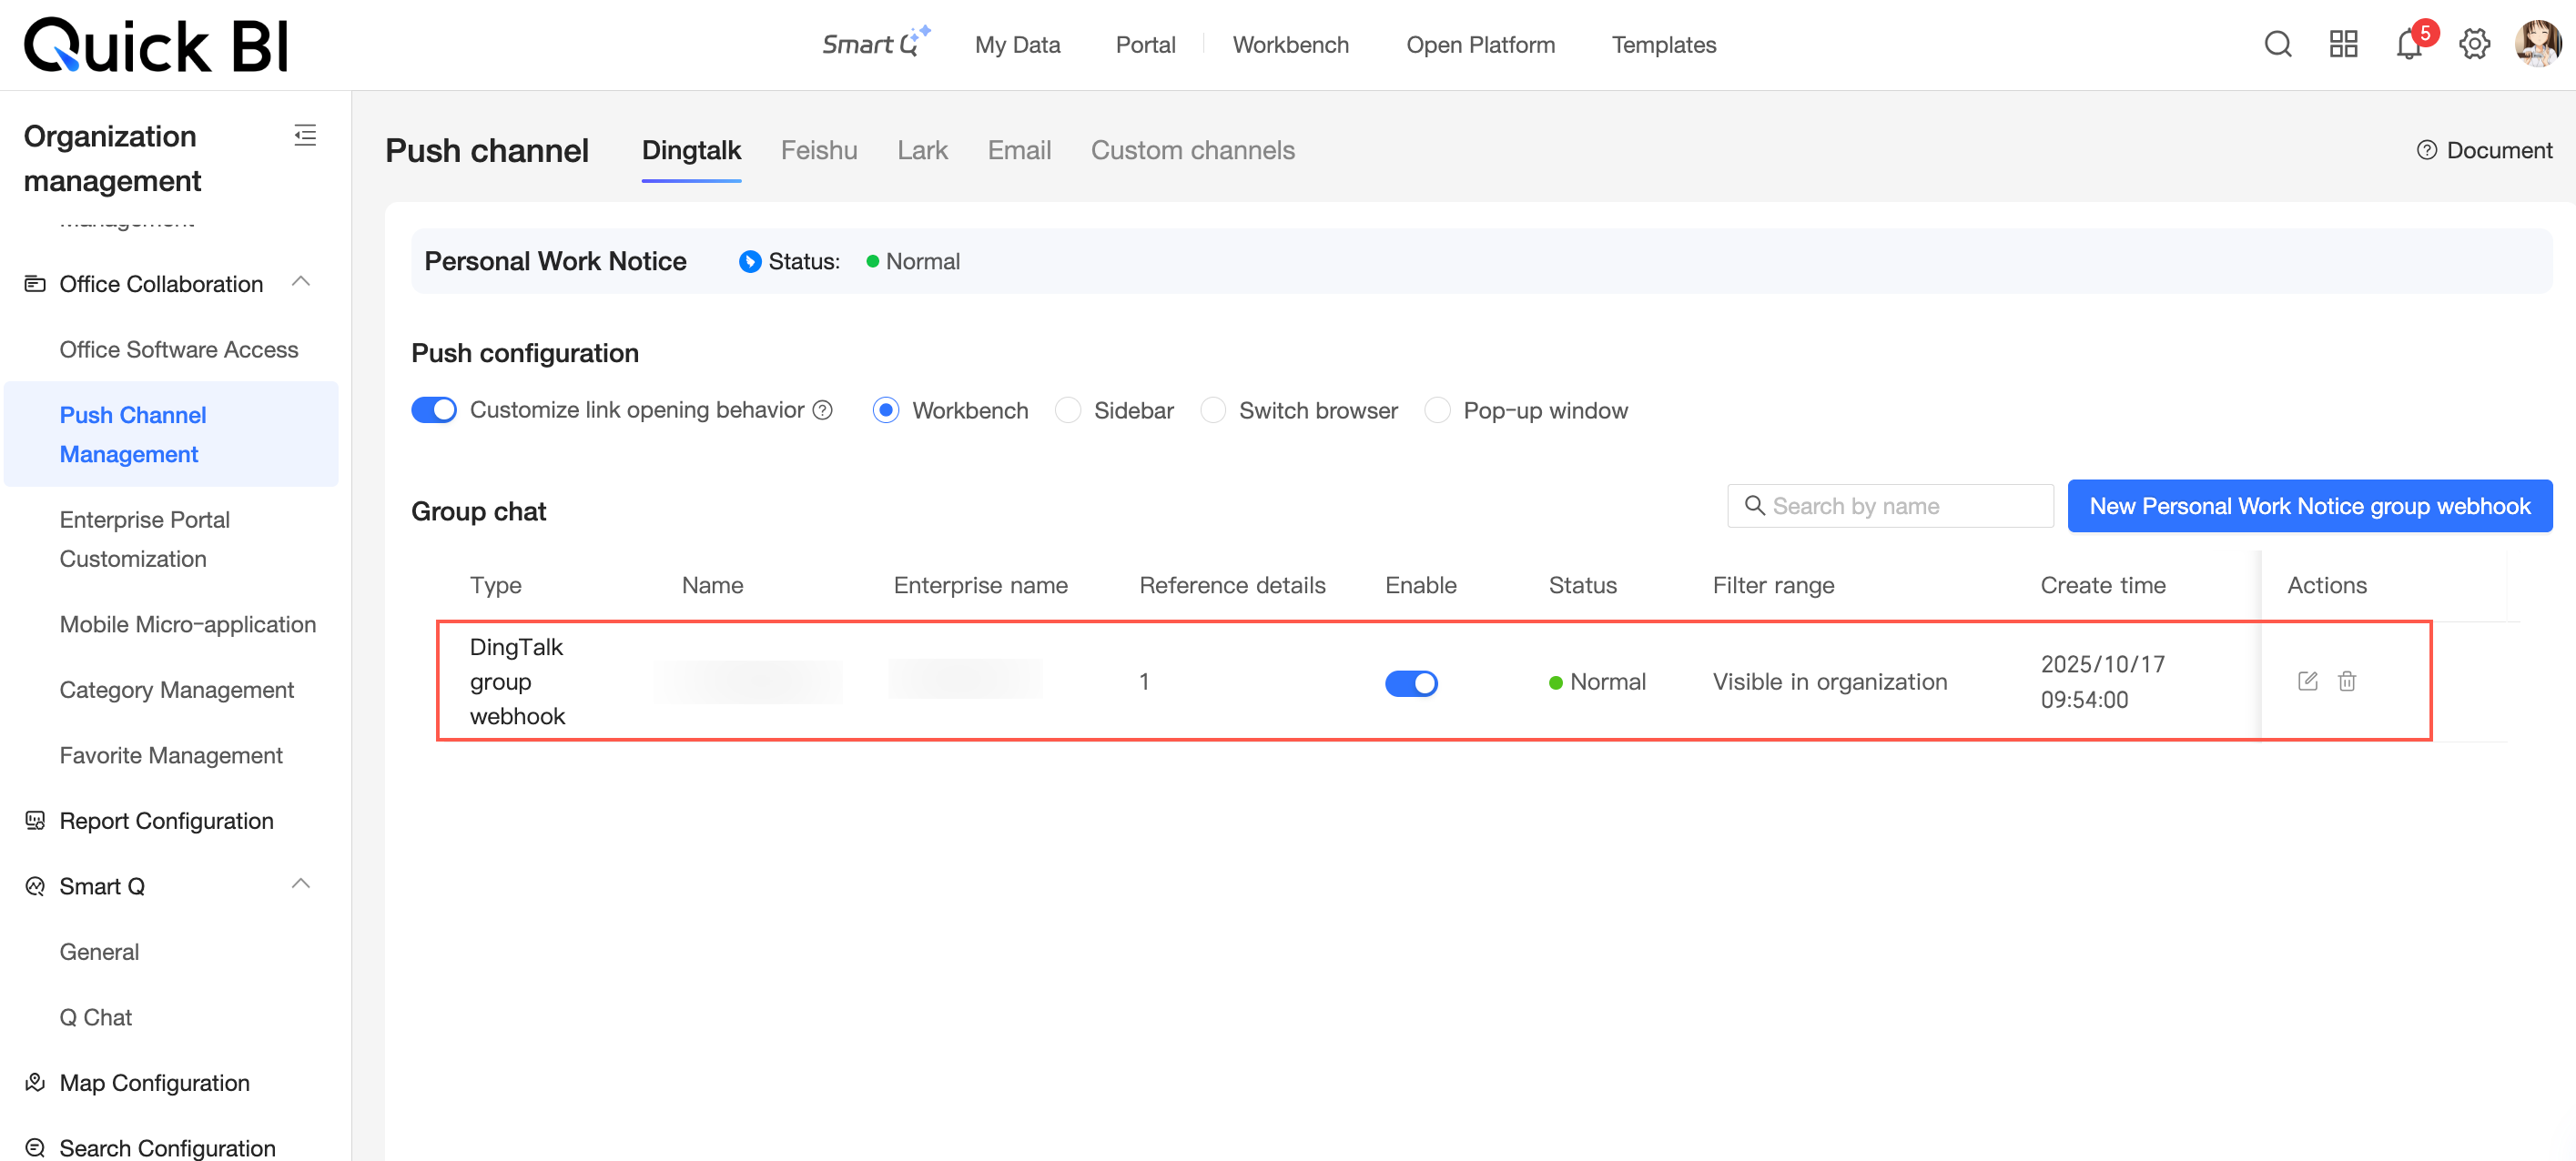
On the Quick BI home page, follow the steps in the figure to navigate to the Create DingTalk Group Webhook page.
-
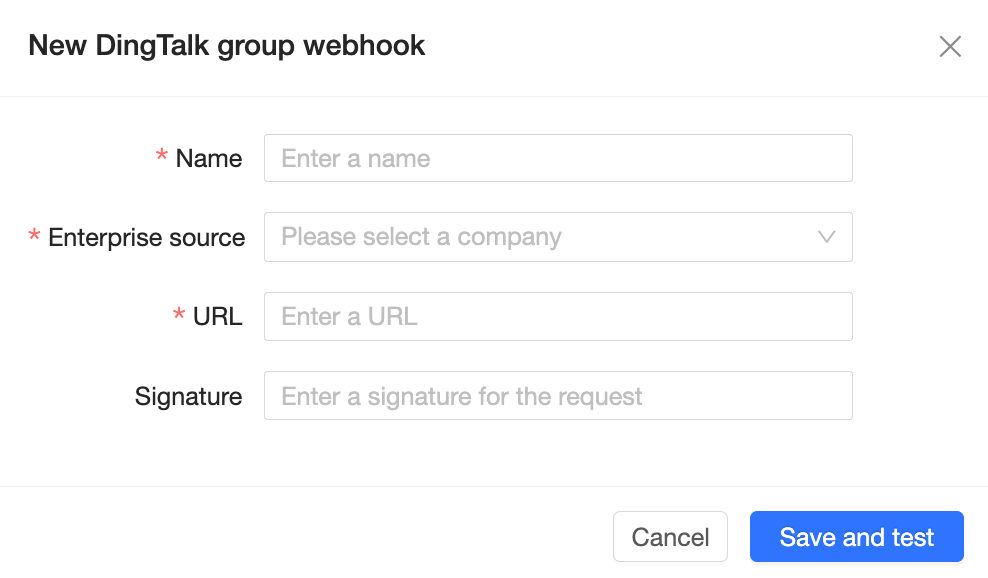
In the Create DingTalk Group Webhook dialog box, configure the following parameters.
Parameter
Description
Name
Enter a name for the DingTalk group robot.
If you have multiple DingTalk group robots, name them in the
DingTalkGroupName_RobotNameformat to tell them apart.Enterprise Source
Select the enterprise to which the robot belongs. Click the
 icon and select the DingTalk organization from the drop-down list.
Push URL
Enter the webhook URL of the target DingTalk group robot.
Add Signature to Request
If your messages contain sensitive internal information, configure a signature to ensure message security.
-
Click Save and Test.
After you save the settings, the new DingTalk group robot appears in the robot channel list.
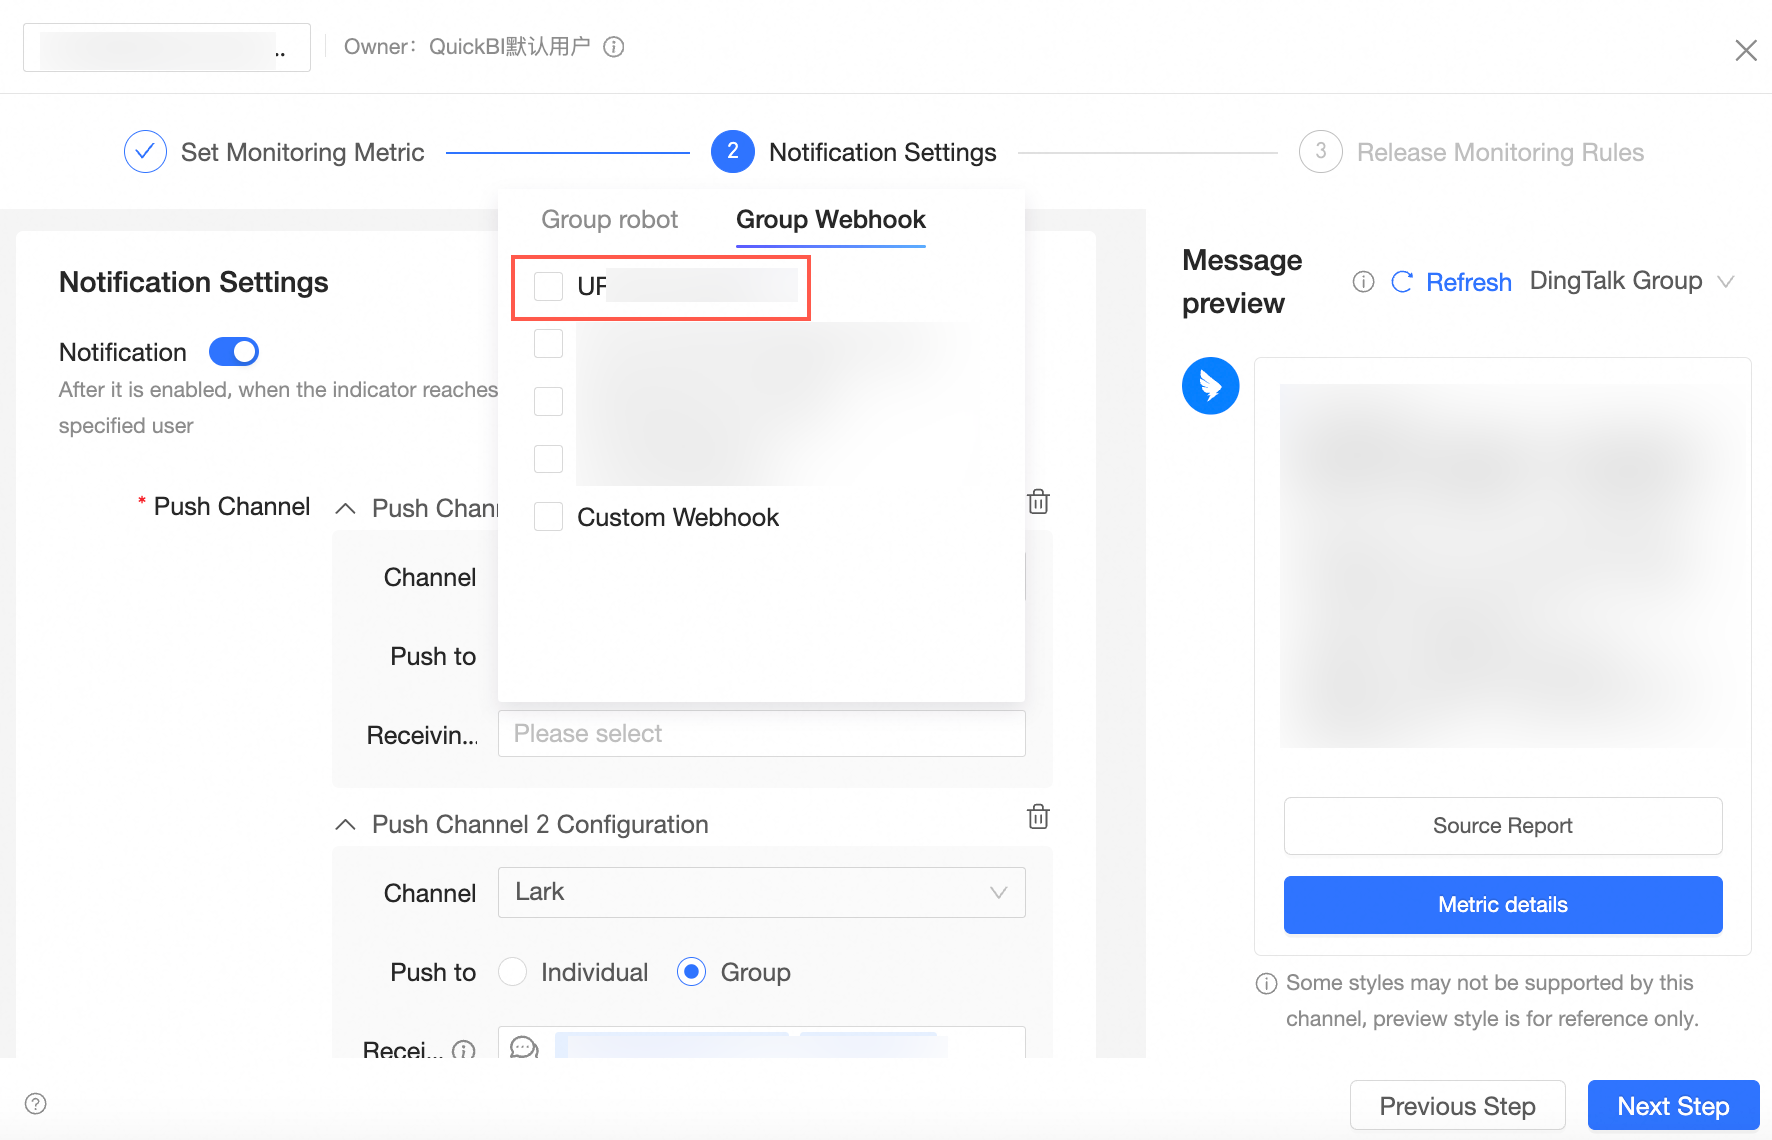
Configure a DingTalk robot in the alert push channel
After you create a robot channel, you can select it as the push channel when configuring metric alert rules.
-
On the Quick BI home page, follow the steps in the figure to navigate to the metric monitoring page.
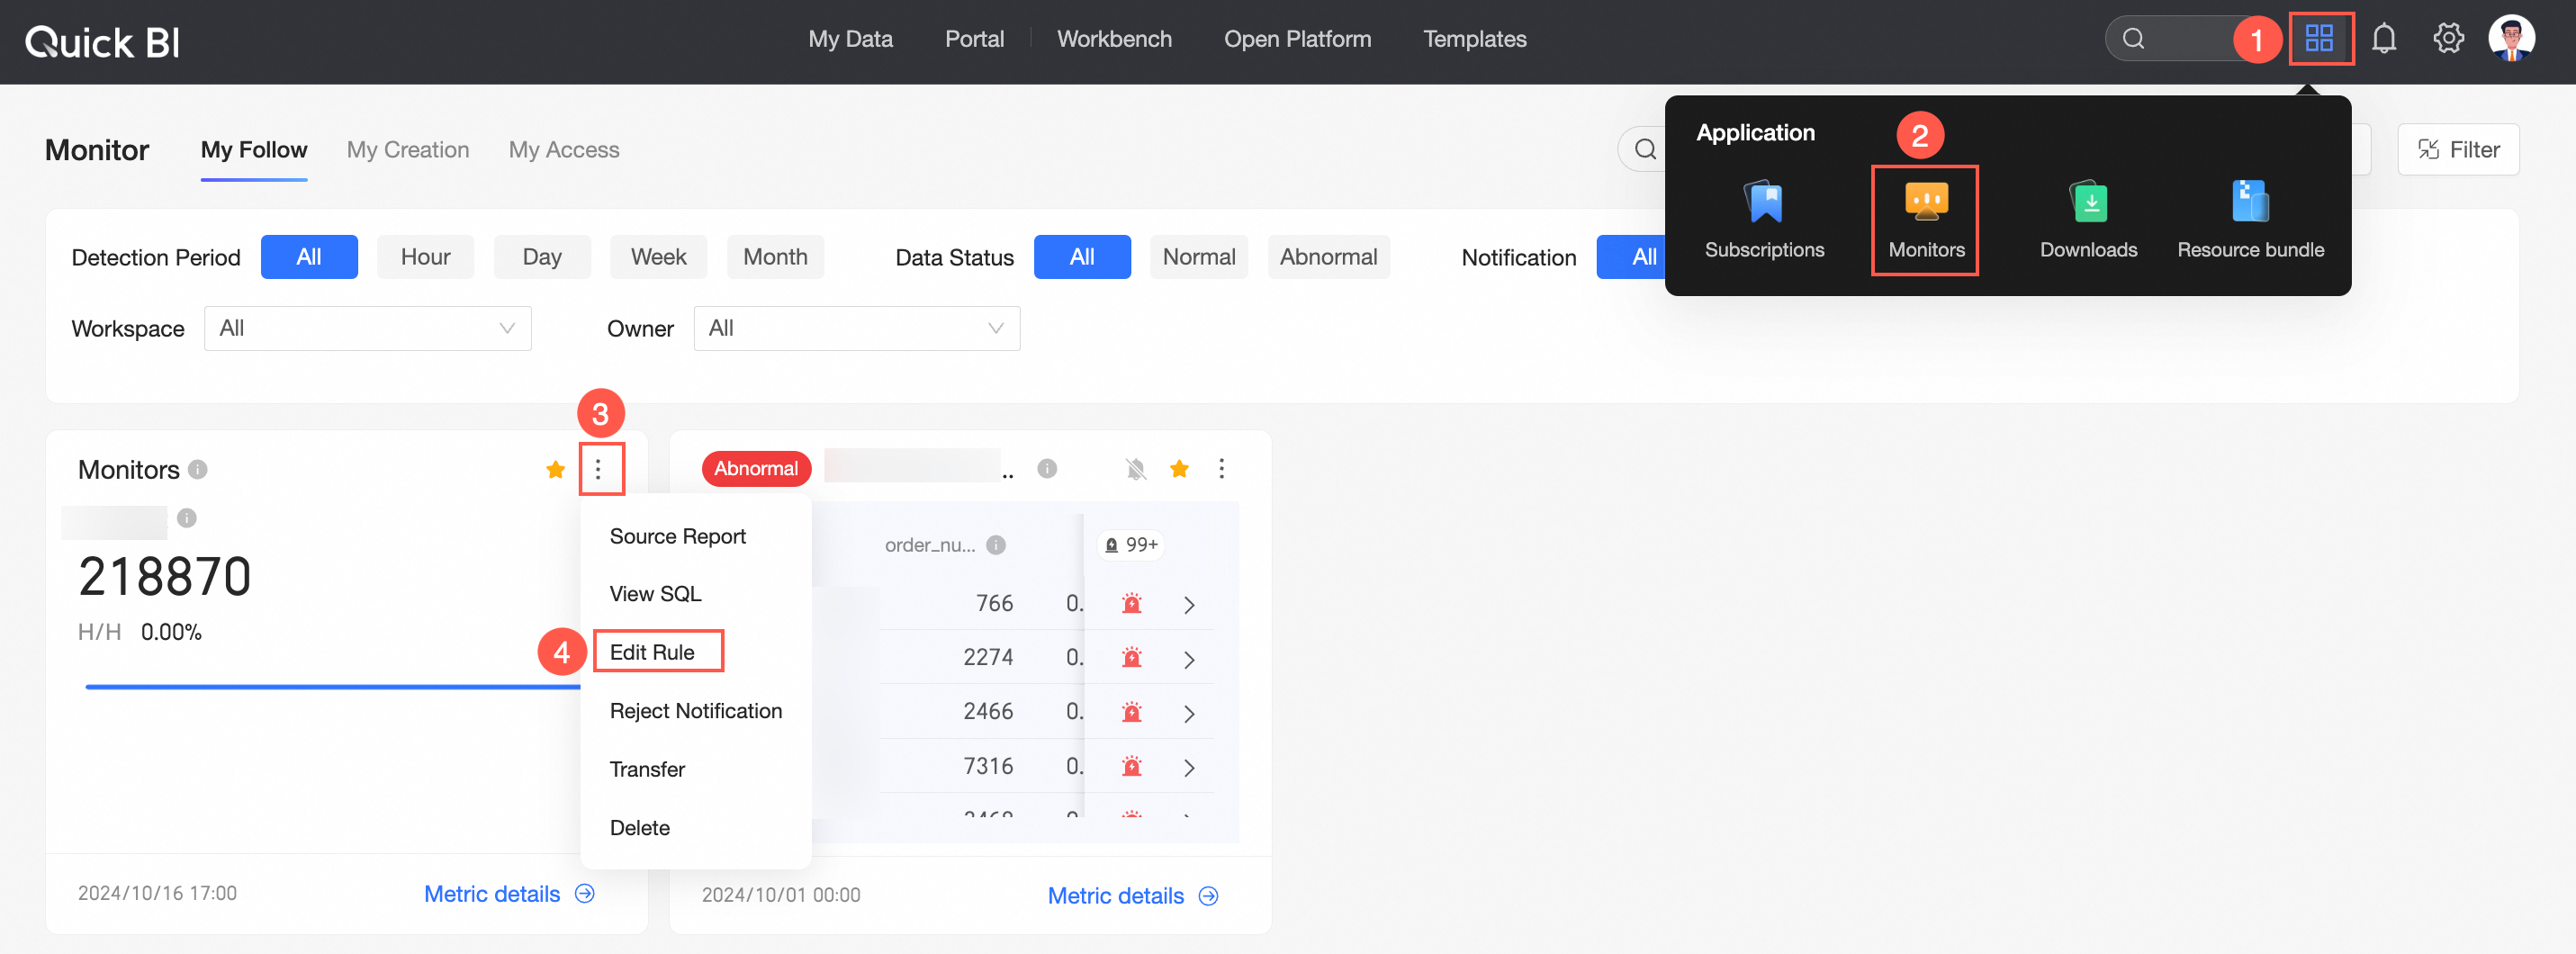
-
In the Monitoring Alert Settings > Push Message Settings dialog box, set the push channel to DingTalk. Then, in Robot Management, select your DingTalk robot.