Metric Insight is a core feature that uses automated attribution algorithms to perform multi-dimensional, multi-step root cause analysis on metric changes within a single dataset. It generates visual attribution analysis reports to help you quickly pinpoint the key drivers of business fluctuations. This document describes how to configure and use Metric Insight.
This is a value-added module that requires a separate purchase.
This feature is currently available only on the China (Hong Kong) and Malaysia sites.
Key features
Supports multi-step attribution analysis.
Supports multiple attribution methods, such as dimensional attribution and metric attribution.
Use cases
Analyze business fluctuations
For example: "Why did yesterday's sales drop by 30%?"
Attribute changes between different periods
For example, compare two periods to understand why a metric changed.
Prerequisites
You have permission to use the dataset.
You have permission to create or edit Metric Insights.
Access Metric Insight
Follow the steps in the figure below to navigate to the Insight Attribution > Metric Insight page.
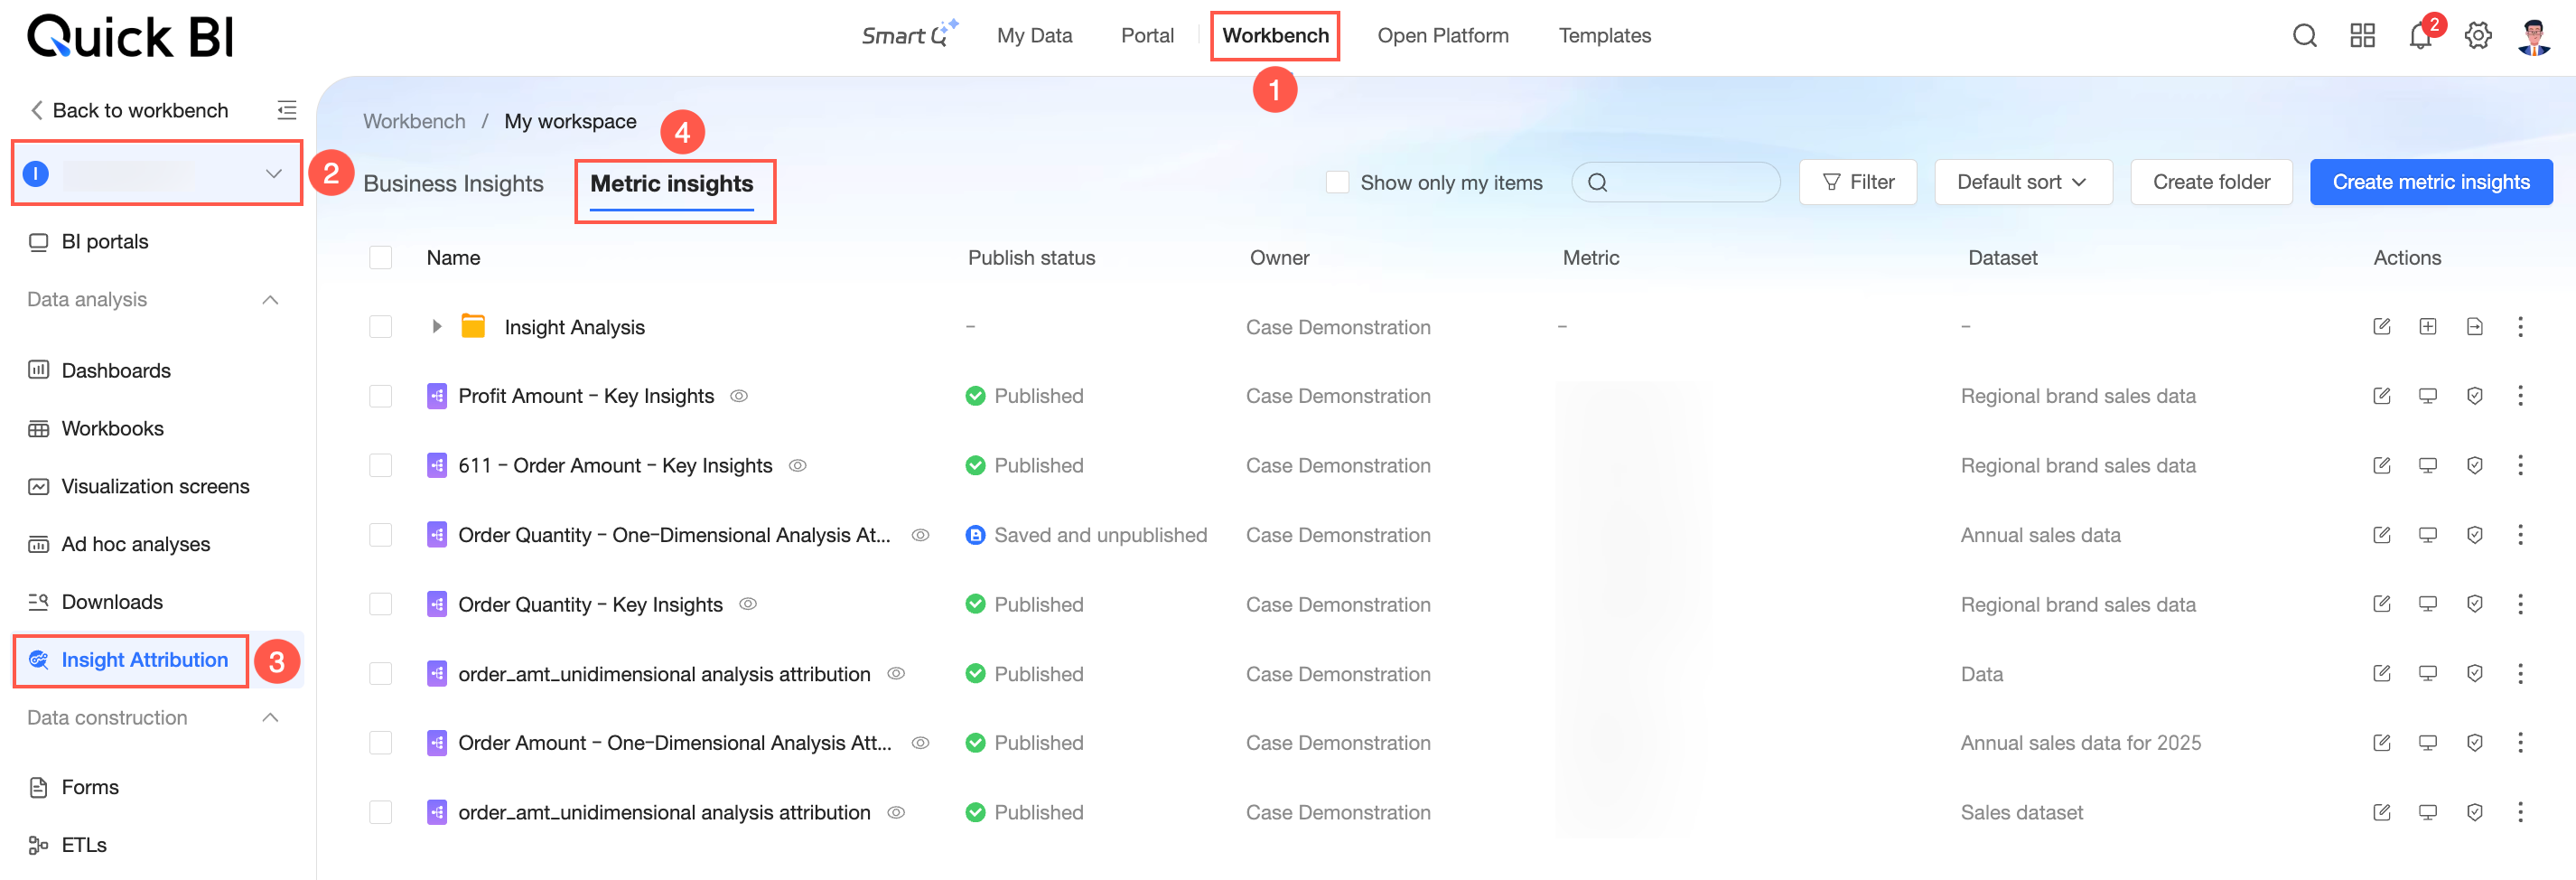
The Metric Insight page lets you create and manage Metric Insights.
Create Metric Insight
You can create multiple Metric Insights to analyze frequently used metrics. A single Metric Insight can be used with multiple Business Insights.
Click Create Metric Insight, select a dataset and a Metric, and then click OK.

In the Attribution Metric section, you can configure the metric's aggregation method, metric unit, insight dimension, filter method, and filter conditions.
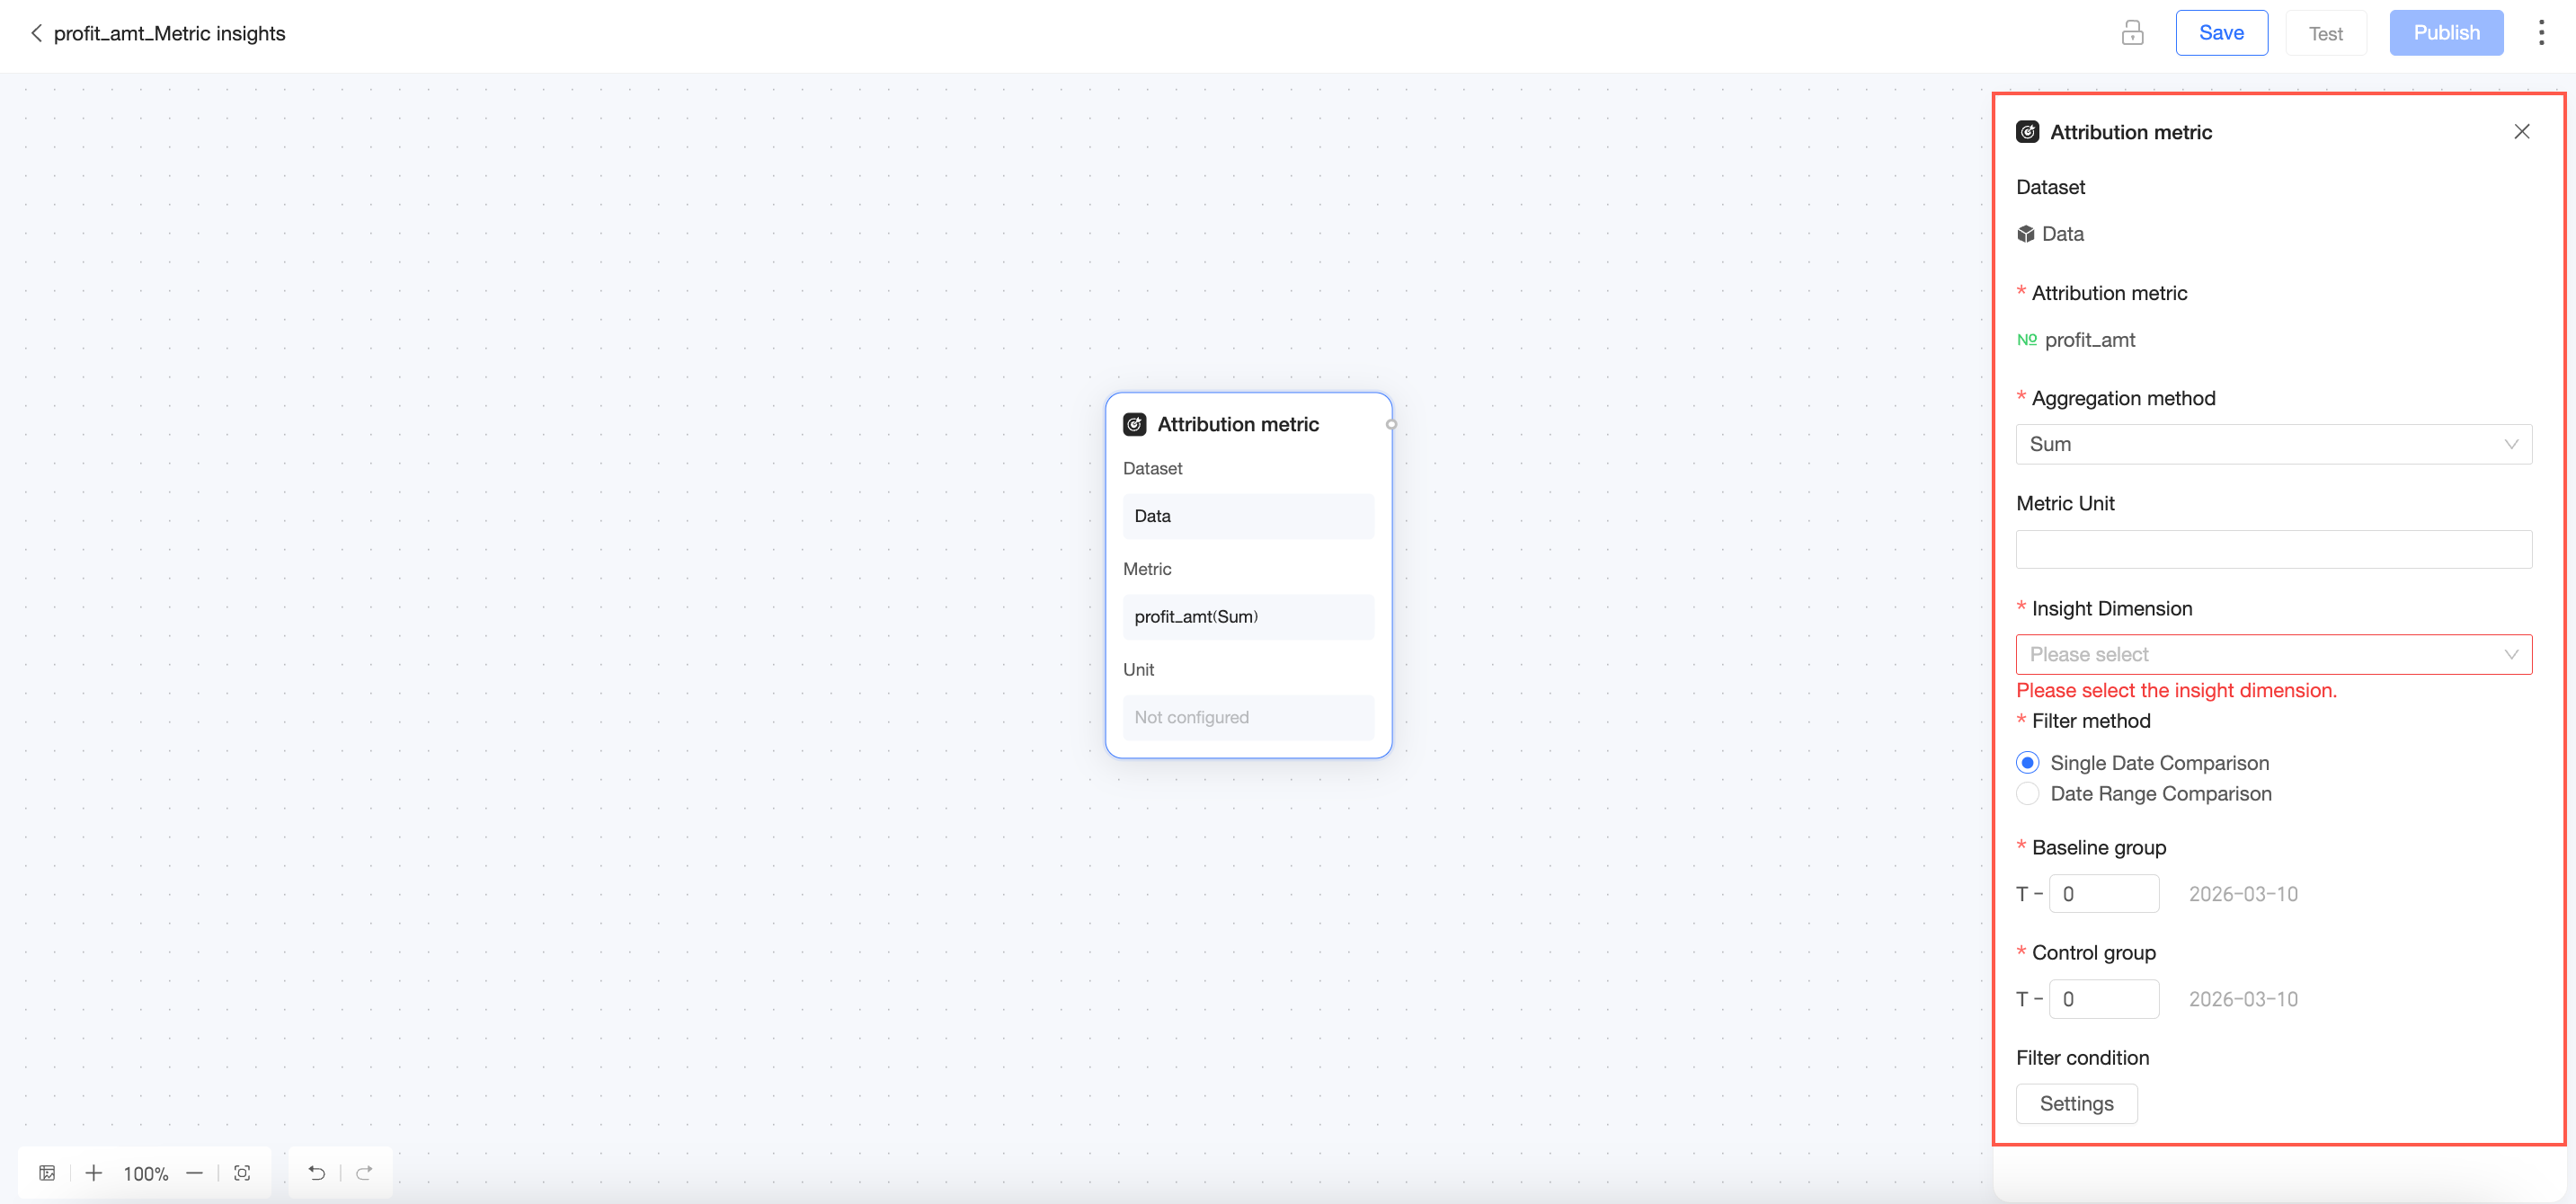
The aggregation method can be set to Sum, Average, Count, or distinct count.
You can set a custom metric unit, such as "10K".
Select an insight dimension.
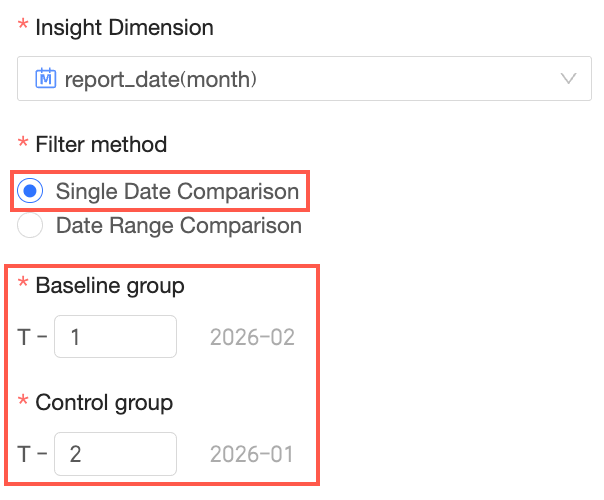
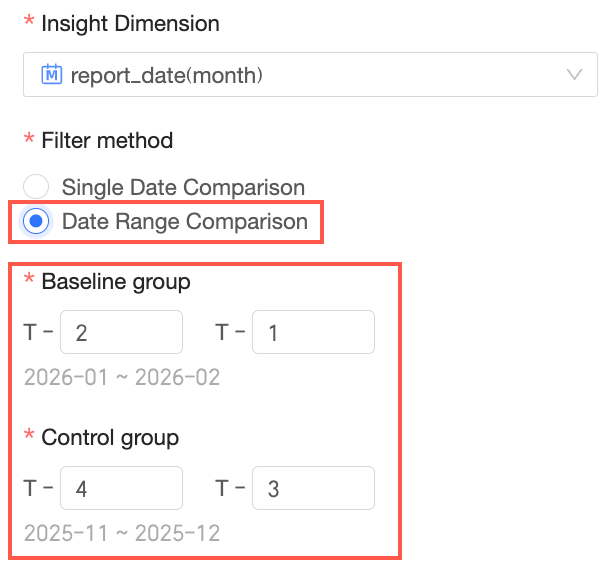
If the insight dimension is a date field, the filter method supports Single Date Comparison and Date Range Comparison. You can set a baseline group and a comparison group.
When the filter method is Single Date Comparison, you can set a baseline group and a comparison group for a single date.
When the filter method is Date Range Comparison, you can set a baseline group and a comparison group for a date range.
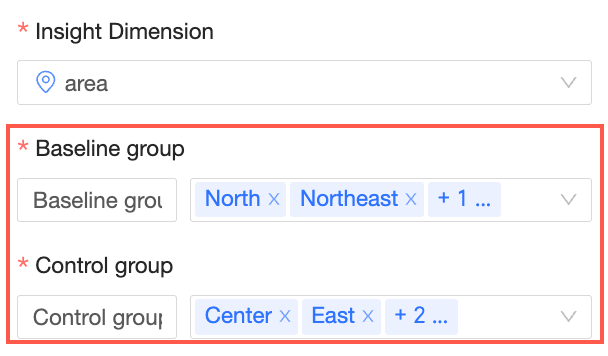
If the insight dimension is a text field, you can set and rename the baseline group and the comparison group.
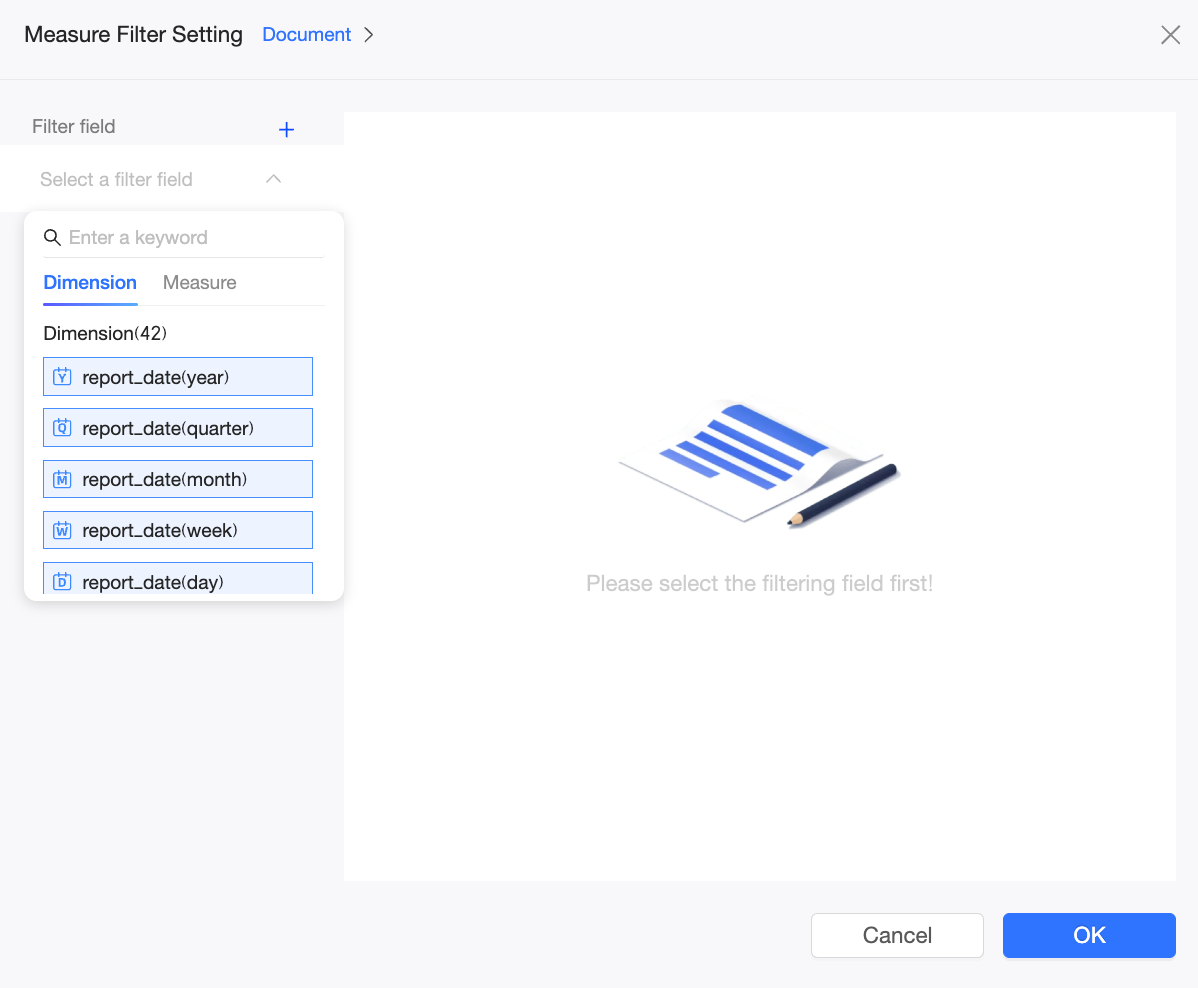
You can set filter conditions for the metric.
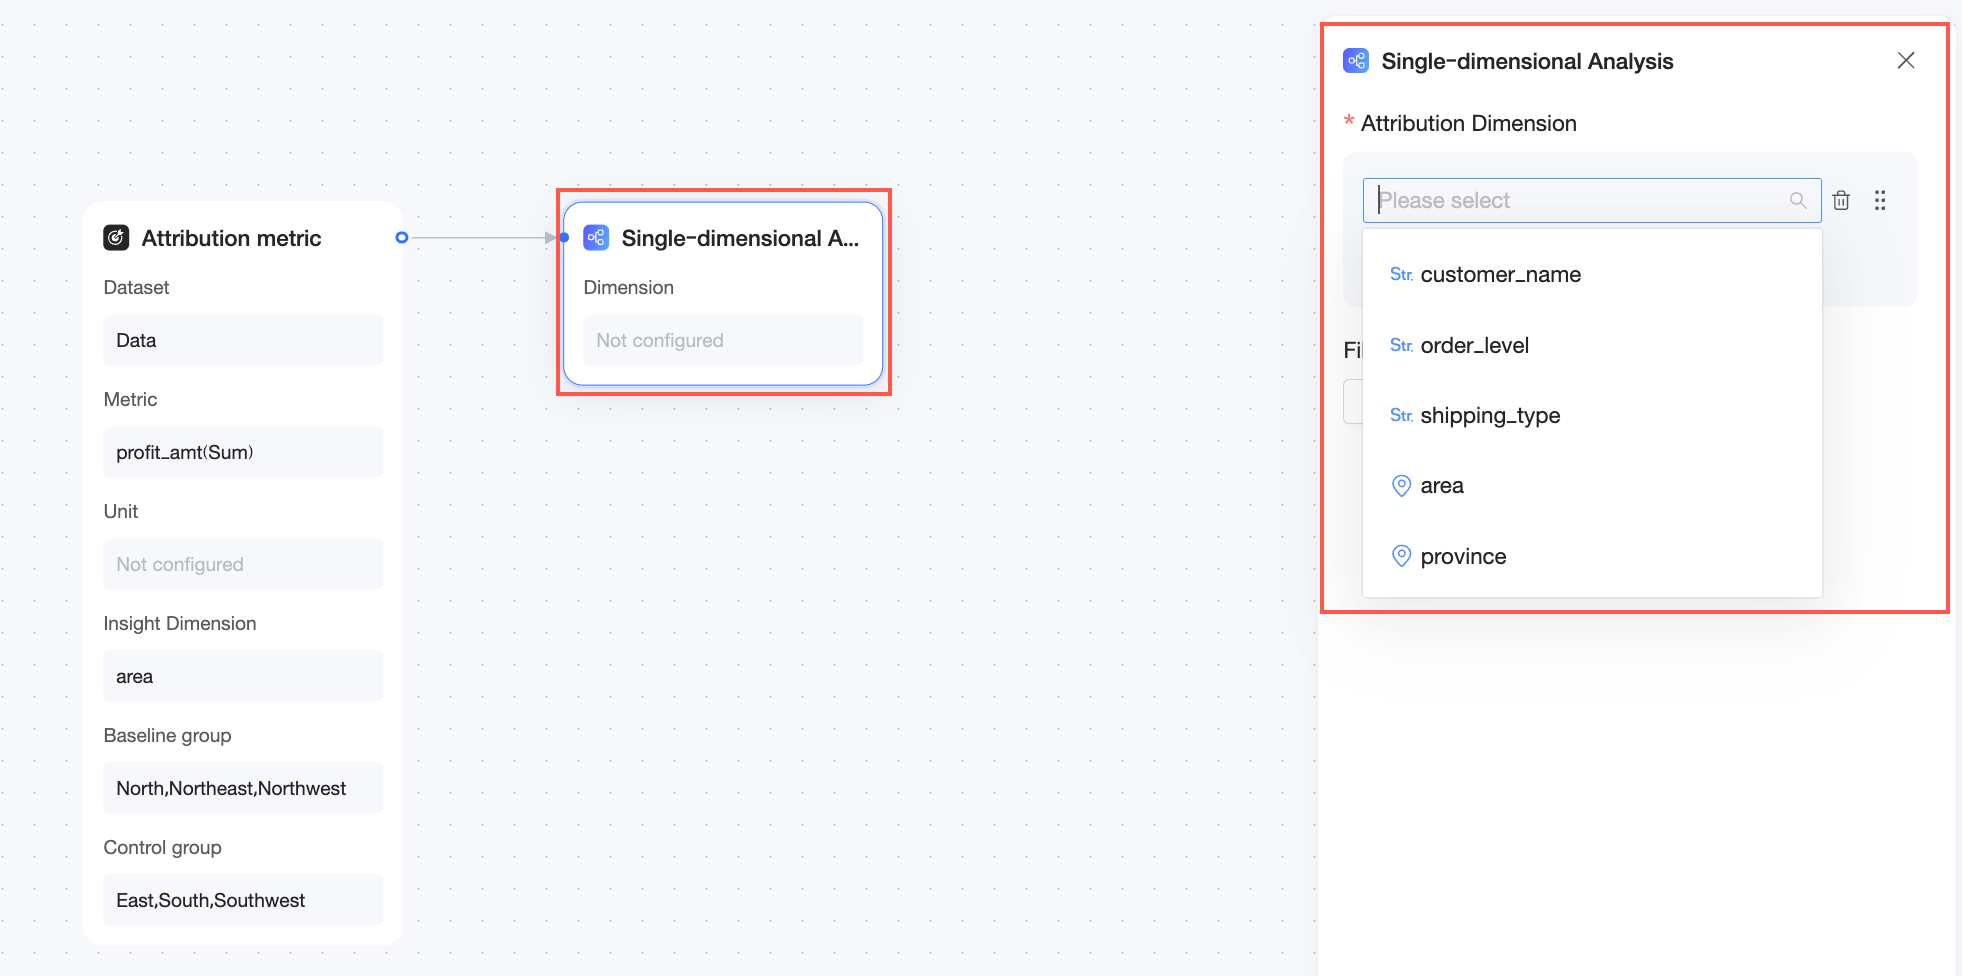
After configuring the attribution metric, you can configure the attribution analysis settings. These include dimensional attribution (Single-Dimension Analysis and Dimension Intersection) and metric attribution (Metric Correlation Attribution and Metric Factor Attribution).

Single-Dimension Analysis
Analyzes how a single dimension, such as region, affects the metric.
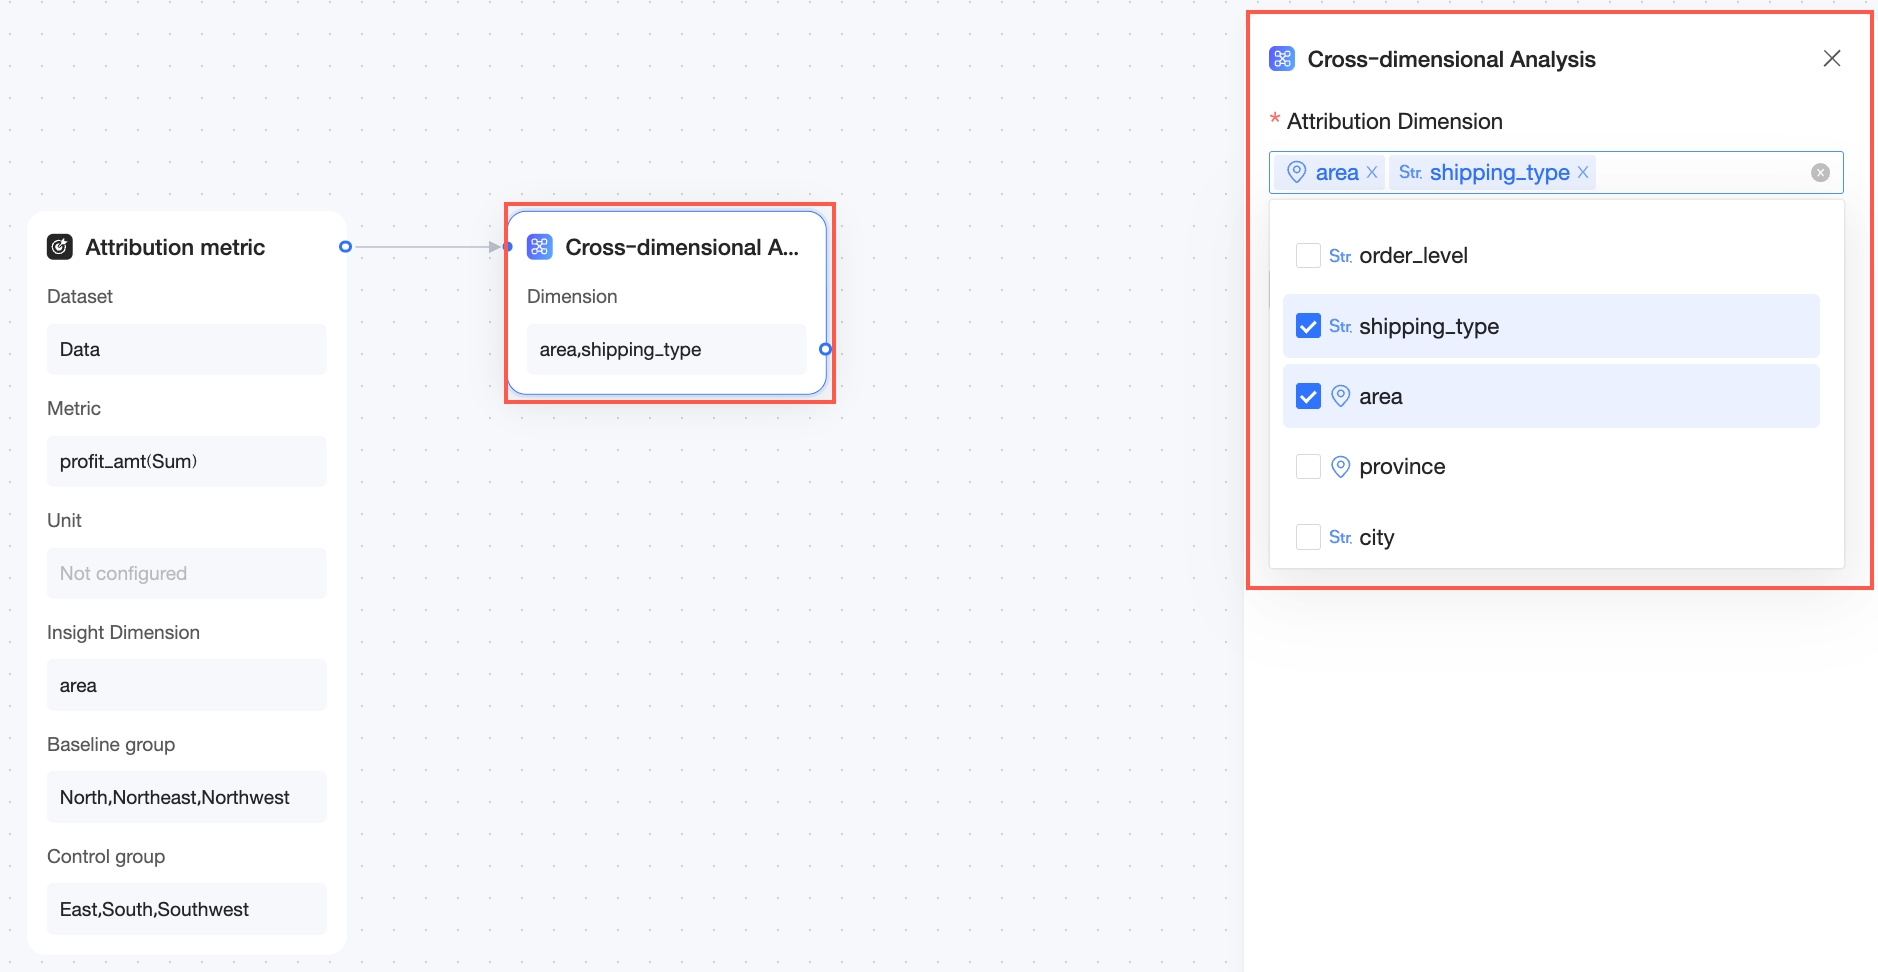
Dimension Intersection
Analyzes the combined impact of two to three dimensions, such as "Region + Channel".
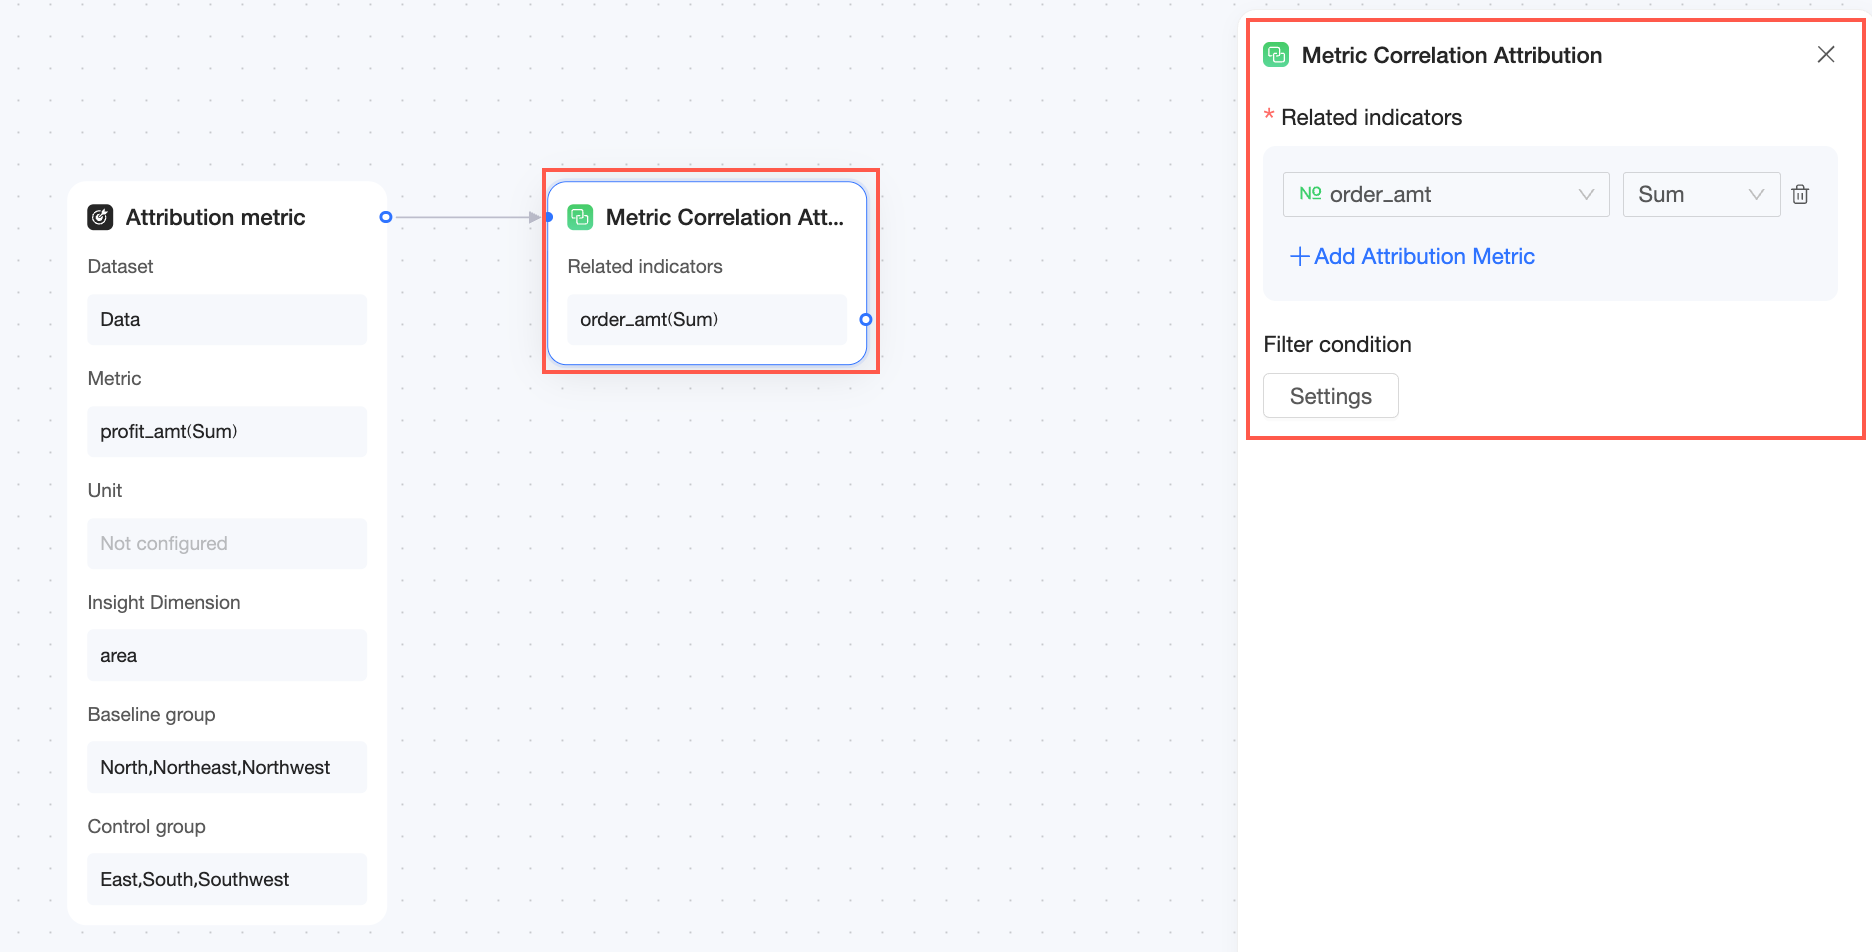
Metric Correlation Attribution
Analyzes the correlation weight between metrics that do not have a direct arithmetic relationship (for example, the correlation between customer satisfaction and GMV).
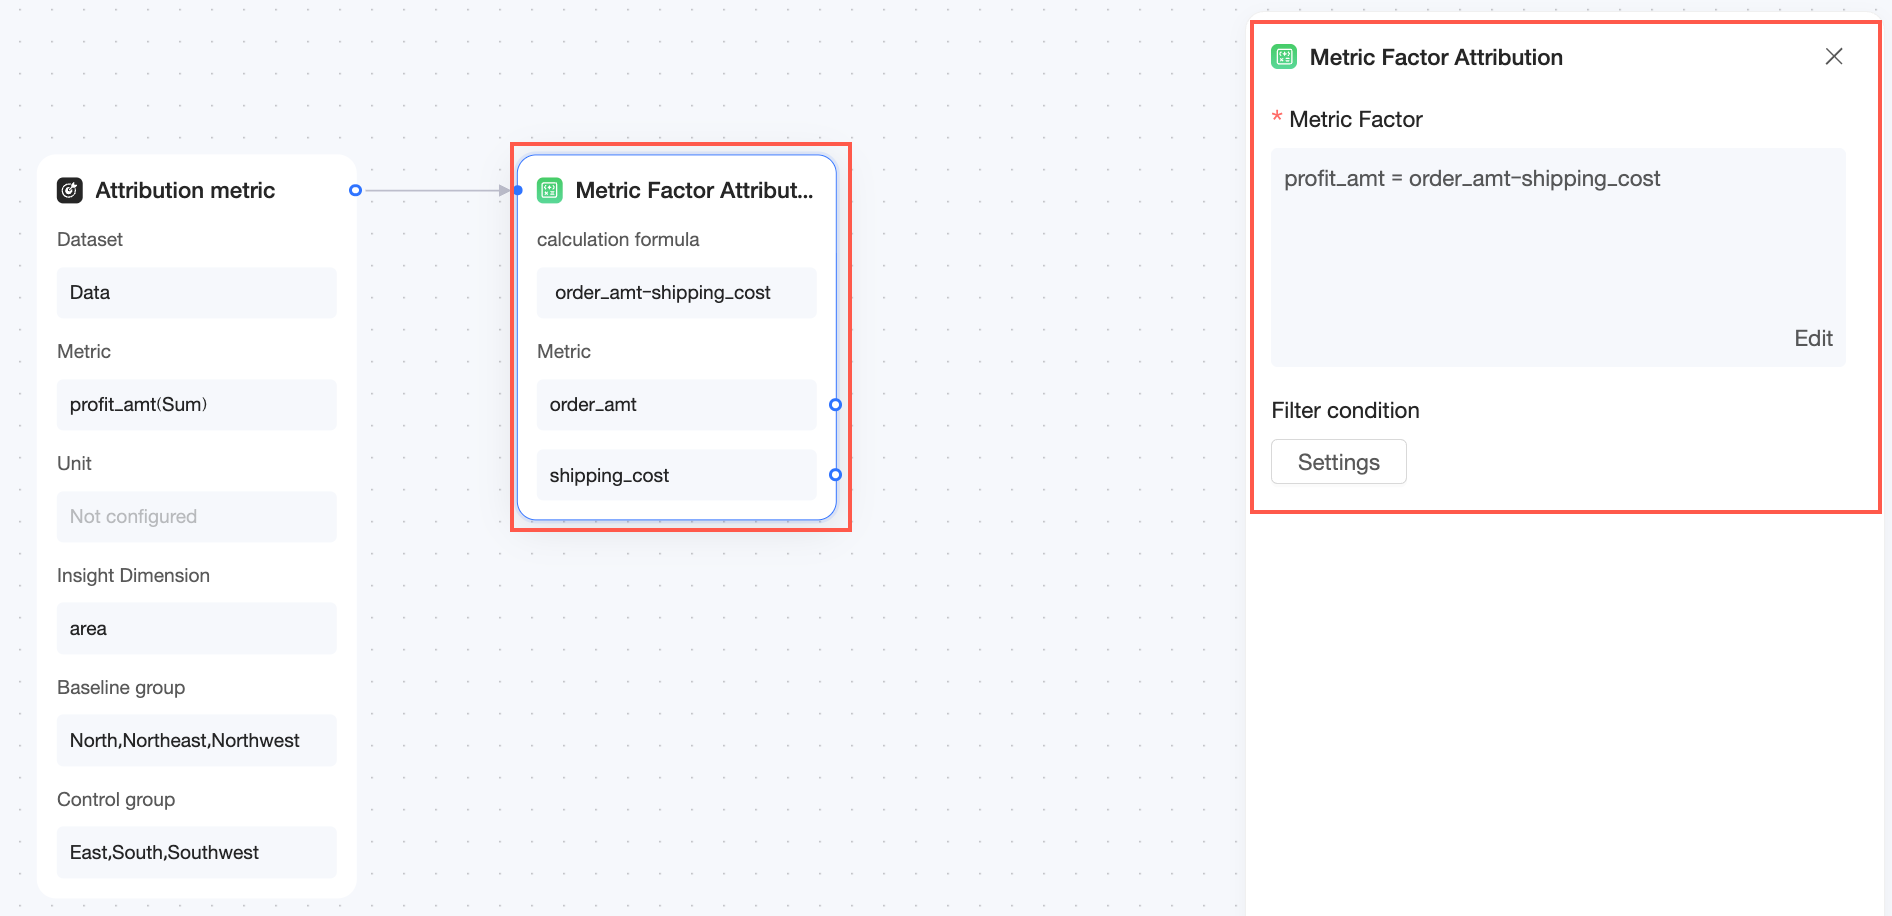
Metric Factor Attribution
Calculates the impact of multiple metrics that have an arithmetic relationship, such as Number of Users × Average Revenue Per User.
Manage Metric Insight
On the Metric Insight configuration page, you can perform the following actions:
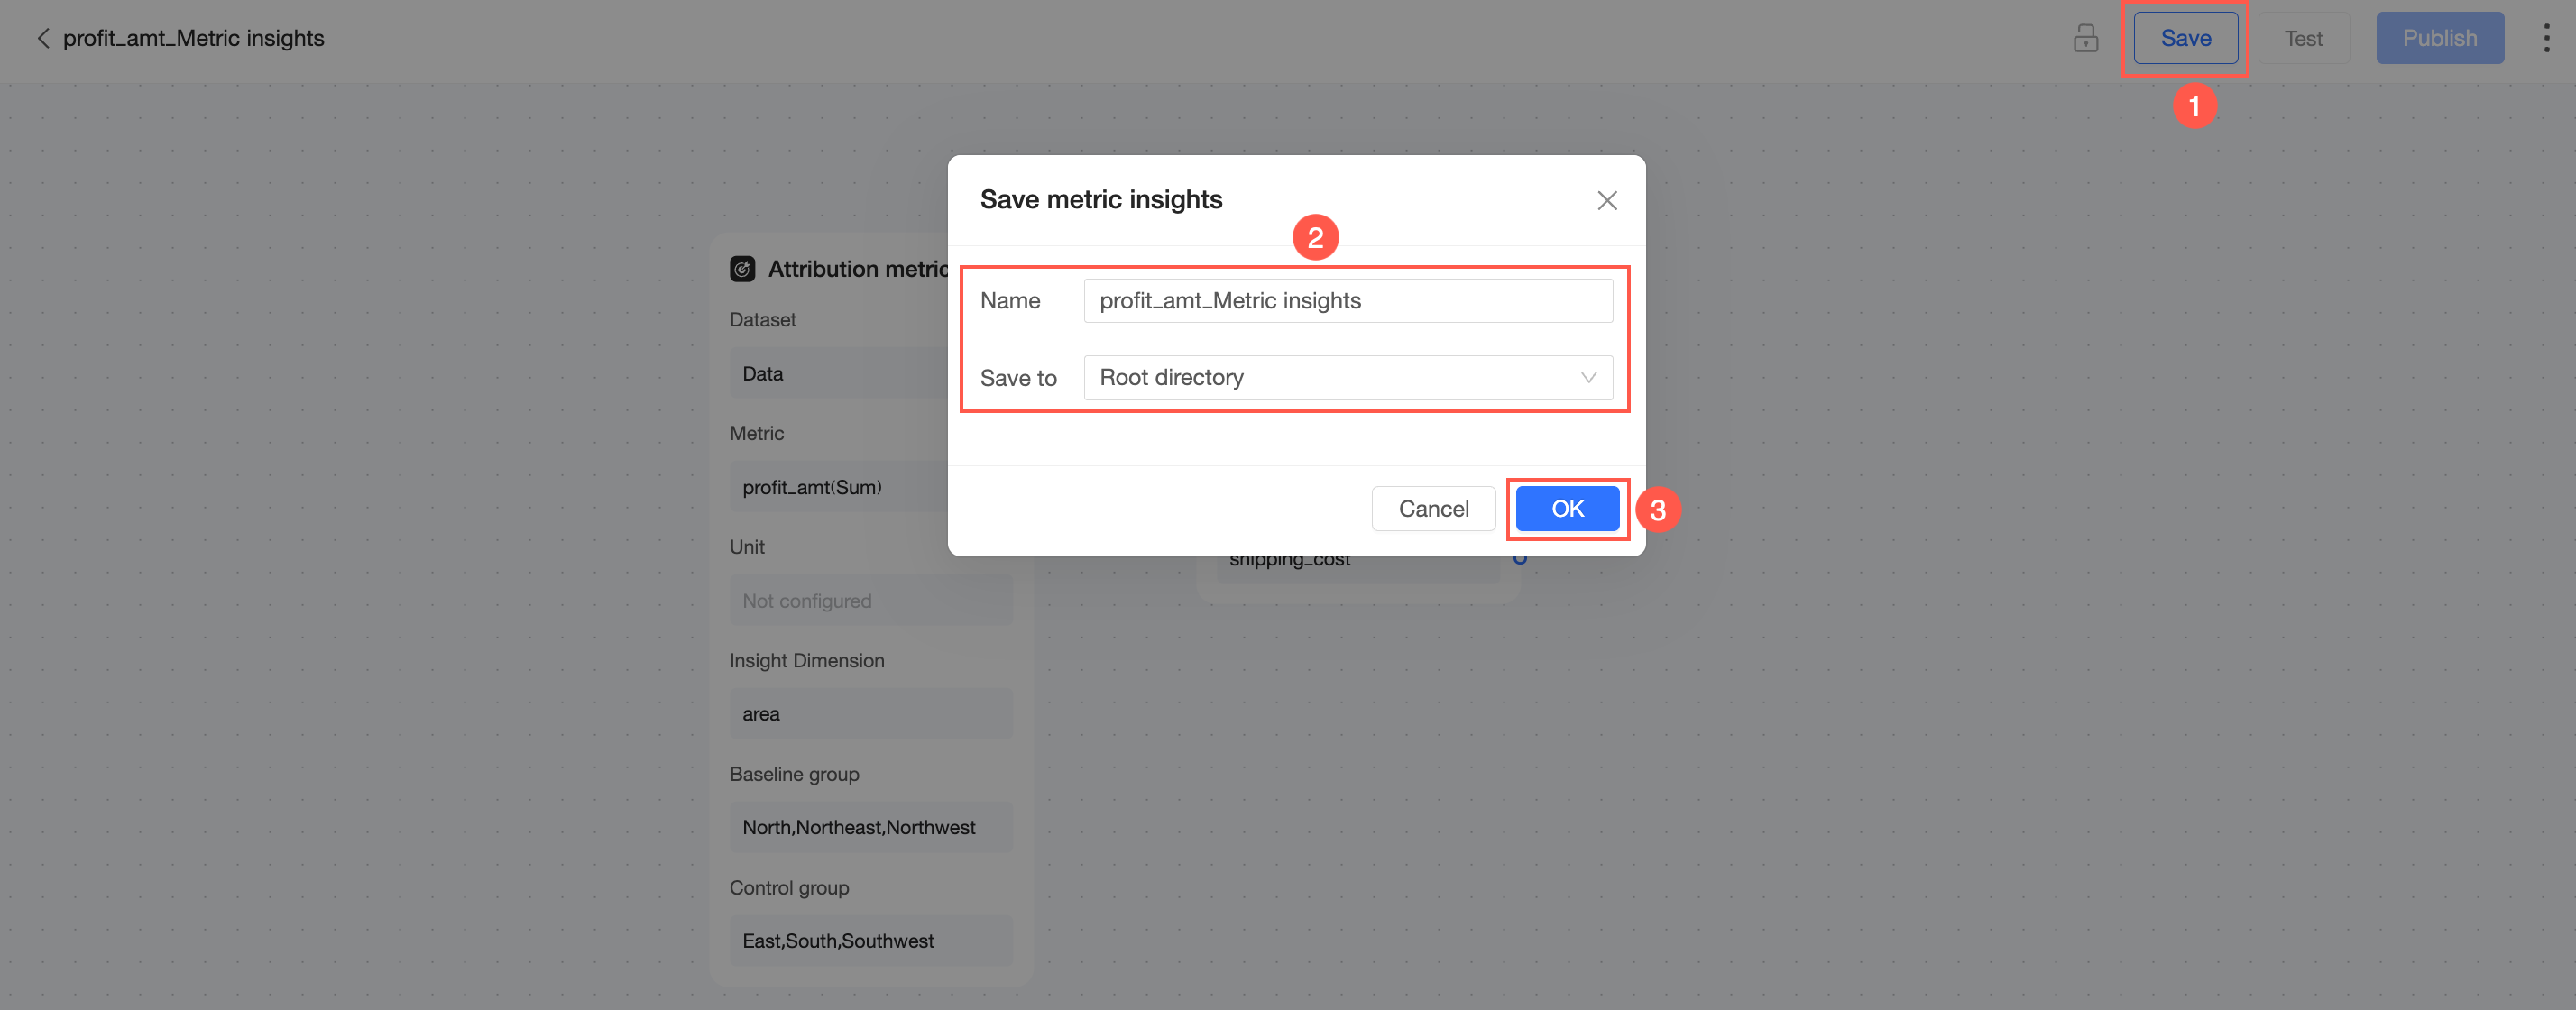
Save
Click Save, enter a custom Name for the Metric Insight, select a Location, and then click OK.
Test
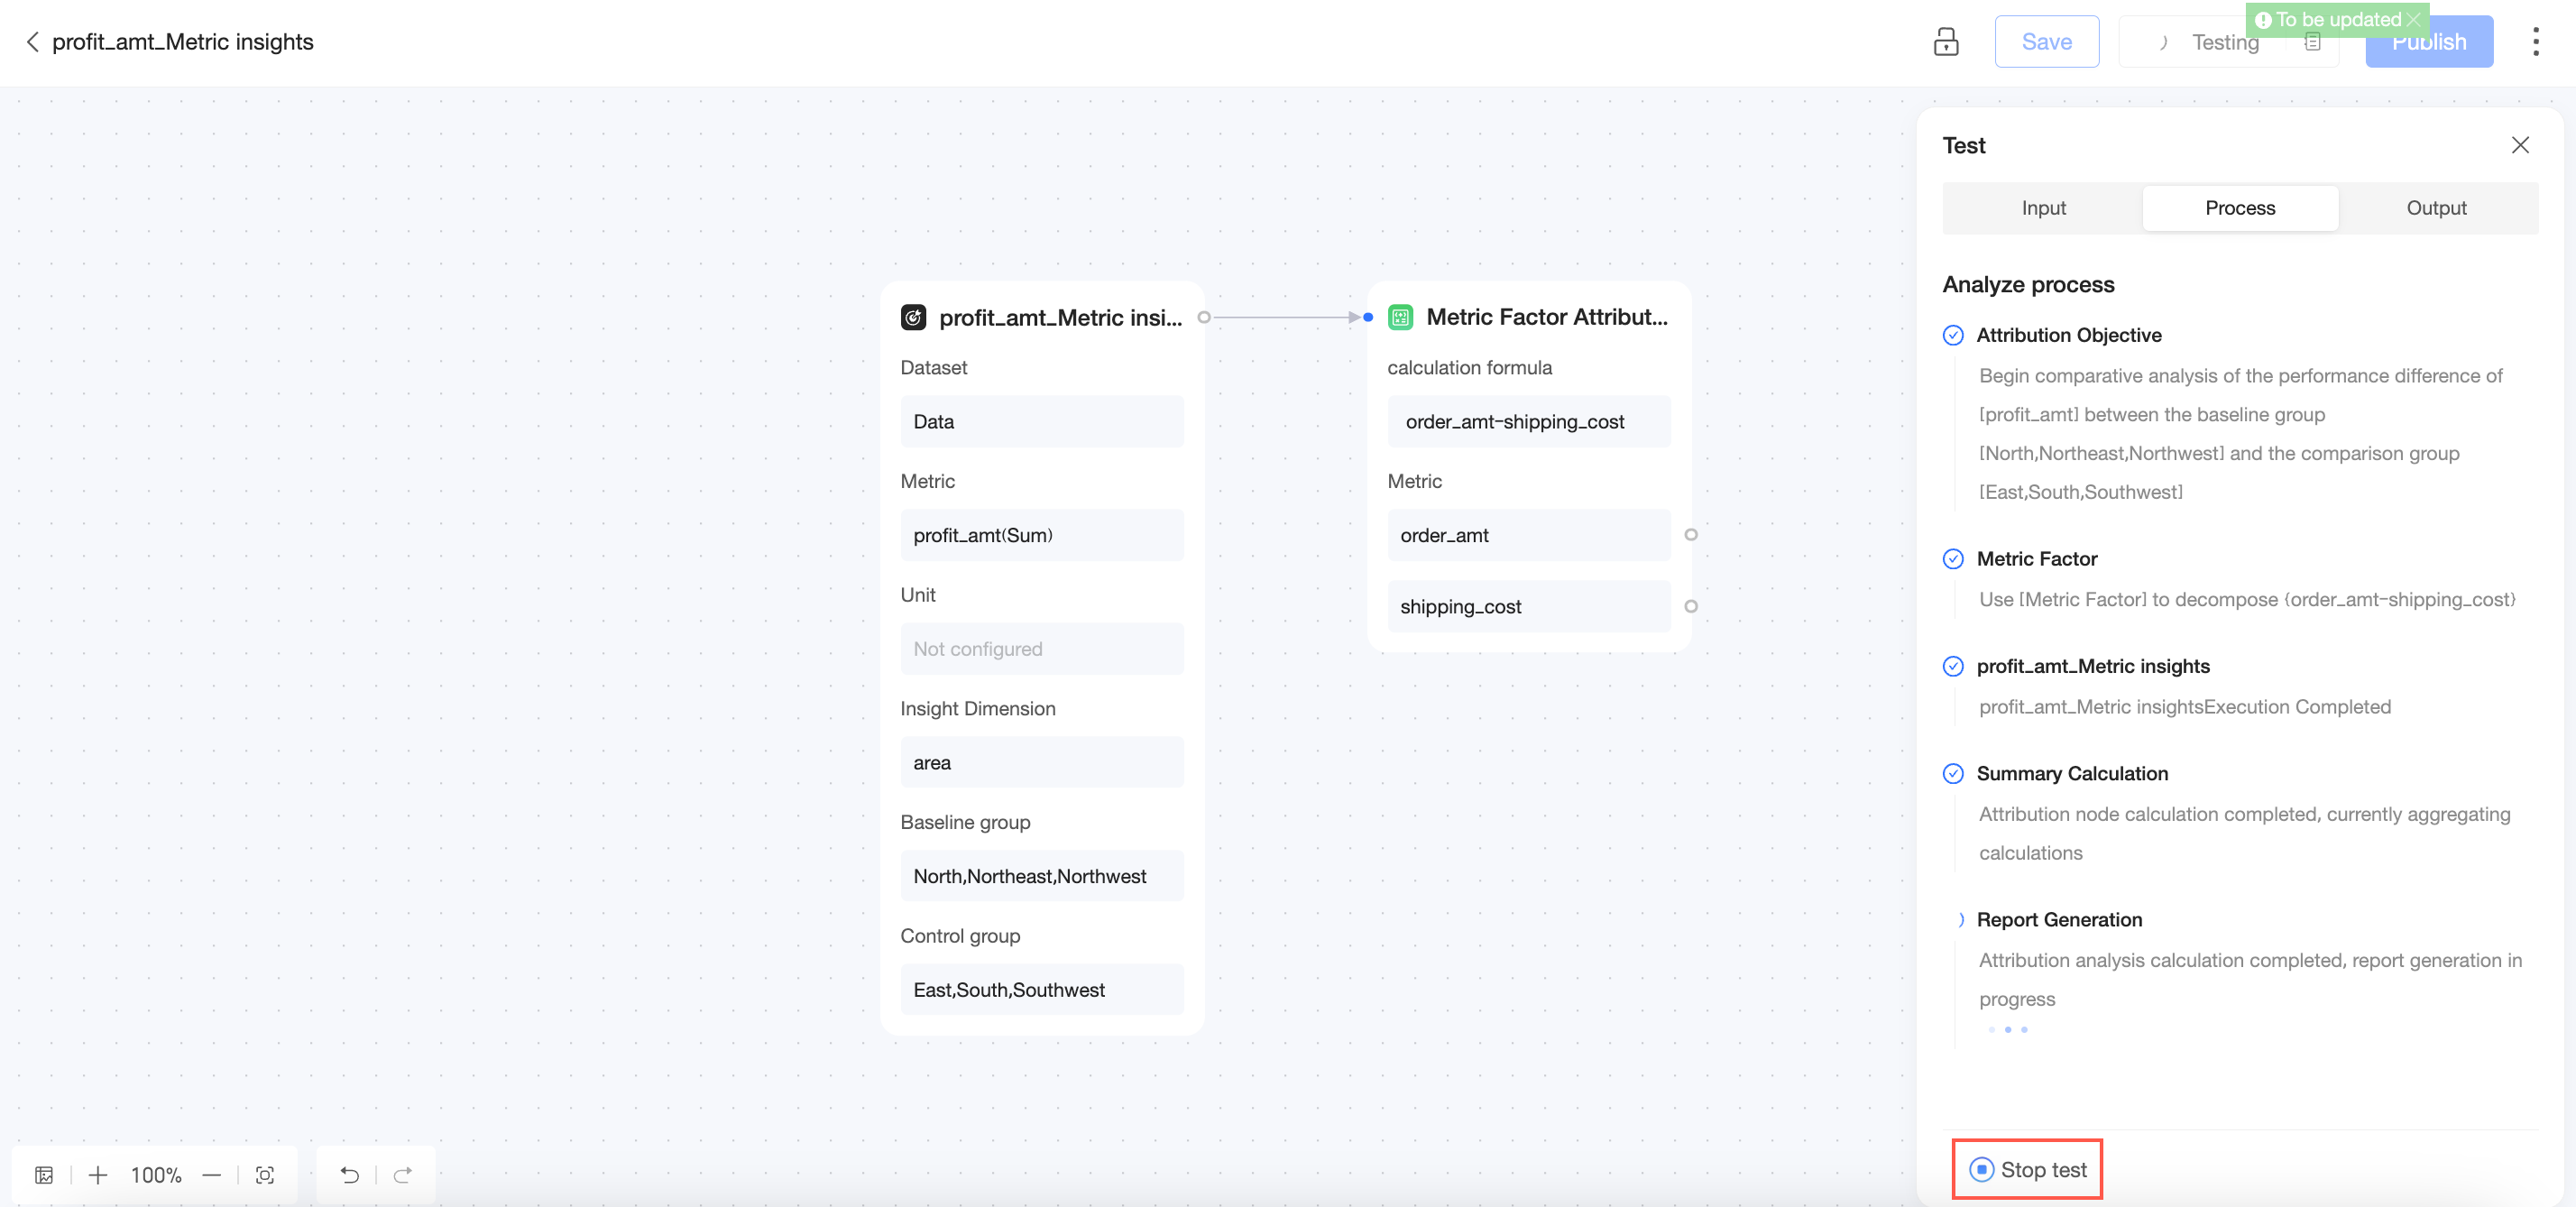
Click Test to generate an attribution analysis report.
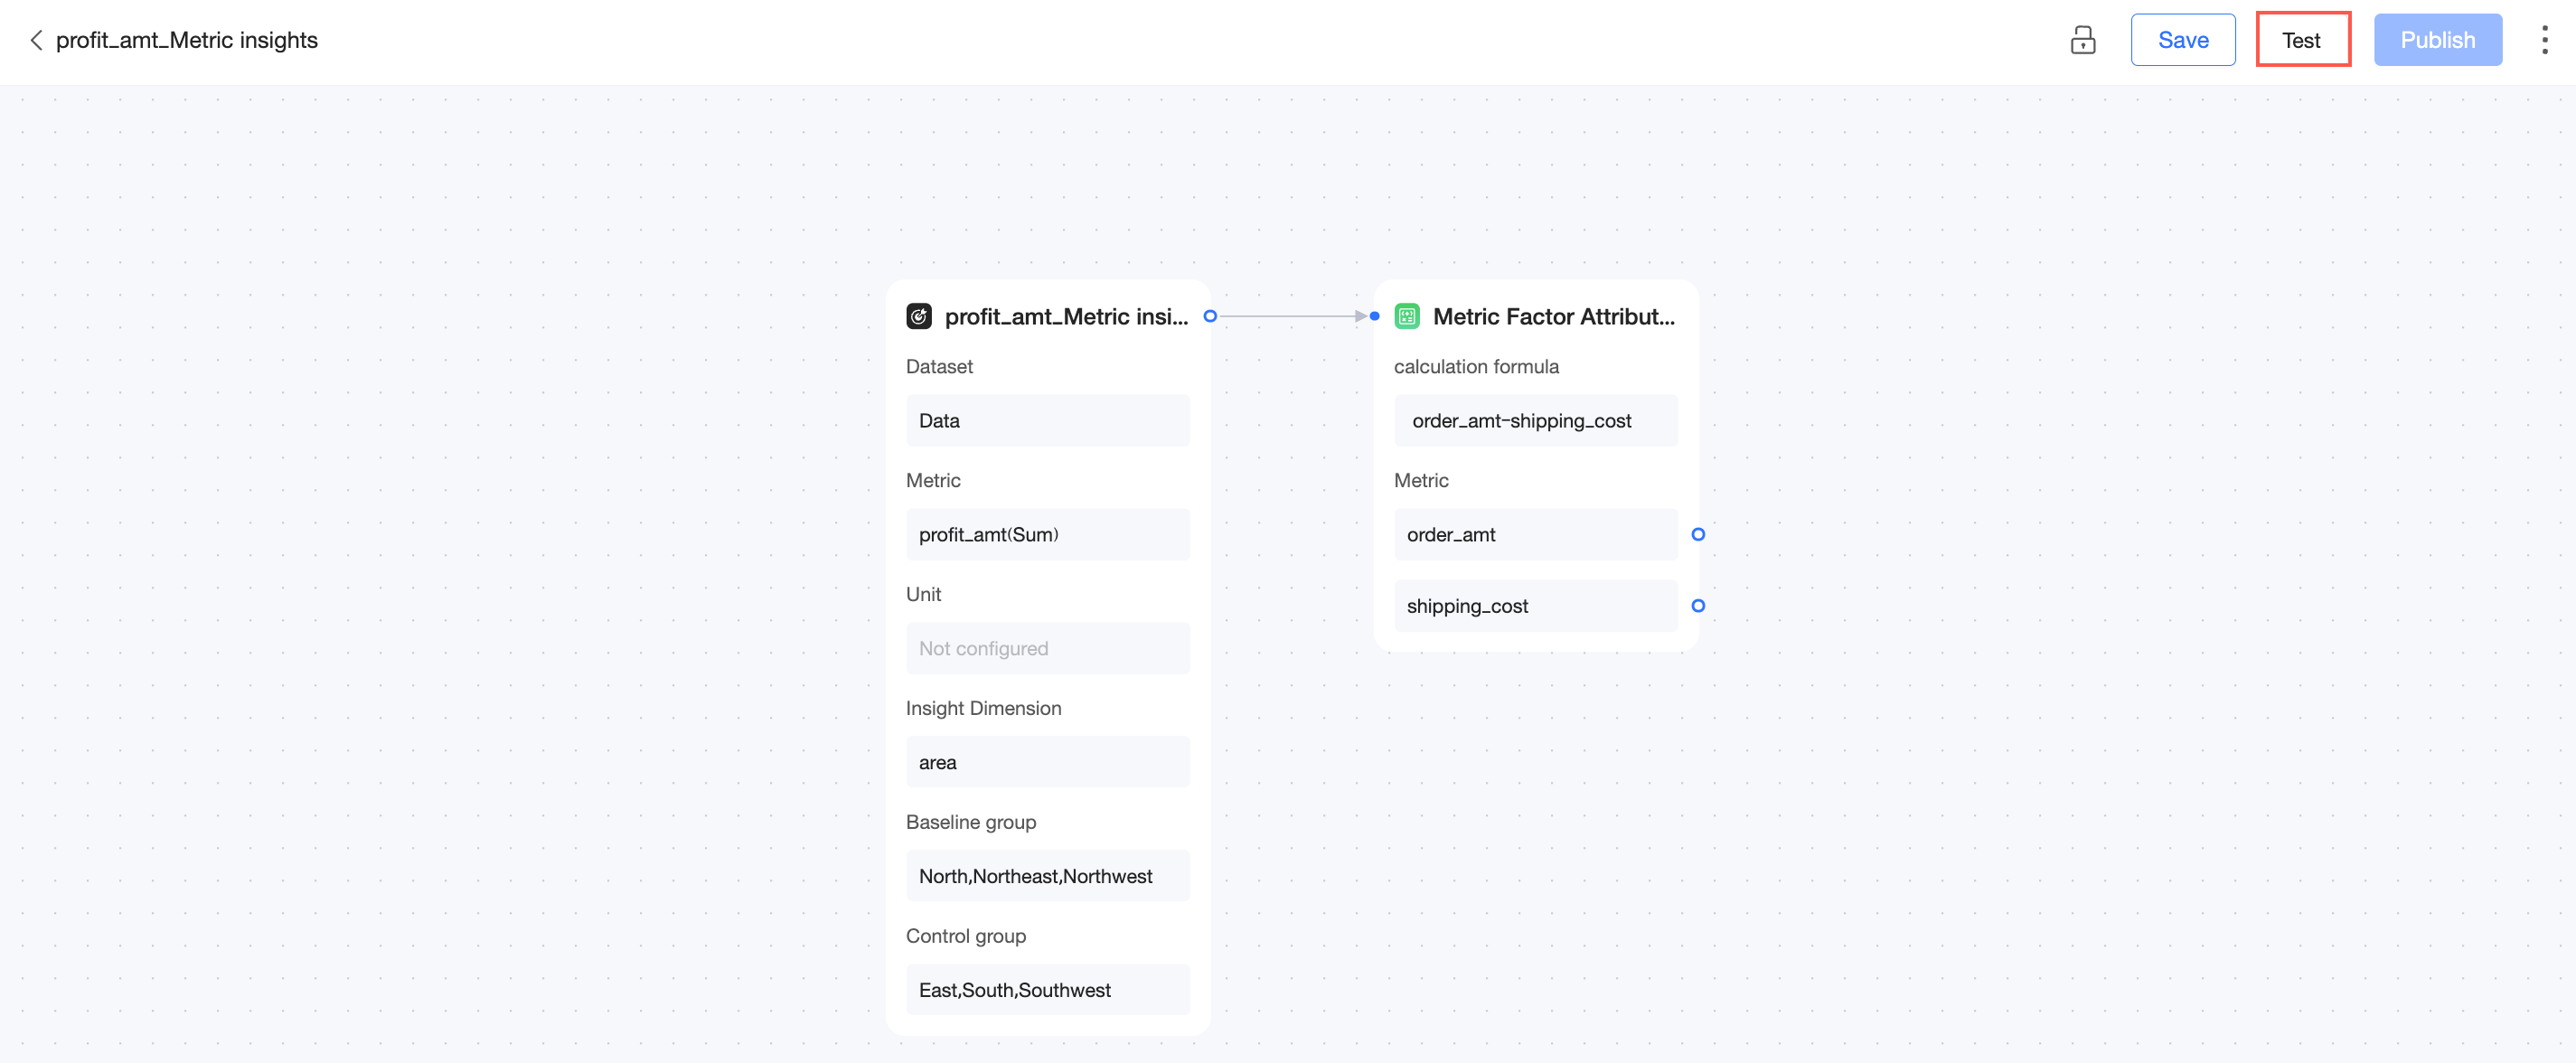
You can click Stop Test while the report is being generated.
 After the test is complete, you can view the output.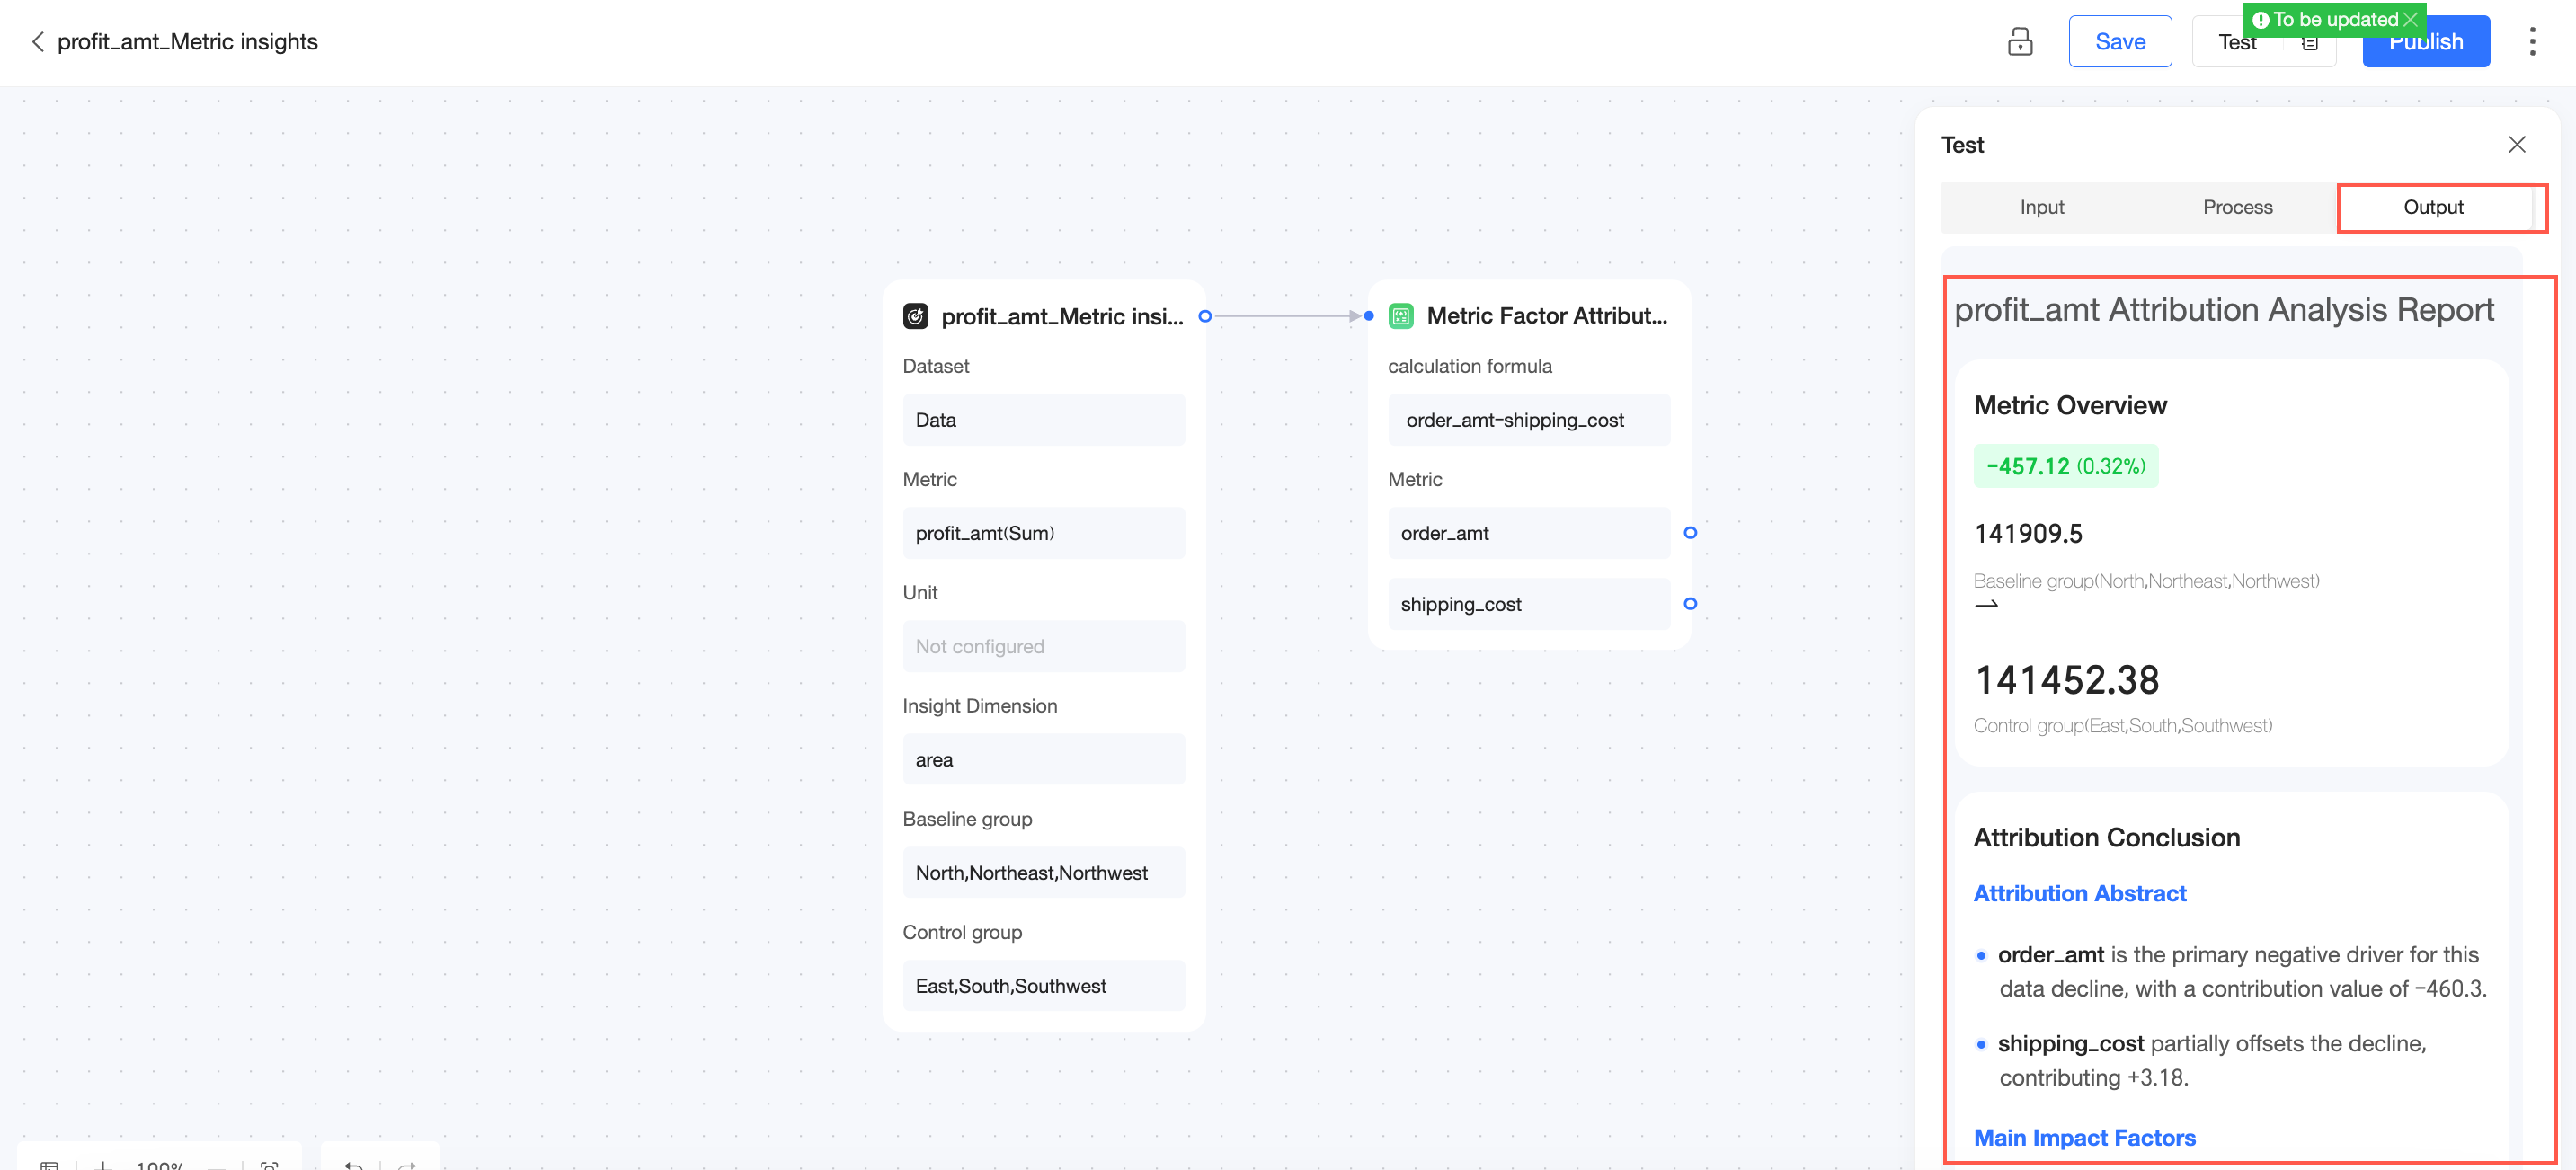
Publish
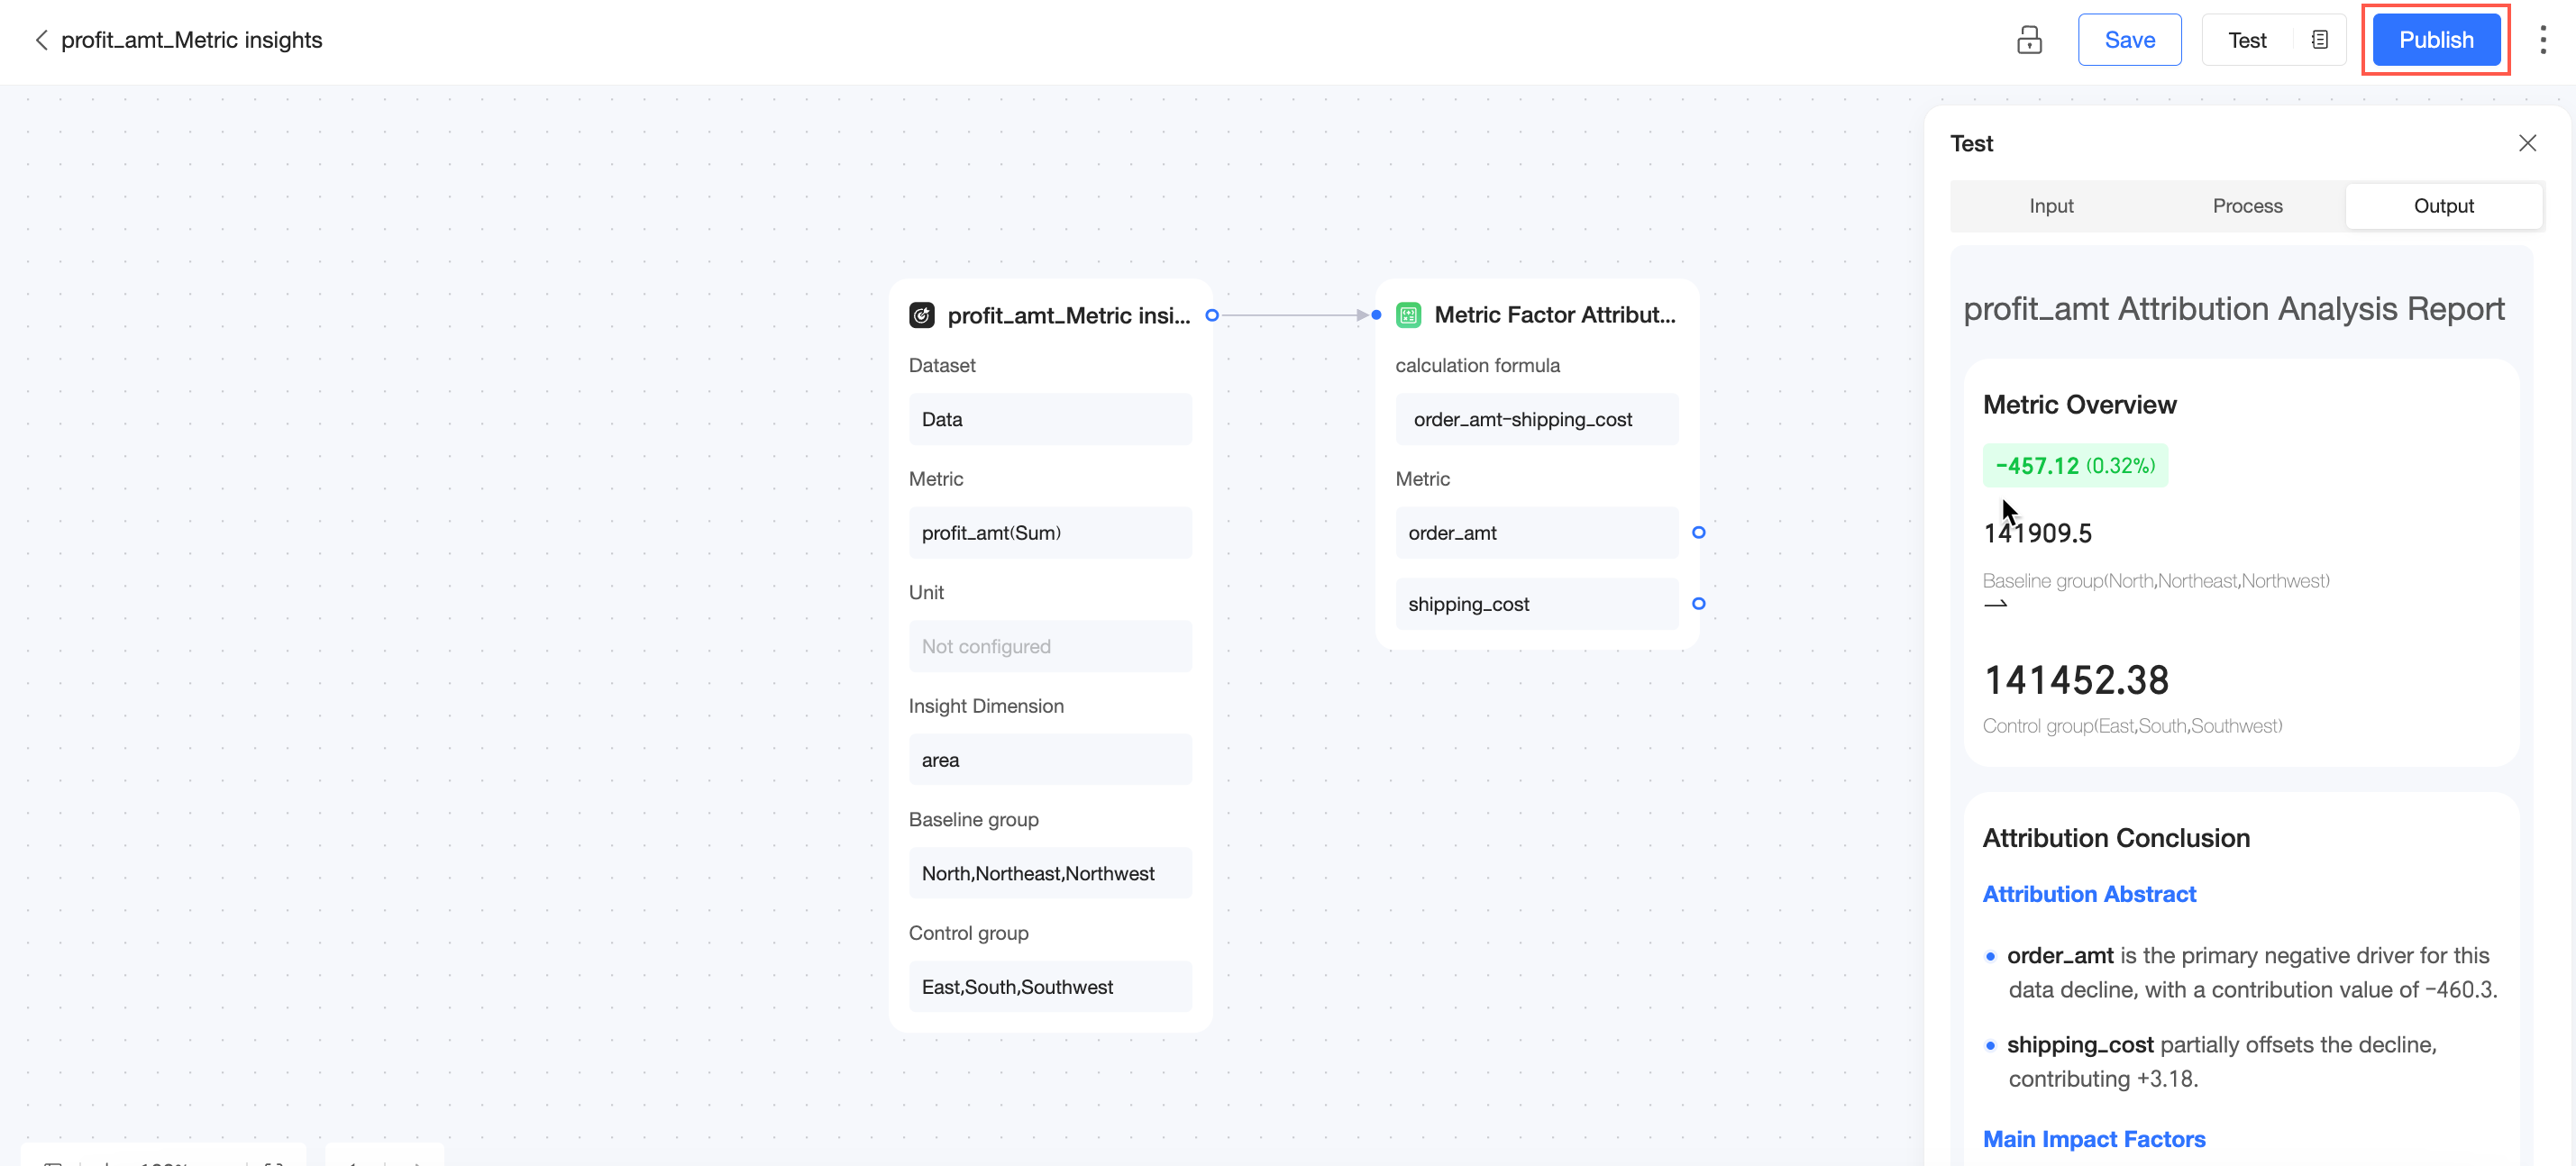
Click Publish to publish the Metric Insight.
Republish
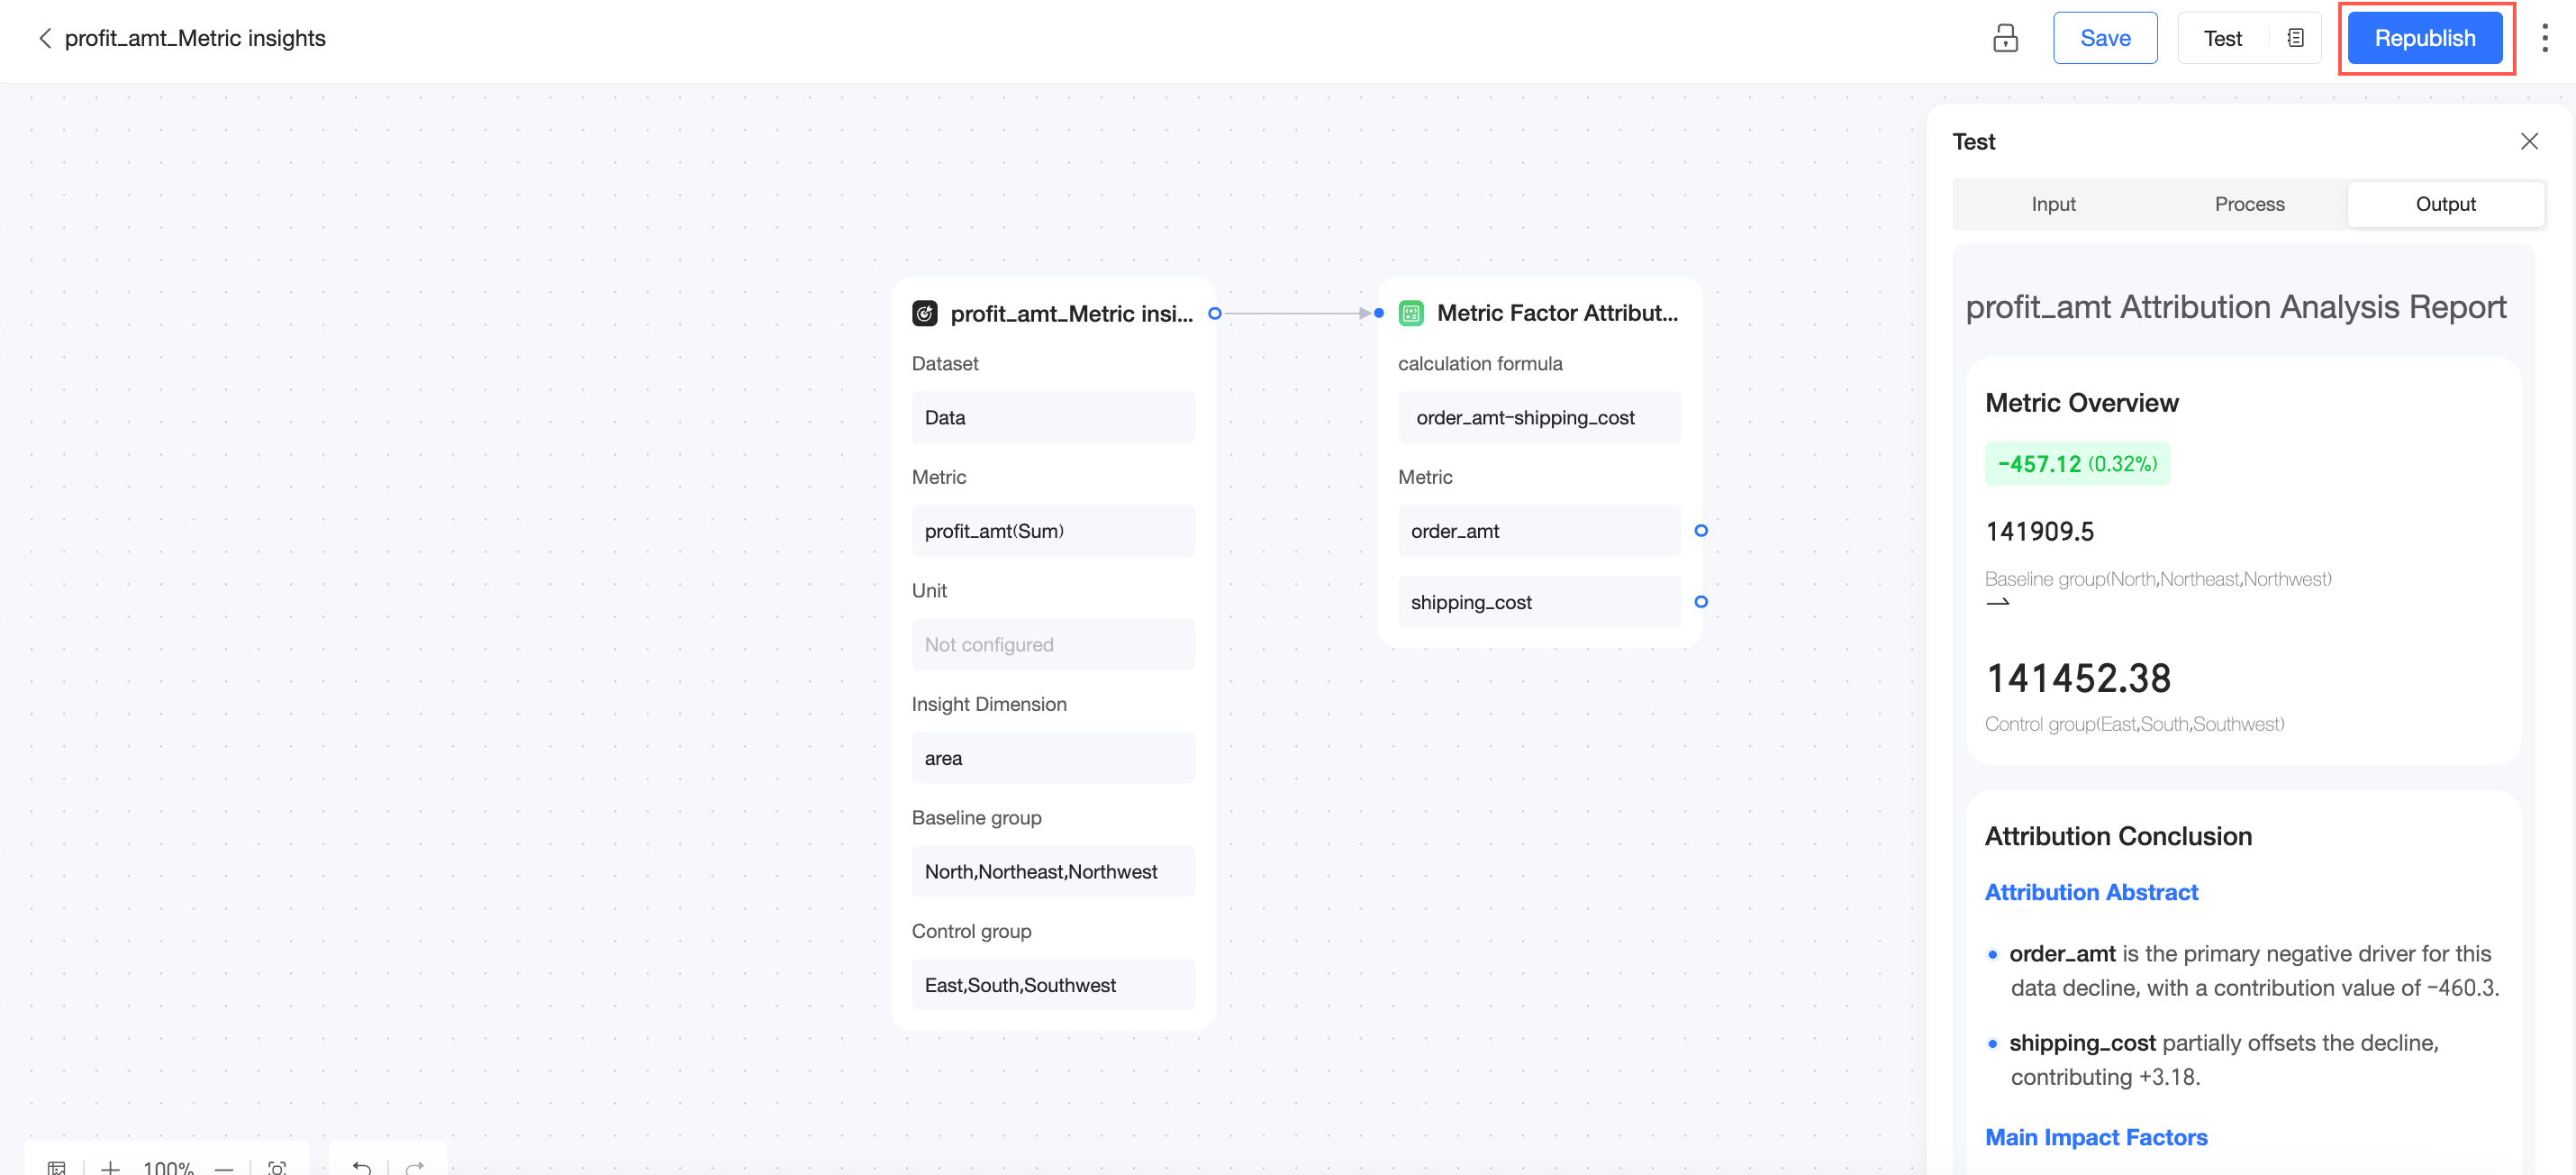
After updating a published Metric Insight, click Republish to apply the changes.
Save as
In the upper-right corner, click the
 icon and select Save as.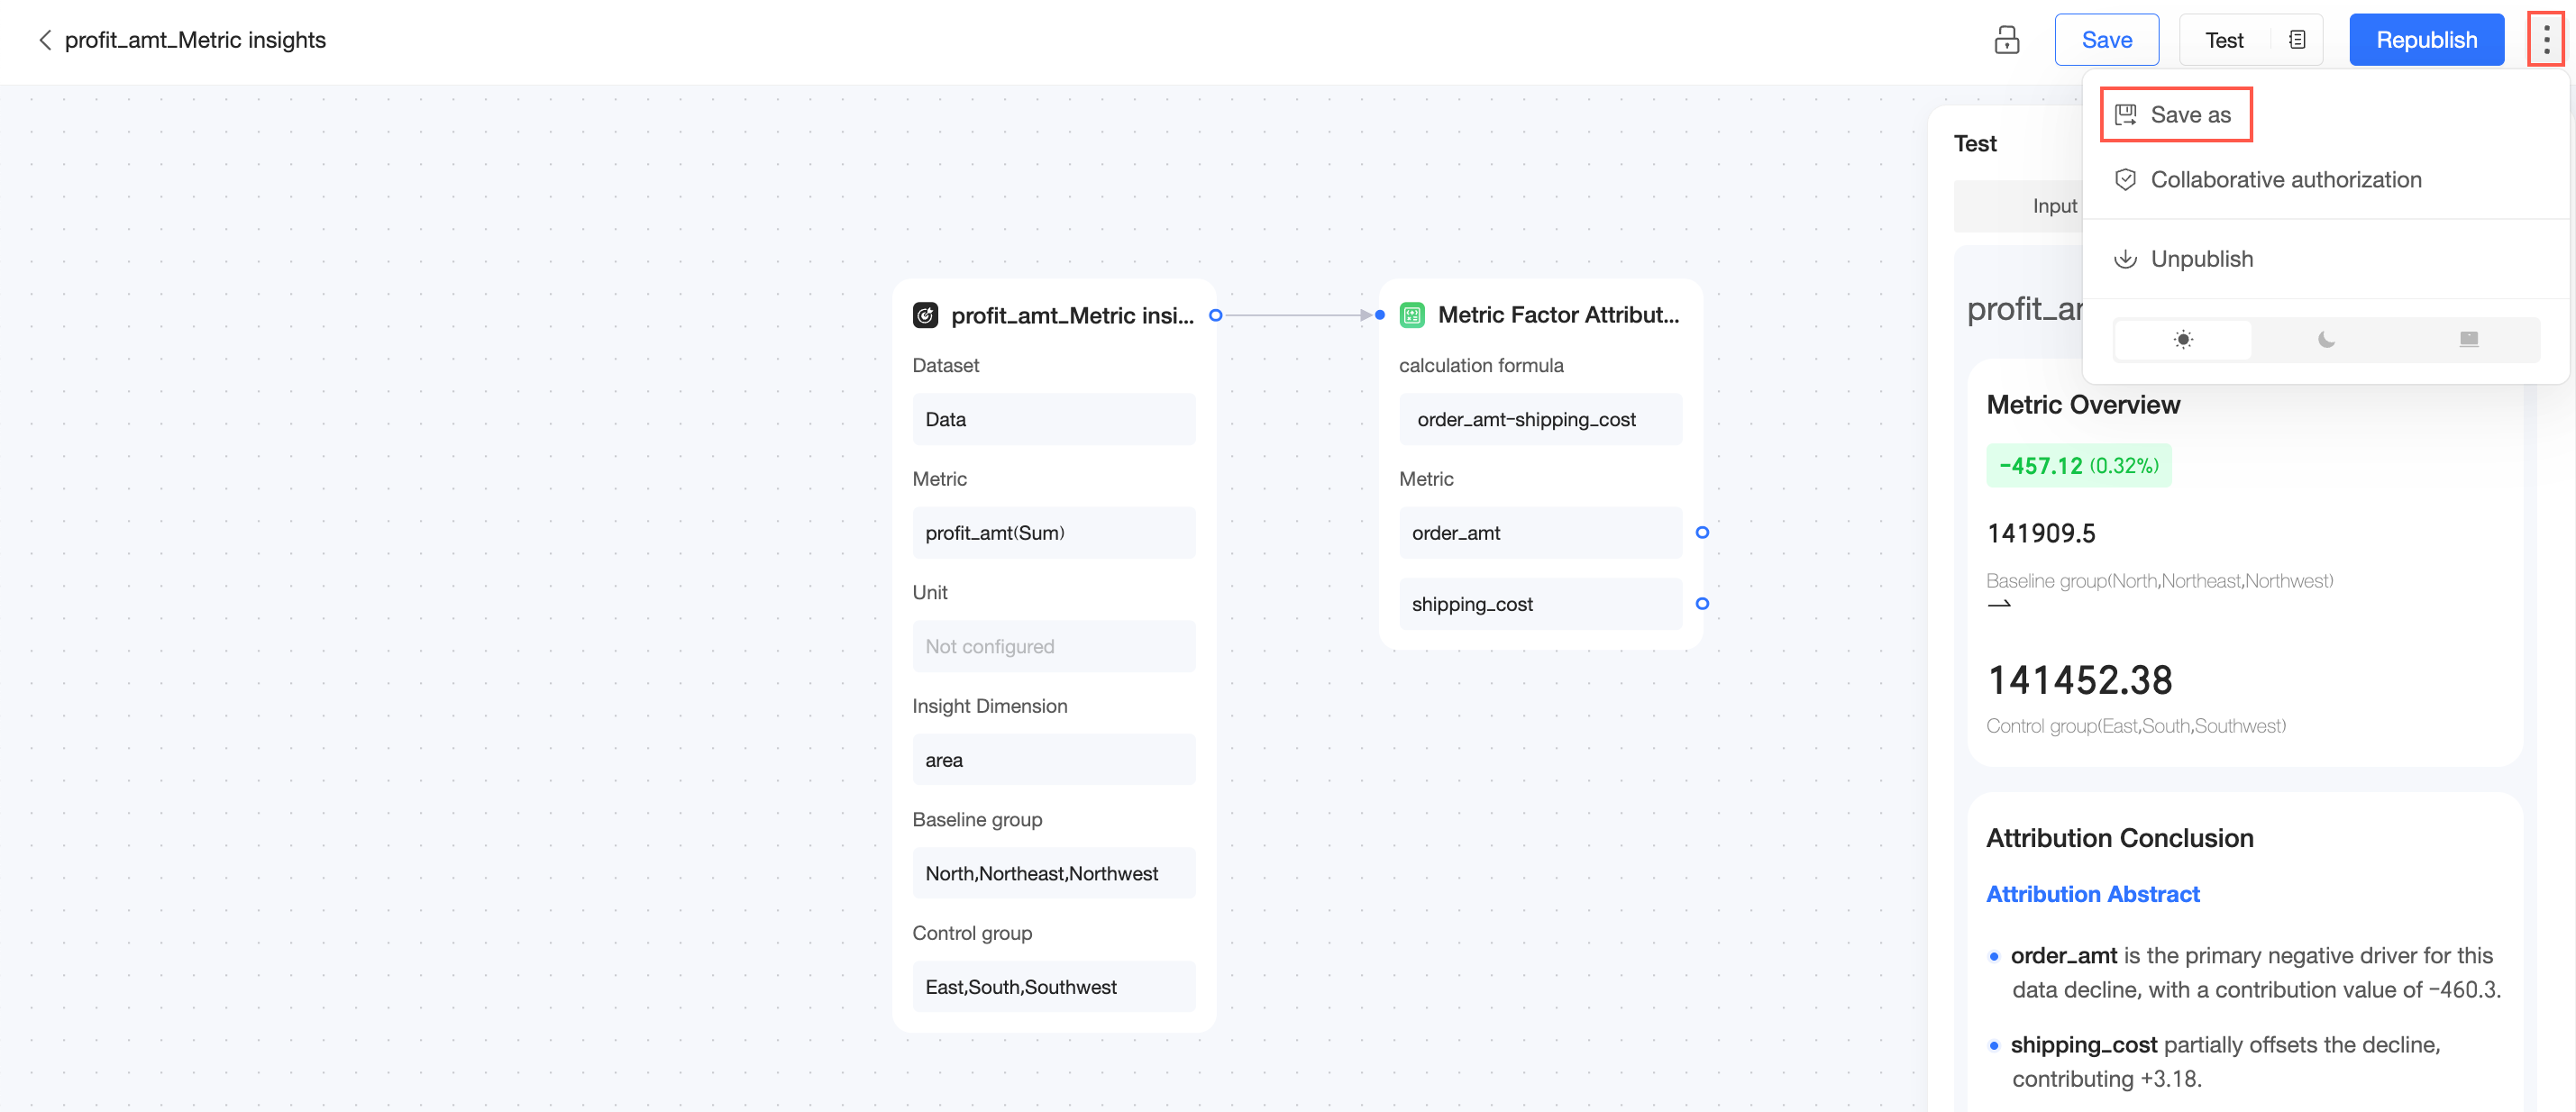
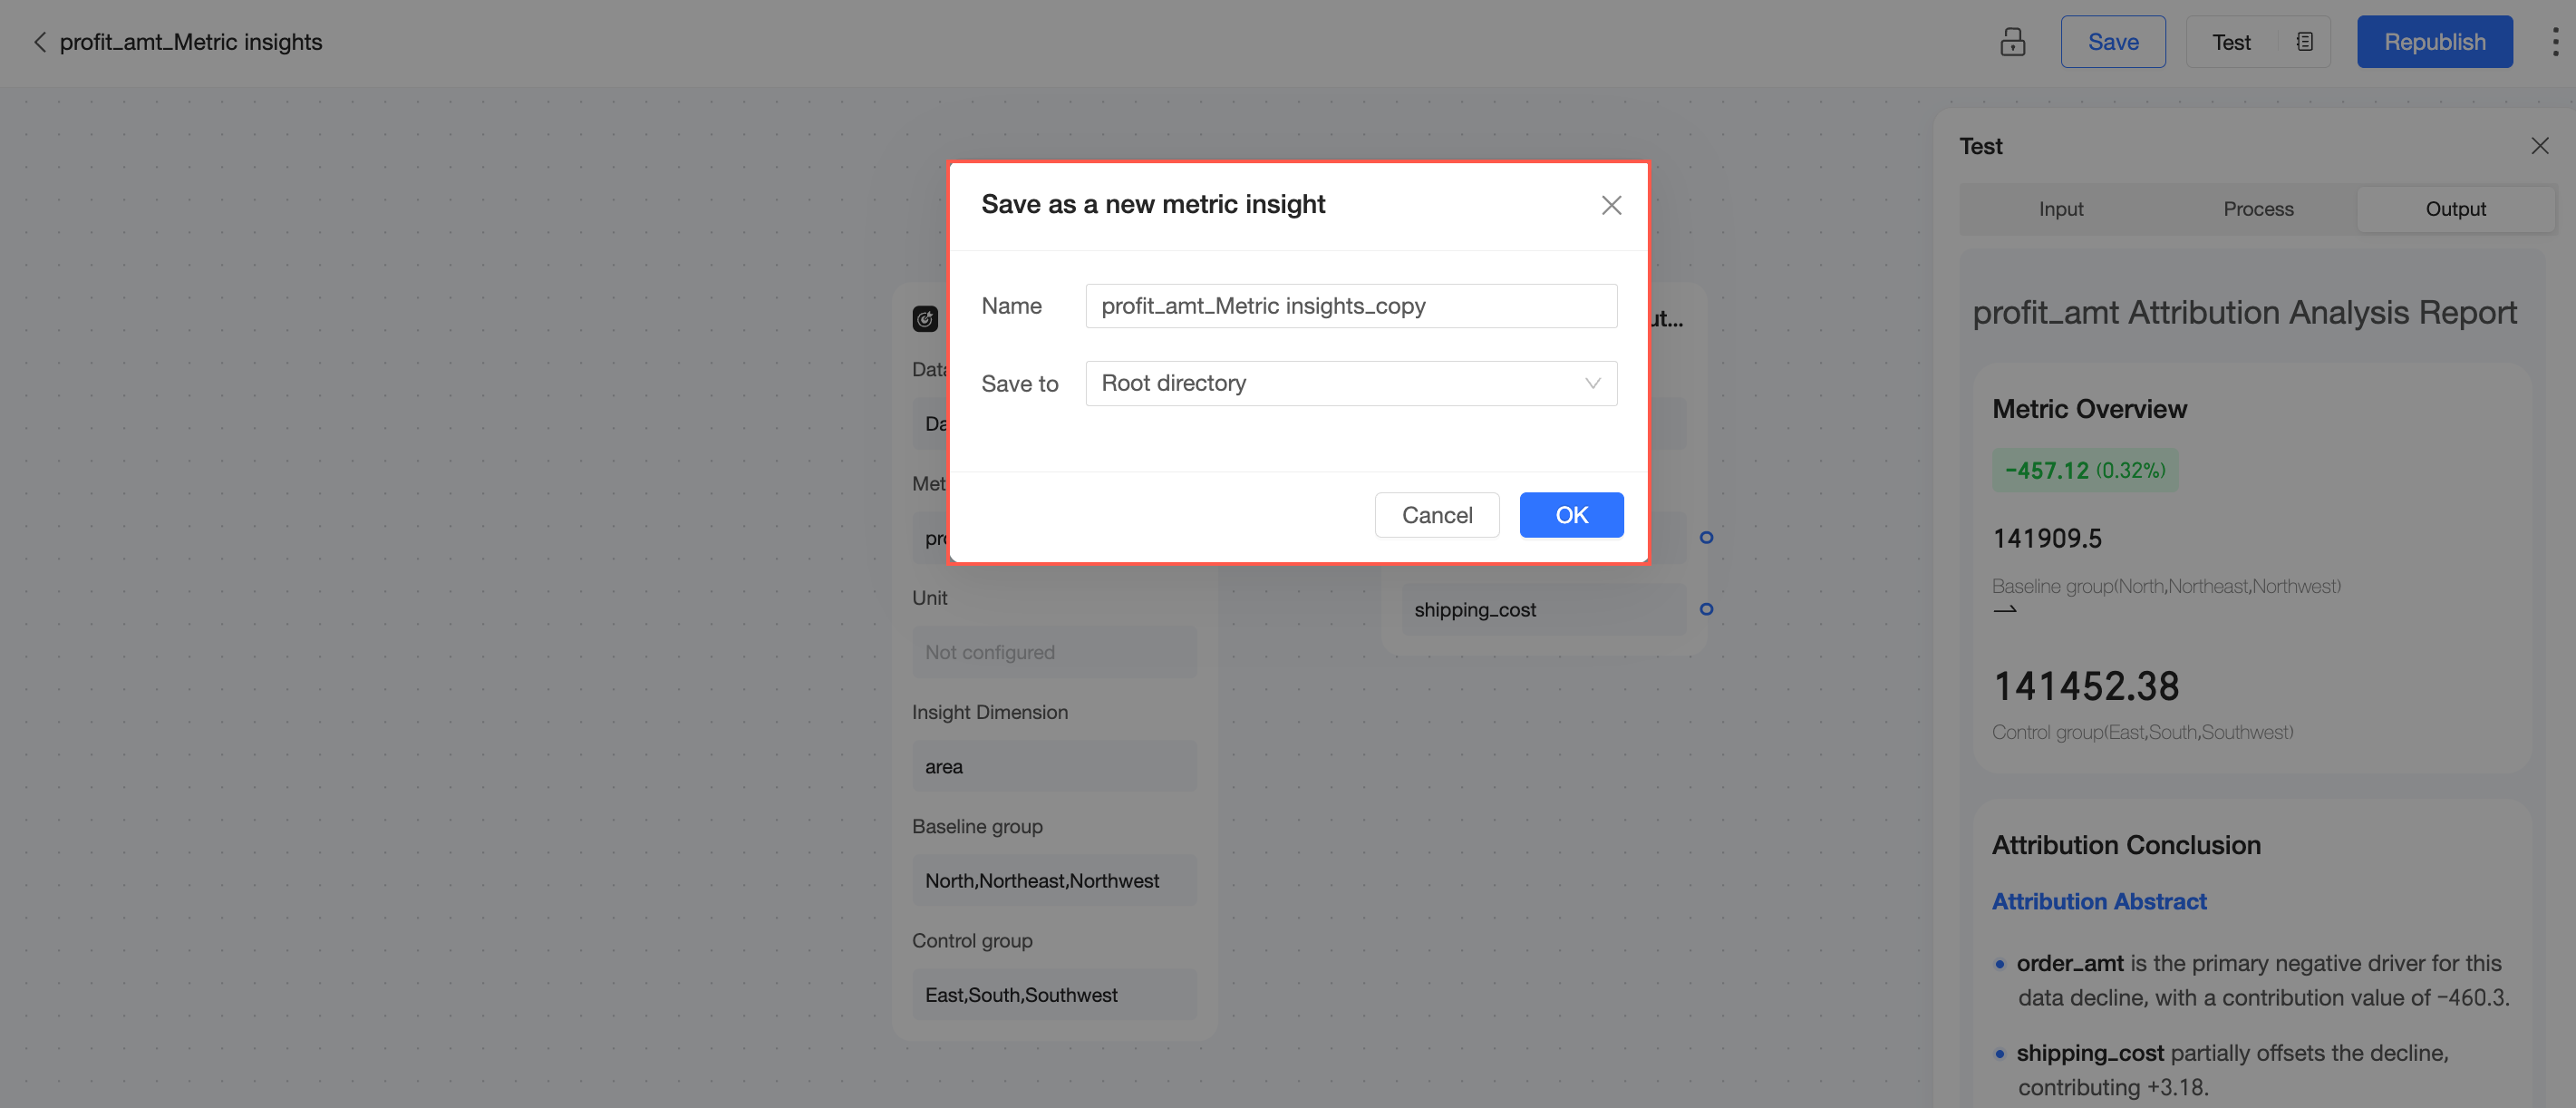
Enter a new Name for the Metric Insight, select a Location, and then click OK.
Collaboration authorization
In the upper-right corner, click the
icon and select collaboration authorization.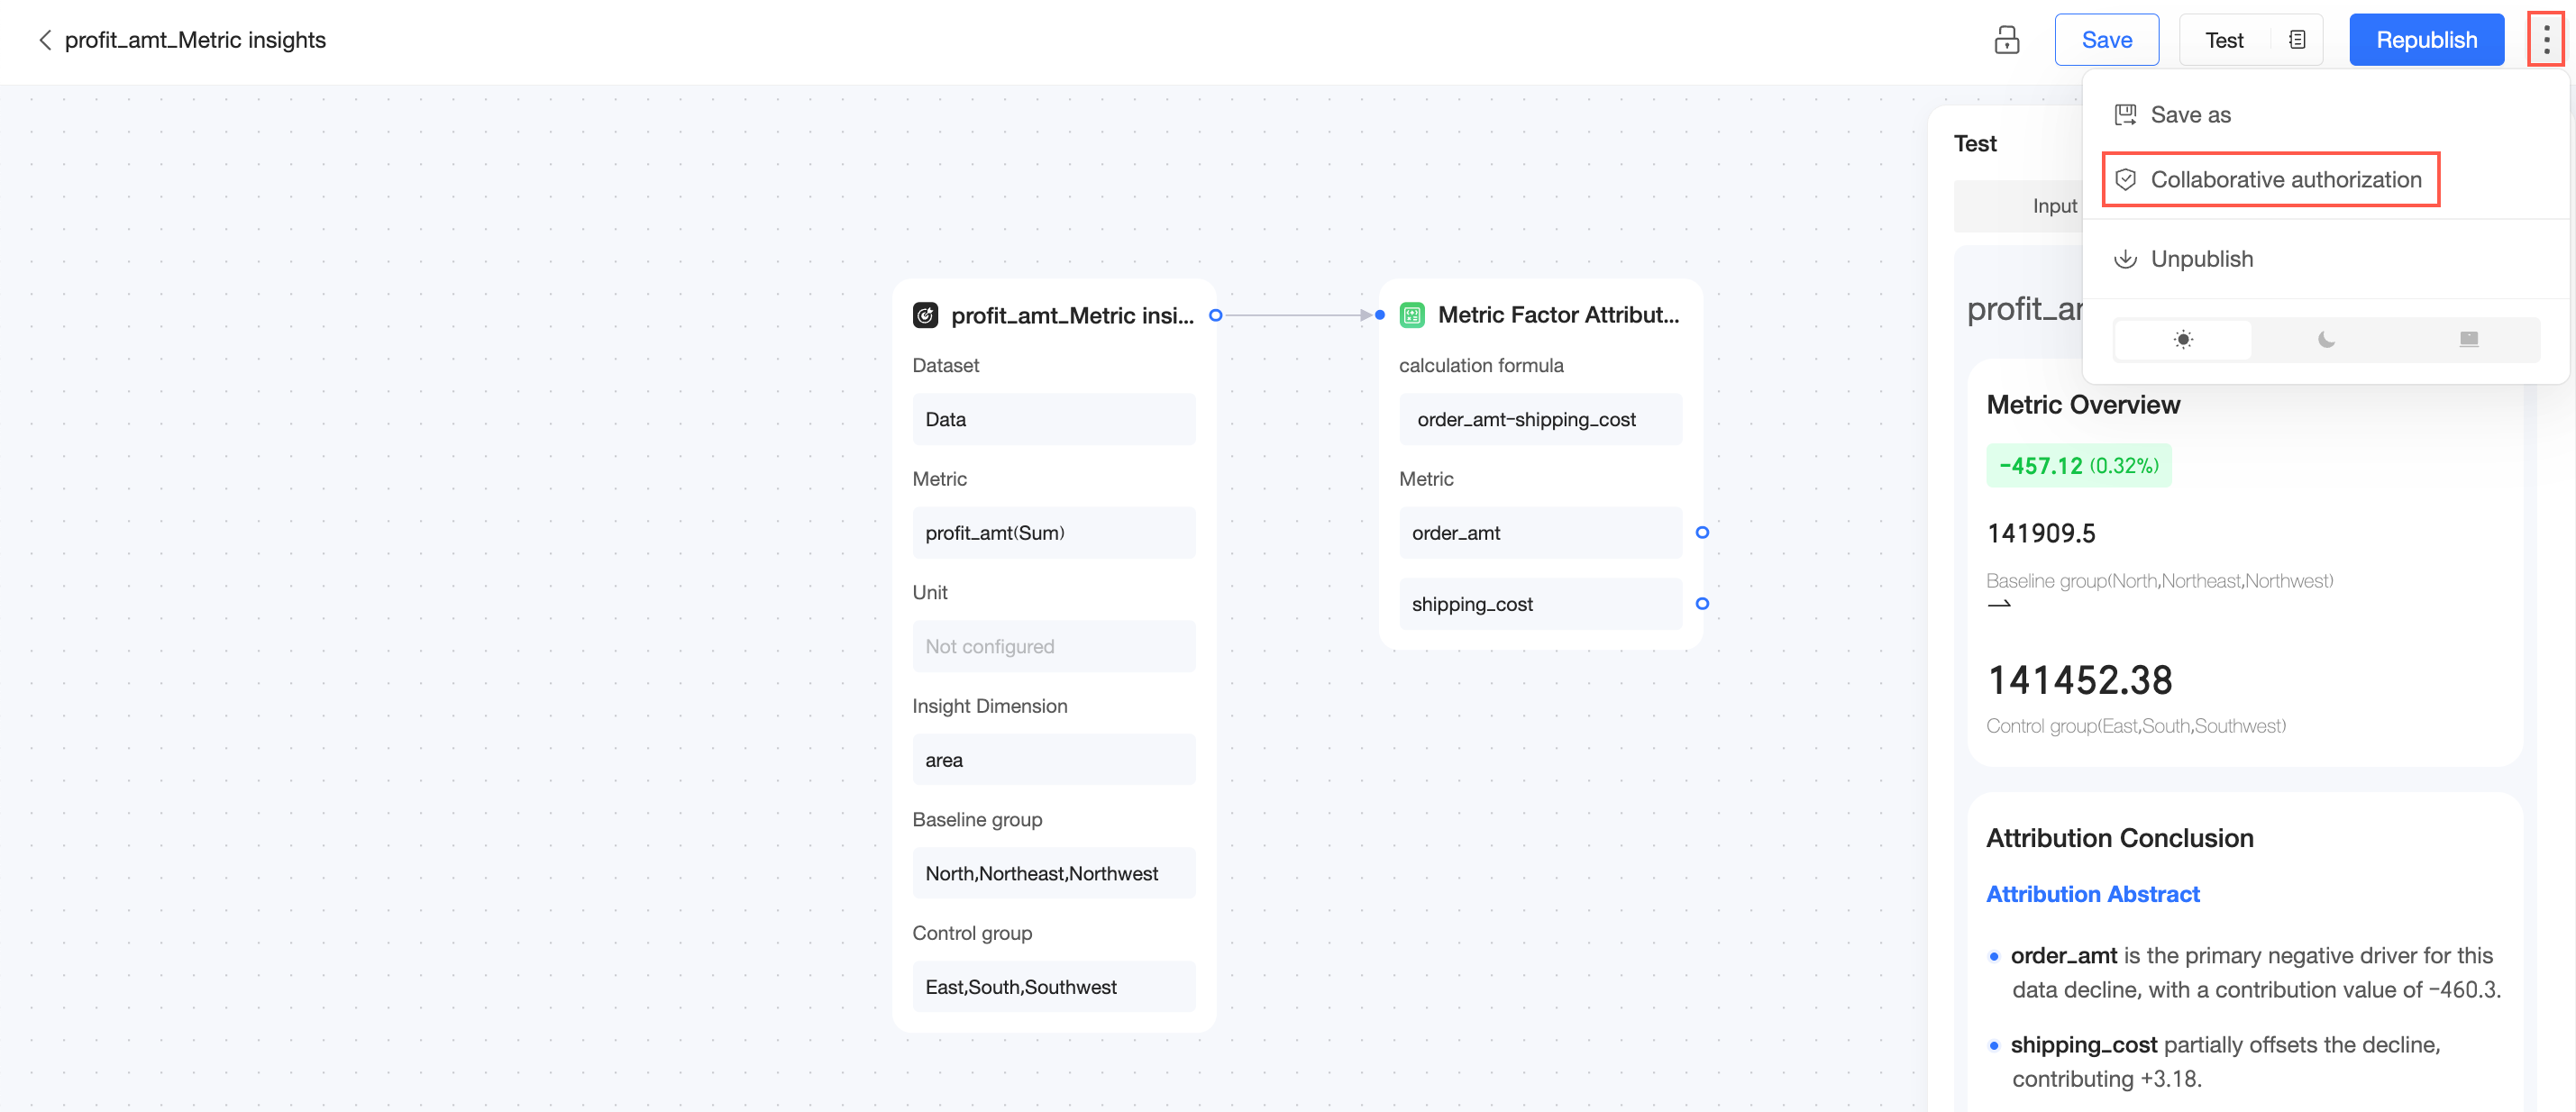
On the collaboration authorization page, grant view or edit permissions to specific users.
NoteIn the Private state, only the resource owner and the workspace administrator have edit permissions. To grant edit permissions to specific members, you must first switch to the Specific Members state.
You can grant Edit permission only to users in the current workspace who also have the Create/Edit Metric Insight permission.

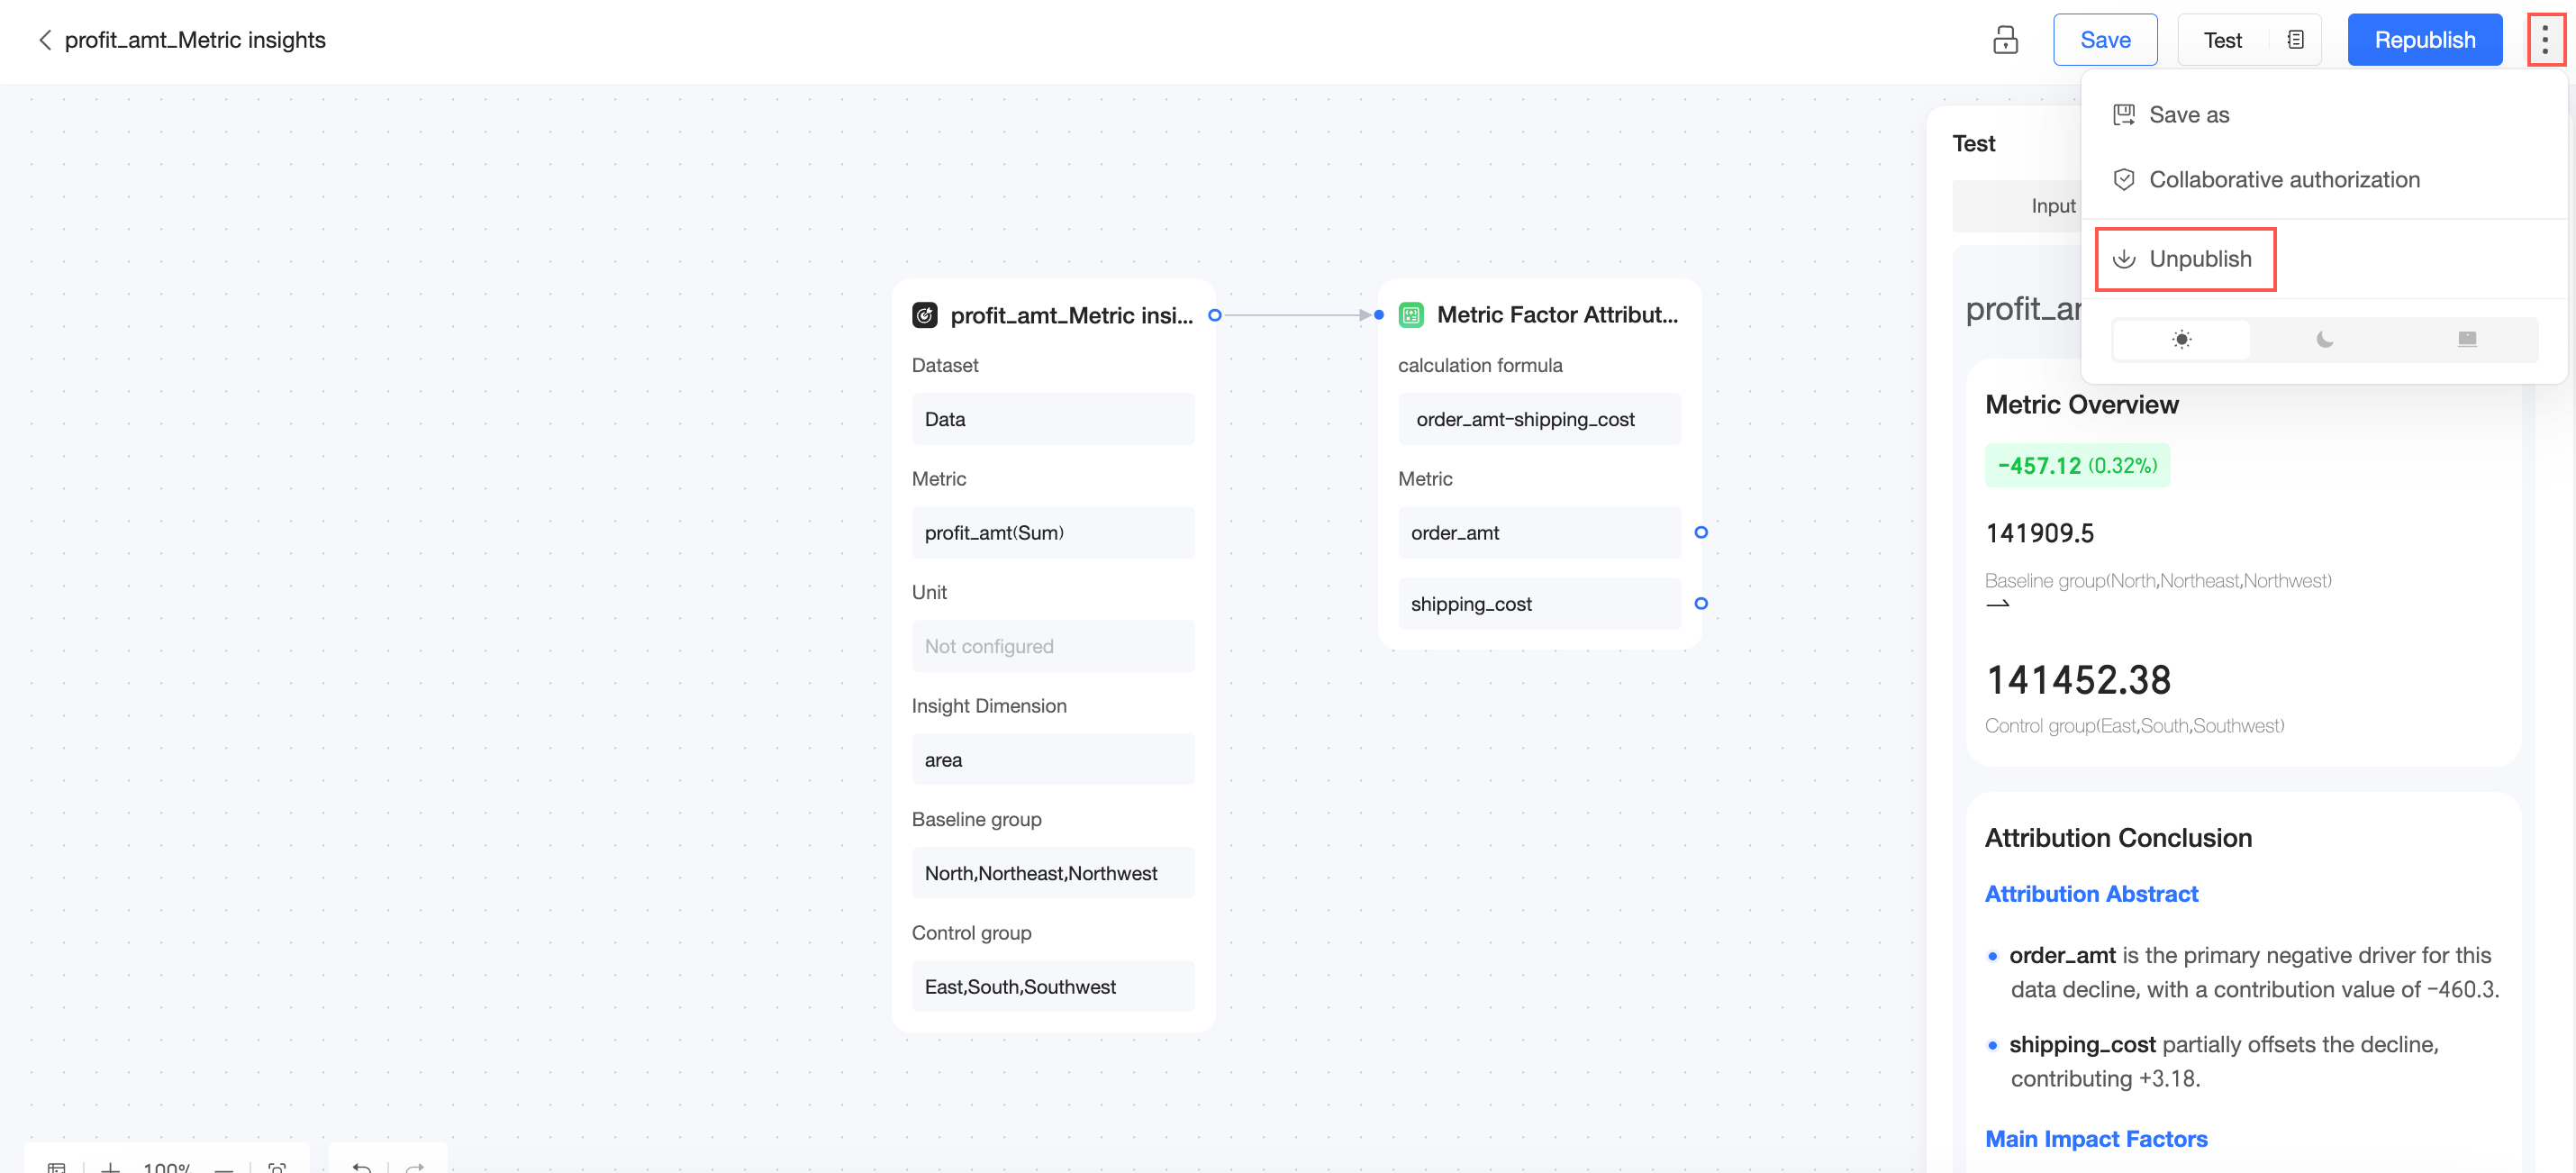
Unpublish
In the upper-right corner, click the icon and select Unpublish. After a Metric Insight is unpublished, it is no longer visible to users.
Switch themes
You can set the theme to Light Mode, Dark Mode, or Follow Organization Settings.
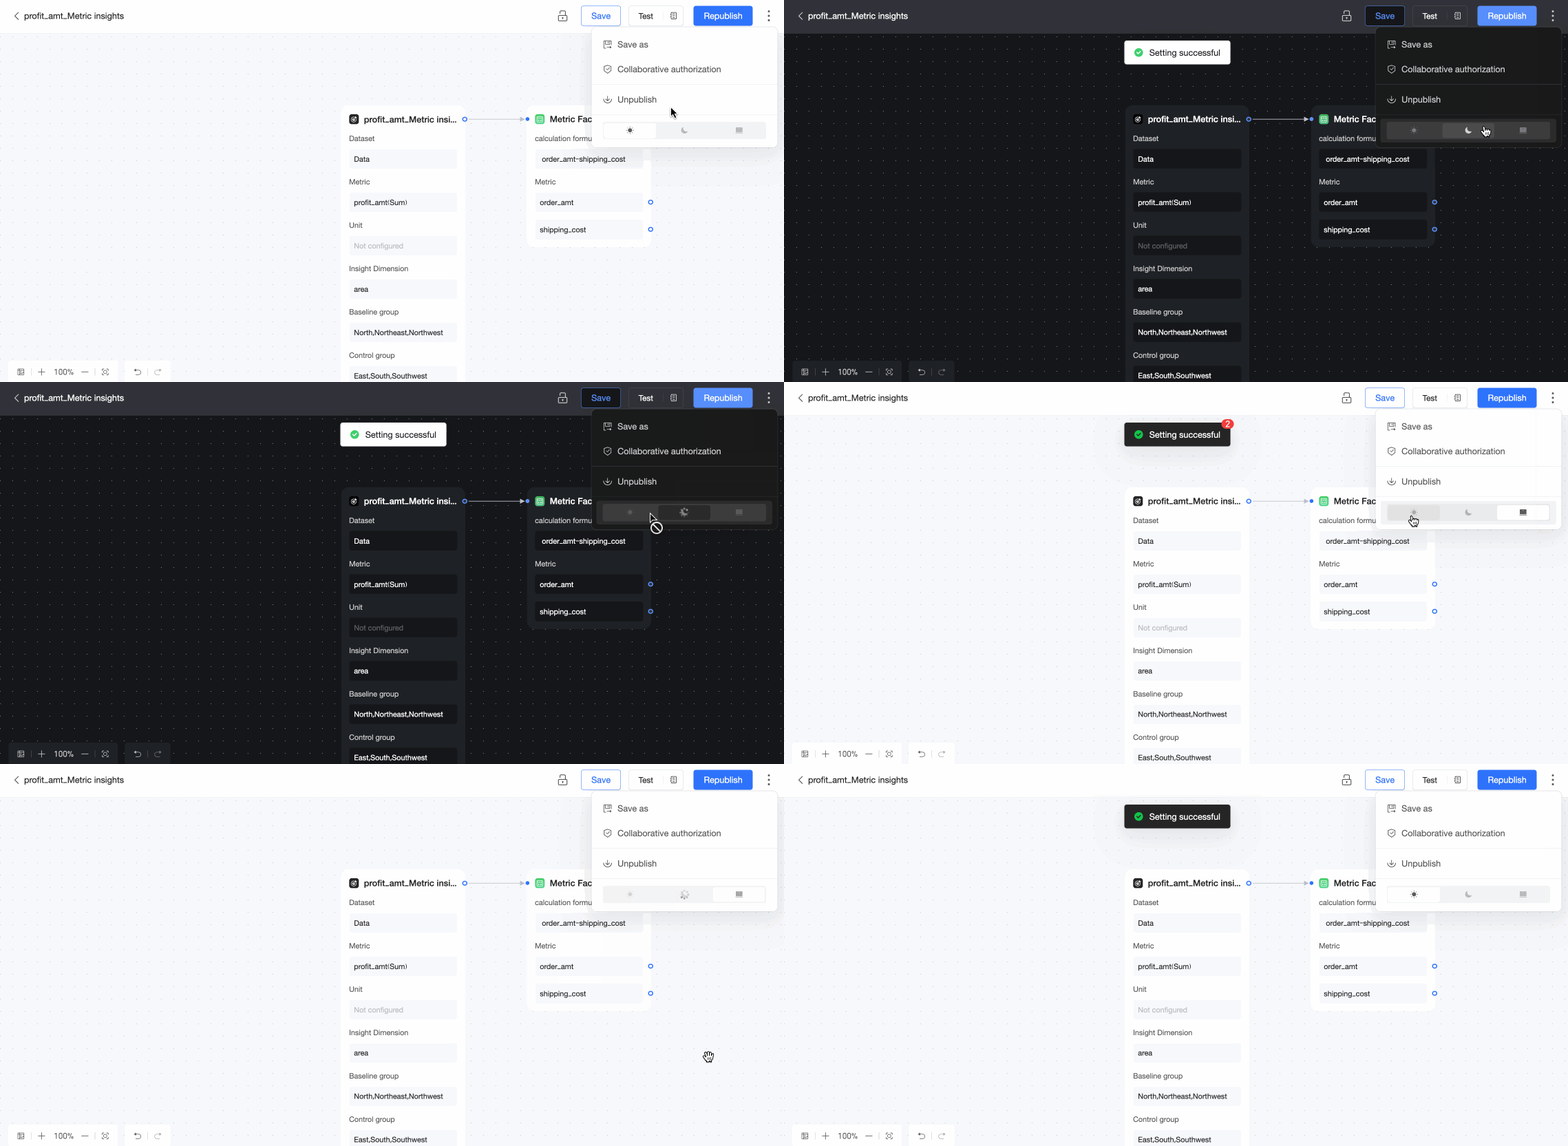
For more information about the system theme applied by Follow Organization Settings, see System Theme Customization.
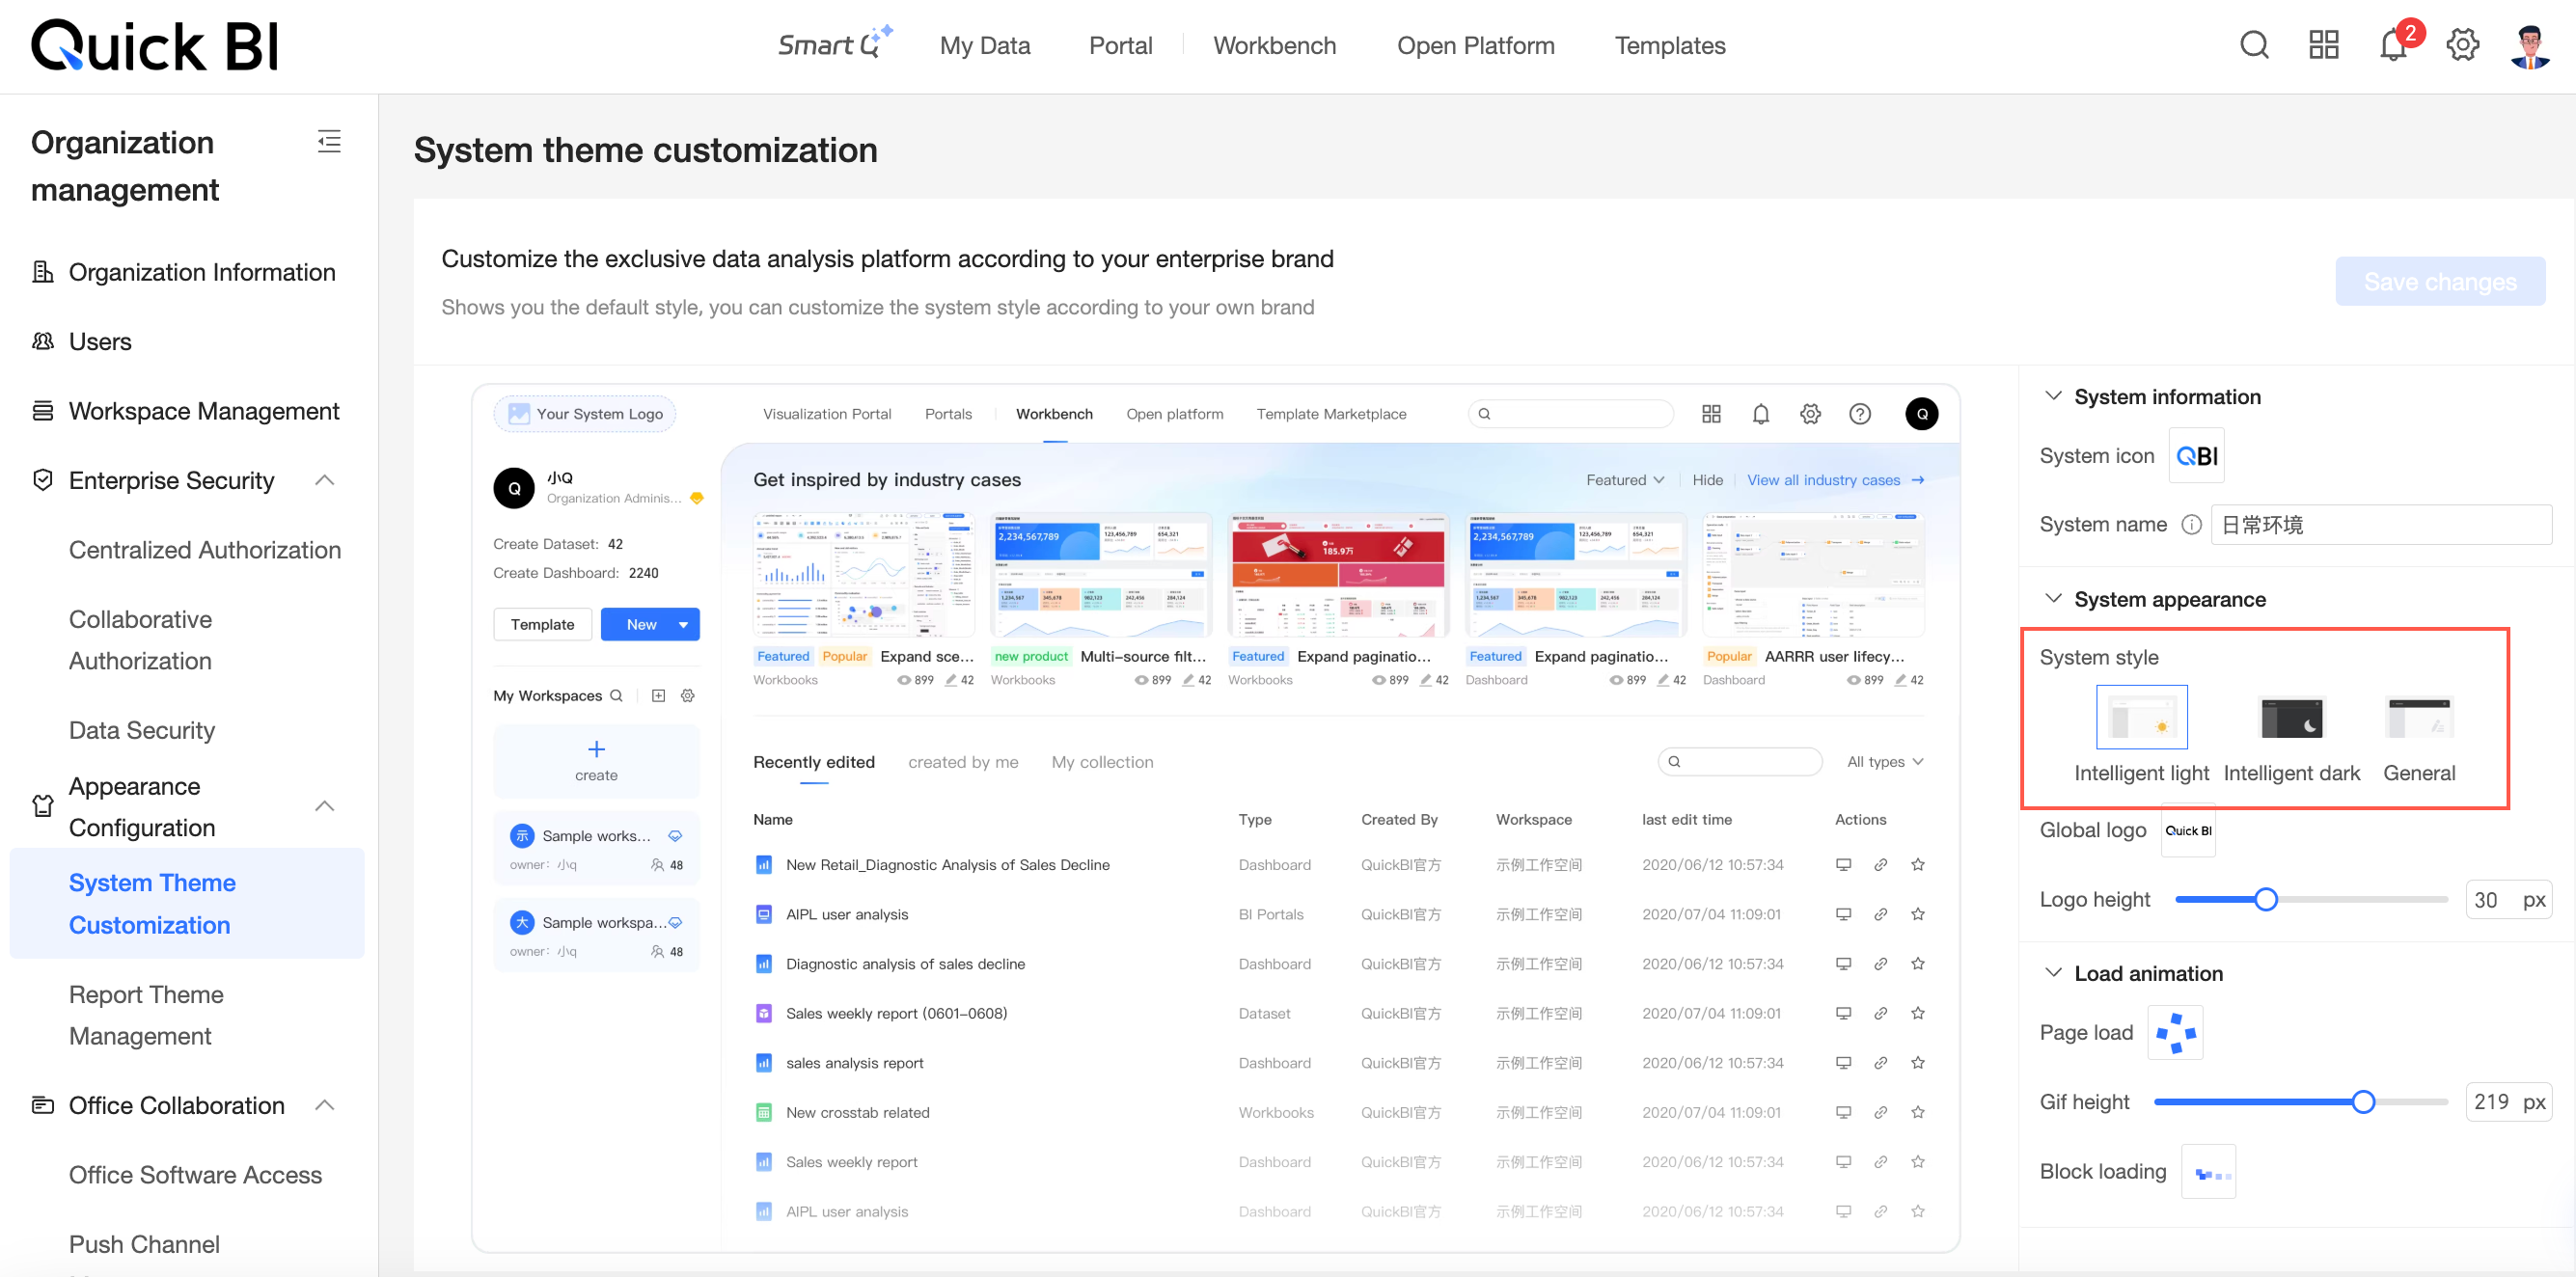
Only an organization administrator can configure the system style in System Theme Customization. The theme setting in Metric Insight overrides the organization-level settings.
List page operations
Follow the steps in the figure below to navigate to the Insight Attribution > Metric Insight list page.
On the Metric Insight list page, you can perform the following actions:
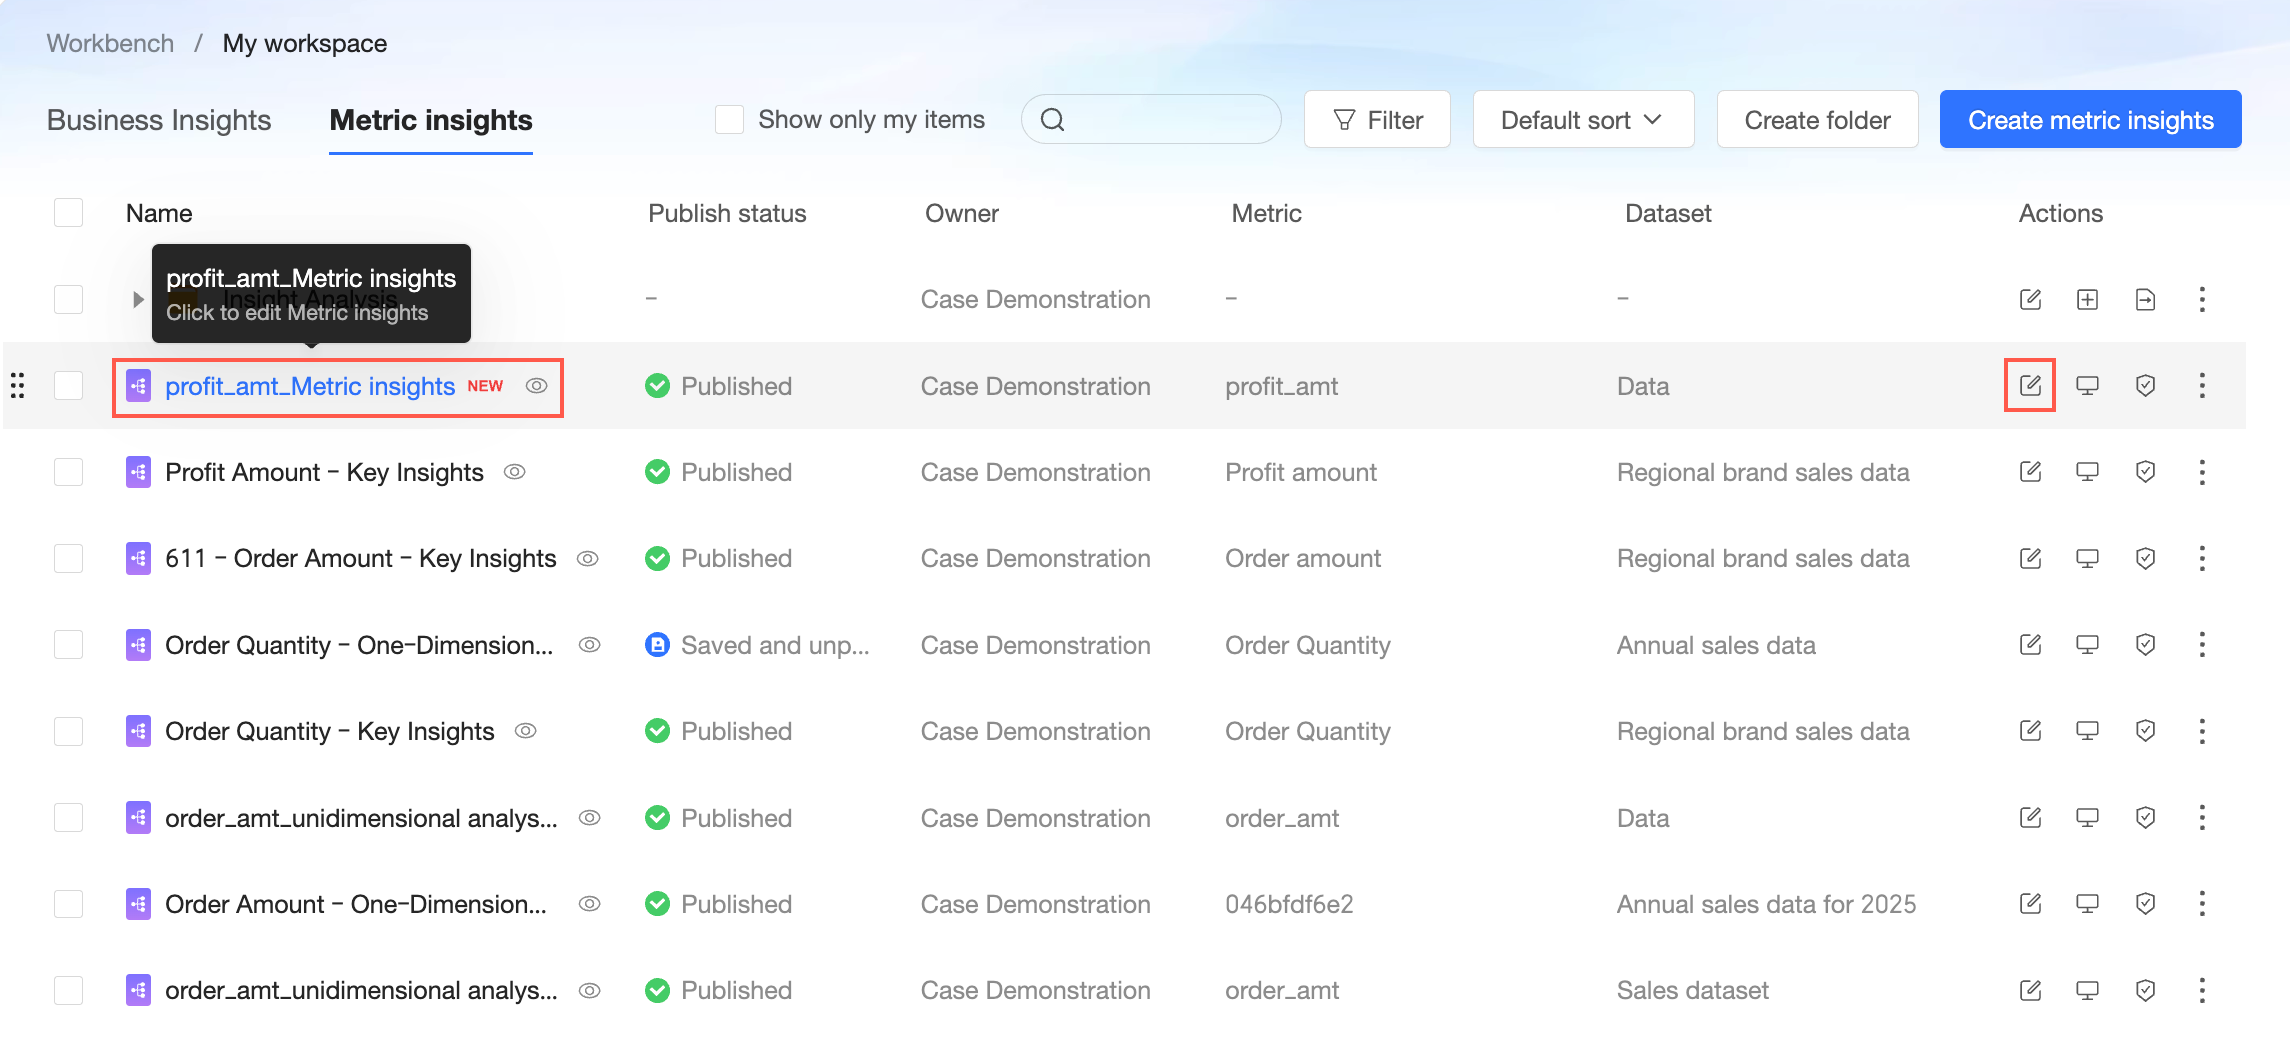
Edit
Click the name of a Metric Insight or click the  icon in the Actions column to open the edit page.
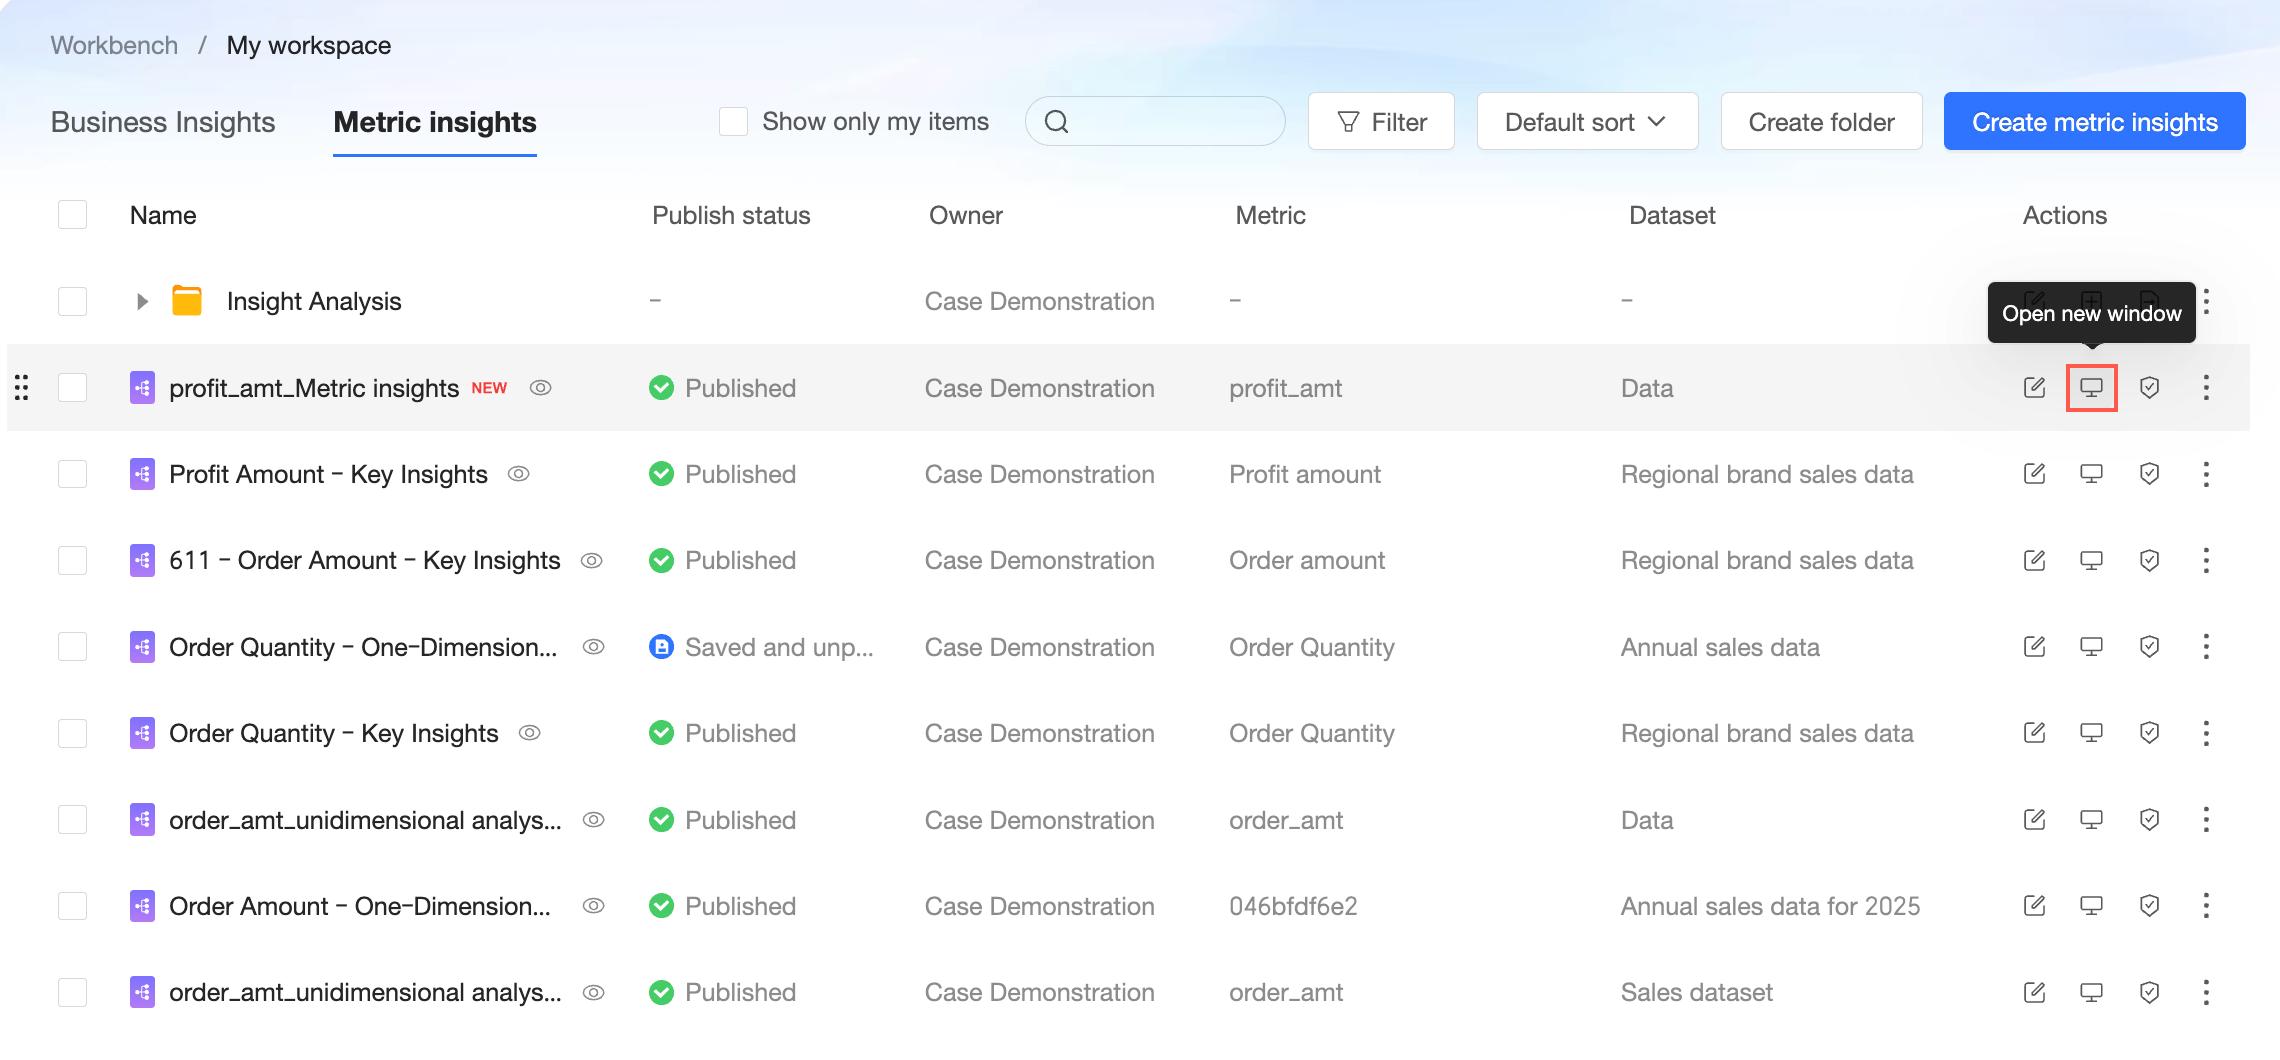
View in new window
Click the  icon in the Actions column to open the Metric Insight in a new window.
Only published Metric Insights can be viewed in a new window.
Collaboration authorization
Click the
 icon and select collaboration authorization.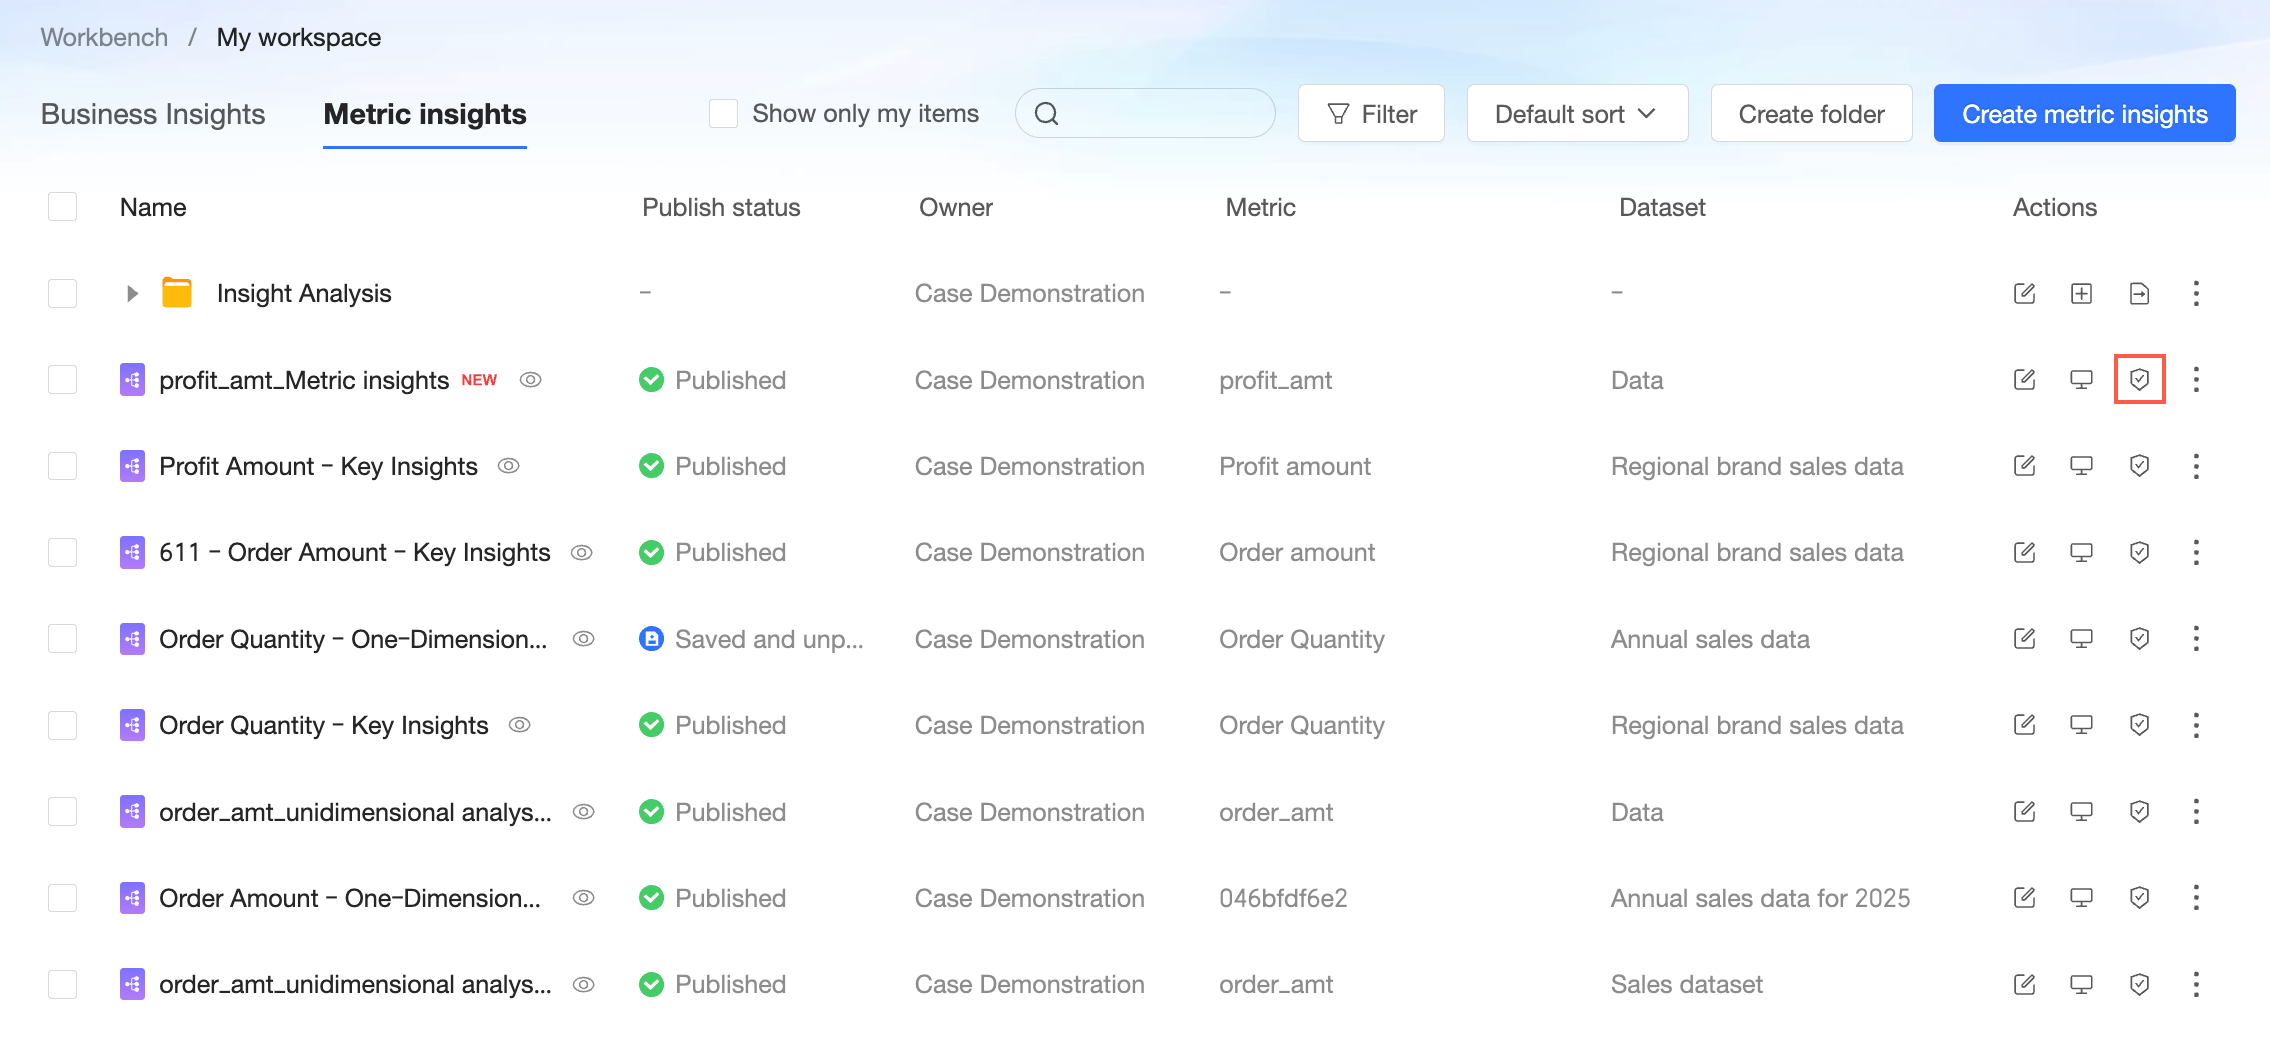
On the collaboration authorization page, grant view or edit permissions to specific users.
NoteIn the Private state, only the resource owner and the workspace administrator have edit permissions. To grant edit permissions to specific members, you must first switch to the Specific Members state.
You can grant Edit permission only to users in the current workspace who also have the Create/Edit Metric Insight permission.
Properties
In the Actions column, click the
icon and select Properties.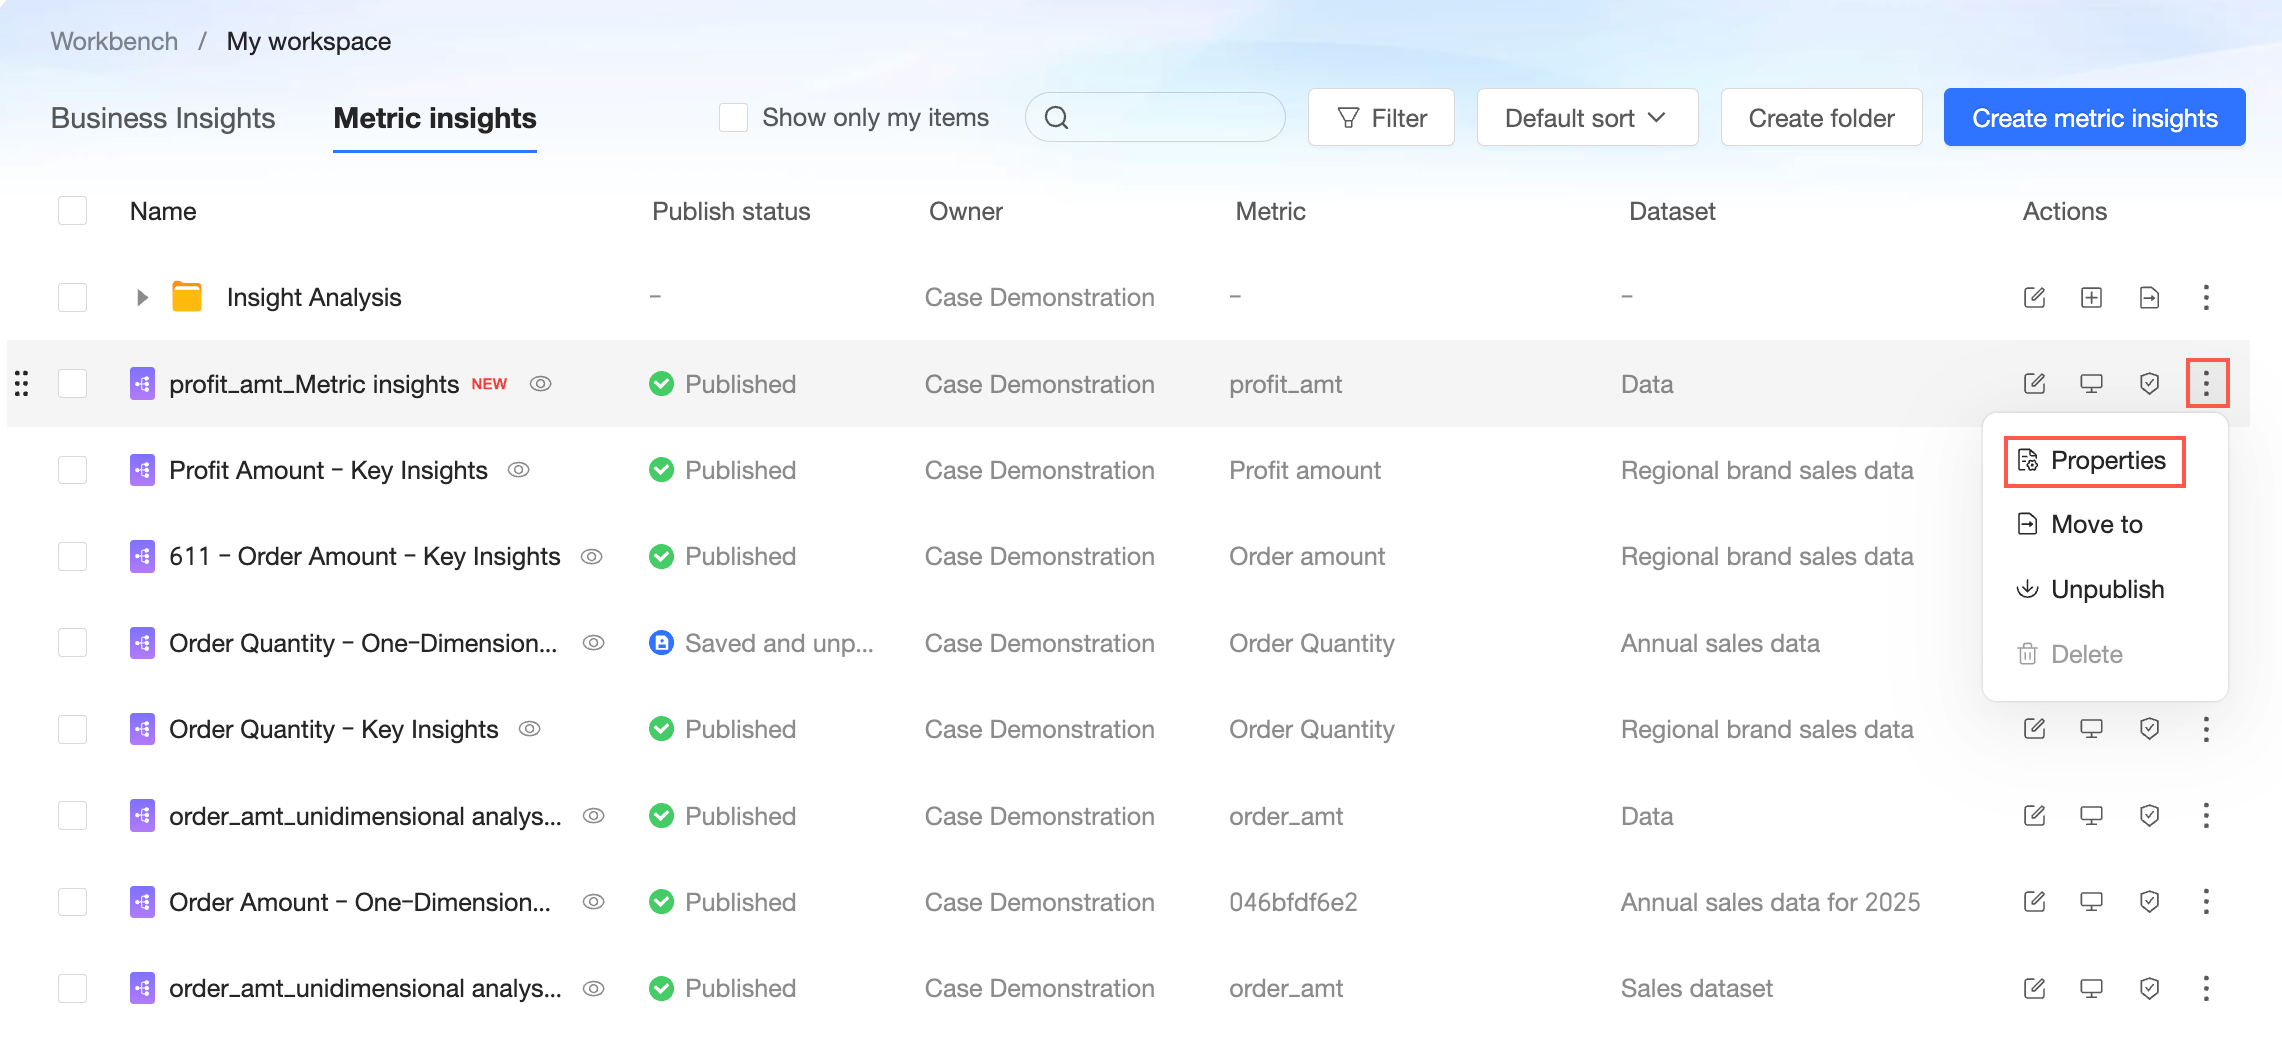
On the Properties page, you can modify the Name, transfer the Owner, and add a Description for the Metric Insight.
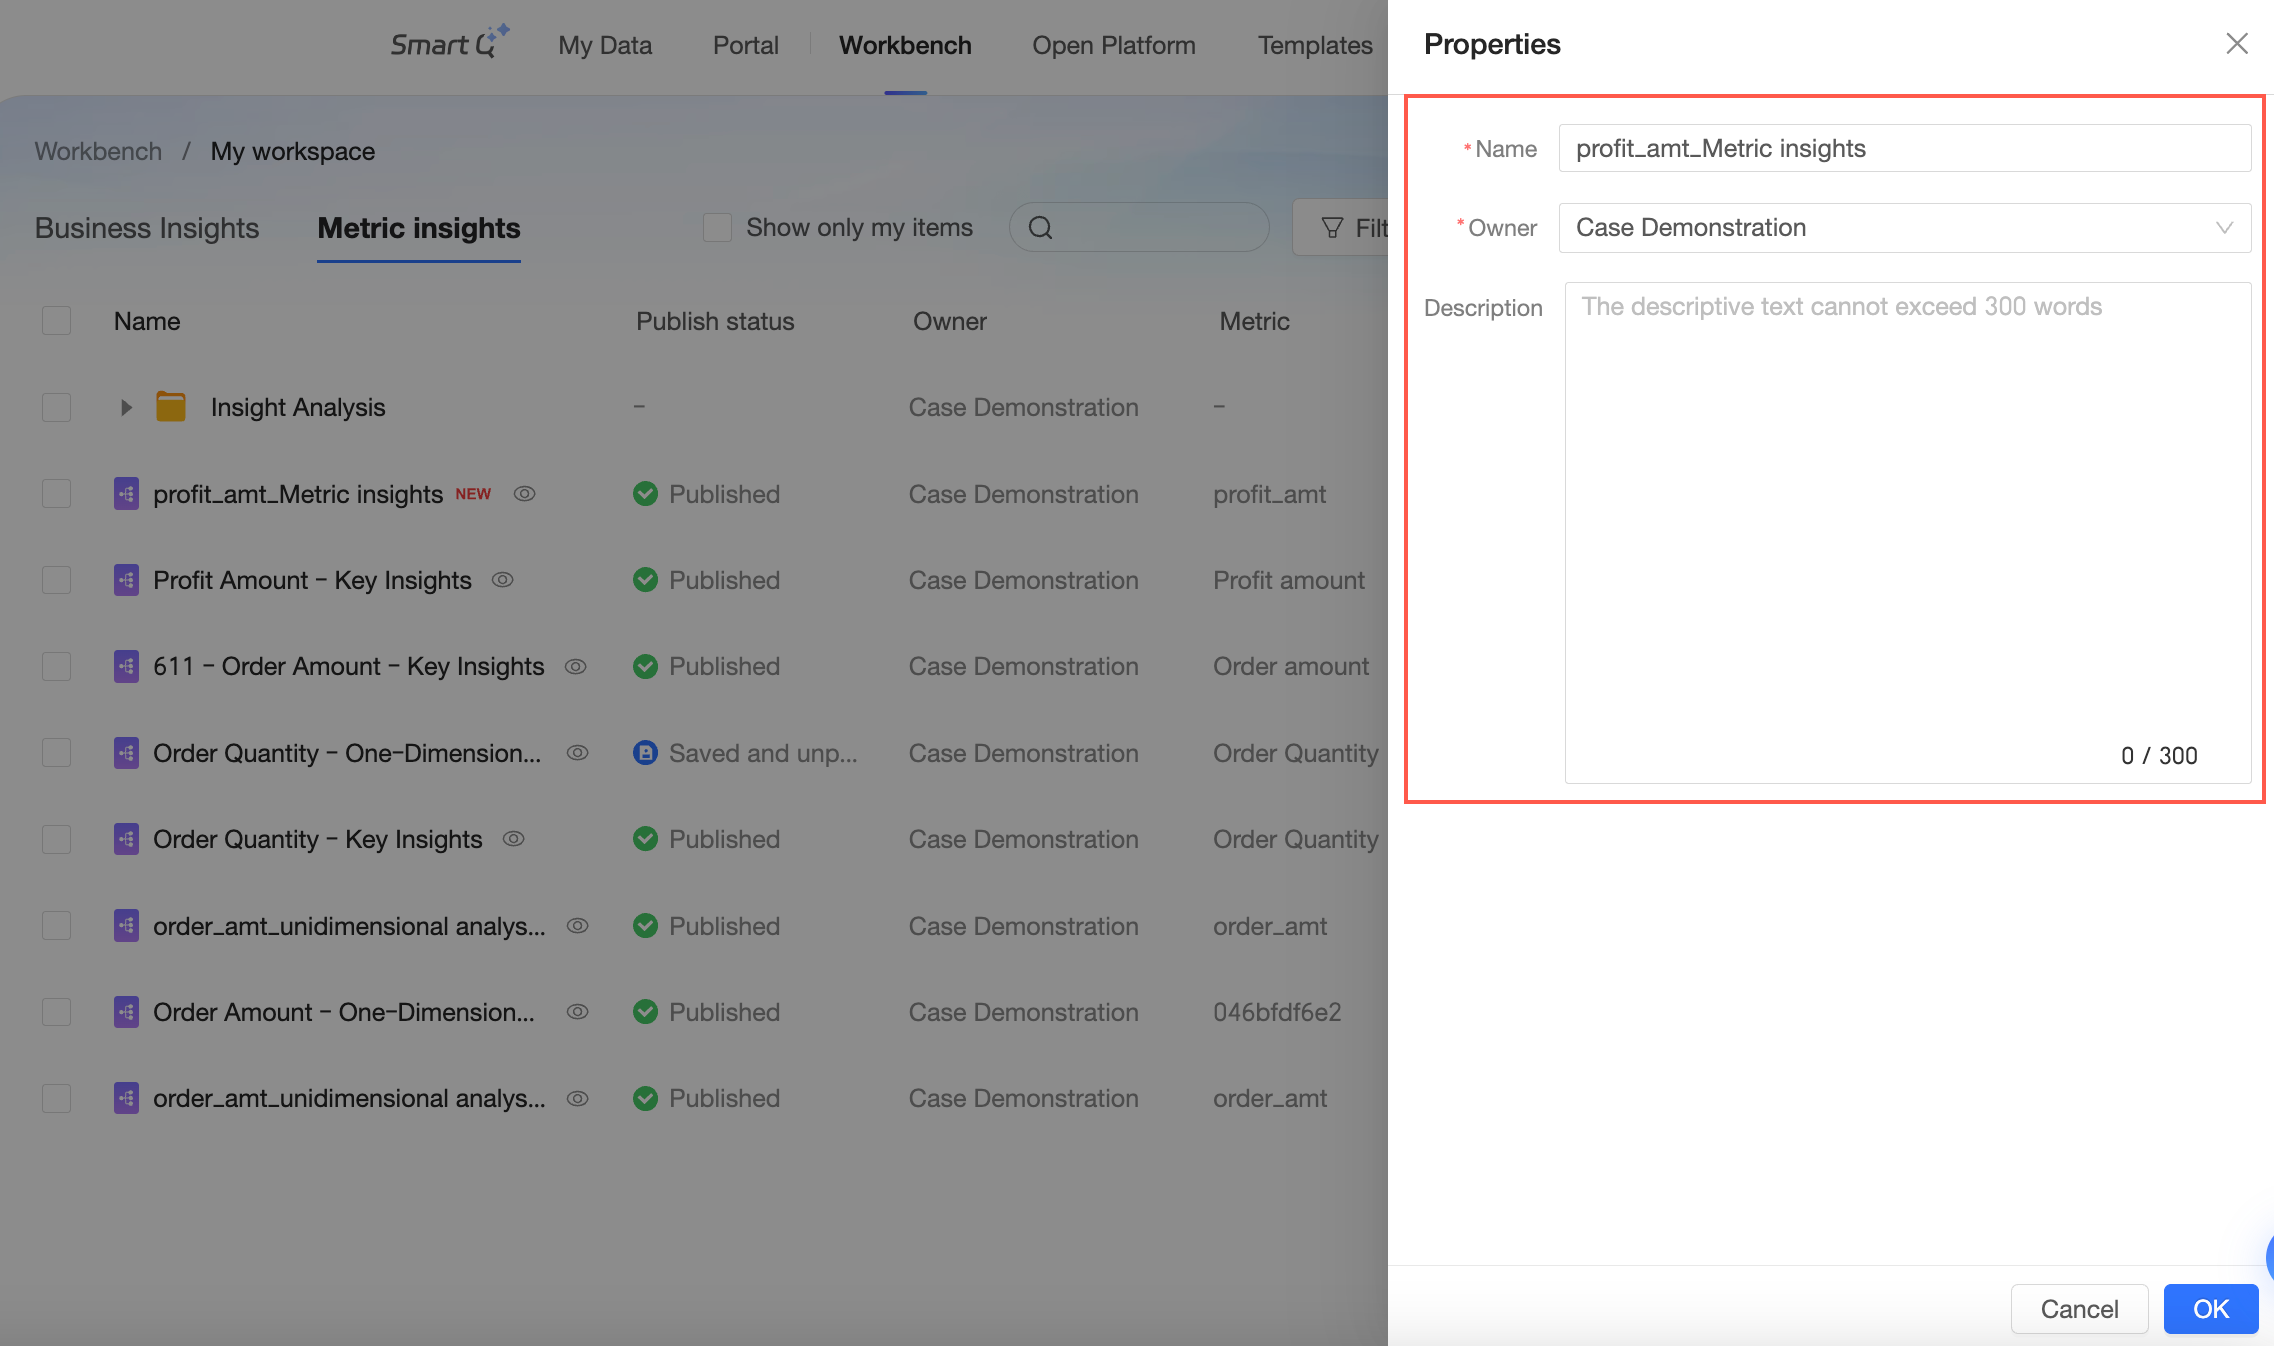
Click OK to save the properties.
Move to
In the Actions column, click the
icon and select Move to.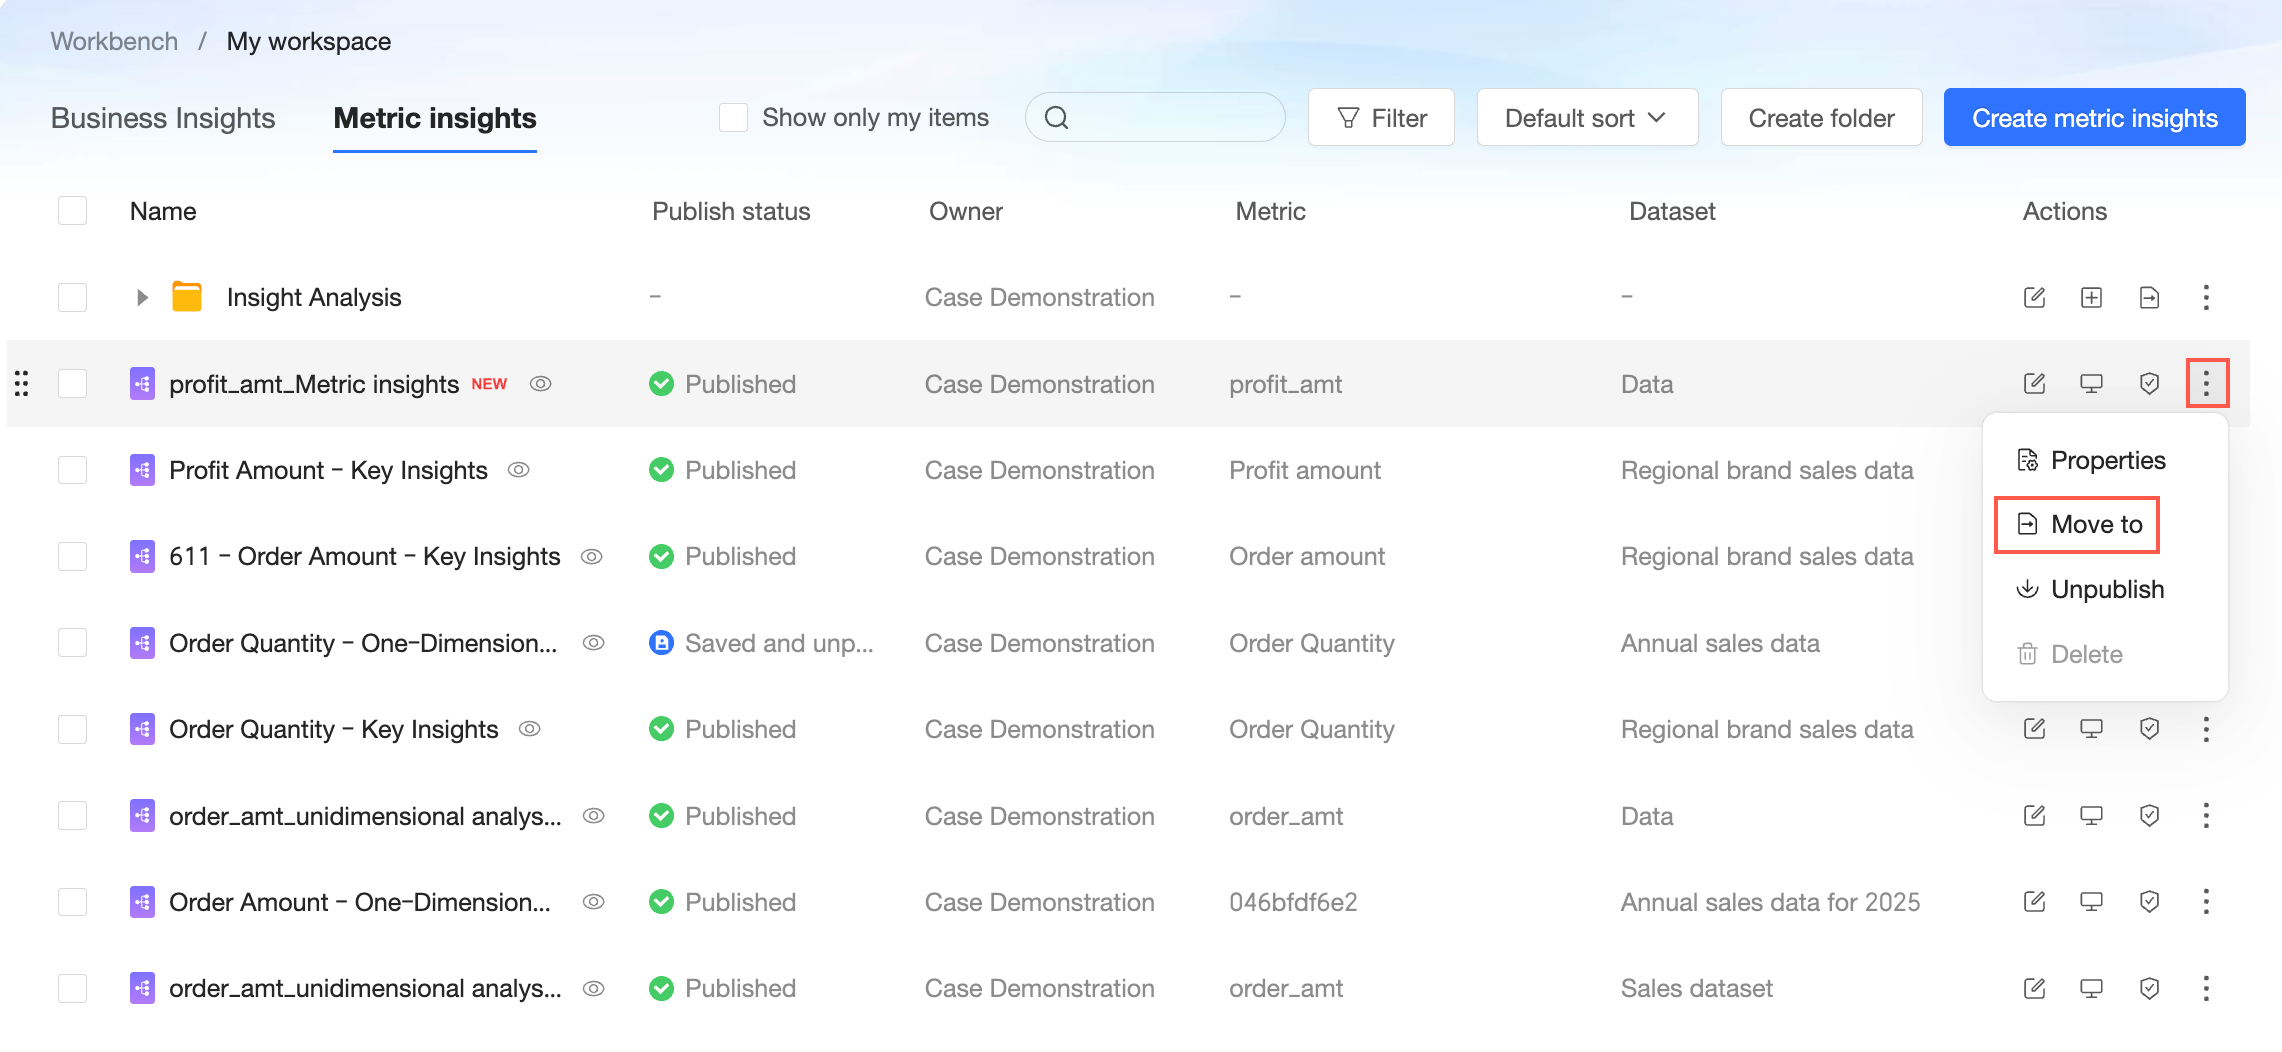
Select a destination folder for the resource.
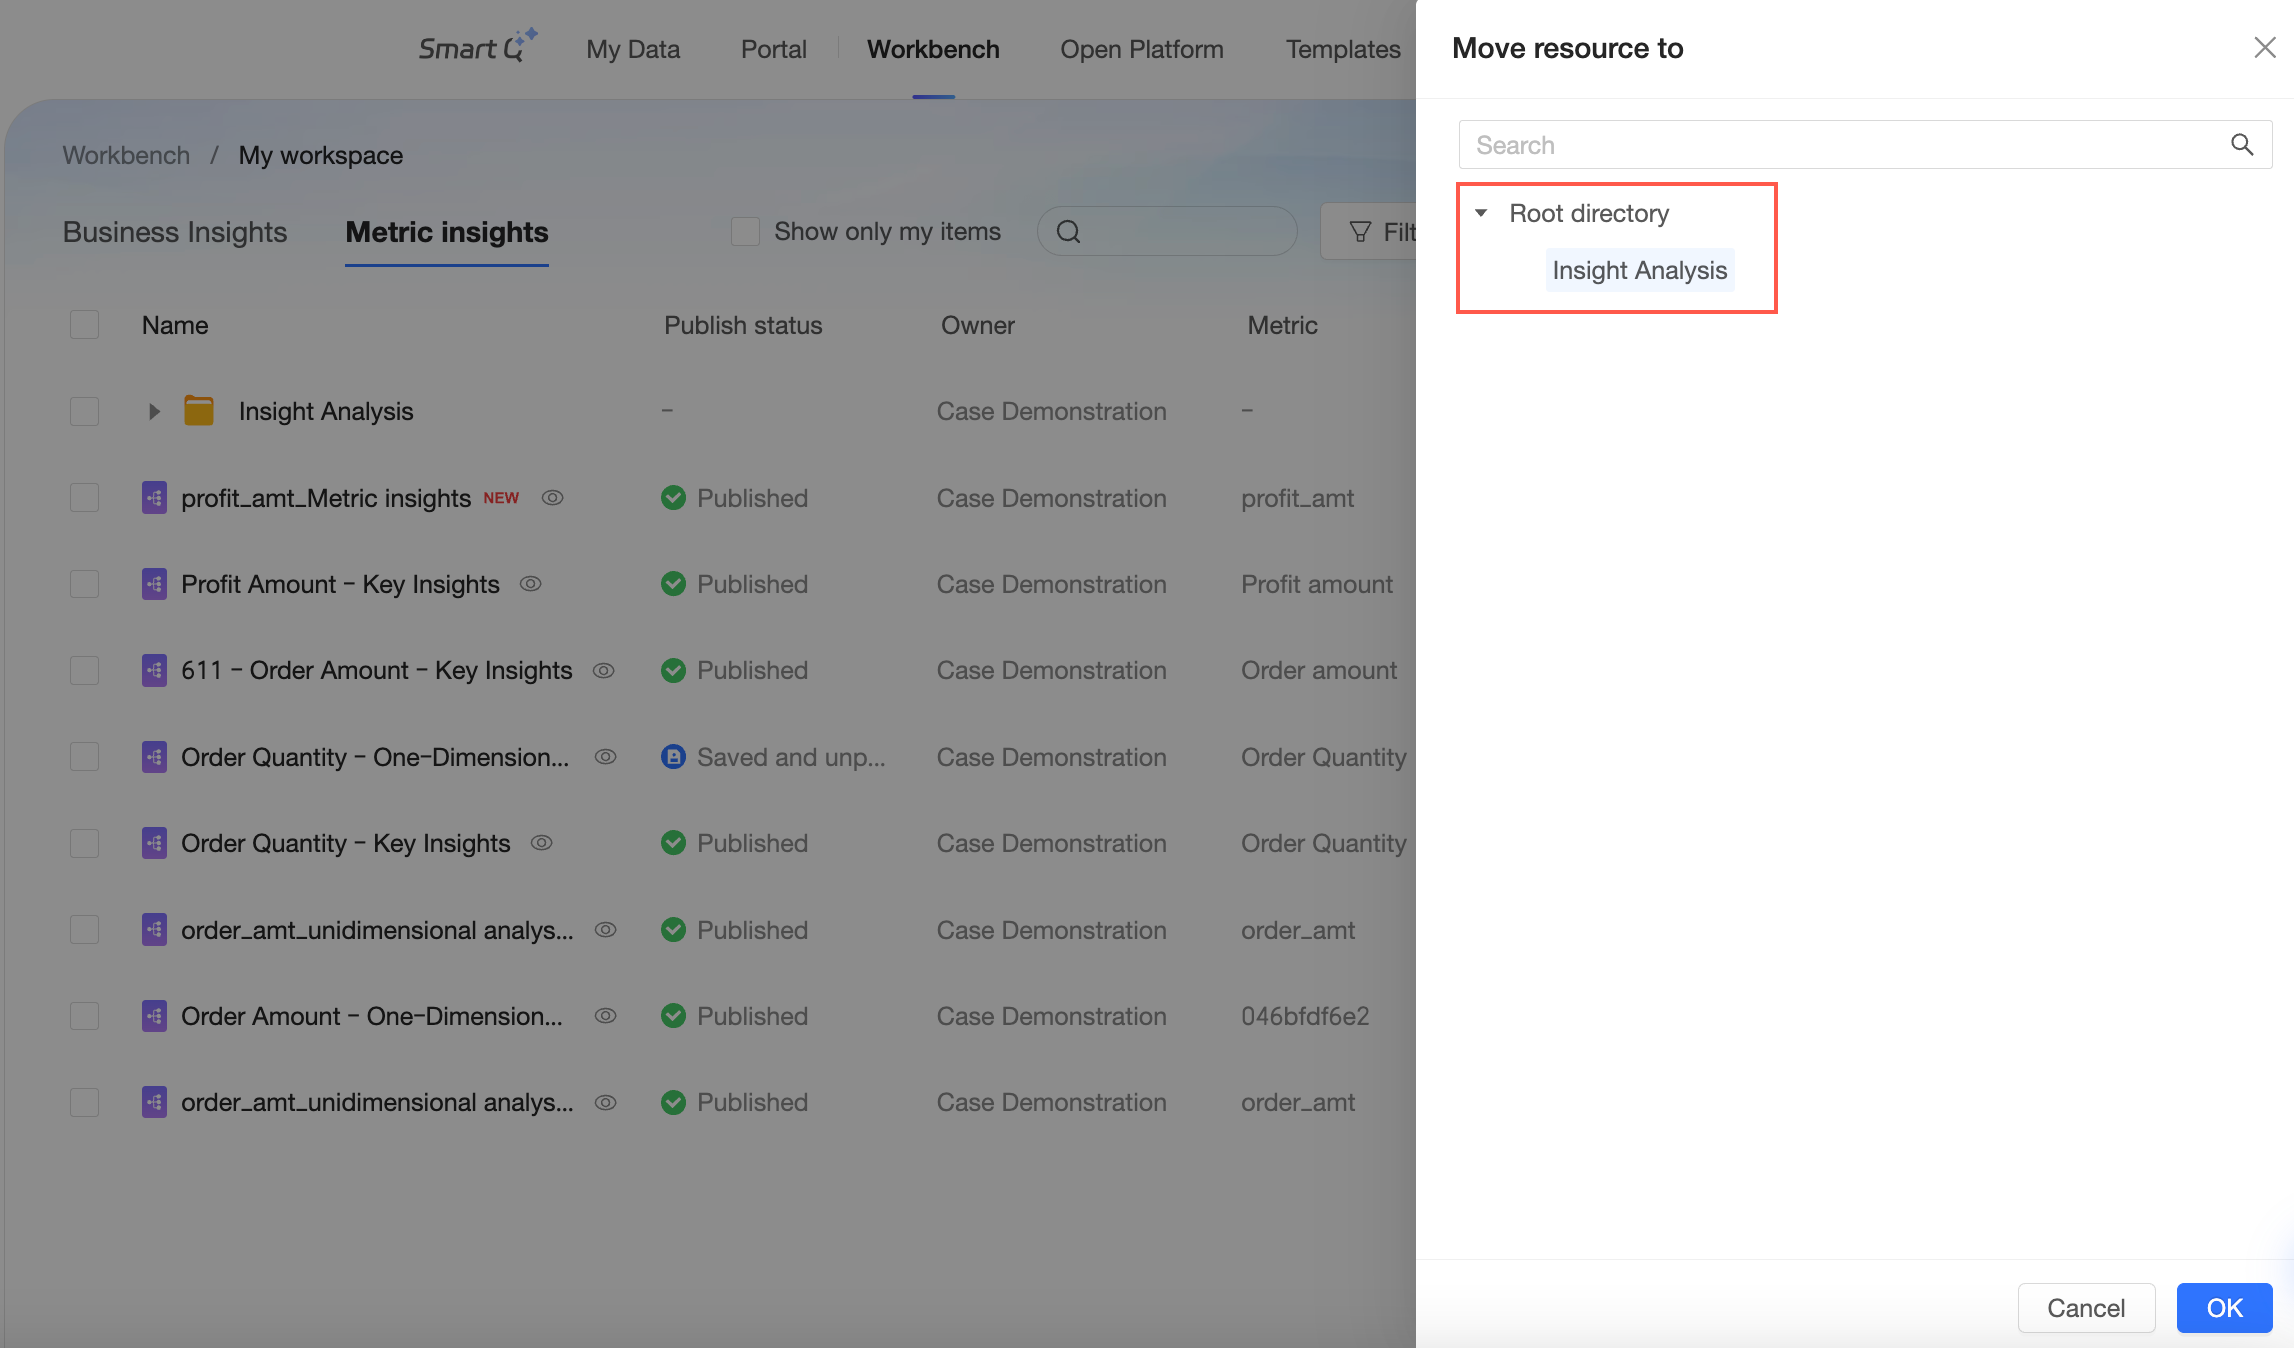
Click OK to complete the move.
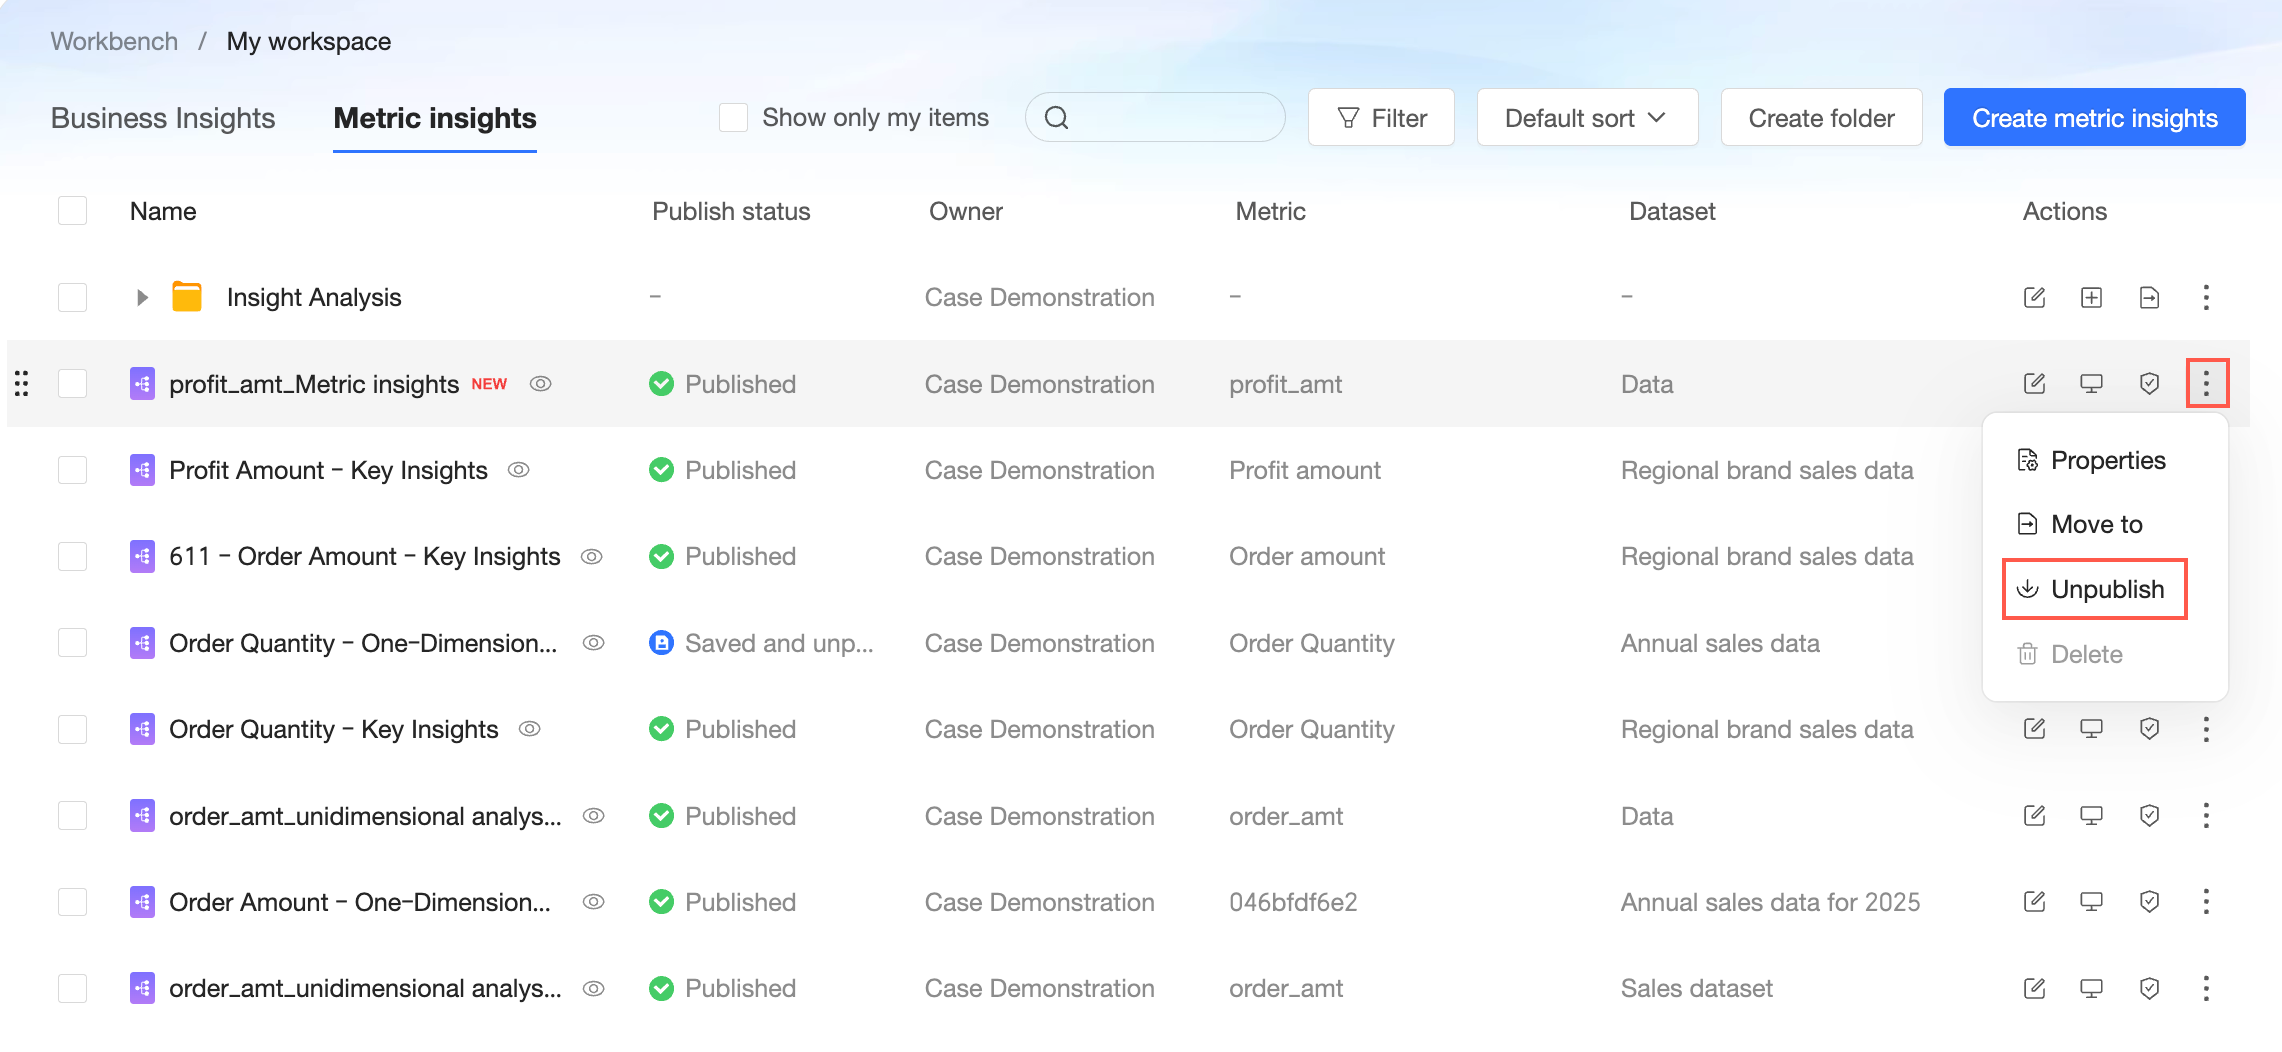
Unpublish
In the Actions column, click the icon and select Unpublish. After a Metric Insight is unpublished, it is no longer visible to users.
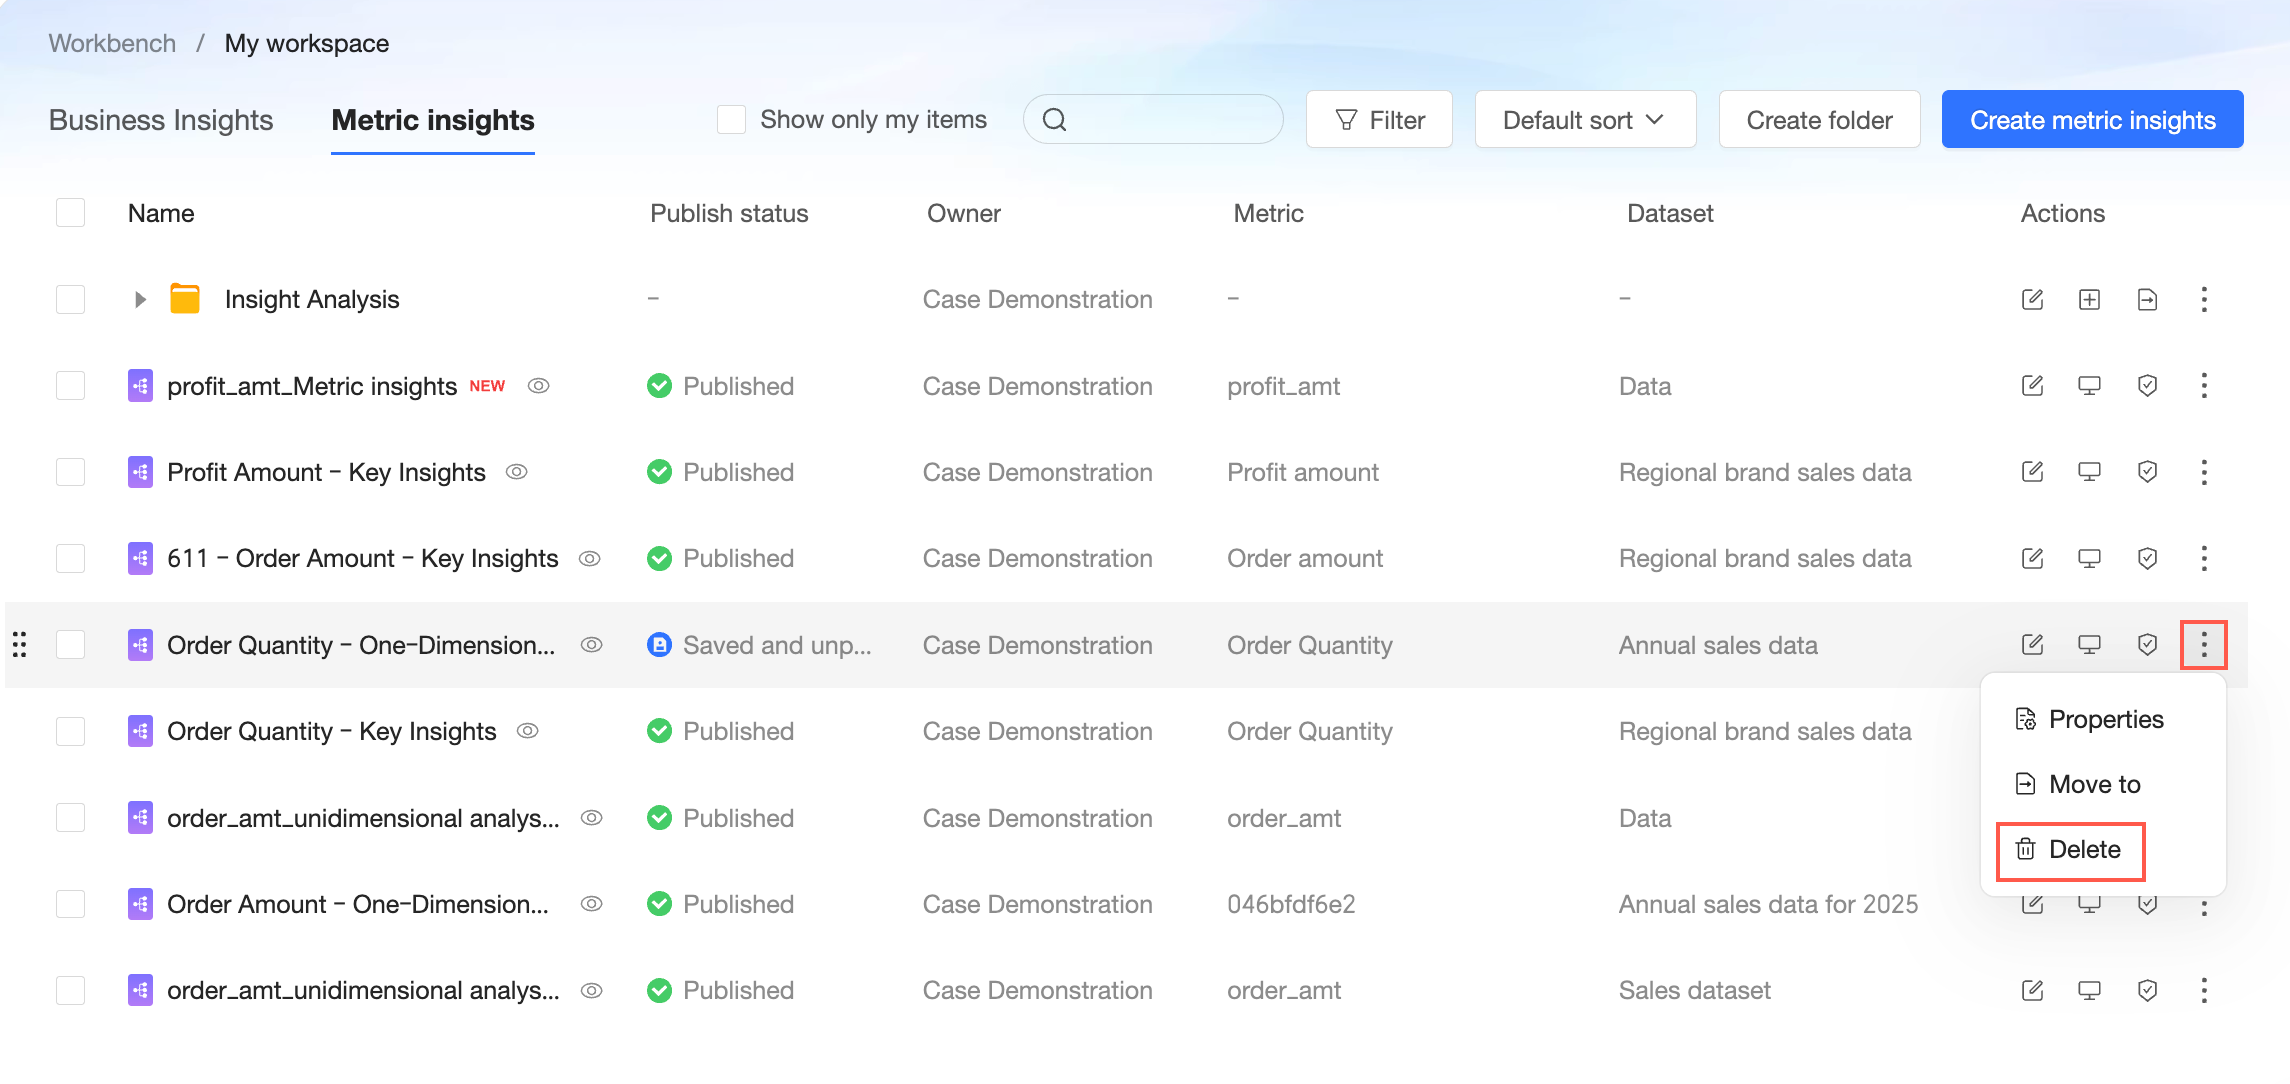
Delete
In the Actions column, click the
icon and select Delete.NoteYou can only delete Metric Insights that are unpublished.
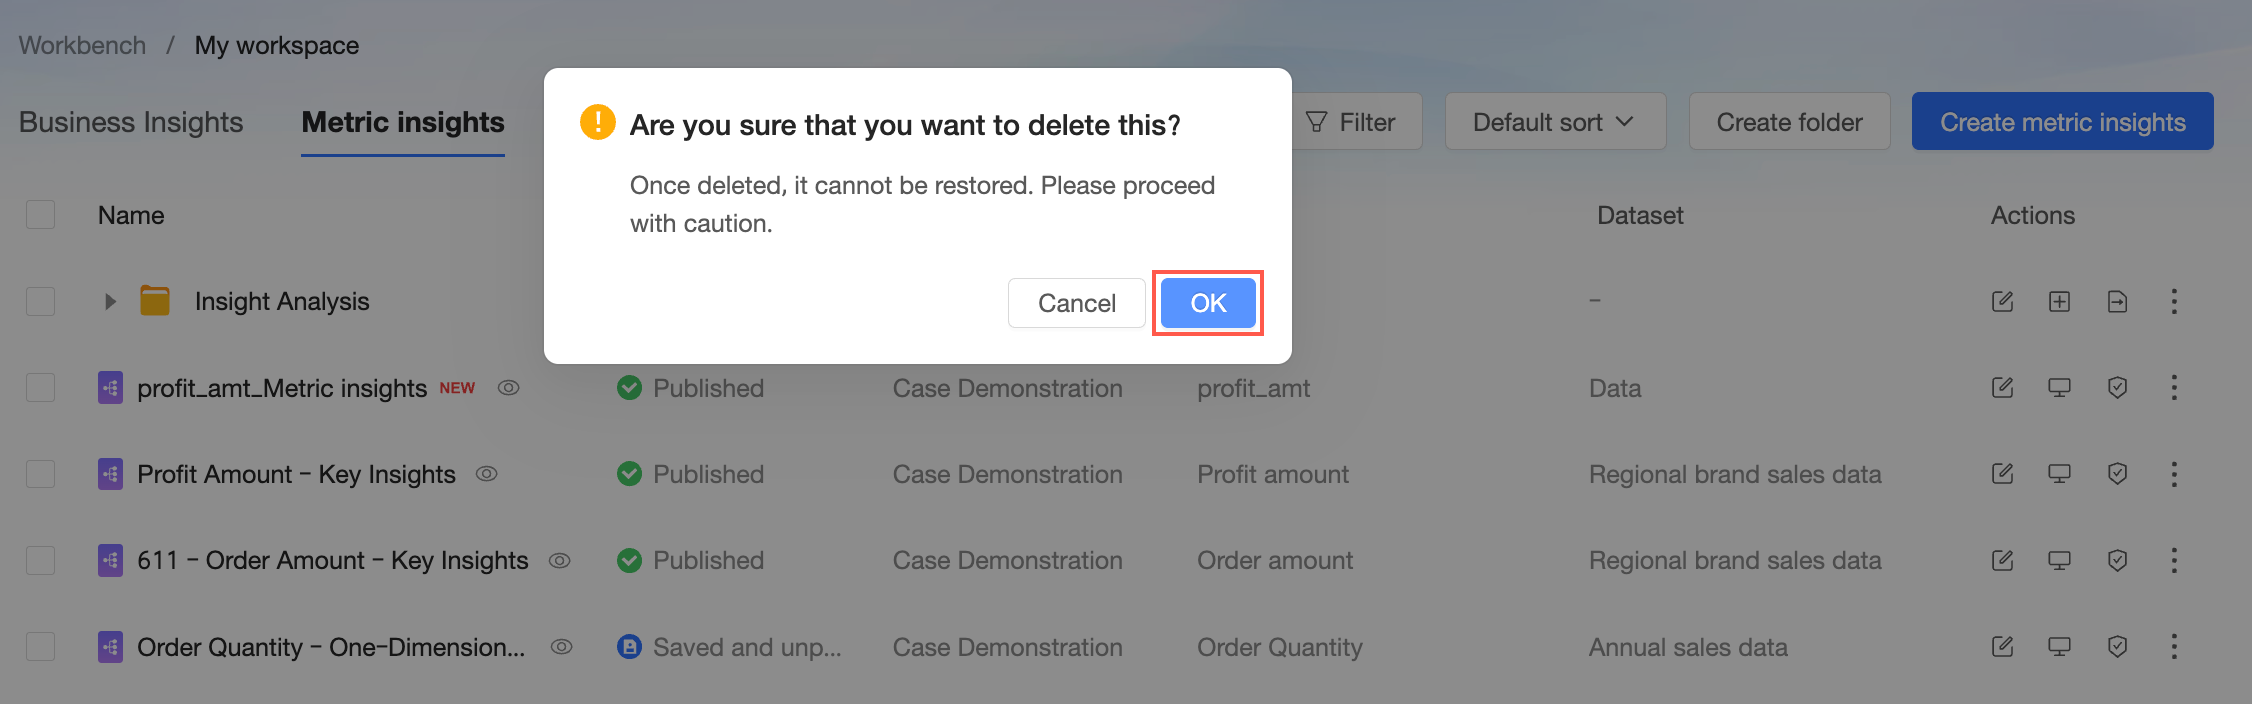
In the confirmation dialog box, click OK.
Next steps
After setting up a Metric Insight, you can configure a Business Insight.