In Quick BI, regular users can apply for resource permissions, and resource owners can batch-approve permission applications.
Background information
Quick BI provides a permission system that helps you secure resources and control data access.
Creators can operate on resources they created. Other users must apply for permissions to view or modify those resources. Supported resource types include BI portals, dashboards, workbooks, ad hoc analysis, downloads, forms, datasets, and data sources. For more information, see Overview.
Apply for permissions
You can apply for specific operation permissions on a resource. Once approved, you can perform the corresponding operations.
The following example shows how an analyst applies for dashboard editing permissions. For more information, see Resource authorization description.
-
Log on to the Quick BI console.
-
On the homepage of the Quick BI console, apply for specific permissions on a resource.
The following example shows how to apply for access permissions on a dashboard.
-
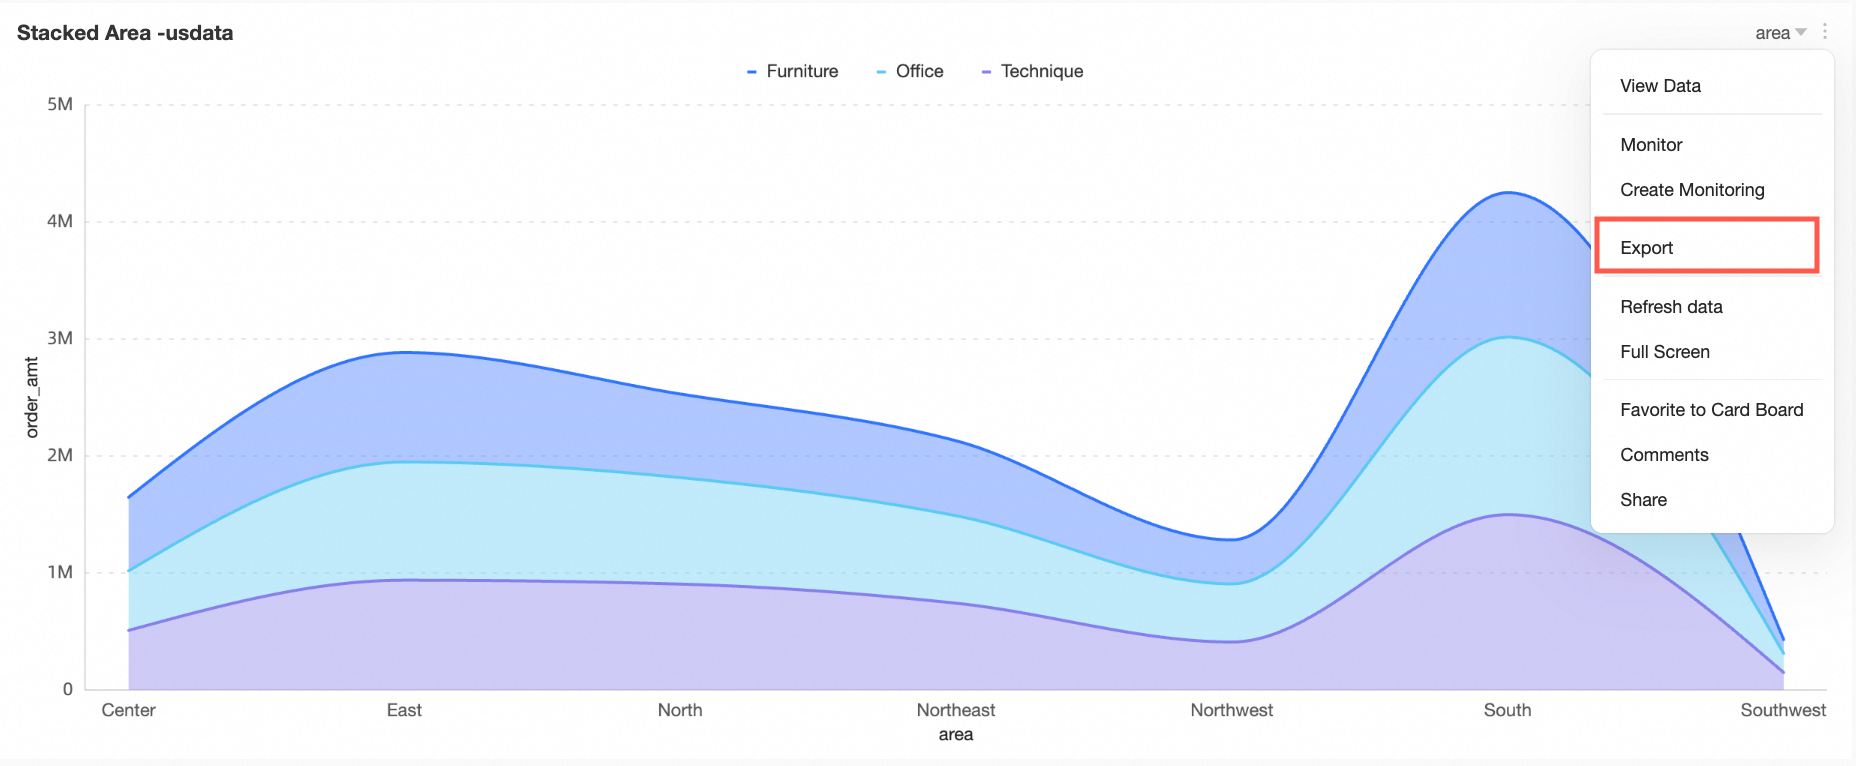
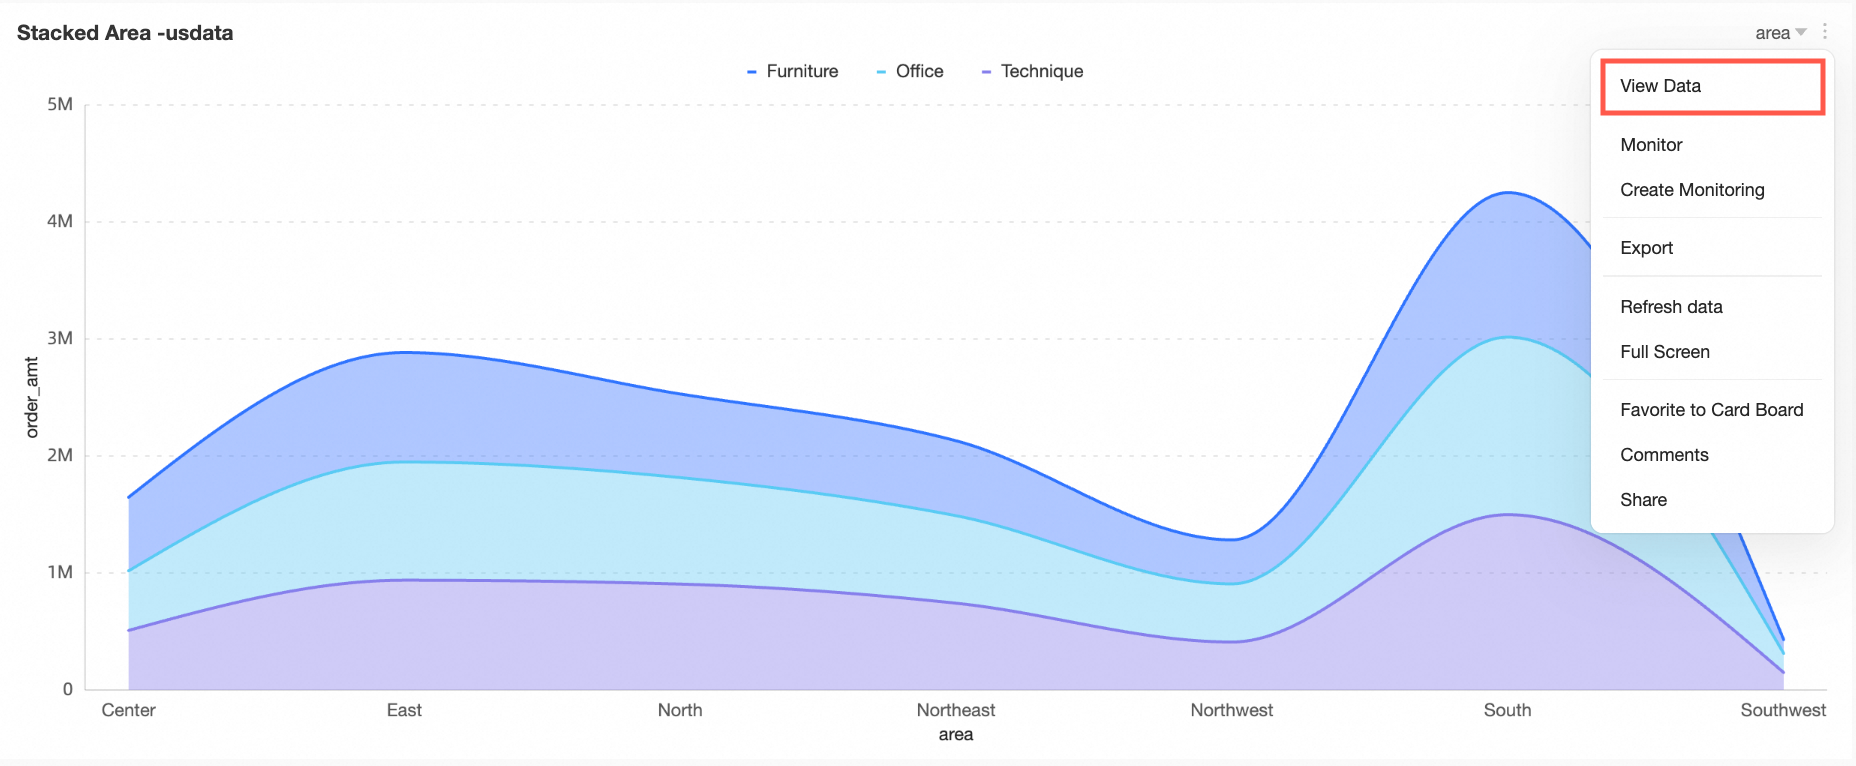
Perform the steps that are shown in the following figure to view the dashboard.

-
On the preview page, click Apply For Permission.

-
-
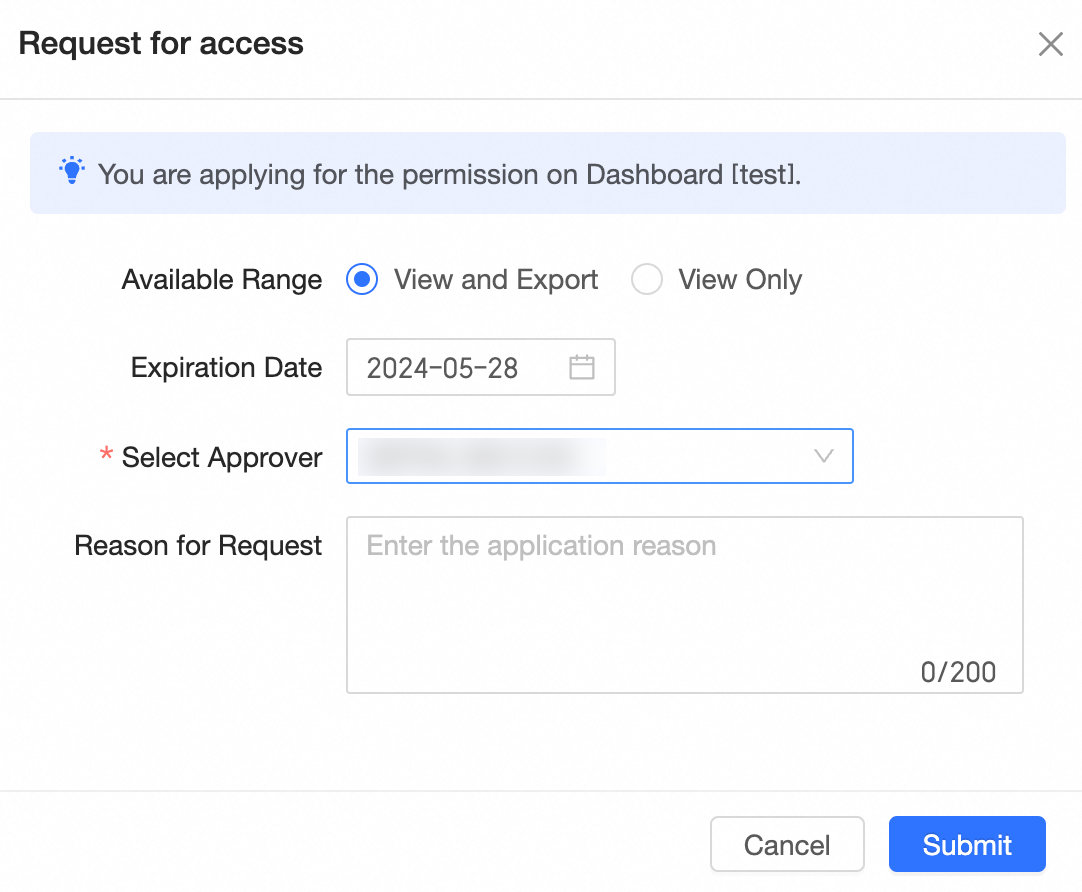
Click Apply For Permission, configure the parameters shown in the figure, and click Submit Application.
The parameters vary depending on the permission you apply for. Refer to the actual interface.
Parameter
Description
Available Range
The permitted operations on the resource:
-
Select View And Export to view the dashboard and export its content.
-
Select View Only to view the data of dashboard components.
When a user has the View permission but not the Export permission for a report, they can Apply for Export Permission on the preview page.
NoteThe BI portal preview page does not support Apply for Export Permission.
NoteIf you select other resource types, refer to Resource authorization description for available range options.
End Date
The period during which you can access the dashboard.
The default validity period is 30 days. You can specify a custom period.
Select Approver
The approver for the dashboard. Only the resource owner can be selected as the approver.
You do not need to select an approver. The system automatically assigns the resource owner.
Application Reason
The reason for requesting access to the dashboard.
The approver can approve or reject the application based on this reason.
-
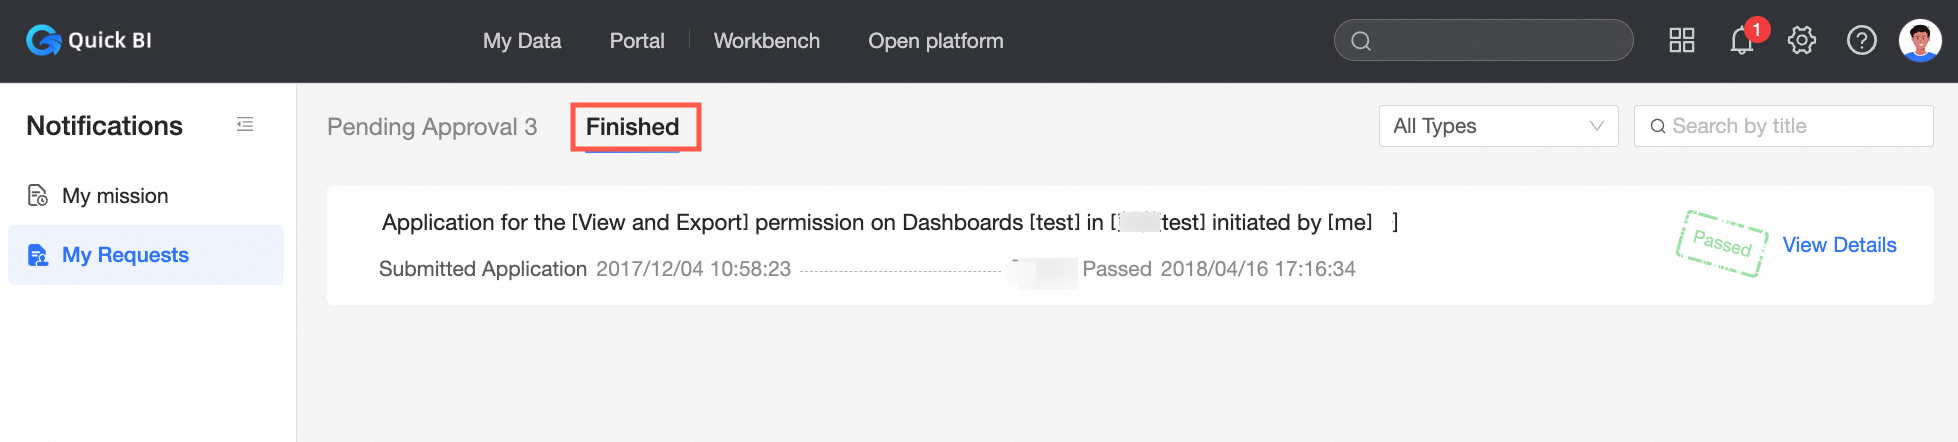
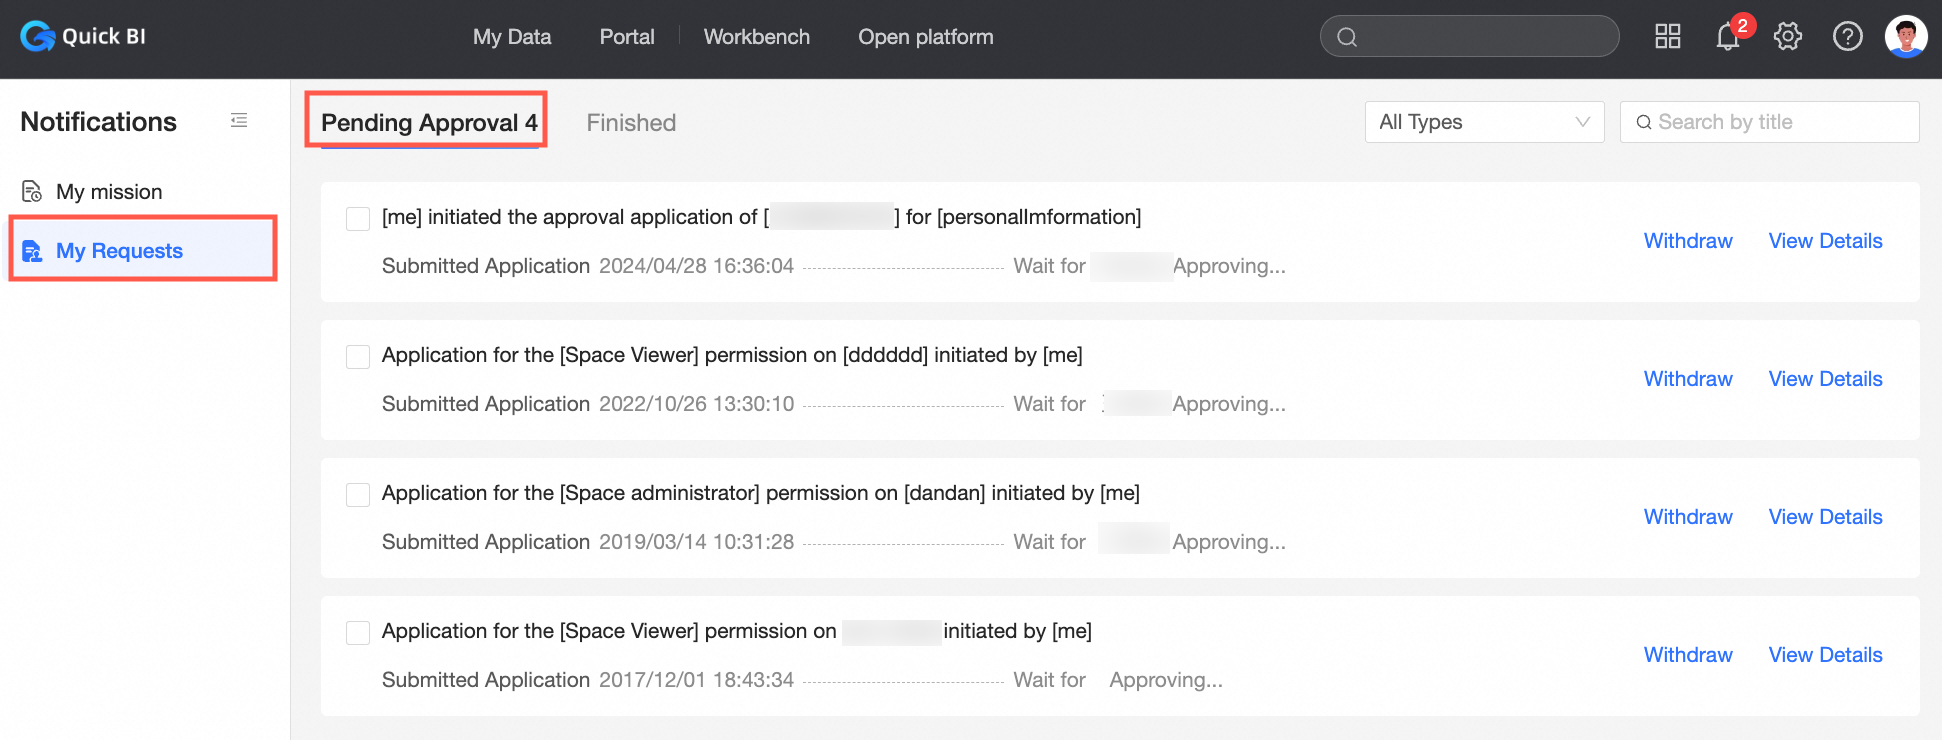
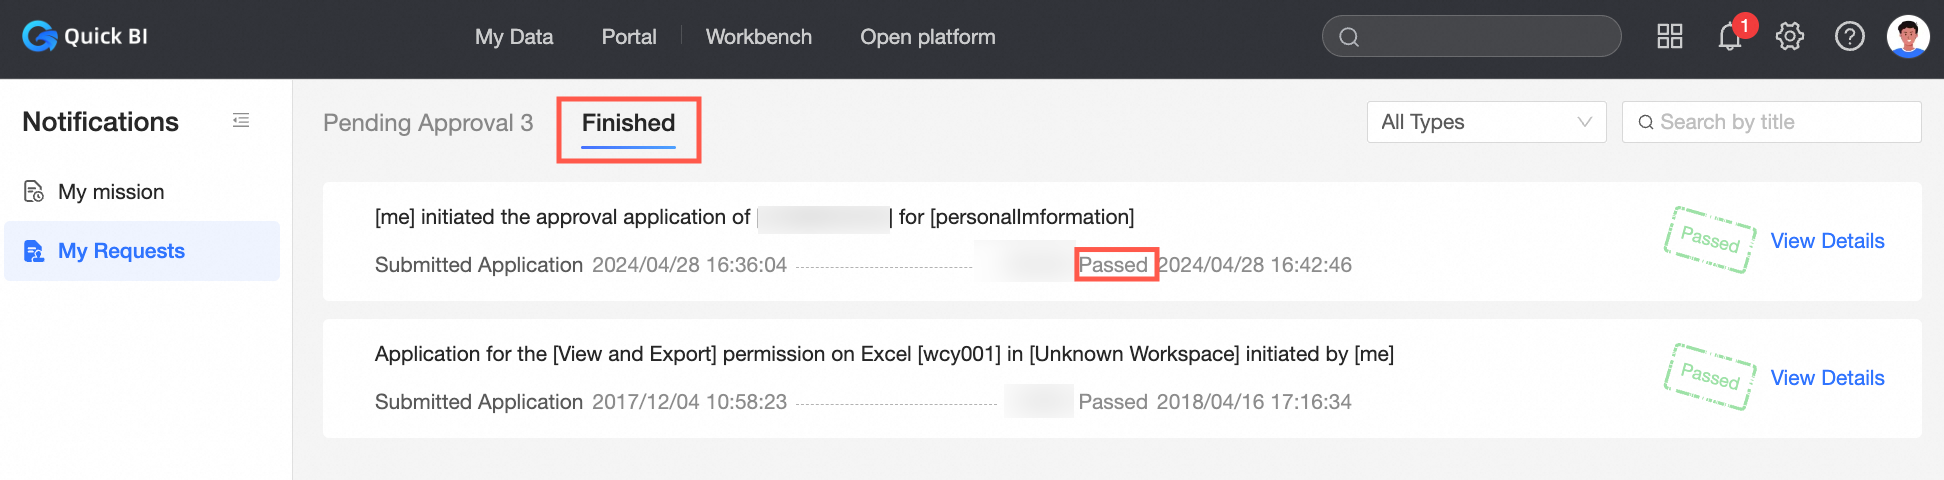
After submitting the application, you can see the application progress in My Applications.
-
View pending applications in the In Progress tab.
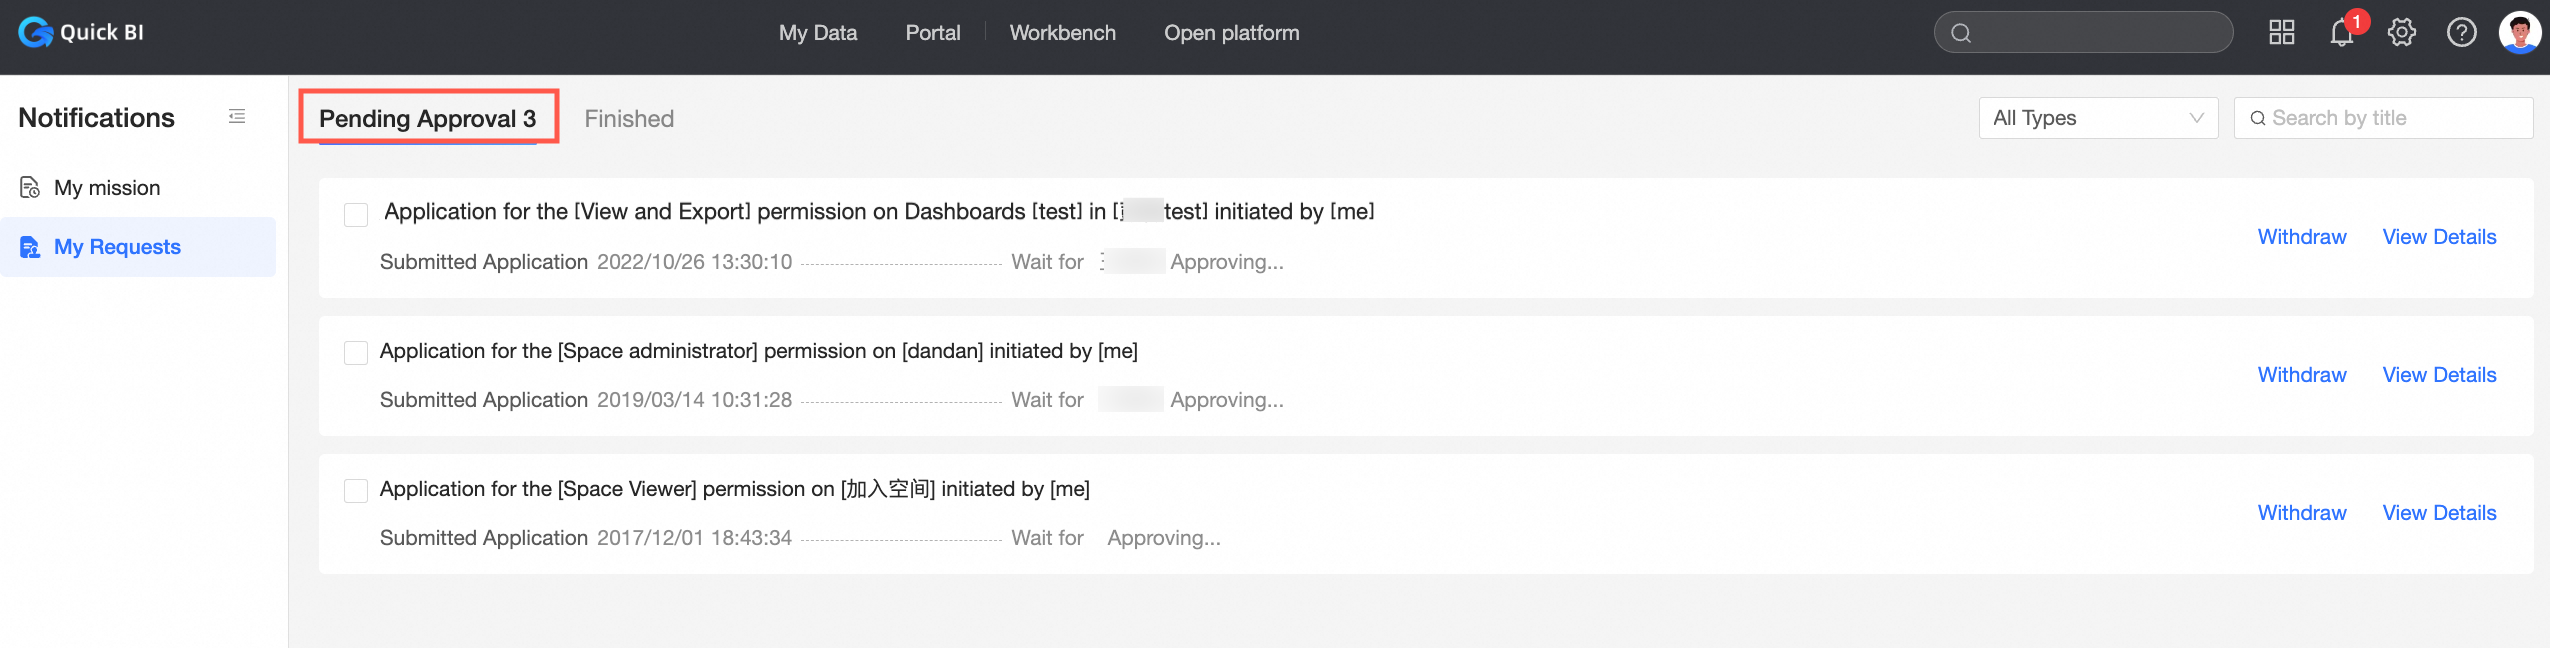
-
View completed applications in the Completed tab.
Handle permission applications
Resource owners can view and approve permission applications at any time.
Approval operations are available only when Allow In-Platform Approval is selected in Approval Settings. When Notification Only is selected, you can only view Details and cannot perform approval operations.
-
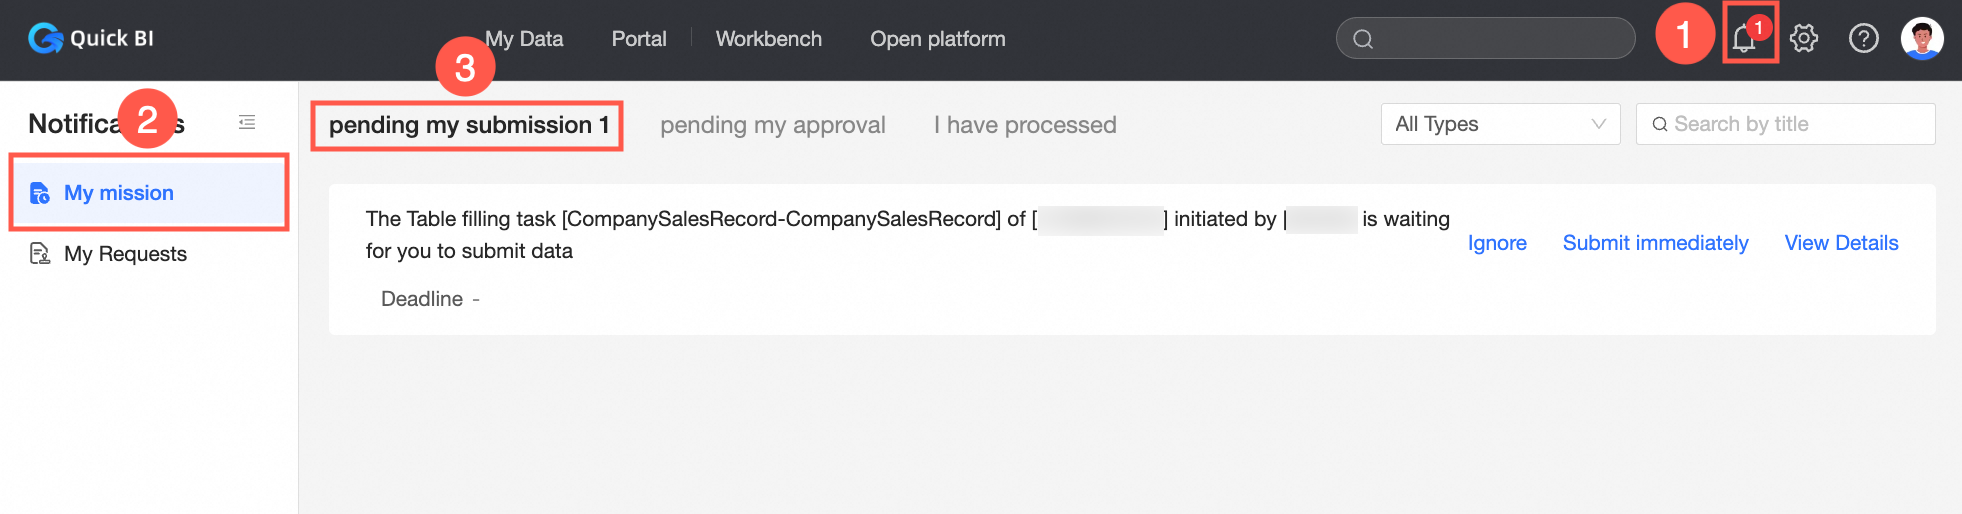
After entering the Quick BI console, follow the instructions in the figure below to access the form submission page.
-
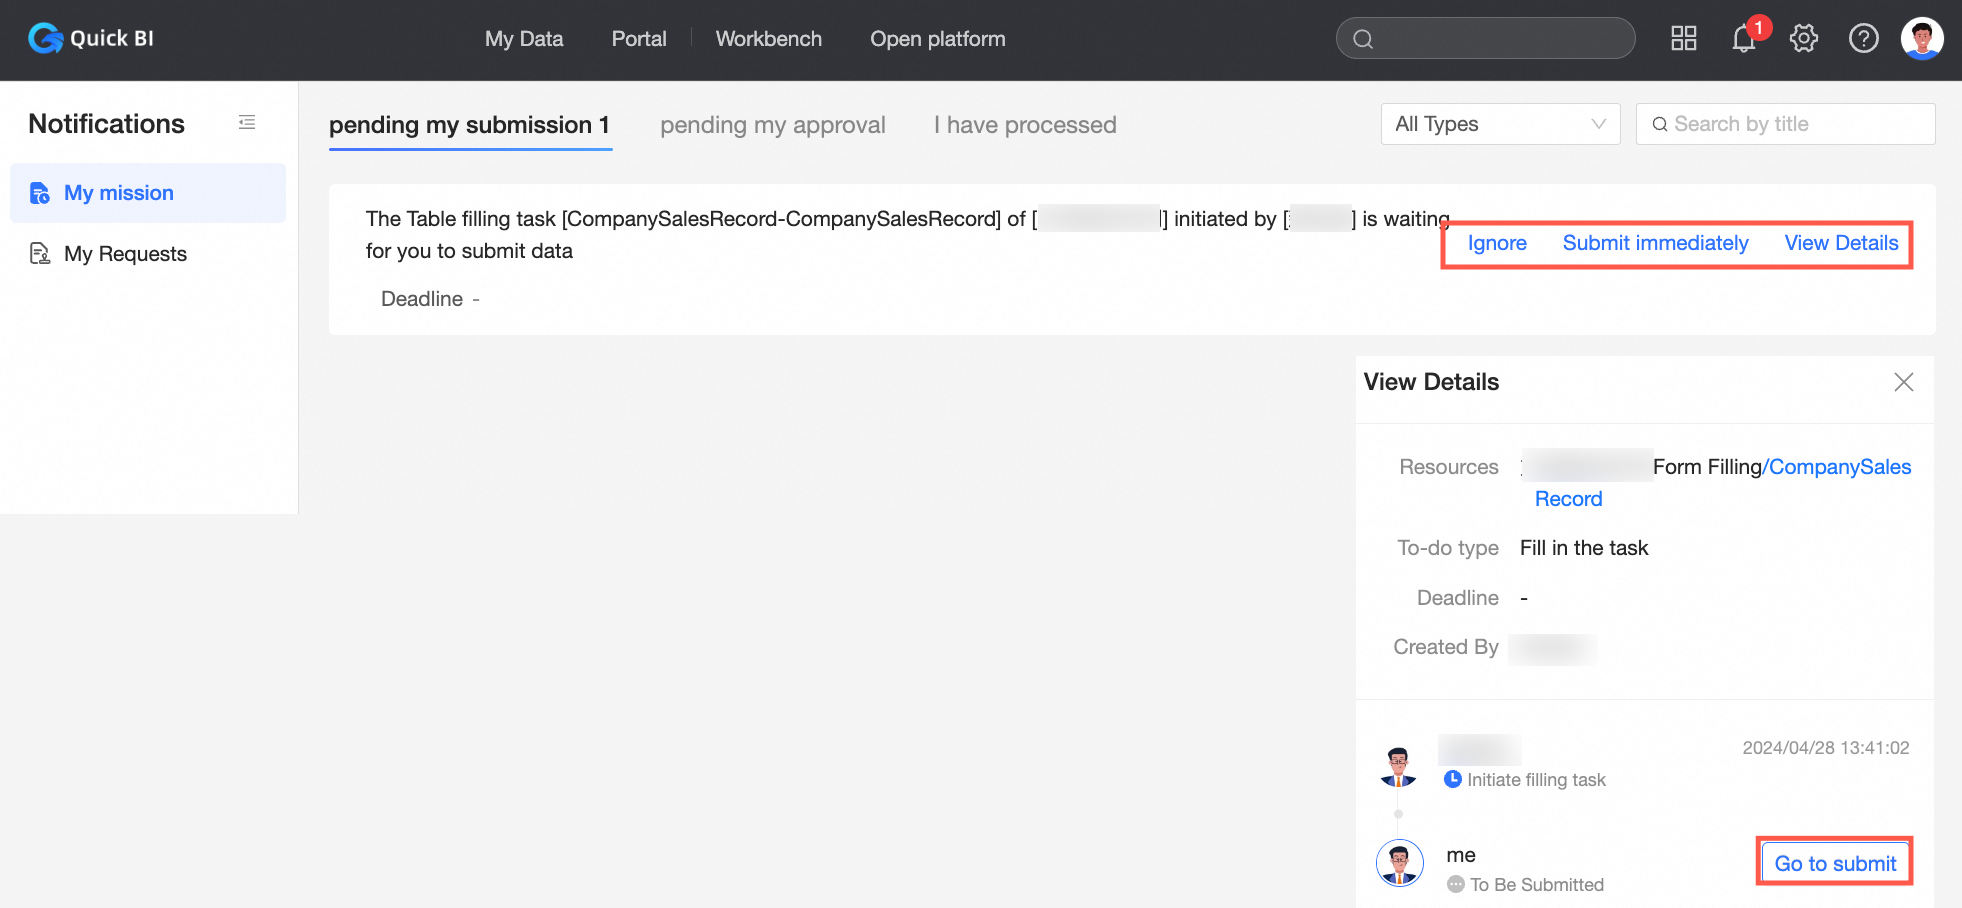
On the form submission page, you can Ignore the task, Submit Now, or view Details. In the details page, you can see the resource path, task type, deadline, creator, and other information about the form task, and submit the task as needed.
-
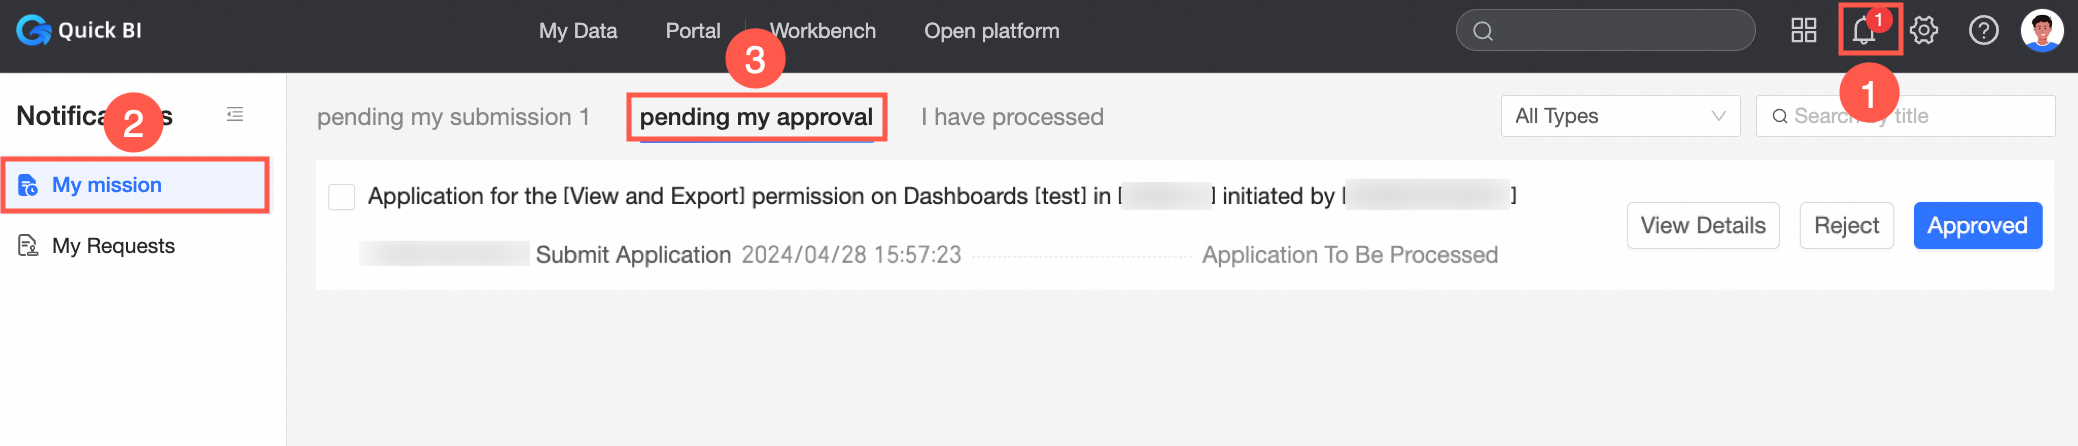
Click Pending My Approval as shown in the figure below to view all pending approval processes.
-
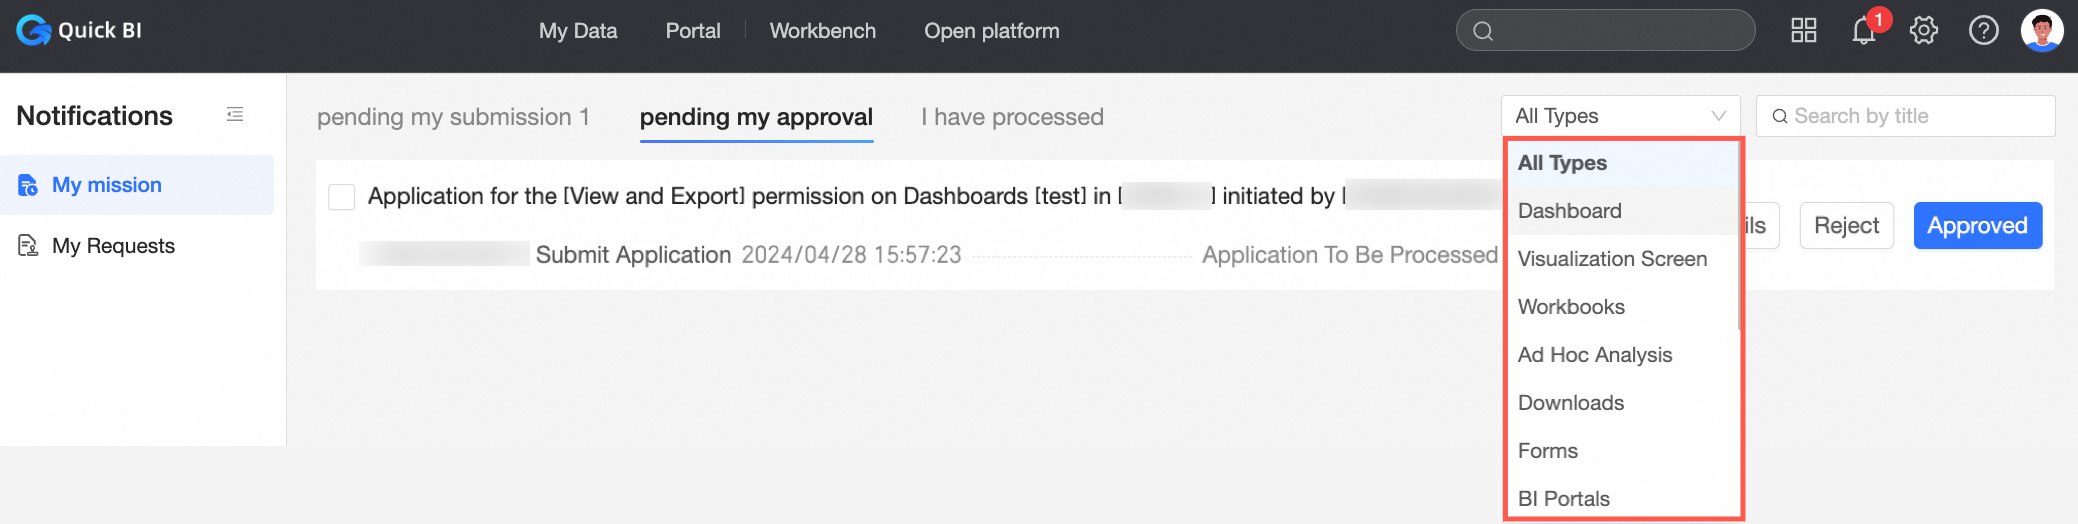
In the All Types dropdown menu at the top, click to select the type you want to view. The approval list will display the pending approval tasks for that type.
-
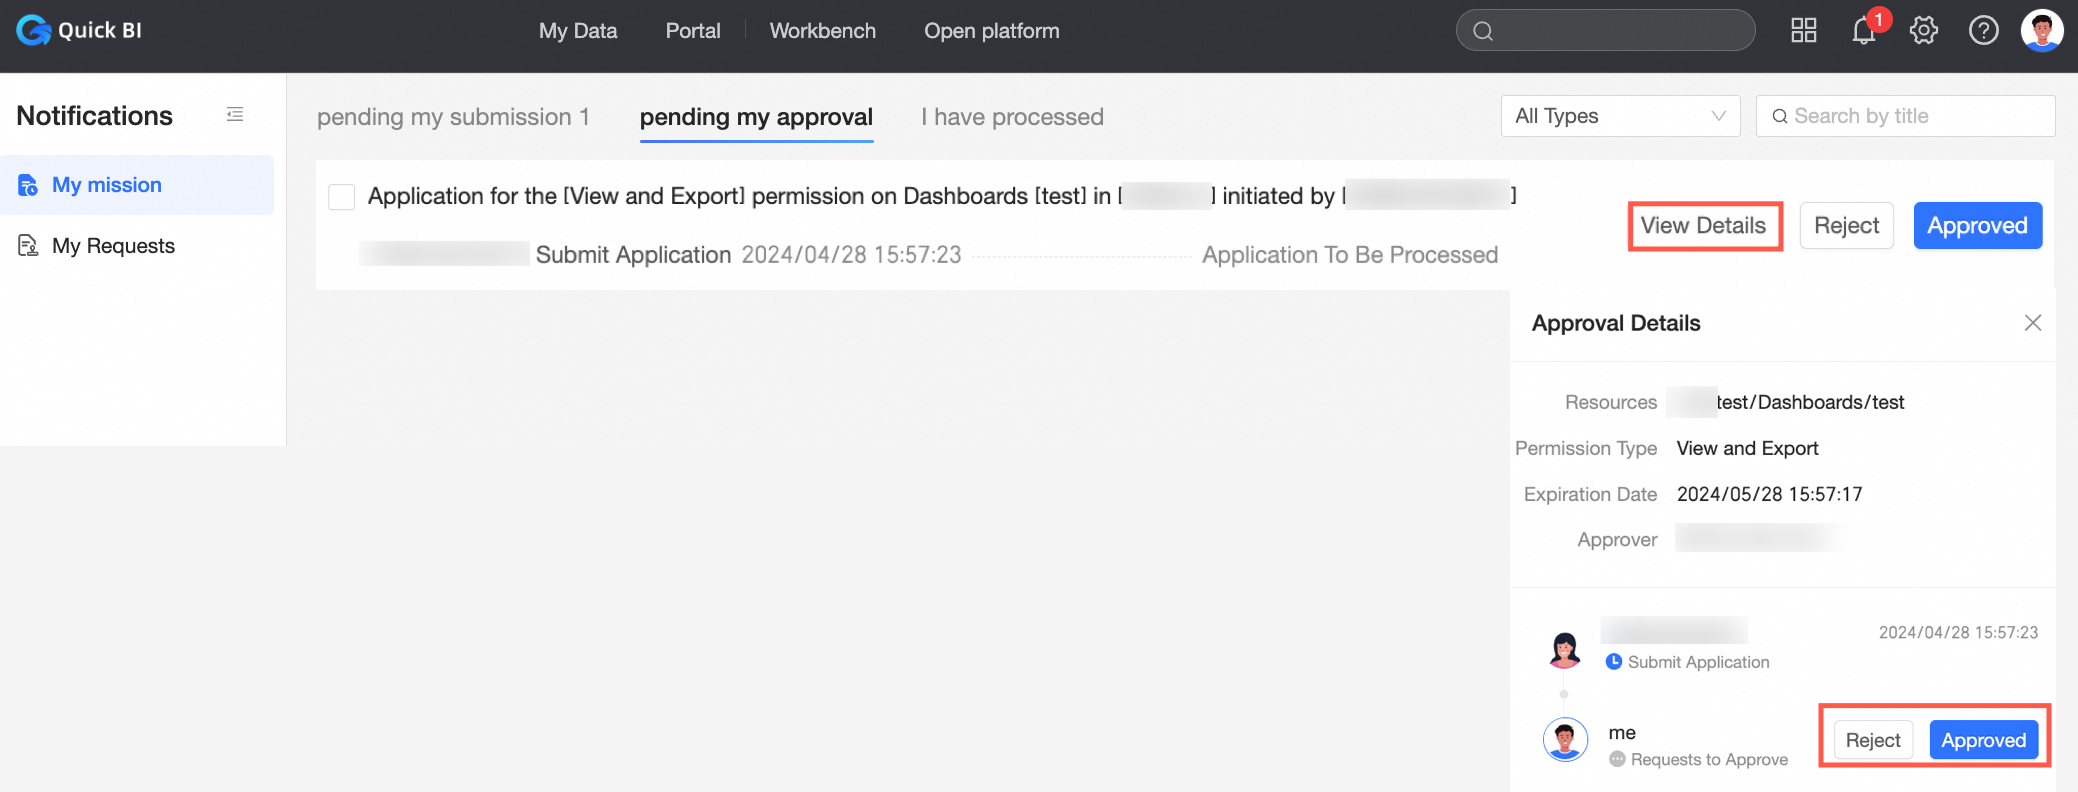
In the Pending Approval tab of the approval list, click Details on the right side of the pending approval task. After viewing the detailed information, click Approve or Reject.
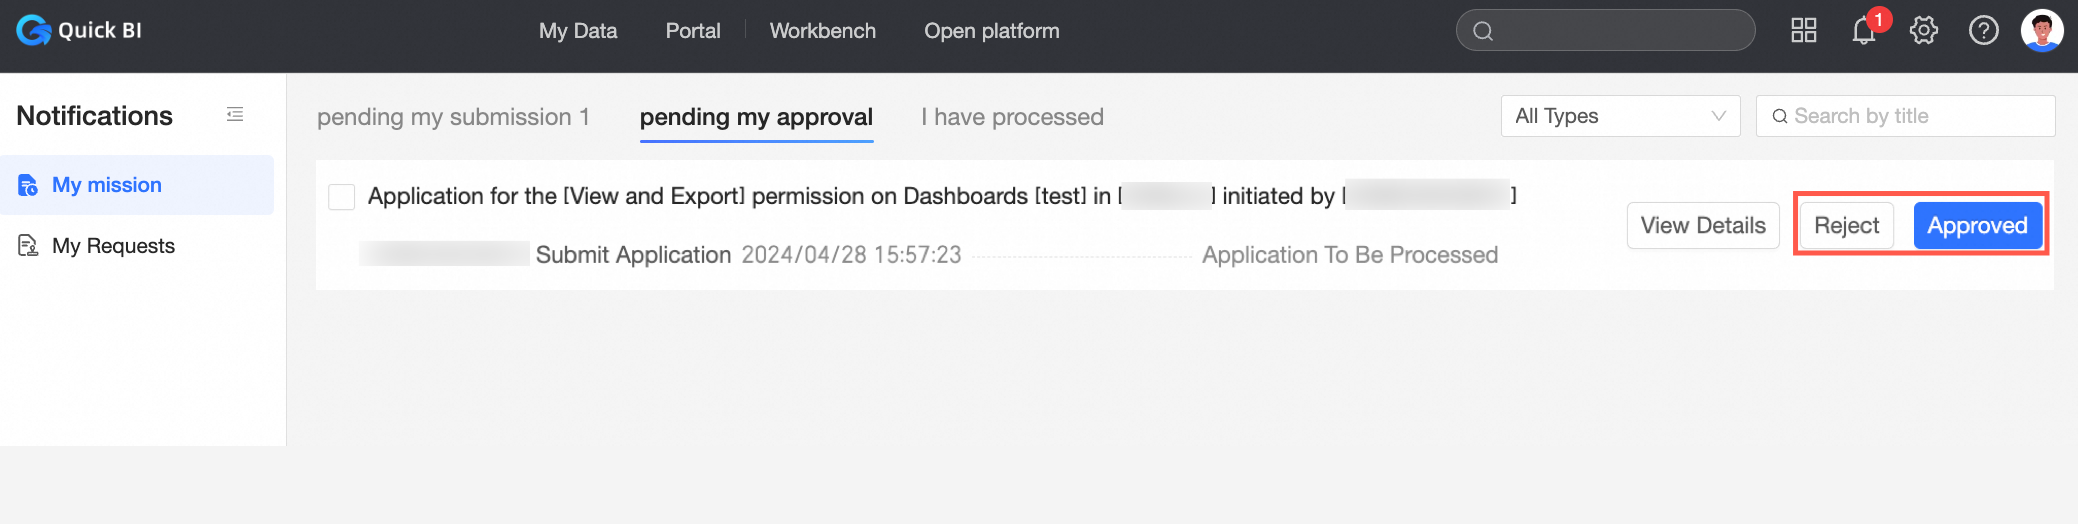
You can also directly click Approve or Reject to complete the task approval.
-
(Optional)
When you need to process pending approval tasks in batches, click Select All, then click Approve or Reject to complete batch task approval.
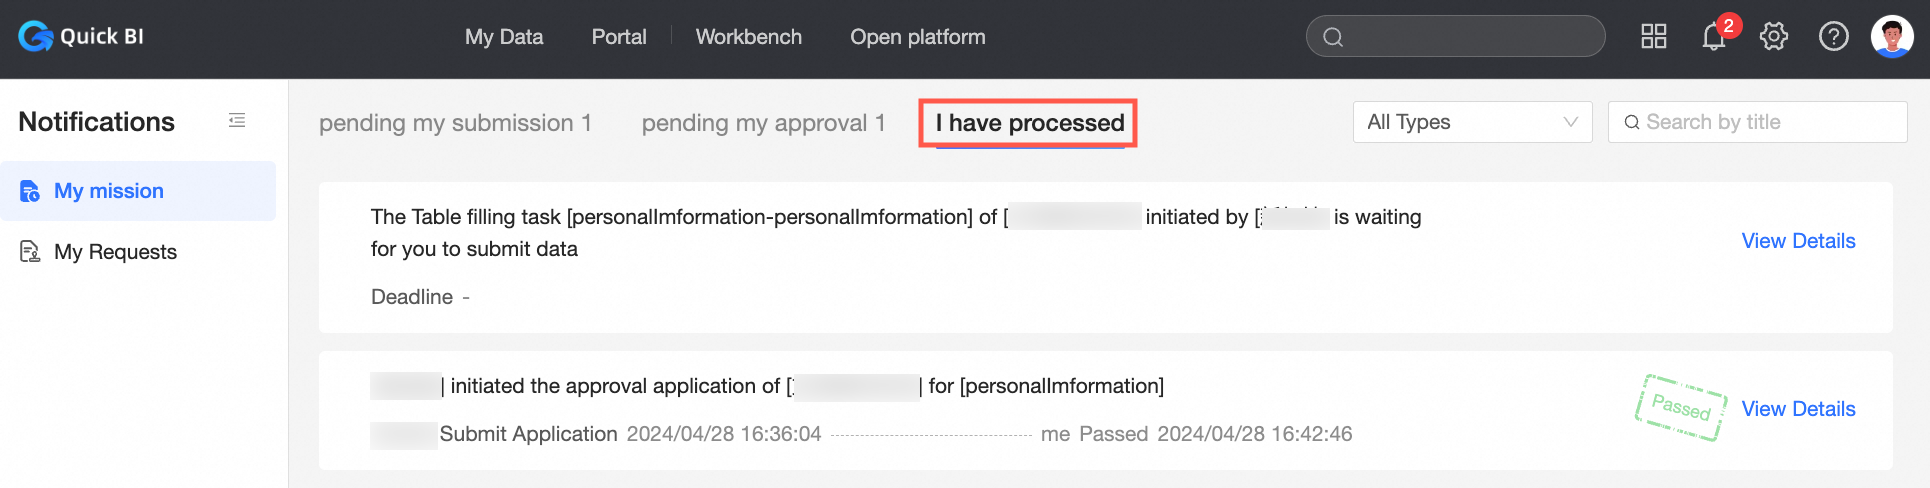
 After approval is completed, you can see the approved tasks in Processed By Me.
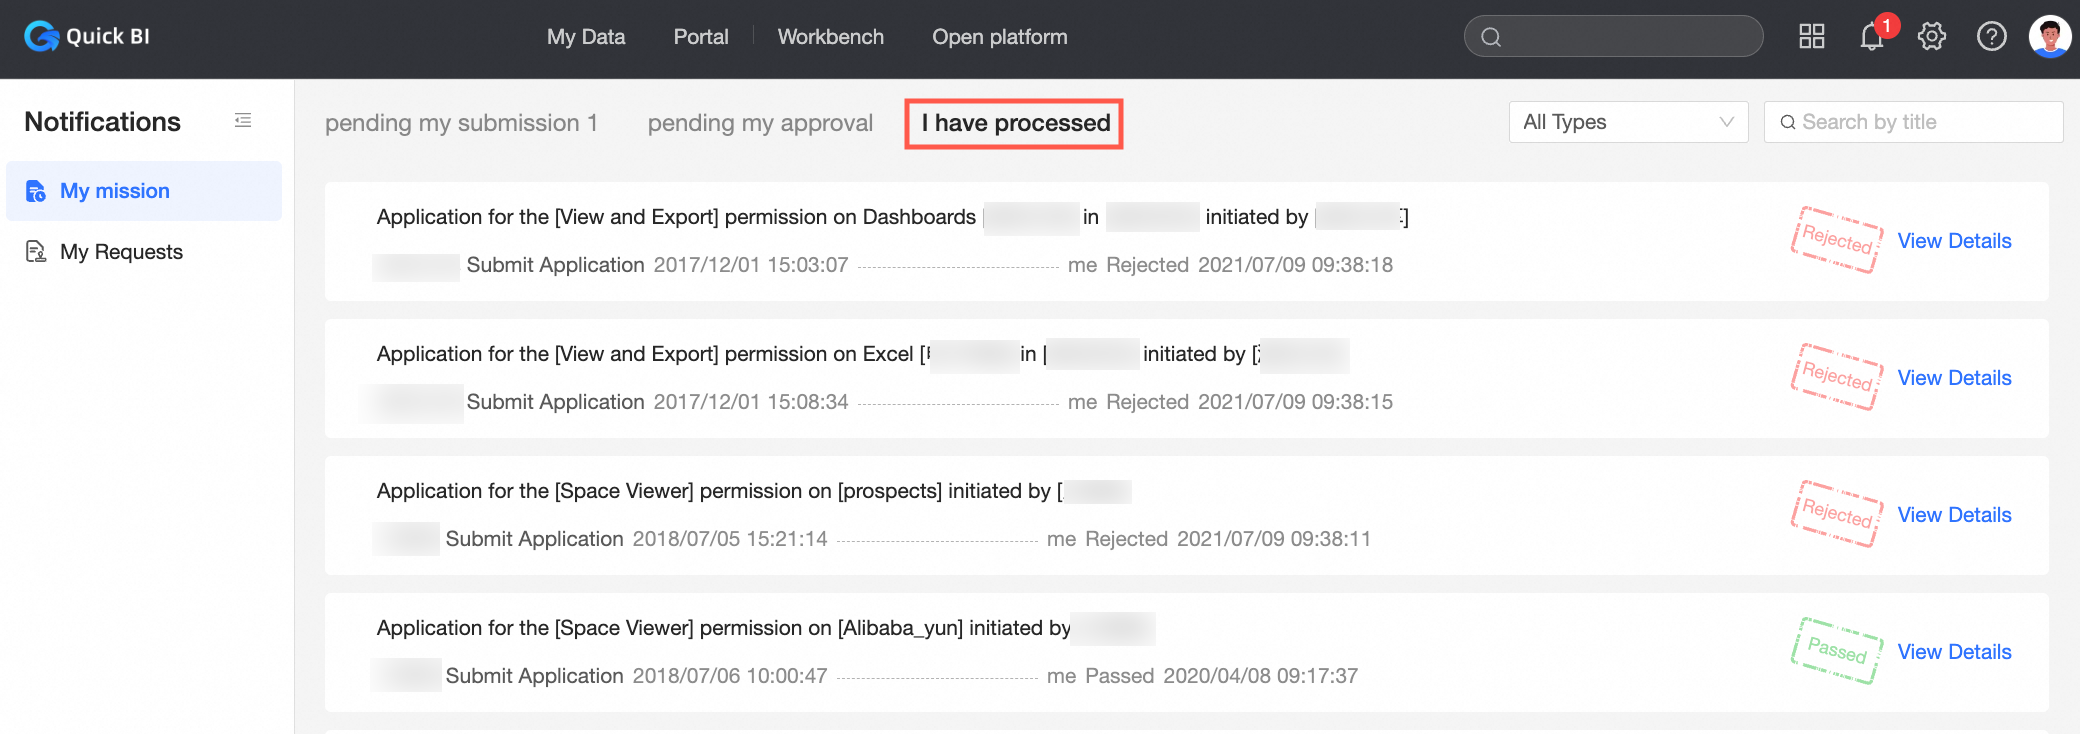
Form data approval processing
This section explains the process from two perspectives: form submitter and approver.
Form submitter
The following example demonstrates the Form Data Approval feature and Form Task Assignment.
-
When you receive a form task, you can find the pending submission data in "My Tasks" - "Pending My Submission" in the Message Hub.

-
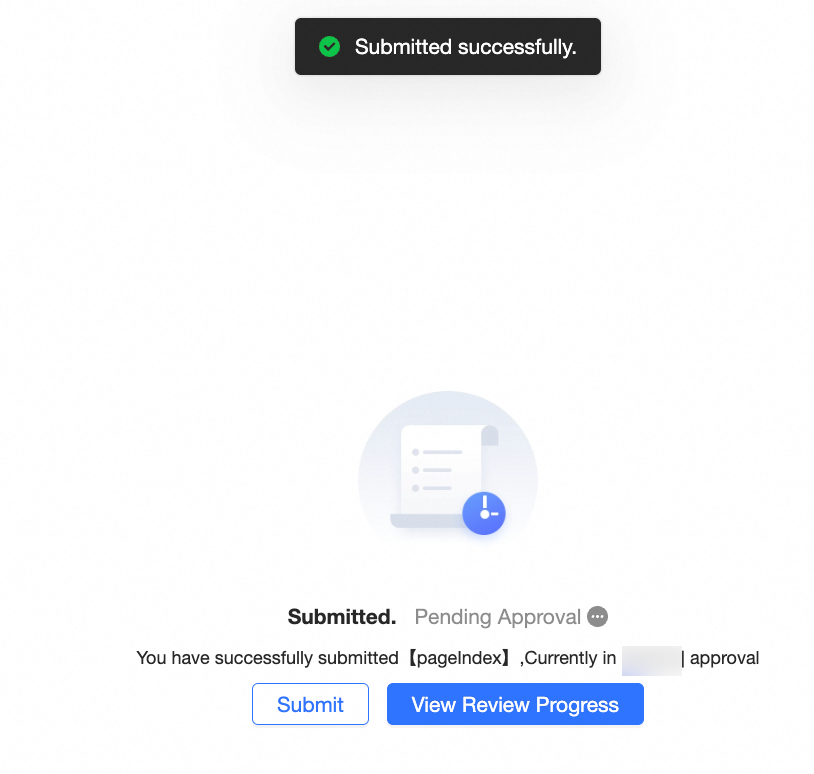
After clicking Submit Now, you will be redirected to the form submission page. After filling in the data and submitting it, a success message will appear, and the status will show as "In Approval".
-
Click View Approval Progress to be redirected to the Form Data Approval page. Select Continue Submission to return to the form editing page.
-
After completing and successfully submitting the form task, you can View Details in "Processed by Me".

-
After processing the form task, click "My Applications" - "In Progress" to check the approval progress of your submitted task.
-
If the data you submitted is incorrect or you need to add new data and resubmit, click Revoke to cancel the approval application.
-
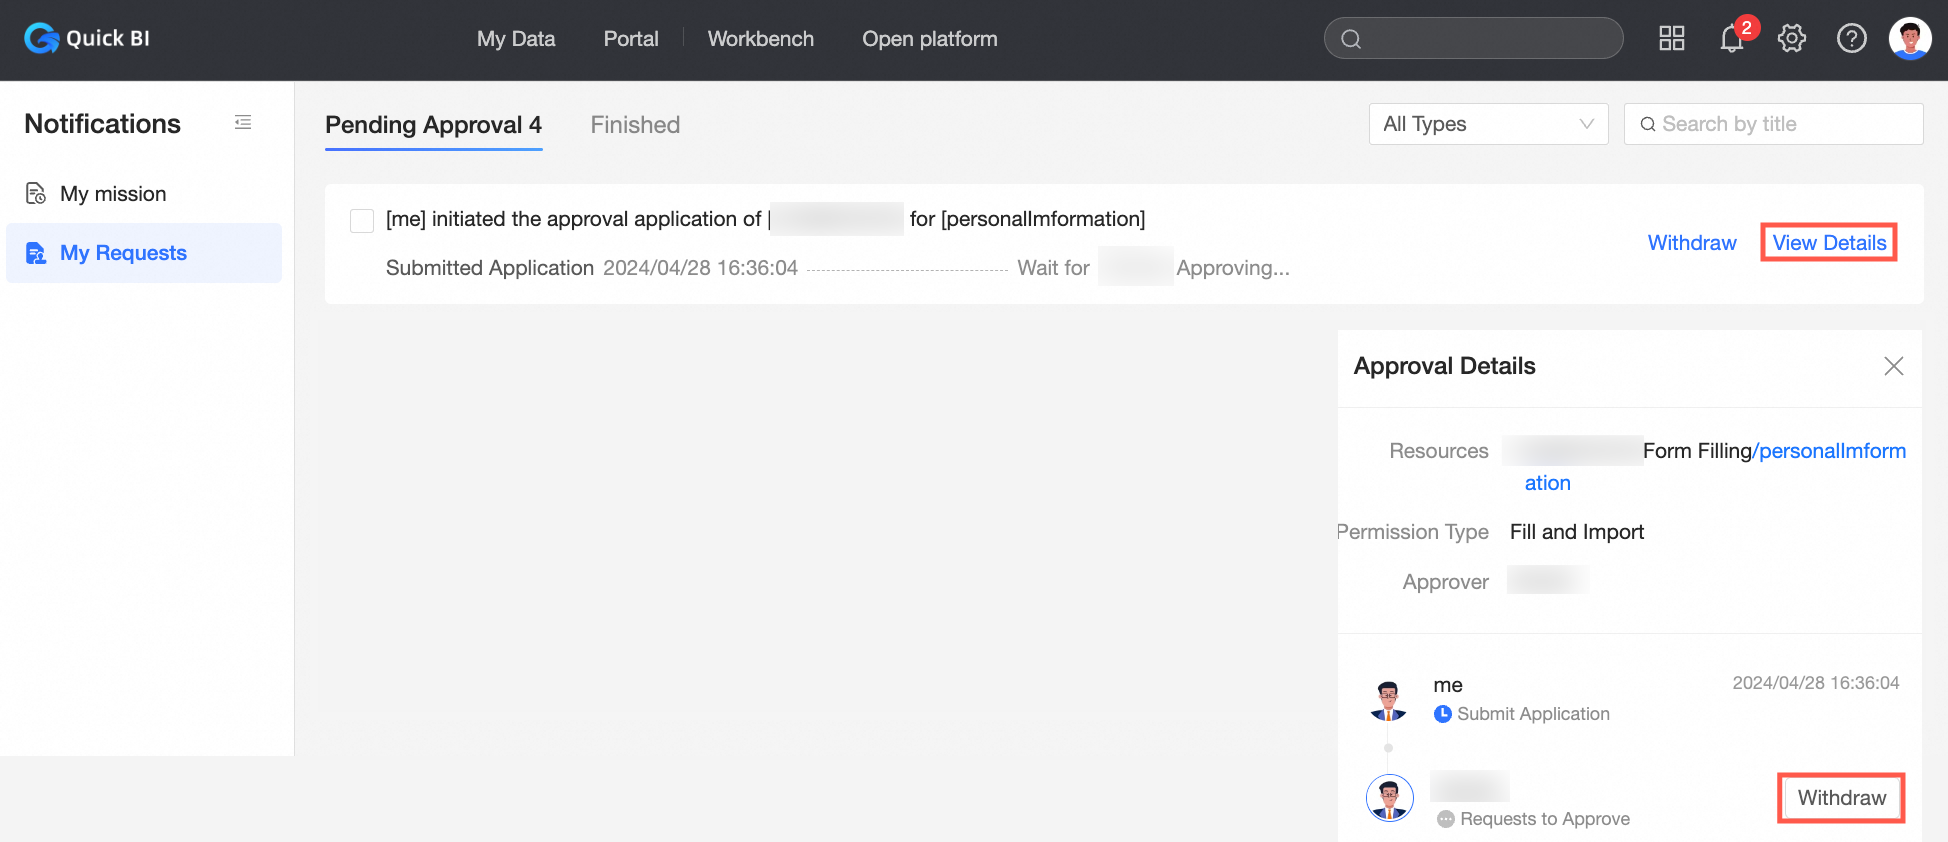
Click Details to view the approval details and revoke the approval.
-
-
If the approver has completed the approval, you can check whether the approval process has passed in "Completed".
-
Click Details on the right to view the approval details.
-
Approver
The following example demonstrates the Form Data Approval feature and Form Task Assignment.
-
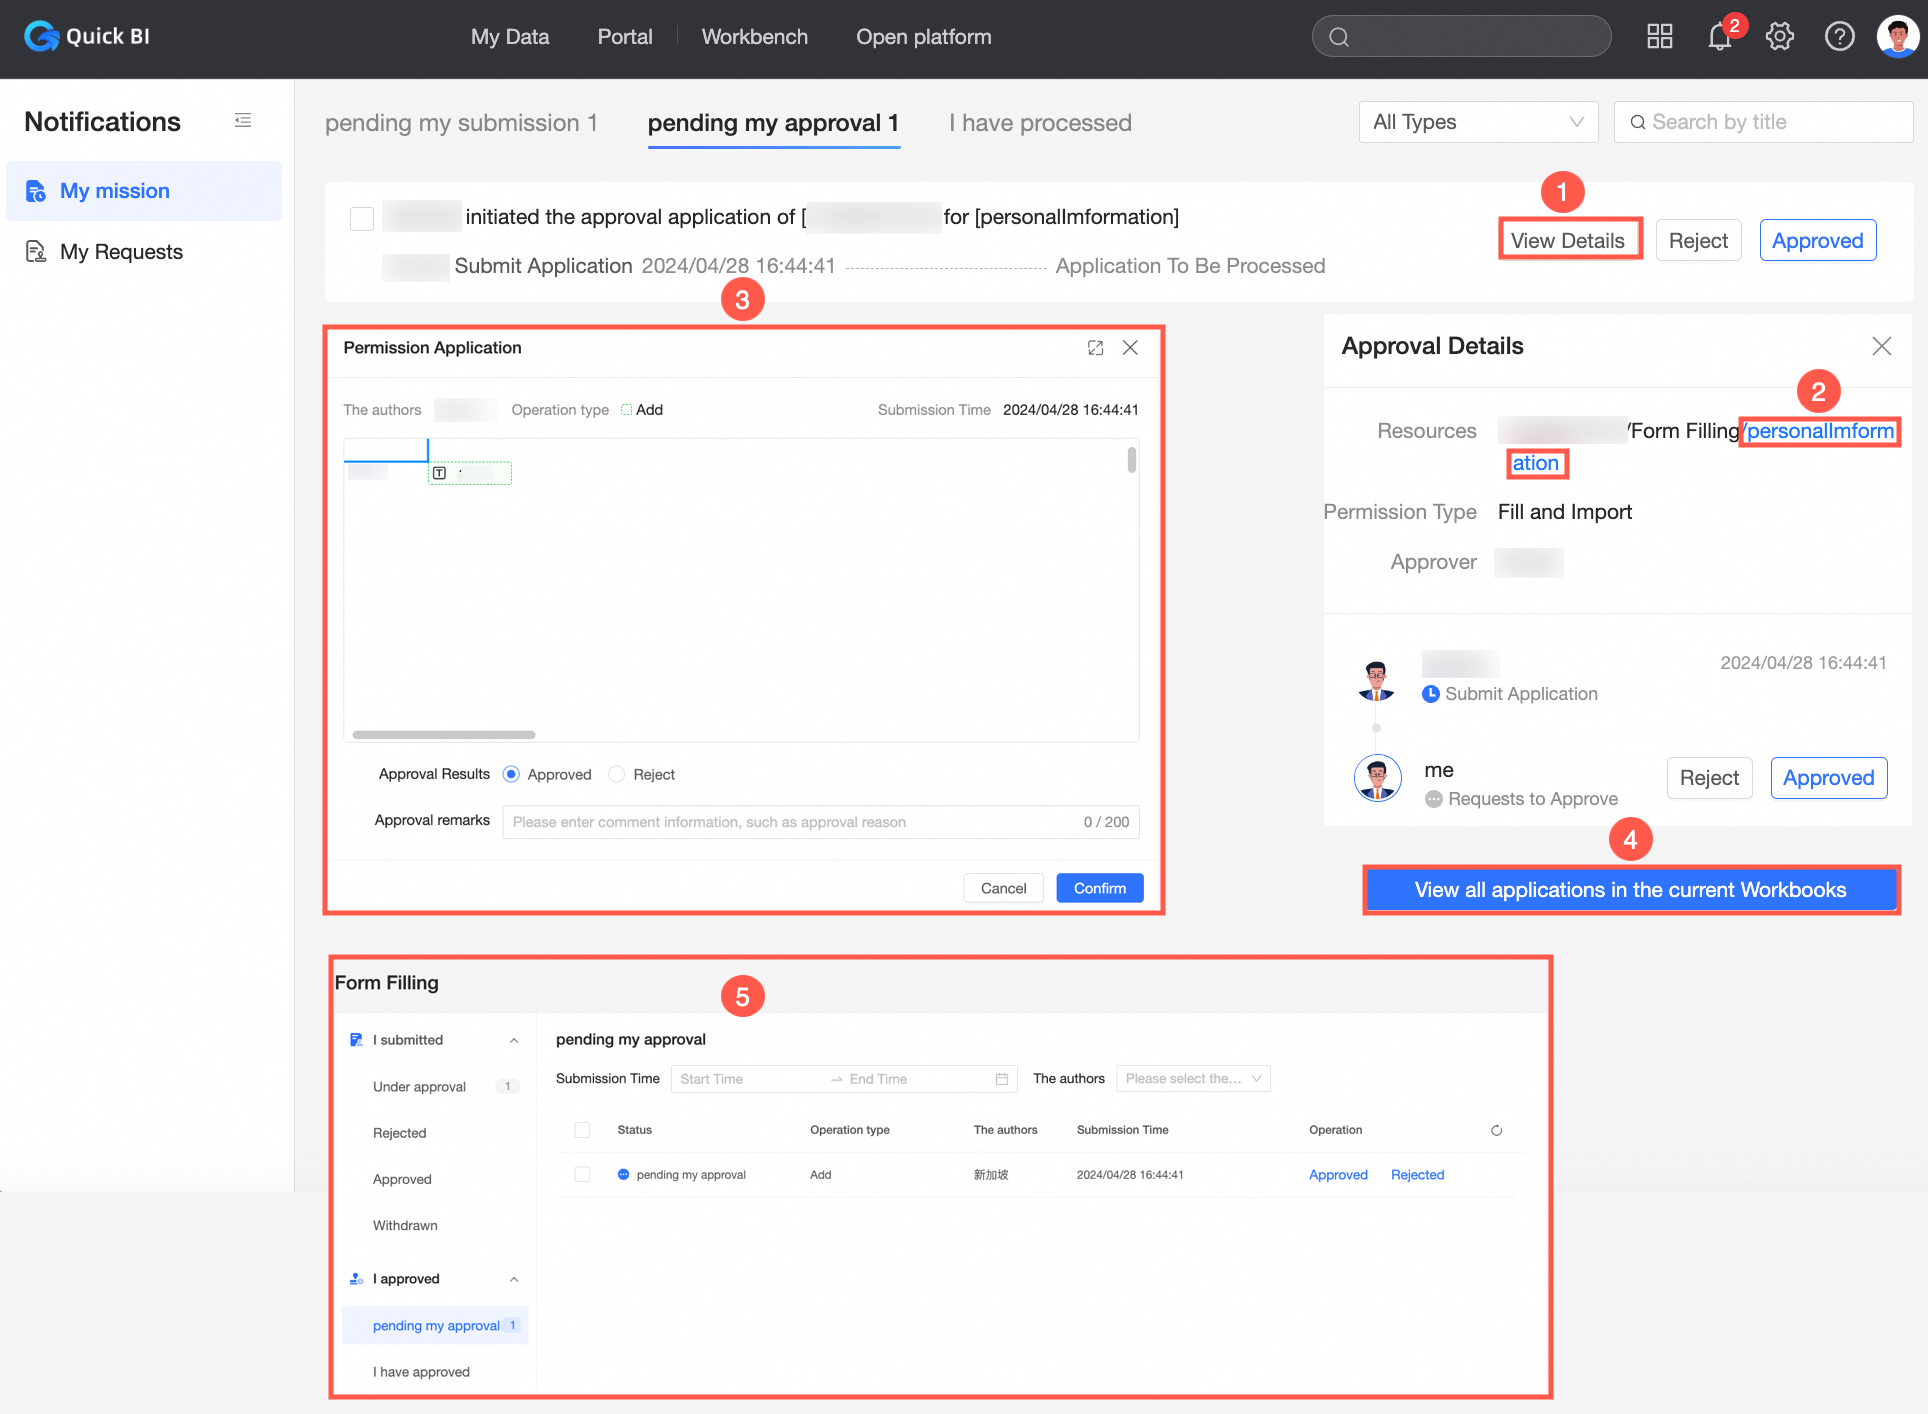
After the form submitter submits data, you can view the pending approval content in "My Tasks" - "Pending My Approval".

-
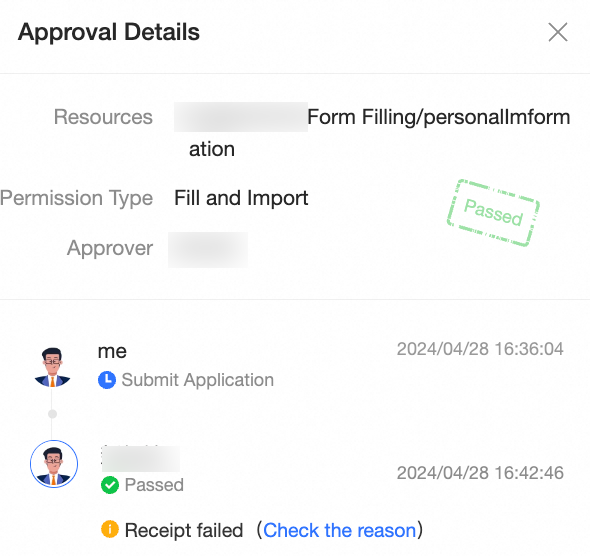
The approval details page (①) displays resource, permission type, approver information, and approval flow initiation and operation records. Click the form name (②) in the resource to preview the approval form data in a popup window (③). Click View All Current Form Applications (④) to jump to the Form Data Approval page (⑤).
-
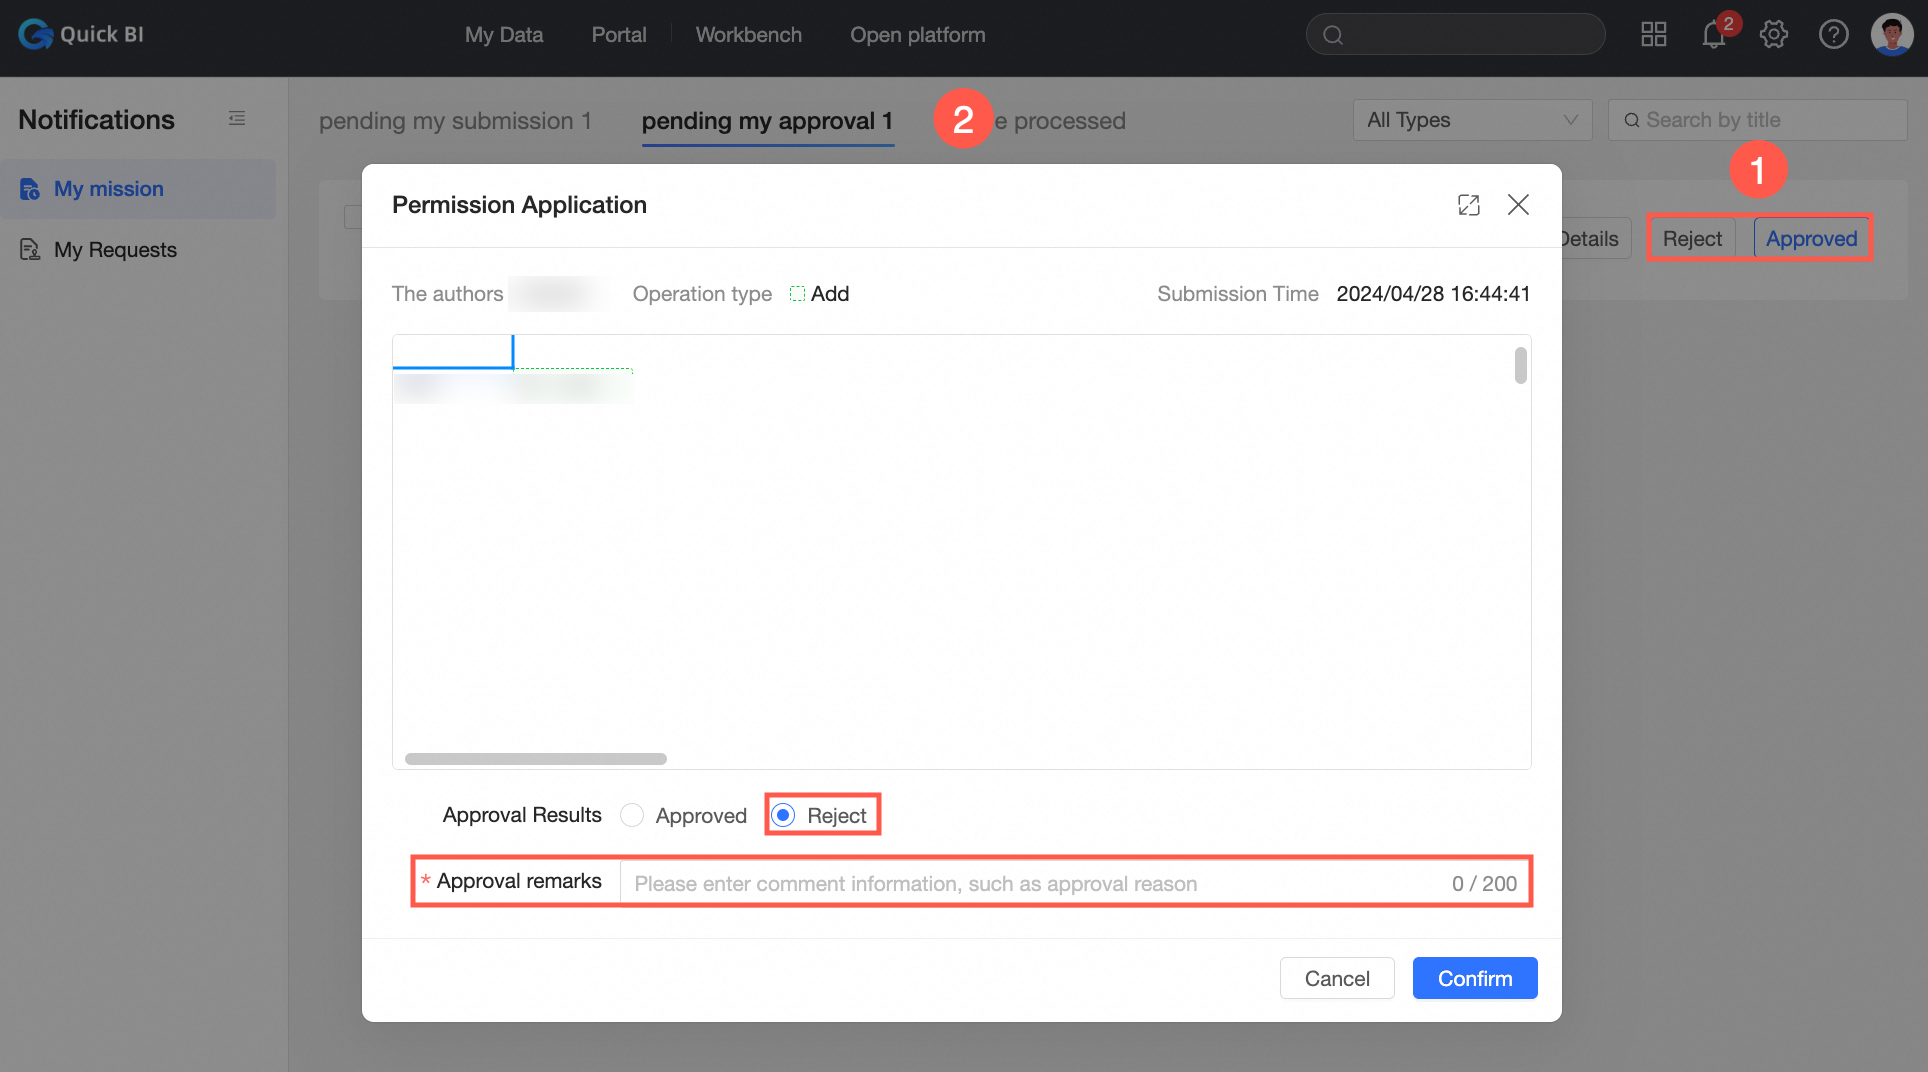
Approve/Reject, both operations lead to the approval page when clicked. The approval result is pre-selected based on your action, and approval comments are required when rejecting.
-
-
The "Processed by Me" page lists all form submissions you have processed as an approver, including both approved and rejected applications.