Audience Push Function
After a audience is created, you can configure push settings on the Audience Management page to push the audience as a CSV file to your Brand Data Bank, Damengpan, or Kafka .
Push Kafka
You can push the user ID of a group to Kafka by hour, day, week, or month, or push the user ID or tag of an audience to Kafka at a time.
All ID types can be pushed.
To push data to Alibaba Cloud Kafka or open source Kafka, you must Create A Kafka API.
The number of IDs to be pushed at a time must be less than 10 million. Otherwise, the push fails.
A maximum of 30 tags can be pushed at a time.
You can also create a push task through API. You can obtain the API description from the API person.
Procedure
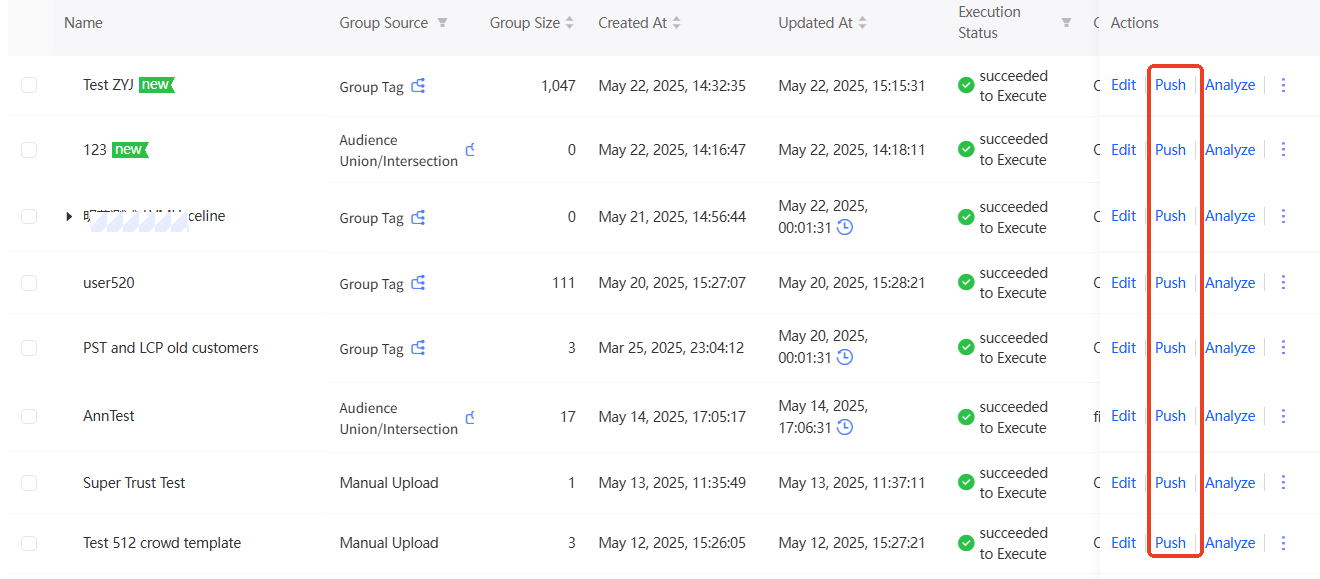
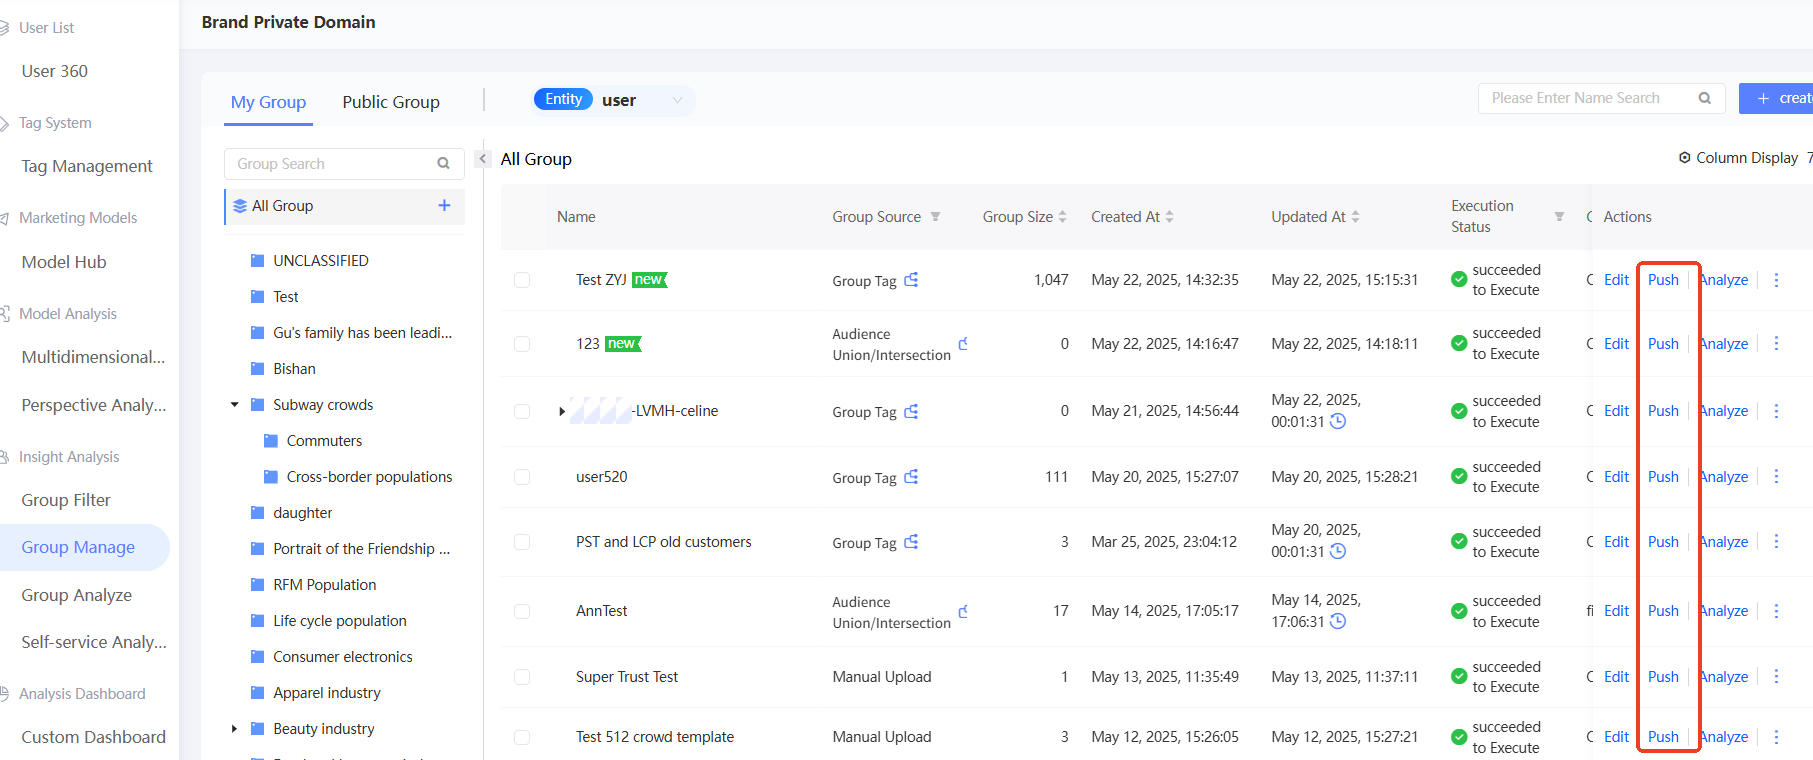
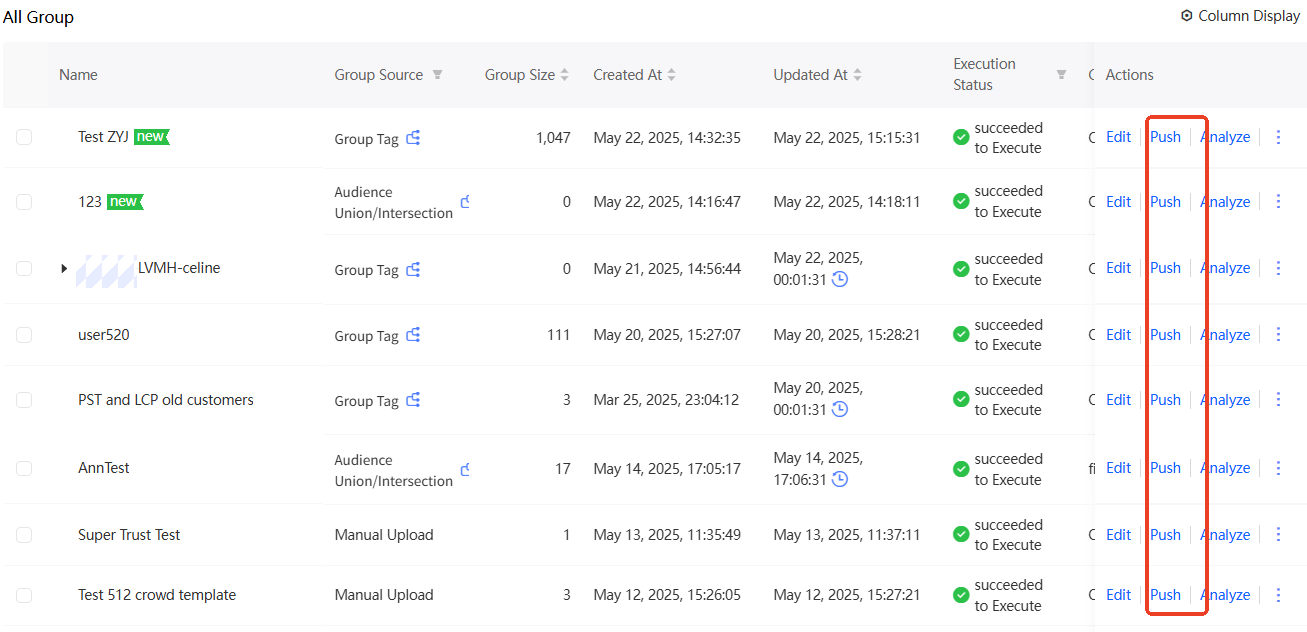
Choose Workspace> User Insight > Audience Insight > Audience Management > My Audience. Click Push.
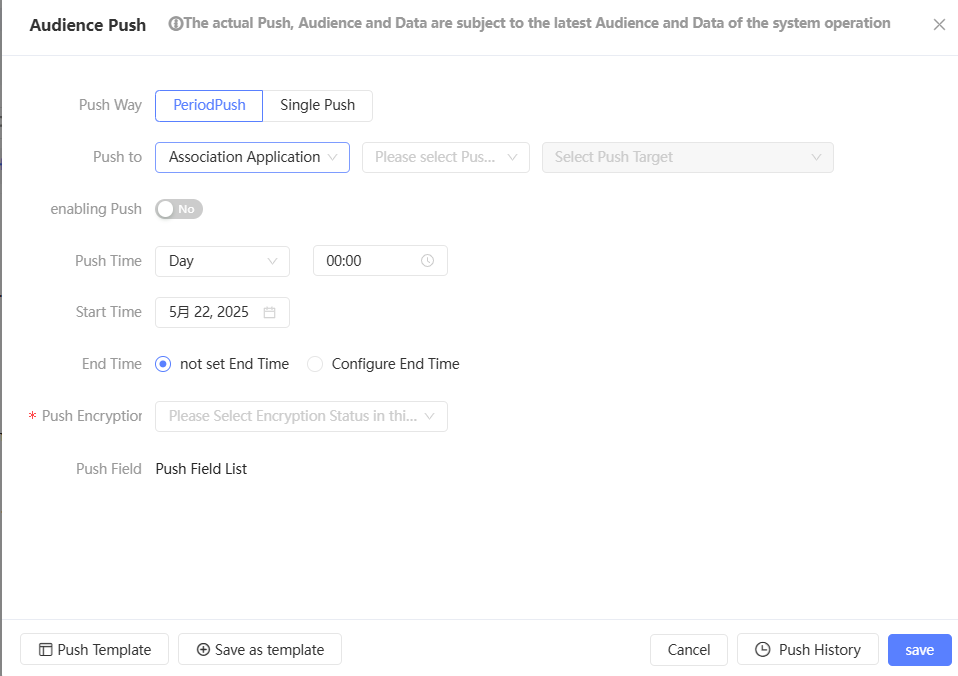
In the Push to drop-down list, select Open API, Kafka, and Kafka API, as shown in the following figure.
Set the push time.
For Periodic Push, turn on Enable Push and set the Push Time, Start Time, and End Time.
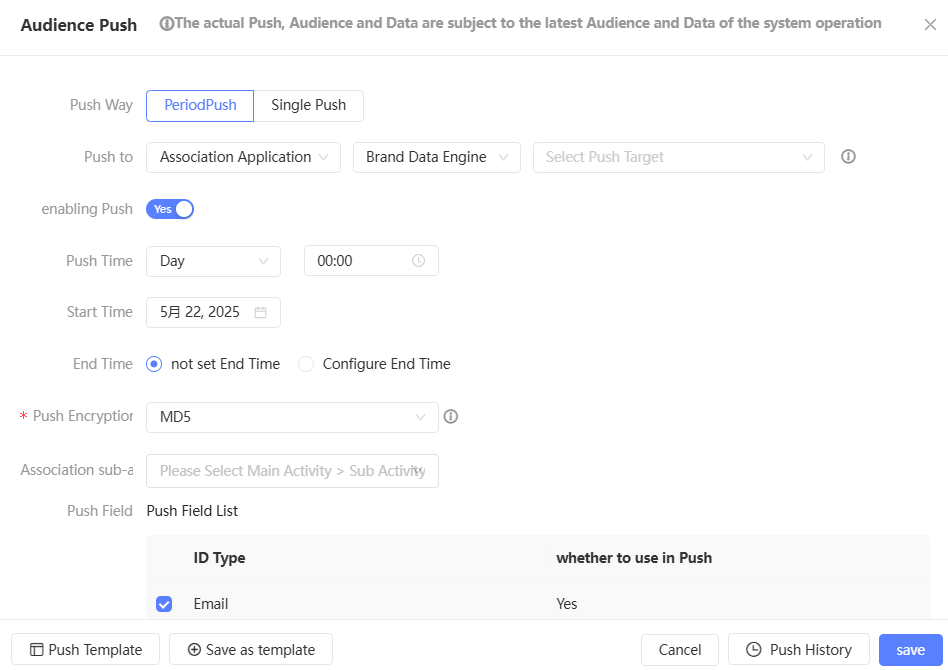
If the group has a periodic push configuration, the Remove Configuration button appears in the lower-right corner. You can click to clear the original configuration. The periodic push of the original configuration is no longer performed.
For One-time Push, you do not need to set the push time.
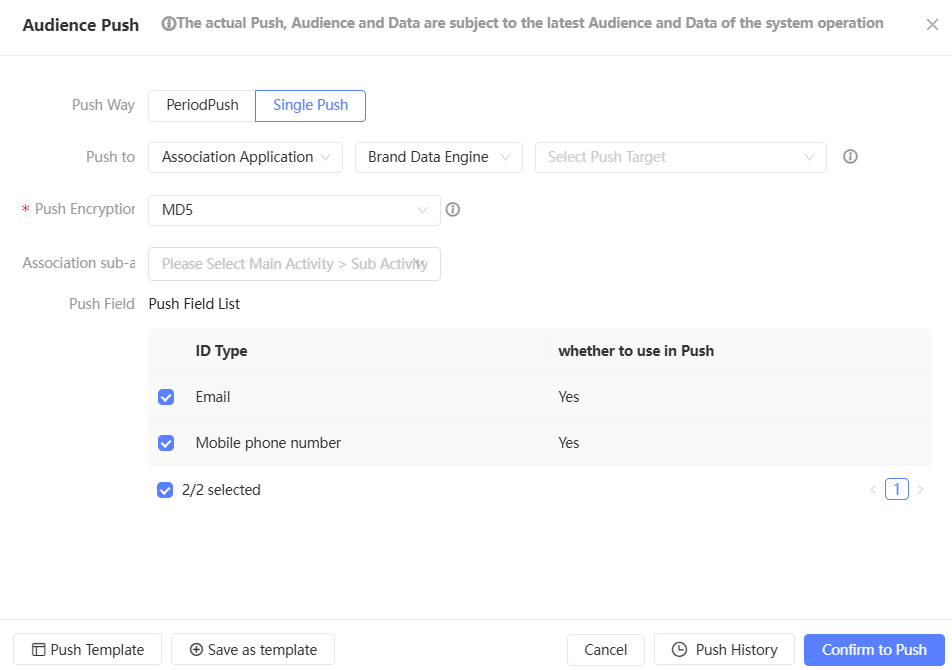
In the Push Type section, select the fields that you want to push.
audience Push: Select an ID from the Push Fields drop-down list.
Push Groups and Tags: Select an ID type from the Push ID Type drop-down list and select a tag field from the Push Field drop-down list. You can search for tags, as shown in the preceding figure.
If you need to use the alias of a tag in Kafka, you can modify the field name mapping of the tag on the right after you select a tag for push. By default, the field name is mapped to the original field name. After the modification, the field name pushed to Kafka is mapped to the new field name instead of the original field name.
NoteYou can select a maximum of 30 tags. The available tags are from the user tag table of the population source.
Click Save or Confirm. The data is pushed to Kafka.
NoteIf the Kafka push parallelism has been set in the management center, people who exceed the limit need to queue up for push. For more information, see Space System Configuration.
When pushing, the encryption method information of the ID field will be pushed at the same time, but will not be decrypted.
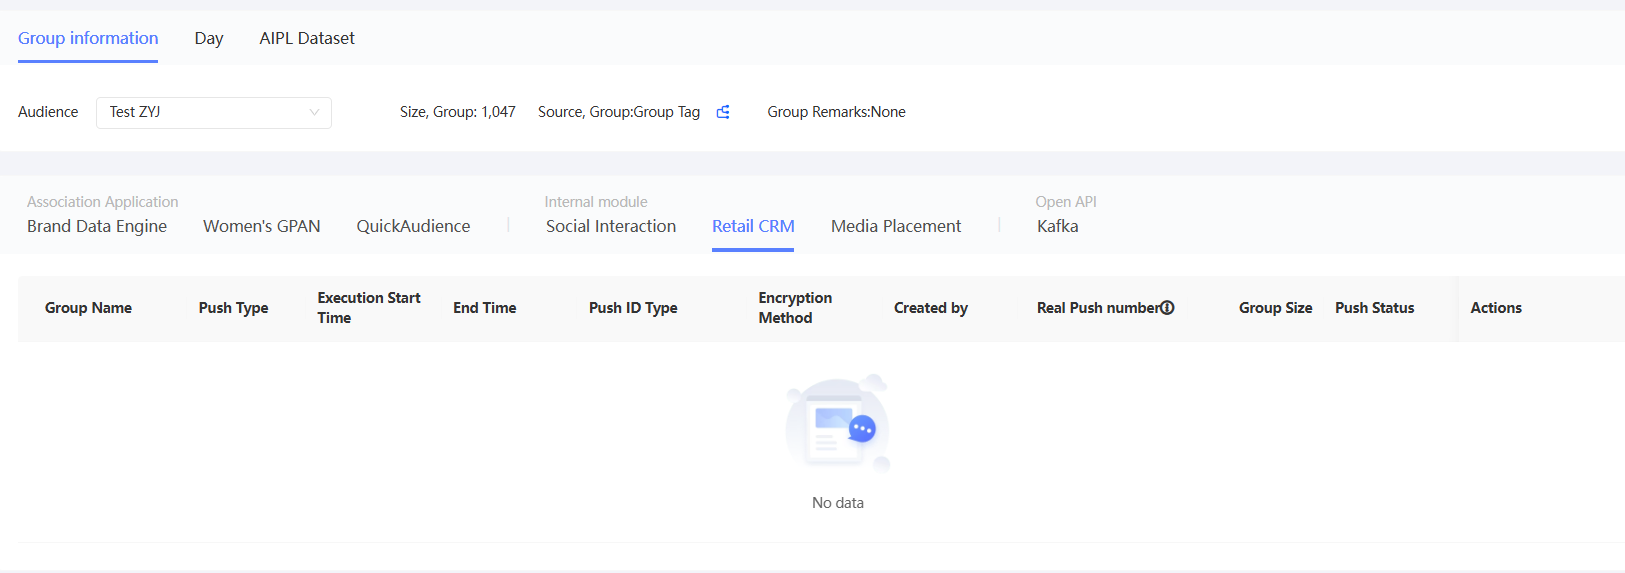
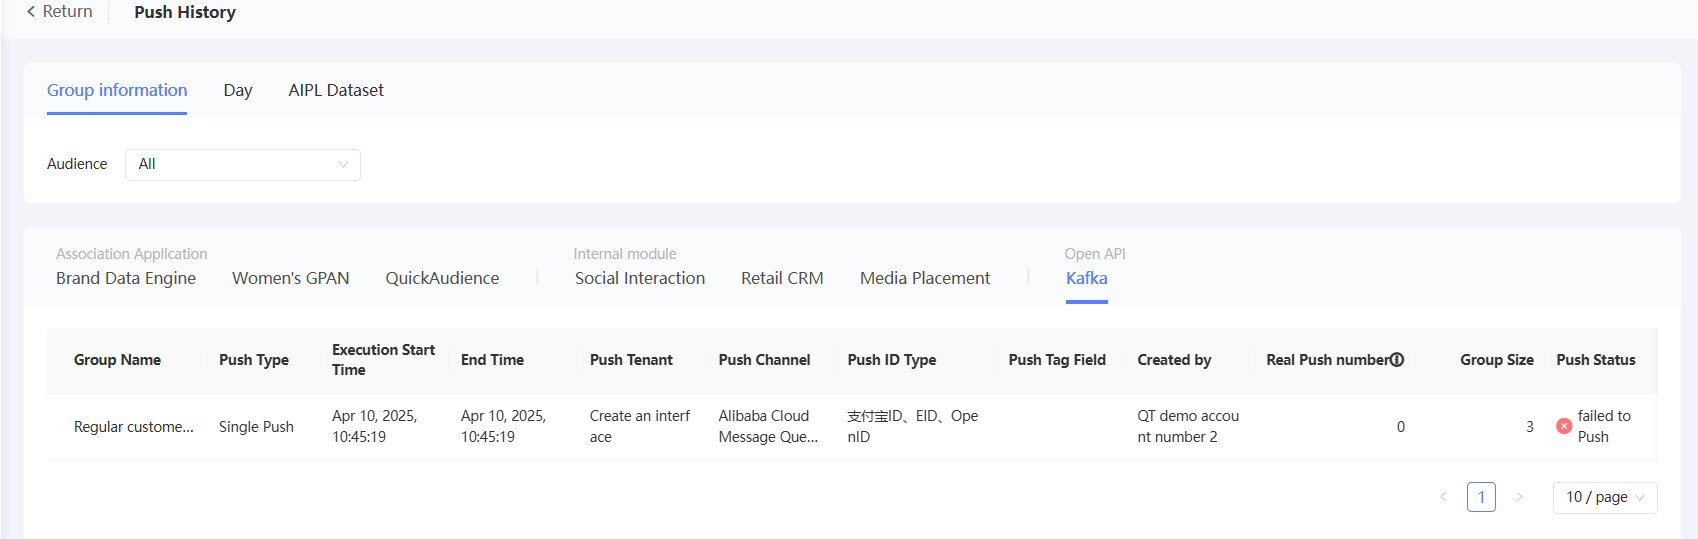
Click Push History to view the push results.
As shown in the following figure, the actual number of pushes in the list is equal to the sum of the number of people covered by each ID type, which is not necessarily equal to the audience size.
Push data bank
For more information about how to perform push data banking operations for people after you Bind Data Bank, see Audience Push Data Bank.
Push Dharma Disk
For more information about how to push a Damengpan to a audience after Bind Damengpan, see Audience Push Damengpan.
Push internal modules
If you have purchased the Social Interaction, Retail CRM, and Media Delivery modules, some features will be used by the audience. In this case, you need to push the user ID of the audience to the corresponding module.
Push Social Interaction
The ID types and encryption methods that can be pushed to social interactions are:
audience push: By default, the social interaction customer number (original) is pushed, that is, the maiscrm_id field used by the social interaction module.
audience and tag push: supports pushing social interaction customer numbers (original) and tag fields at the same time.
Procedure
Choose Workspace> User Insight > Audience Insight > Audience Management > My Audience and click Push.
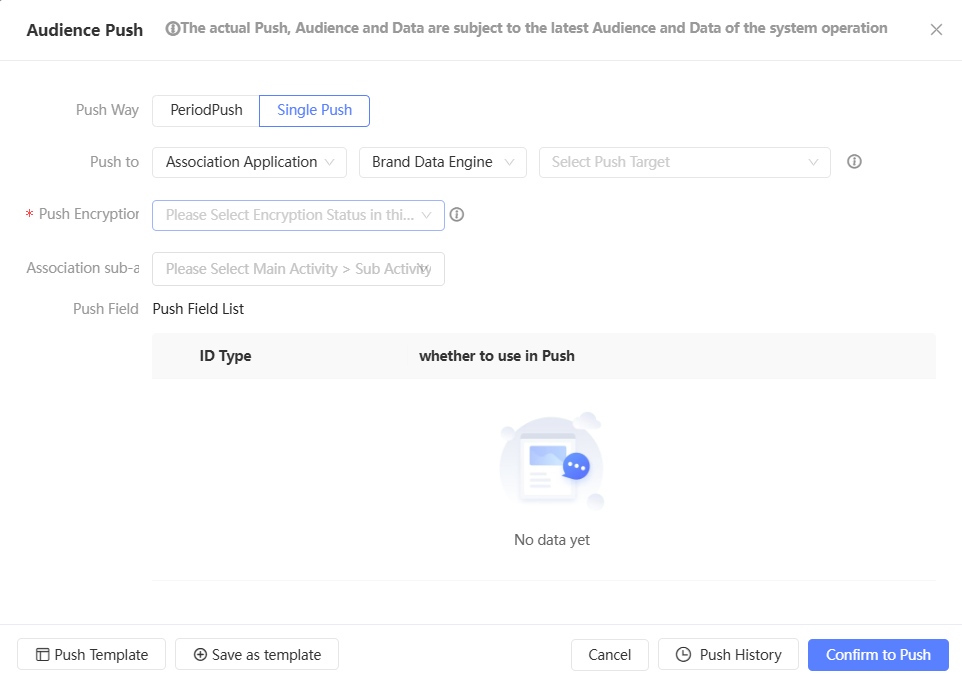
In the Push to drop-down list, select Internal Modules and Social Interaction, as shown in the following figure.
Set the push time.
For Periodic Push, turn on Enable Push and set the Push Cycle, Start Time, and End Time parameters.

If the group has a periodic push configuration, the Remove Configuration button appears in the lower-right corner. You can click to clear the original configuration. The periodic push of the original configuration is no longer performed.
For One-time Push, you do not need to set the push time.
In the Push Type section, select the fields that you want to push.
audience Push: You do not need to set the ID type.
Push Group and Tag: Select Customer ID from the Push ID Type drop-down list. Select a tag field from the Push Field drop-down list. You can search for tags, as shown in the preceding figure.
If you need to use the alias of a tag in social interactions, you can modify the field name mapping of the tag on the right after you select a tag for push. By default, the field name is mapped to the original field name. After modification, the field name pushed to the social interaction will be mapped to the new field name instead of the original field name.
NoteOptional tags exclude tags synced from social interactions.
Click Save or Confirm. The data is pushed to the social interaction.
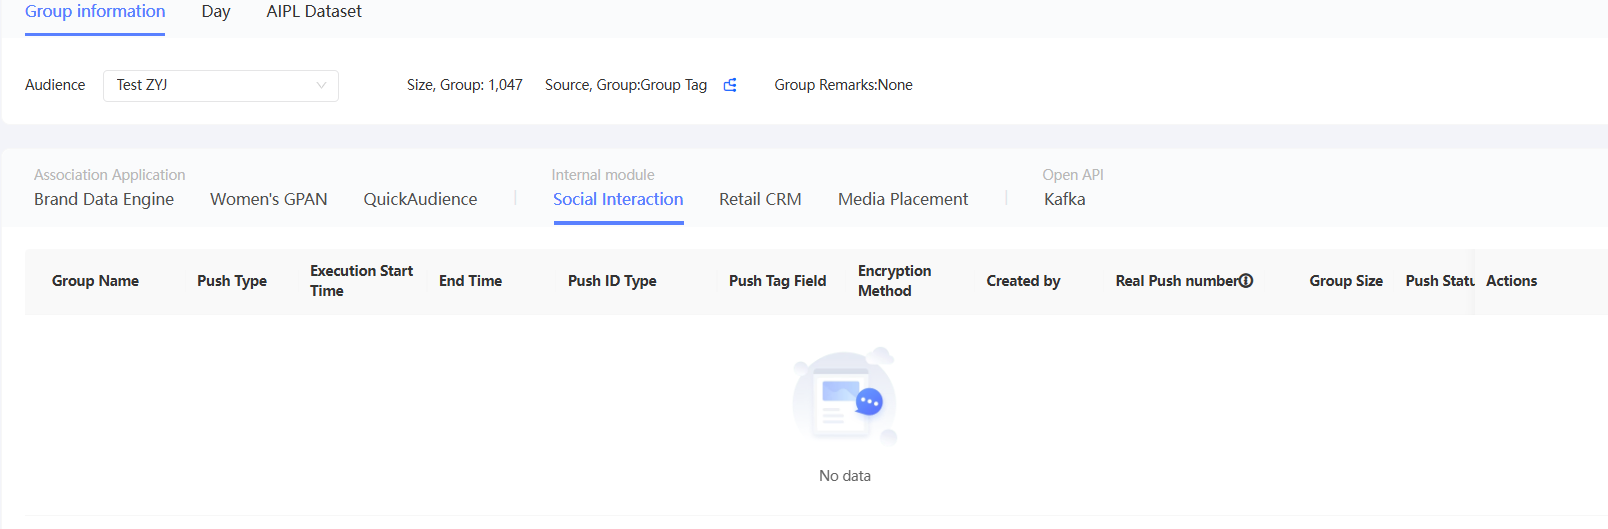
Click Push History to view the push results.
As shown in the following figure, the actual number of pushes in the list is equal to the sum of the number of people covered by each ID type, which is not necessarily equal to the audience size.
If the push fails, you can click Push Again. If the push succeeds, only the audience file is pushed to OSS. This does not mean that the corresponding module has successfully obtained the audience file from OSS. Check whether the corresponding module is available.
Push Retail CRM, Media Delivery
The ID types and encryption methods that support pushing to retail CRM and media delivery are:
Retail CRM: supports pushing mobile phone numbers (original).
Media delivery: You can push IDFA (original /MD5), IMEI (original /MD5), and OAID (original /MD5).
Procedure
Choose Workspace> User Insight > Audience Insight > Audience Management > My Audience. Click Push.
In the Push to drop-down list, select Internal Module, Retail CRM, or Media Delivery, as shown in the following figure.
Set the push time.
For Periodic Push, turn on Enable Push and set the Push Cycle, Start Time, and End Time parameters.
If the group has a periodic push configuration, the Remove Configuration button appears in the lower-right corner. You can click to clear the original configuration. The periodic push of the original configuration is no longer performed.
For One-time Push, you do not need to set the push time.
Select the ID type to be pushed:
For push to Retail CRM: You need to select the unencrypted mobile phone number (original) field, as shown in the preceding figure.
For push to Media Delivery: Select Unencrypted or MD5, and then select the IDFA, IMEI, and OAID fields to be pushed, as shown in the following figure.
Click Save or Confirm to push the audience file to OSS. The system automatically notifies the corresponding module to obtain the audience file from OSS.
NoteThe total maximum number of concurrency pushed from an internal module to all modules is 3.
Click Push History to view the push results.
As shown in the following figure, the actual number of pushes in the list is equal to the sum of the number of people covered by each ID type, which is not necessarily equal to the audience size.
If the push fails, click Push again. If the push succeeds, the audience file is pushed to OSS. This does not mean that the corresponding module has successfully obtained the audience file from OSS. Check whether the corresponding module is available.