The mounted drive maps cloud storage to a local drive, enabling you to access, edit, and back up cloud files as if they were stored locally.
Features
Two-way real-time synchronization between local and cloud storage.
Direct access to cloud files as a local disk, without pre-downloading.
Smart prefetching and on-demand downloads. For example, stream audio and video files without waiting for a full download.
Smart cache management with minimal local disk usage.
Support for both Windows and macOS.
Limitations
The mounted drive does not support simultaneous editing by multiple users. For collaborative editing, use online document editing.
The mounted drive cannot be installed on Windows systems that run on ARM processors, such as some Microsoft Surface models that use Qualcomm Snapdragon CPUs.
The mounted drive is a client-side plugin and does not offer an API.
File access requires a stable, high-bandwidth network connection. On slow or unstable networks (such as mobile hotspots), file transfers may fail. In these situations, use the Enterprise Drive Client to download files, edit them locally, and then upload the changes back to the cloud.
Microsoft stopped supporting Windows 7 on January 14, 2020. Many software ecosystems have also stopped supporting Windows 7. As a result, you may be unable to use mounted disks on computers with an outdated system version. If this issue occurs, upgrade your system to Windows 11 or Windows 10.
Prerequisites
Using the mounted drive incurs charges for data transfer and storage.
Enable the mounted drive
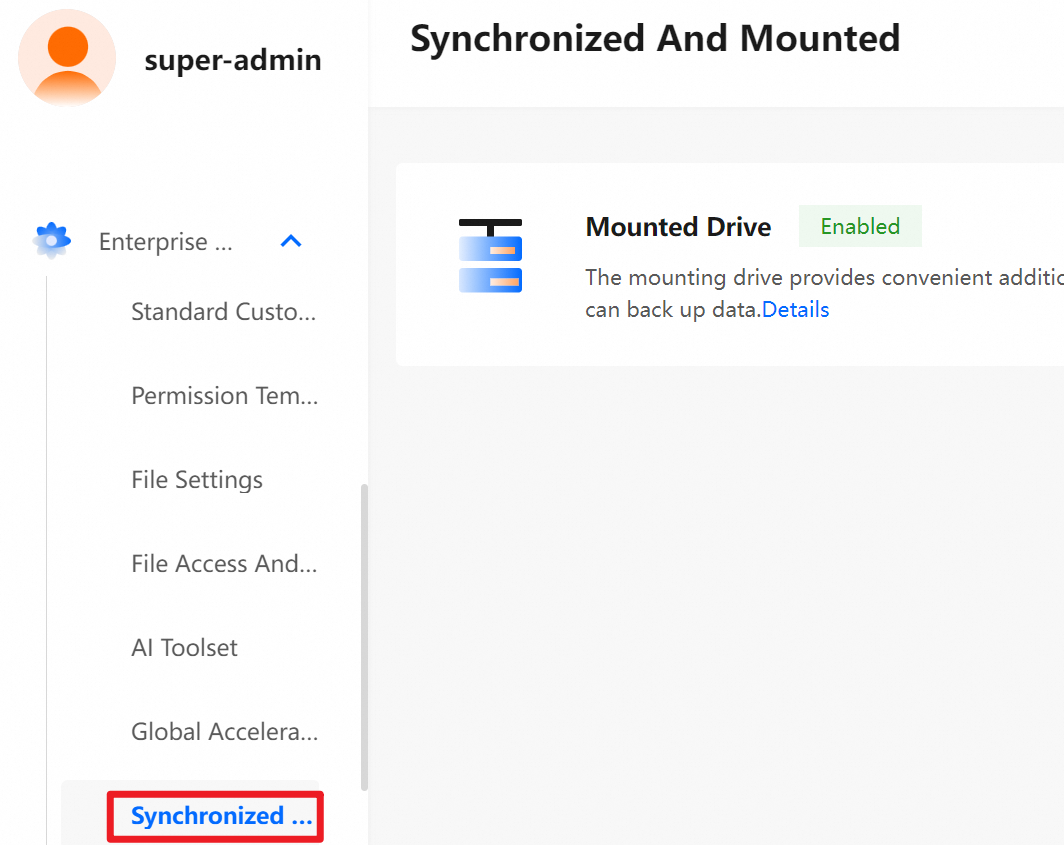
Only super administrators or drive administrators can enable the mounted drive.
Log on to the Management Console as a super administrator or drive administrator.
Go to the Management Console.
In the left-side navigation pane, choose , and then enable Mounted Drive.
Note: After you enable the mounted drive for the first time, log out of your current account and log on again to ensure it functions correctly.
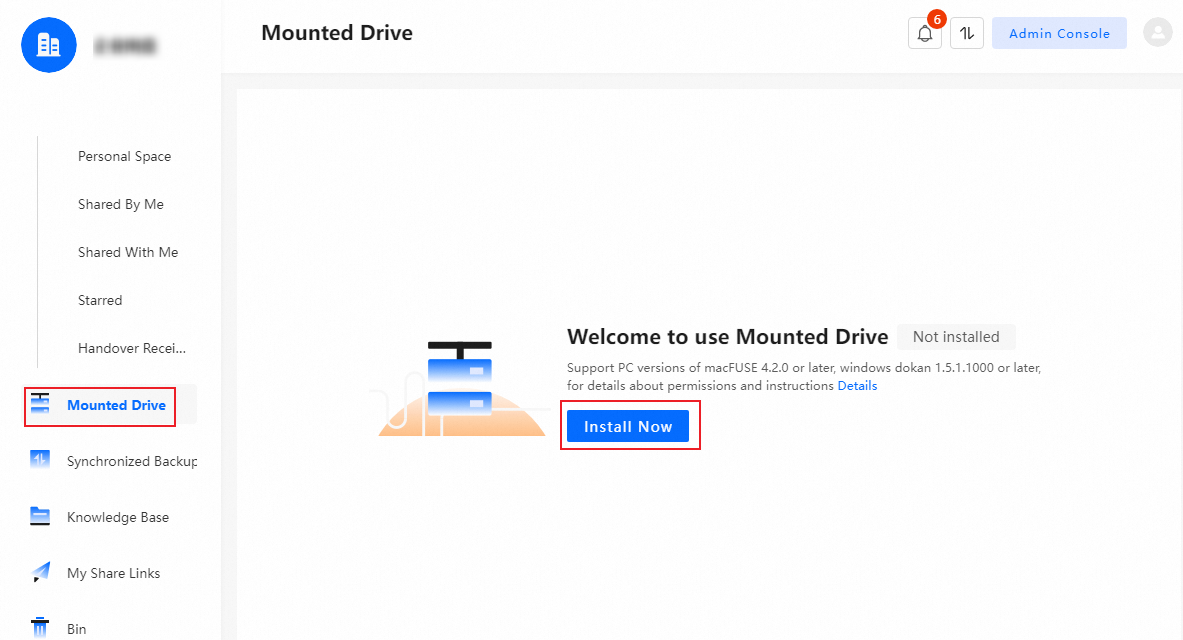
Install the mounted drive
Before using the mounted drive for the first time, you must install it for your operating system.
If the mounted drive does not appear in the user interface after you enable it, restart the Desktop Client.
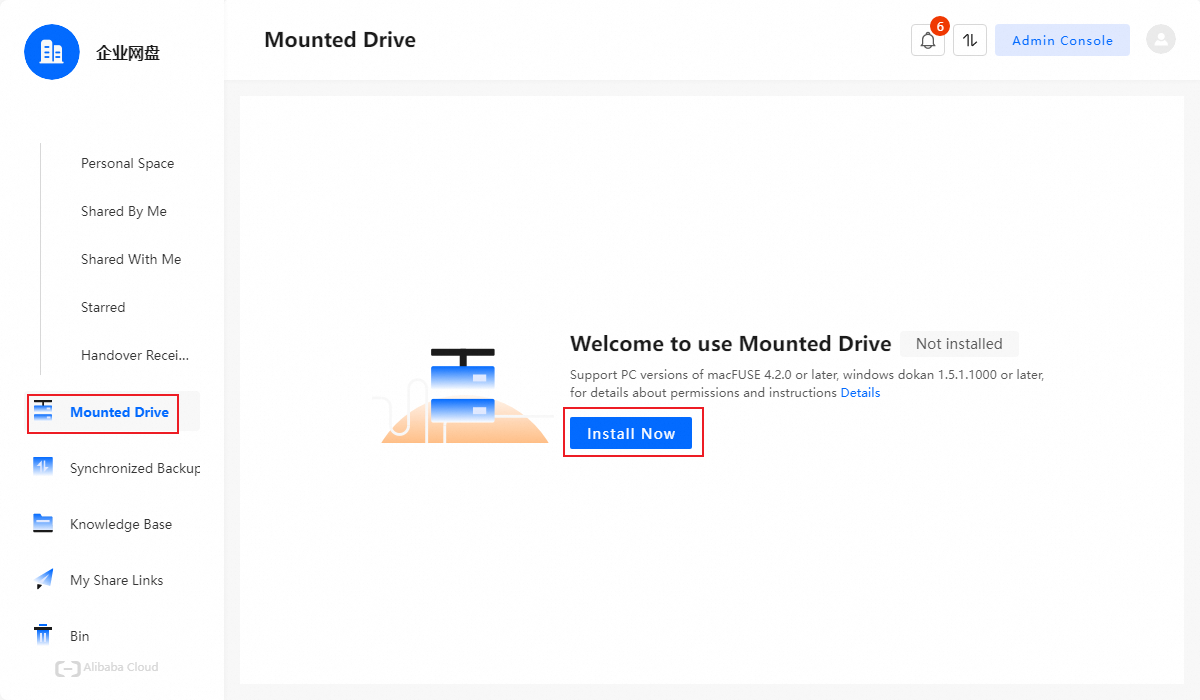
Install on Windows
Log on to the Desktop Client.
Go to the Mounted Drive page and click Install Now.
The mounted drive cannot be installed on Windows systems that run on ARM processors.
If the installation fails on Windows, see How do I fix the Mount Drive installation failure on Windows with "The Mount Drive service is unavailable" error?.
Install on macOS
If you are using an Apple silicon Mac, you must first configure system extensions. For more information, see Change security settings on the startup disk of a Mac.
Download and install the macFUSE driver.
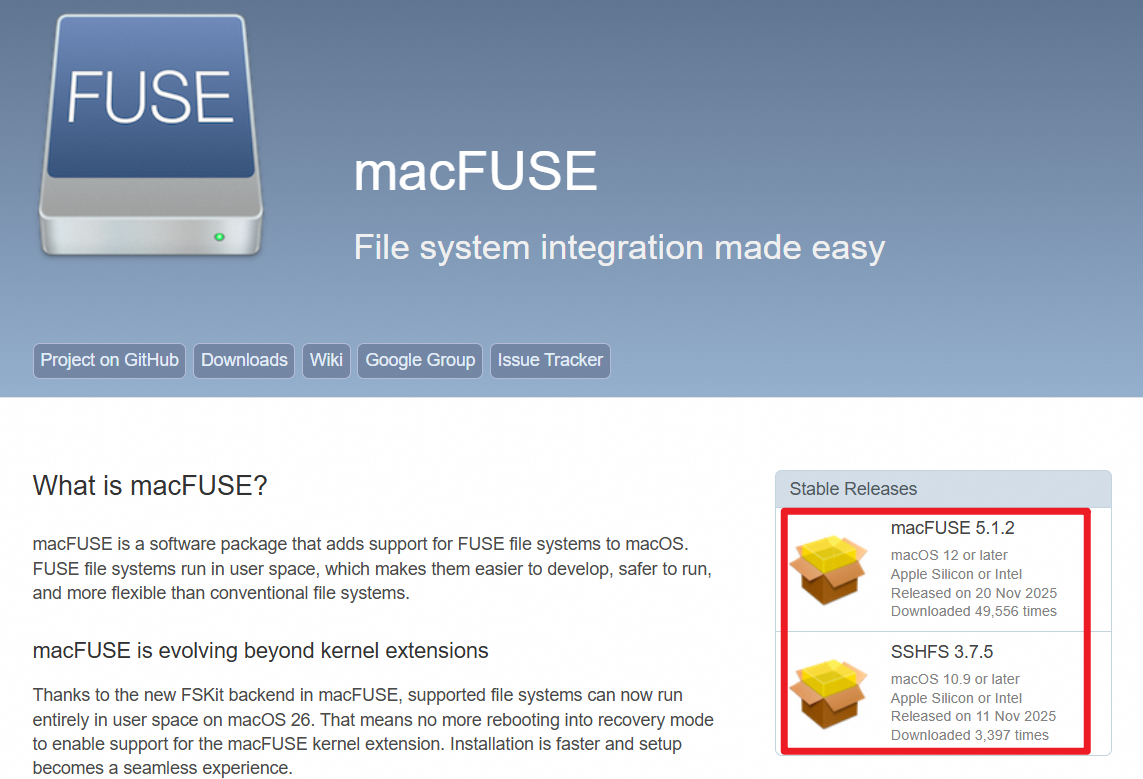
The following table lists the recommended macFUSE driver versions for different macOS versions.
macOS version
macFUSE version
Notes
Tahoe 26.x
5.1.2
If you are using the latest version of macOS, install the latest version of macFUSE to ensure compatibility.
Sequoia 15.x
4.10.2
Sonoma 14.x
4.6.1
Ventura 13.x
4.6.1
Monterey 12.x
4.6.1
Big Sur 11.x
4.6.1
Other earlier versions
3.11.2
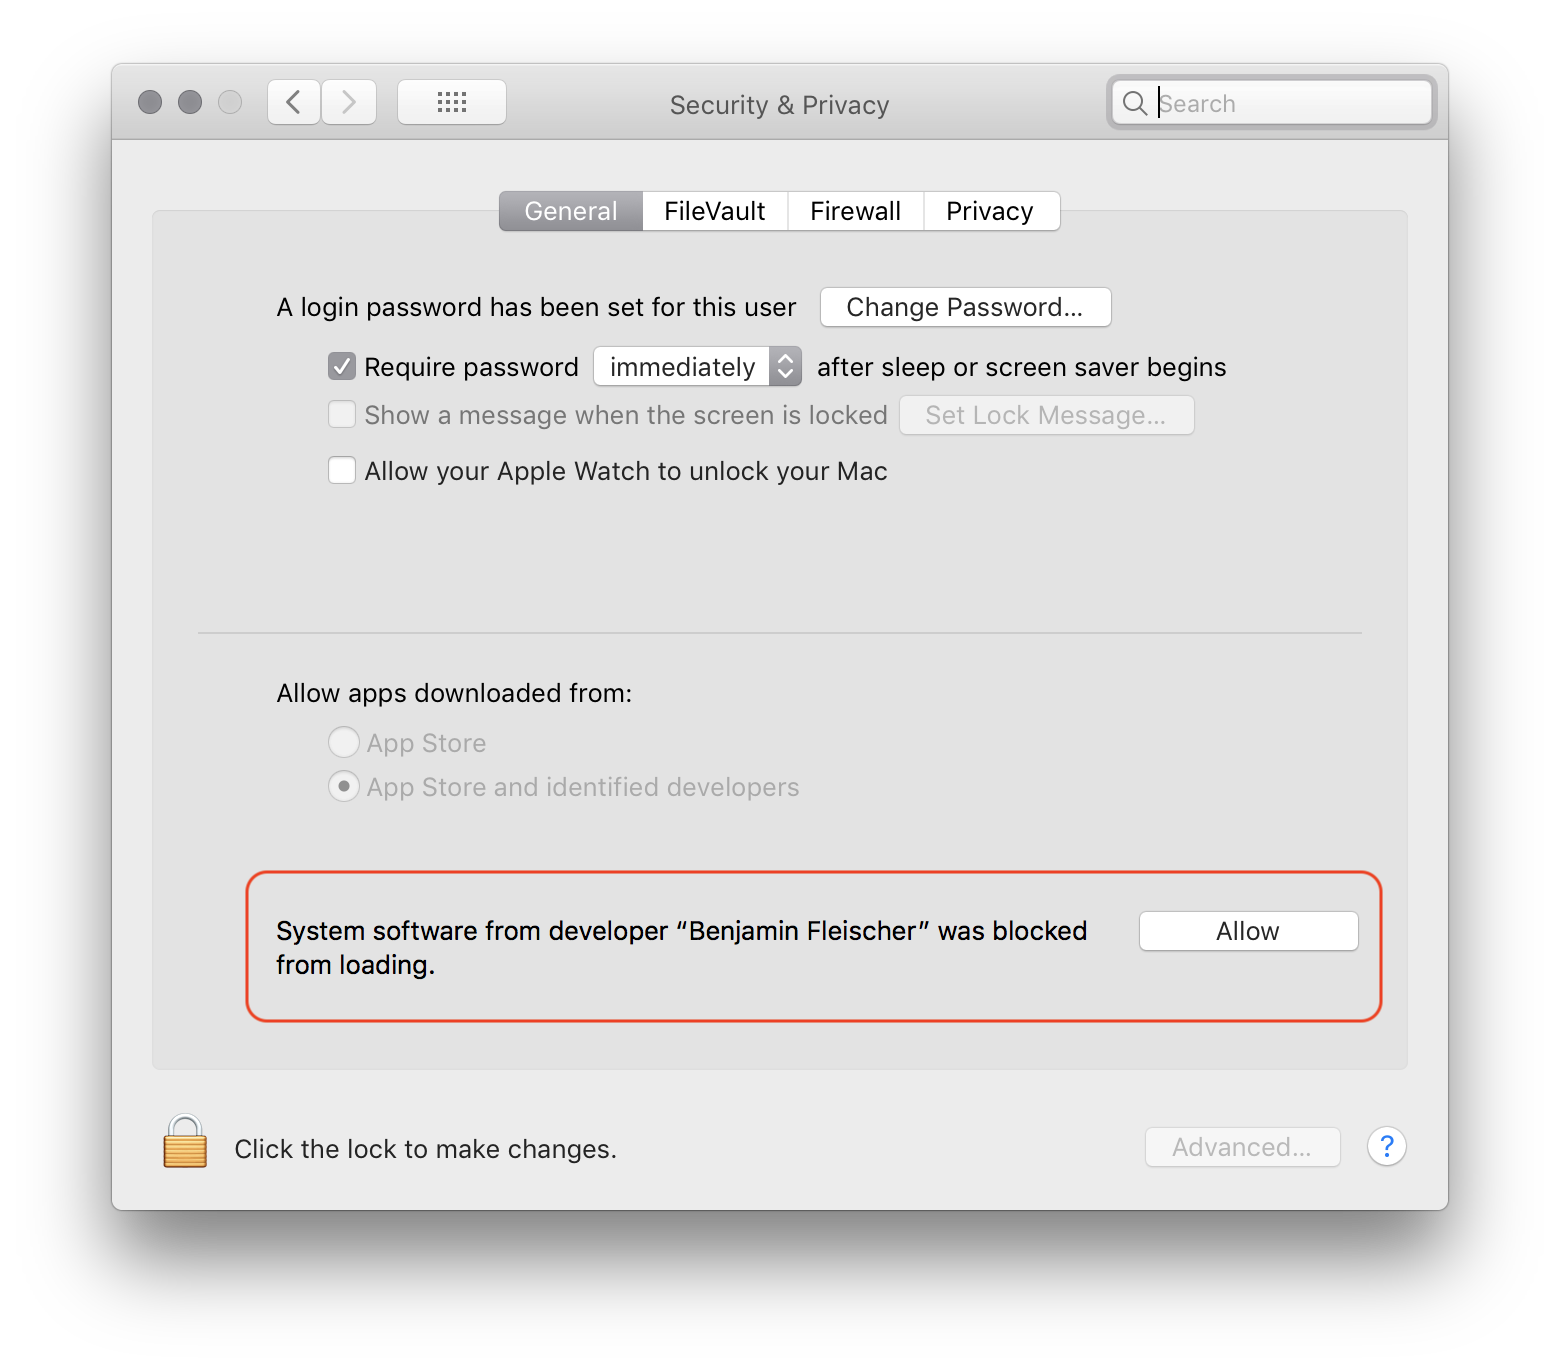
After the installation is complete, if a System Extension Blocked message appears, click Open Security Preferences.
Follow the prompts to go to System Settings > Privacy & Security. In the security section, under "Allow applications downloaded from:", select App Store and identified developers.
Allow the macFUSE extension from developer "Benjamin Fleischer" to load.
Install the mounted drive.
Log on to the Desktop Client.
Select Mounted Drive and click Install Now.
Use the local mounted drive
On the Mounted Drive page, click Open Local Mounted Drive. The local mounted drive is named PDSDrive by default when it is created.
NoteChanging the drive letter is only supported on Windows.
Once opened, manage content in the personal space, received shares, and team space.
ImportantDo not delete, rename, or add files or folders to the root directory of the mounted drive.
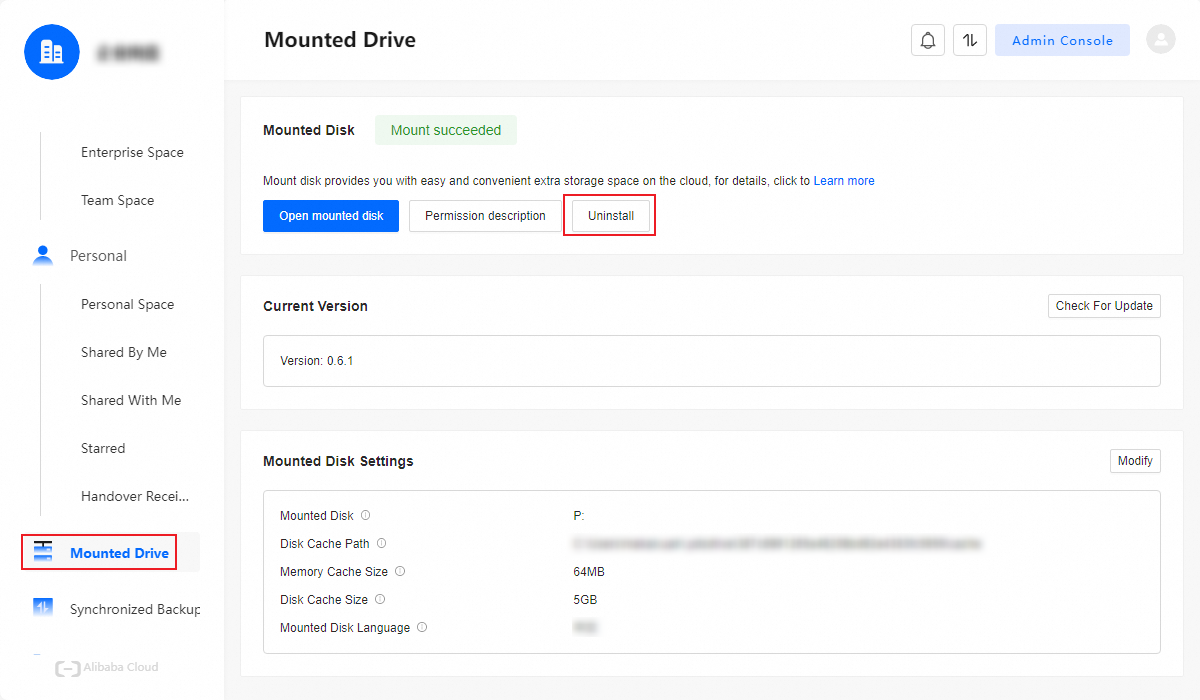
Uninstall the mounted drive
Log on to the Desktop Client.
Go to the Mounted Drive page and click Uninstall.
In the Uninstall Mounted Drive dialog box, click OK.
FAQ
How do I fix the mounted drive installation failure on Windows?
Use the mounted drive on a genuine version of Windows. Issues that occur on non-official or modified systems may not be supported.
Always save and close files before you exit the Desktop Client to avoid data loss.
This error is typically caused by a failed installation of the required Dokan driver.
Troubleshooting
First, verify if the Dokan driver is installed correctly by checking for Dokan Library in Control Panel > Programs and Features.

Based on whether the Dokan driver is installed, follow the appropriate steps below.
Navigate to the mounted drive plugin directory:
C:\Users\[username]\.edm\plugins\mountapp\pkgDouble-click the installer file
Dokan_x64-noVC.msito run it manually.
After the installation is complete, try installing the mounted drive again.
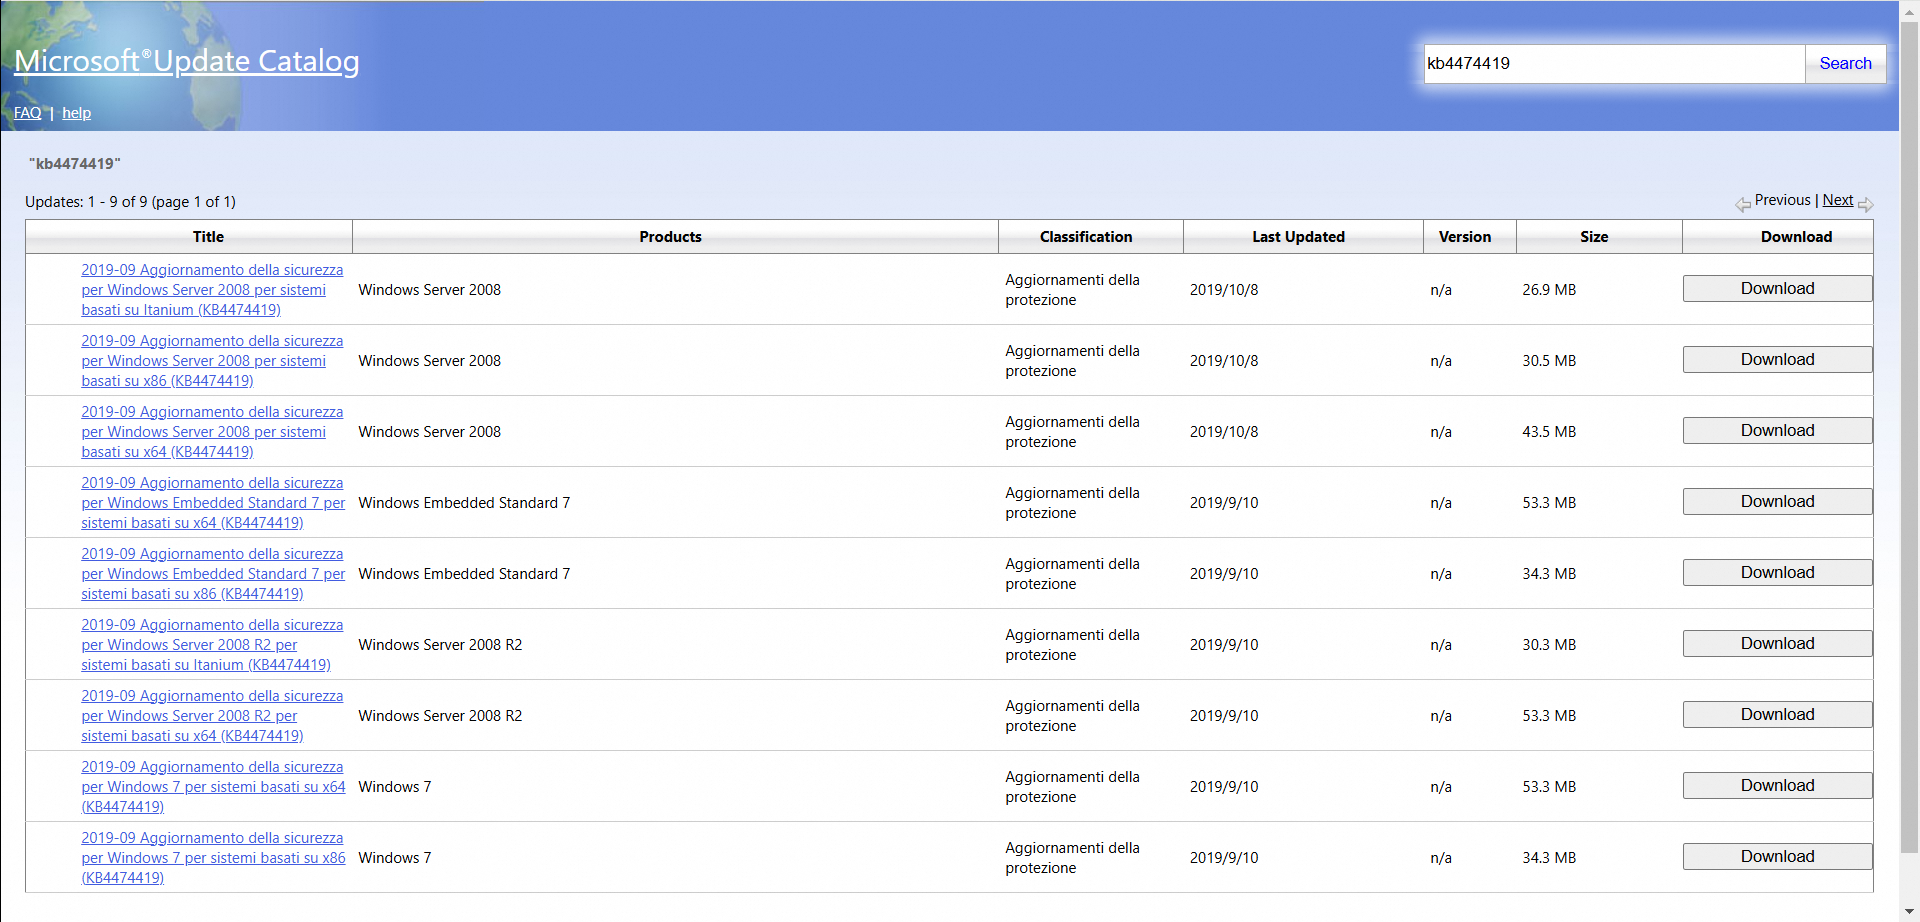
On Windows 7, this failure may be due to the missing security patch KB4474419, which is required for driver signing.
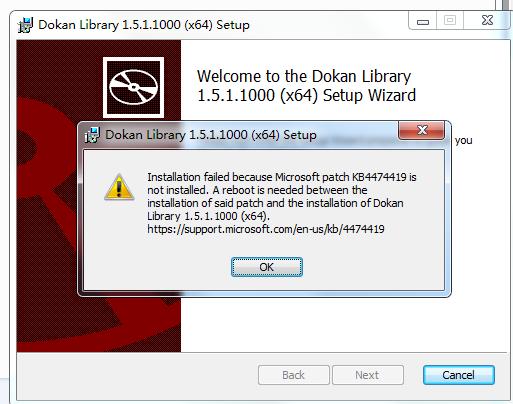
Go to the Microsoft Update Catalog, download the patch that matches your OS version, and install it.
Restart your computer for the changes to take effect.
Follow the steps in Scenario 1 to manually install the Dokan driver.
Why does the mounted drive fail with a macFUSE 'Unsupported macOS Version' error after I upgrade macOS?
Problem
After upgrading macOS to version 15.0 or later, opening the Desktop Client shows an Unsupported macOS Version error from macFUSE. This prevents the mounted drive from working.
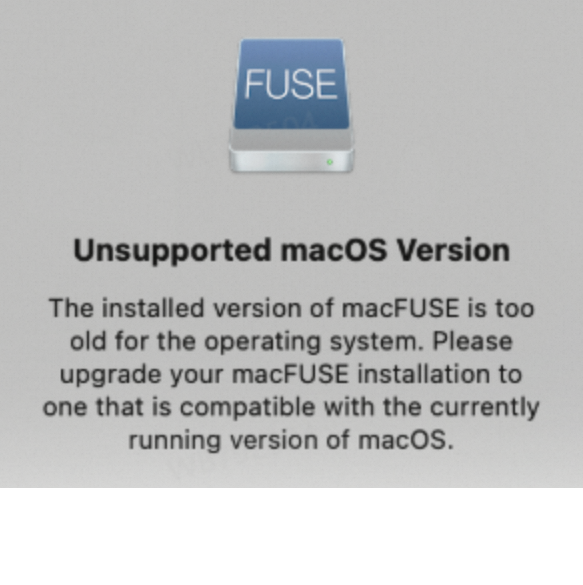
Cause
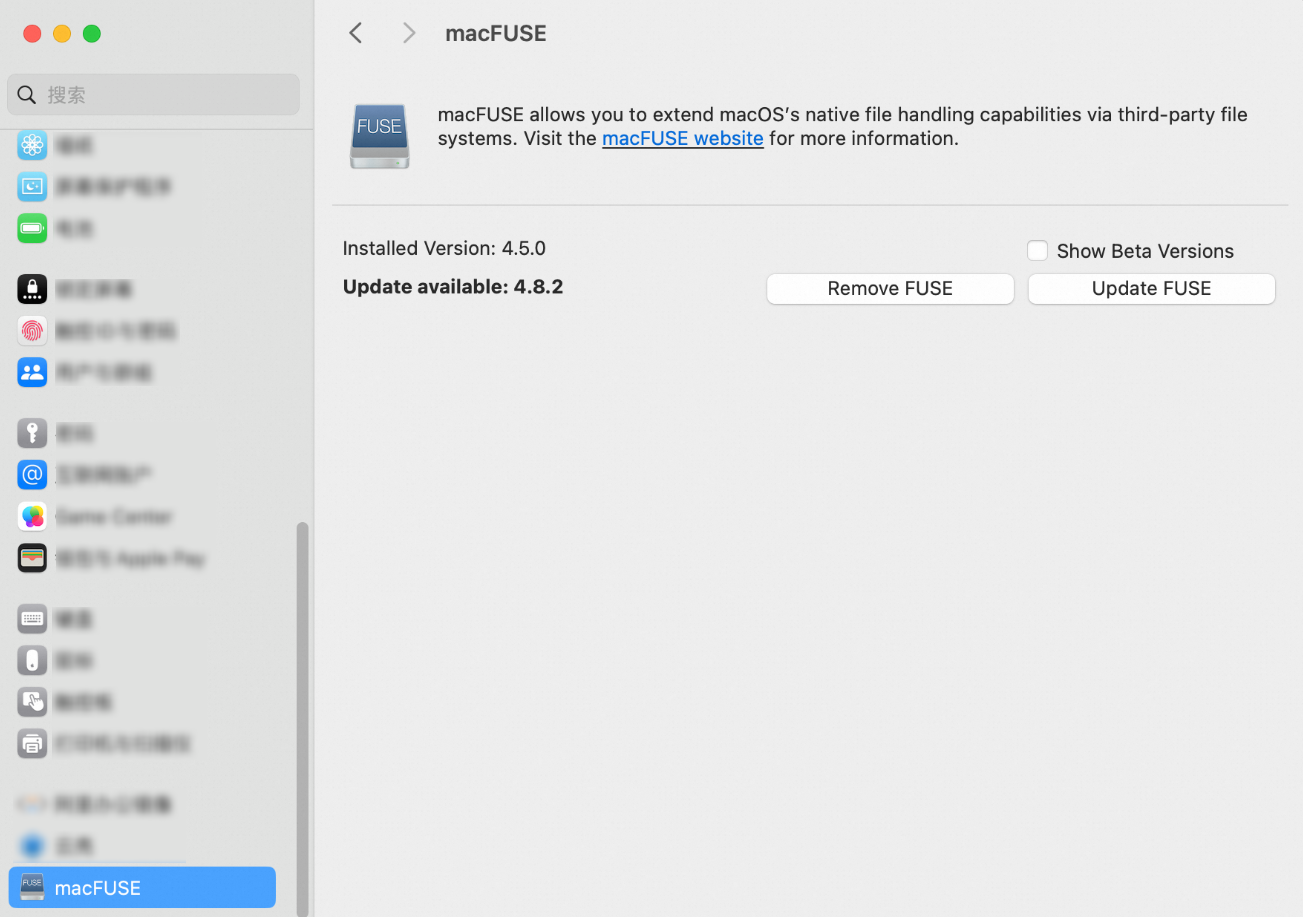
This error indicates that your current version of macFUSE is not compatible with the new version of macOS.Solution
The solution is to update macFUSE to a compatible version. Open System Settings on your Mac, select macFUSE, and then click Update FUSE.
After the update is complete, restart the Desktop Client to apply the changes.
When I delete a file from the mounted drive, does it go to my local Recycle Bin or the cloud?
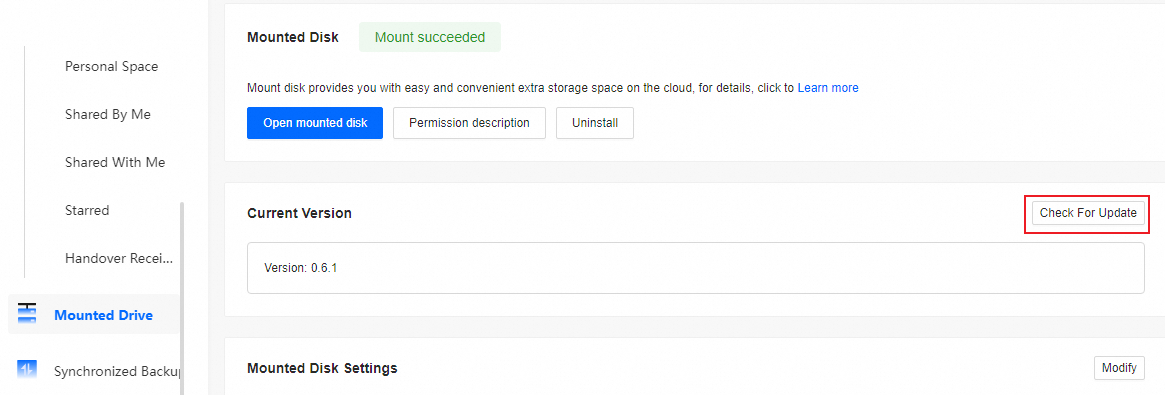
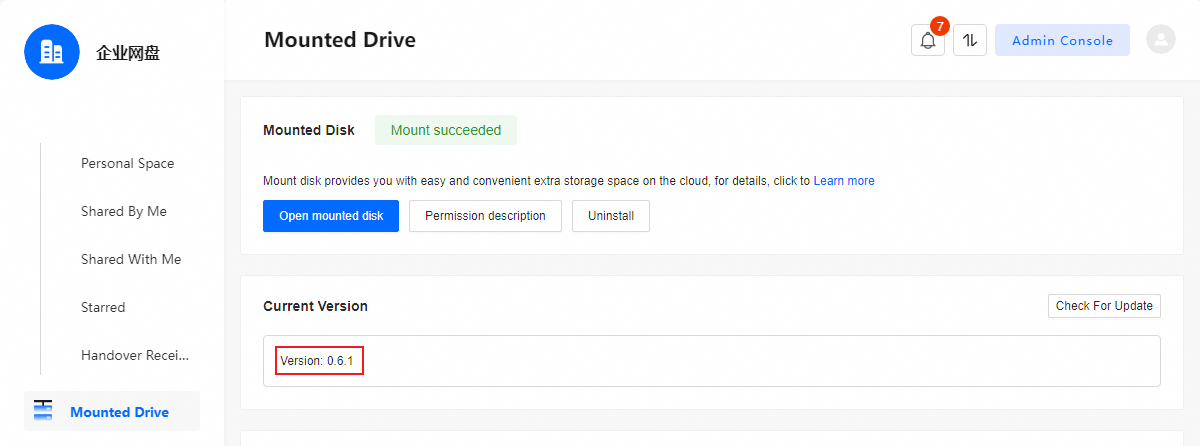
How can I check the version number of the mounted drive?
Find the version number directly on the Mounted Drive page in the Desktop Client.
What is the correct way to upgrade the mounted drive?
When a new version is available, the Desktop Client will prompt you to upgrade. To upgrade manually at any time:
Go to the Mounted Drive page in the Desktop Client.
Click Check For Update.