Notebook Lab provides a lightweight editor that lets you preview and edit notebook files stored in Object Storage Service (OSS) without starting any computing resources. When you are ready to run your code, you can connect the notebook to a Data Science Workshop (DSW) instance. This allows multiple notebooks to share a single DSW instance, which significantly improves resource utilization.
Differences between Notebook Lab and DSW
|
Feature comparison |
Notebook Lab |
DSW instance |
|
Core concept |
A lightweight notebook editor where multiple notebooks can share a single instance. |
A complete AI development environment |
|
File storage |
Stored in OSS, decoupled from compute. |
Bound to the instance's working directory. |
|
Billing model |
No charge for editing. |
Billing starts when the instance is running. |
|
Toolset |
Focused on Notebook development. |
Includes Notebook, WebIDE, and Terminal. |
Quick Start
Step 1: Open a notebook
-
Log on to the PAI console and select the target Region in the upper-left corner.
-
In the left-side navigation pane, click Workspaces. Click the name of the target workspace.
-
In the left-side navigation pane, choose Model Training > Data Science Workshop (DSW), and then click the Notebook tab.

Step 2: Select a code directory
Click Select Code Directory. Select an OSS bucket, create a new directory such as notebook_test, and select it. This directory stores your notebook files. After the code directory is configured, the notebook list scans this directory and displays all notebook files (*.ipynb) found at the OSS path.
Step 3: Create a notebook and develop code
-
Click Create Instance. This opens the notebook development environment and creates a new notebook file.
-
Edit the code. Click +Python to add a Python code cell to develop your code.

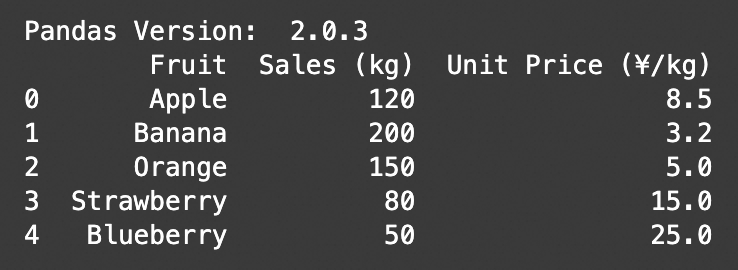
The following is sample code:
Note-
Install dependencies first: Because Notebook files and DSW instances are separate, include the logic for downloading and installing environment dependencies in the Notebook file. This ensures that your code runs correctly when you switch between different DSW instances.
-
Save your code: Notebook Lab does not automatically save your code by default. Save your code promptly after making changes.
-
Step 4: Associate a DSW instance and run the code
-
Click Select a DSW instance and choose a running instance. To improve resource utilization, multiple notebooks can be associated with the same DSW instance.
-
Click the
 icon to run the code.
If the kernel fails to load in the Select Kernel section in the upper-right corner of the Notebook, refresh your browser to reload the environment.
Sample code output:
Stop your DSW instance in a timely manner: If you create a Pay-As-You-Go instance, billing starts when the instance enters the Running state and is based on its runtime, even if you do not open the WebIDE or run any code. To avoid unnecessary charges, stop or delete the instance when it is no longer needed.
Use Copilot for coding assistance
You can use Copilot for coding assistance. To trigger Copilot, use one of the following methods:
-
Method 1: In the Notebook Lab toolbar, click the Generate button.

-
Method 2: Select a cell and use the following keyboard shortcut:

-
Windows:
Ctrl+I -
macOS:
Command+I
-
Run MaxCompute SQL
-
Install dependencies. First, add a Python cell and run the following command:
!pip install https://dataworks-notebook-cn-shanghai.oss-cn-shanghai.aliyuncs.com/public-datasets/pypi/dataworks-magic/dataworks_magic-0.1.5-py3-none-any.whl jupysql tenacity sqlparse maxframe alibabacloud_emr_serverless_spark20230808 alibabacloud_ververica20220718 psycopg2-binary -
Bind a MaxCompute resource.
-
In the top toolbar, click +SQL to create an SQL node, or click MaxCompute SQL in the lower-right corner of a Python code cell to switch its type.

-
Bind a computing resource. Click Resource Specifications, and then click Associate Computing Resource. You are redirected to DataWorks to bind a compute resource.

-
-
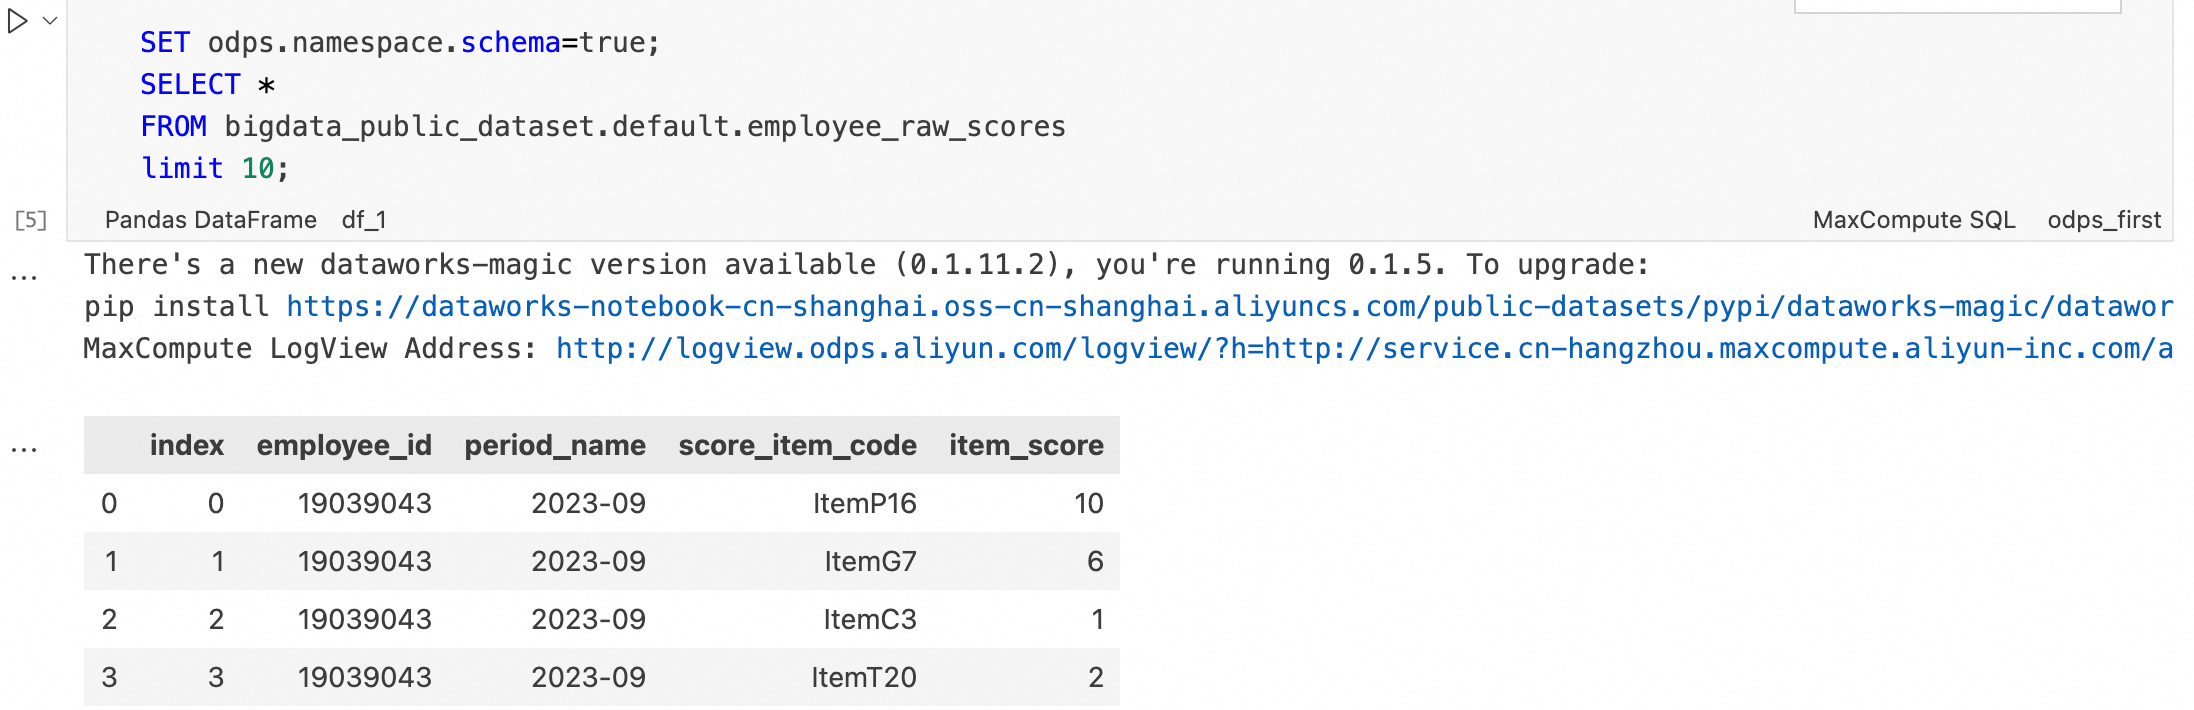
Write and run the SQL cell. The following is a test query that uses a public dataset.
SET odps.namespace.schema=true;
SELECT *
FROM bigdata_public_dataset.default.employee_raw_scores
limit 10;
Result:
Billing description
Editing code in Notebook Lab is free of charge. When a notebook is associated with a running DSW instance, DSW billing rules apply. For more information, see Billing of DSW.
If you use MaxCompute resources to run SQL queries, MaxCompute billing rules apply. For more information, see MaxCompute billing overview.