Deploy a model as an online inference service on EAS and call it via API. This example uses vLLM to serve Qwen3-0.6B.
For production LLM deployment, use scenario-based LLM deployment or one-click deployment from Model Gallery.
Prerequisites
Activate PAI and create a workspace with your Alibaba Cloud main account. In the PAI console, select a region and complete authorization and product activation.
Billing
This example uses pay-as-you-go public resources. Pricing details: EAS billing.
Prepare resources
Prepare model files and code files. Build a custom image if the official images do not meet your requirements.
Prepare model files
Run the following code to download Qwen3-0.6B from ModelScope to ~/.cache/modelscope/hub.
# Download the model
from modelscope import snapshot_download
model_dir = snapshot_download('Qwen/Qwen3-0.6B')
Prepare code files
The vLLM framework builds an OpenAI API-compatible service, so no separate code file is needed.
For custom business logic or API requirements, prepare your own code files. Example using Flask:
Upload files to OSS
Use ossutil to upload model and code files to OSS. Mount OSS to the service to read the model file.
Other storage options: Storage configurations.
Packaging files directly into the image is not recommended:
-
Model updates require rebuilding and re-uploading the image.
-
Large model files increase image size, slowing pull and startup times.
Prepare images
Qwen3-0.6B requires vllm>=0.8.5. The official EAS image vllm:0.11.2-mows0.5.1 meets this requirement.
If no official image fits, create a custom image. For DSW-trained models, create a DSW instance image for development-deployment consistency.
Deploy the service
-
Log on to the PAI console. Select a region on the top of the page. Then, select the desired workspace and click Elastic Algorithm Service (EAS).
-
Click Deploy Service. In the Custom Model Deployment section, click Custom Deployment.
-
Configure the following key parameters. Keep defaults for other parameters.
-
Deployment Method: Select Image-based Deployment.
-
Image Configuration: In the Alibaba Cloud Image list, select
vllm:0.11.2-mows0.5.1. -
Mount storage: This example stores the model file in OSS at path
oss://examplebucket/models/Qwen/Qwen3-0___6B. Select OSS and configure as follows.-
Uri: OSS path where the model is located. Set to
oss://examplebucket/models/. -
Mount Path: Destination path in the service instance where the file is mounted, such as
/mnt/data/.
-
-
Command: The official image has a default startup command. Modify as needed. For this example, change to
vllm serve /mnt/data/Qwen/Qwen3-0___6B. -
Resource Type: Select Public Resources. For Resource Specification, select
ecs.gn7i-c16g1.4xlarge. To use other resource types, see Resource configurations.
-
-
Click Deploy. Service deployment takes about 5 minutes. When Service Status changes to Running, the service is successfully deployed.
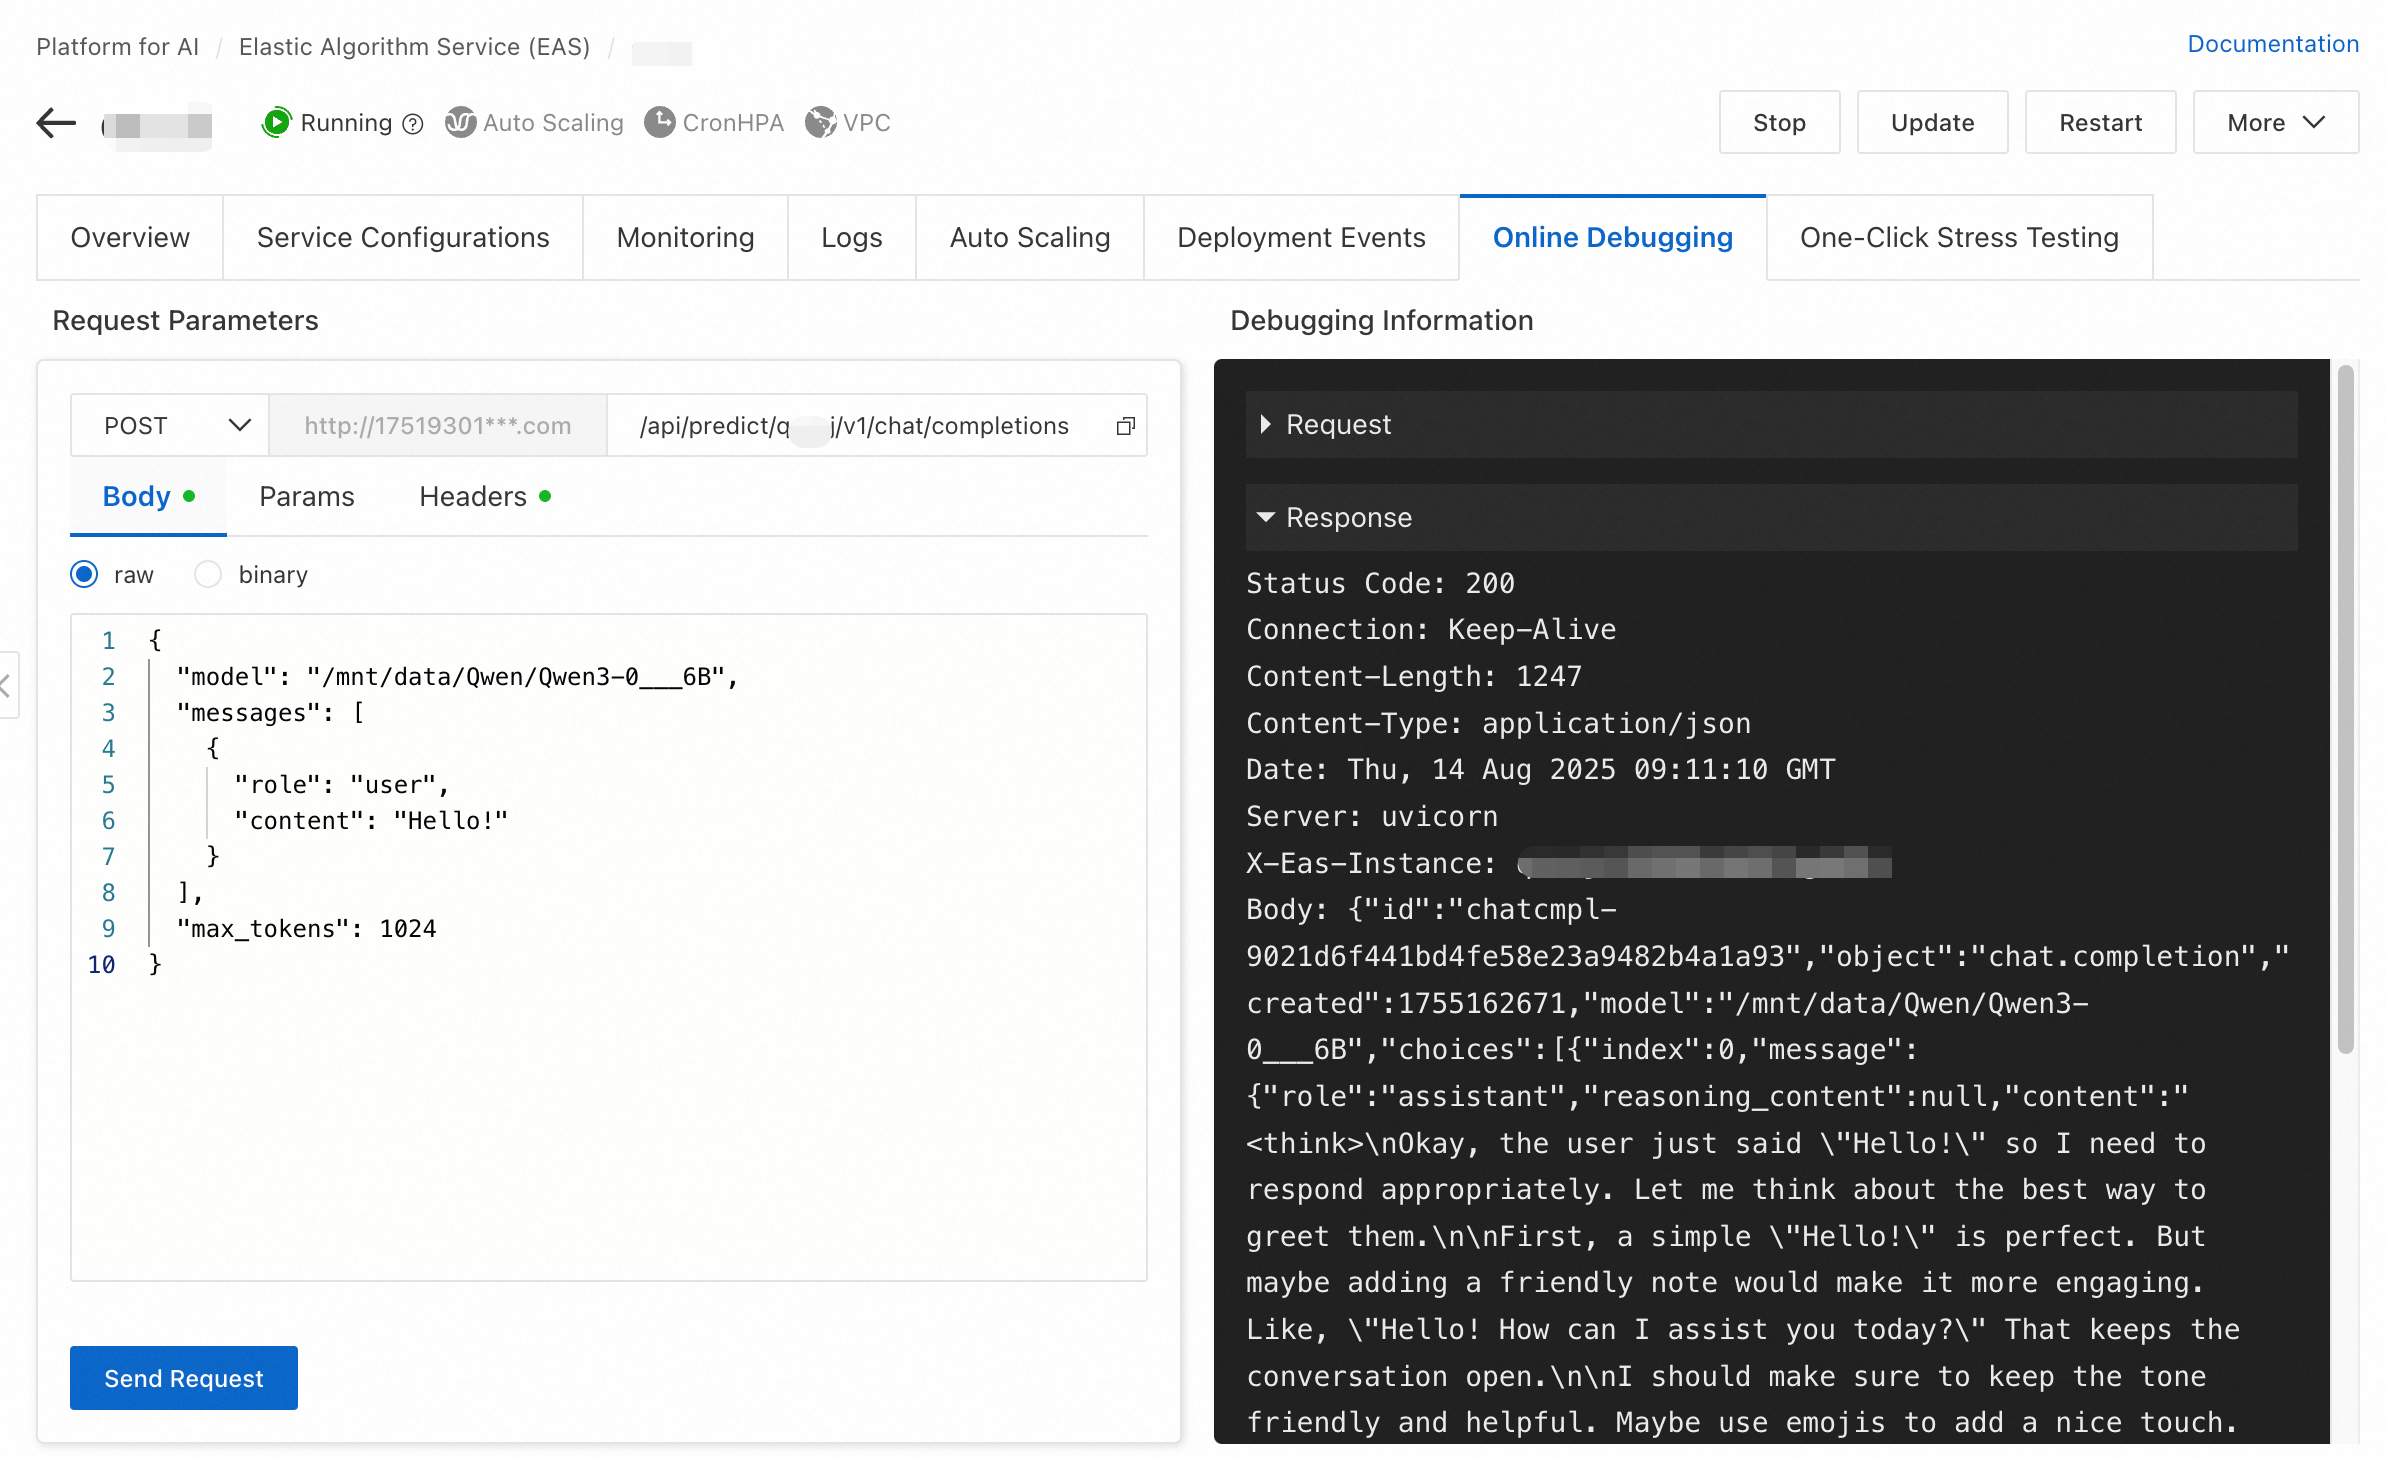
Test the service
Use online debugging to verify the service. Configure the request method, path, and body for your model.
For this example:
-
On the Inference Service tab, click the destination service to go to the service overview page. Switch to the Online Debugging tab.
-
In the Request Parameter Online Tuning section of the debugging page, set request parameters and click Send Request. Request parameters:
-
Chat interface: Append
/v1/chat/completionsto the existing URL. -
Headers: Add a request header. Set key to
Content-Typeand value toapplication/json.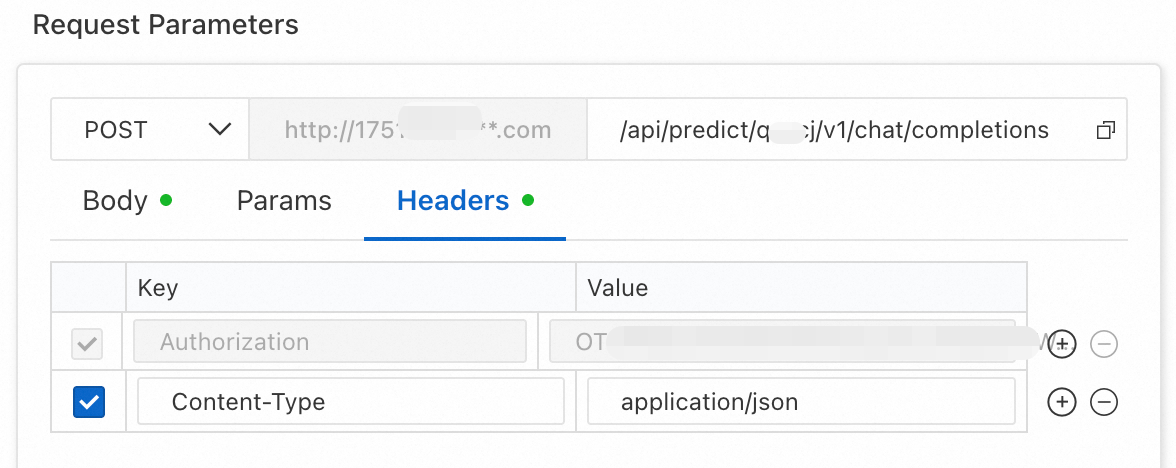
-
Body:
{
  "model": "/mnt/data/Qwen/Qwen3-0___6B",
  "messages": [
    {
      "role": "user",
      "content": "Hello!"
    }
  ],
  "max_tokens": 1024
}
-
-
Response:
Call the service
Obtain endpoint and token
EAS uses the shared gateway by default. Get the endpoint and token from the service overview after deployment.
-
On the Inference Service tab, click the name of the target service to go to the Overview page.
-
In the Basic Information section, click View Endpoint Information.
-
In the Invocation Method panel, copy the endpoint and token:
-
Choose the Internet endpoint or VPC endpoint as needed.
-
The following examples use <EAS_ENDPOINT> as the endpoint and <EAS_TOKEN> as the token.

-
Call with curl or Python
Examples:
curl http://16********.cn-hangzhou.pai-eas.aliyuncs.com/api/predict/****/v1/chat/
completions \
-H "Content-Type: application/json" \
-H "Authorization: *********5ZTM1ZDczg5OT**********" \
-X POST \
-d '{
  "model": "/mnt/data/Qwen/Qwen3-0___6B",
  "messages": [
    {
      "role": "user",
      "content": "Hello!"
    }
  ],
  "max_tokens": 1024
}' import requests
# Replace with the actual endpoint.
url = 'http://16********.cn-hangzhou.pai-eas.aliyuncs.com/api/predict/***/v1/chat/completions'
# For the header, set Authorization value to the actual token.
headers = {
"Content-Type": "application/json",
"Authorization": "*********5ZTM1ZDczg5OT**********",
}
# Construct the service request based on the data format required by the model.
data = {
"model": "/mnt/data/Qwen/Qwen3-0___6B",
"messages": [
{
"role": "user",
"content": "Hello!"
}
],
"max_tokens": 1024
}
# Send the request.
resp = requests.post(url, json=data, headers=headers)
print(resp)
print(resp.content)Stop or delete the service
This service uses pay-as-you-go public resources. Stop or delete the service to avoid charges when no longer needed.

References
-
Improve LLM service efficiency: Deploy an LLM Intelligent Router.
-
EAS feature overview: EAS overview.