OSS Connector for AI/ML integrates Alibaba Cloud Object Storage Service (OSS) directly into PyTorch training pipelines. Use it to stream training data from OSS buckets and save model checkpoints directly to OSS—without managing local disk space or writing custom data loaders.
Prerequisites
Before you begin, make sure you have:
A Linux x86-64 machine or container (glibc >= 2.17)
Python 3.8–3.12
PyTorch >= 2.0
An OSS bucket with your training data
An AccessKey ID and AccessKey secret for a Resource Access Management (RAM) user with read/write access to that bucket
To use the OSS Checkpoint feature, the Linux kernel must support userfaultfd. Run the following command to check:
sudo grep CONFIG_USERFAULTFD /boot/config-$(uname -r)CONFIG_USERFAULTFD=y means the feature is supported. CONFIG_USERFAULTFD=n means it is not, and the OSS Checkpoint feature will be unavailable.
Install the connector
The following example installs OSS Connector for AI/ML for Python 3.12. Replace pip3.12 with the pip version that matches your Python installation.
Install the package:
pip3.12 install osstorchconnectorVerify the installation:
pip3.12 show osstorchconnectorIf version information for
osstorchconnectoris printed, the installation succeeded.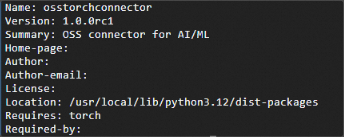
Configure access credentials
OSS Connector for AI/ML reads credentials from a JSON file at /root/.alibabacloud/credentials.
Create the credentials file:
mkdir -p /root/.alibabacloud && touch /root/.alibabacloud/credentialsAdd your AccessKey ID and AccessKey secret:
{
  "AccessKeyId": "LTAI************************",
  "AccessKeySecret": "At32************************"
}
Replace the placeholders with the actual values for your RAM user. To create an AccessKey pair, see Create an AccessKey. For temporary credentials and other credential options, see Configure access credentials.
Configure the connector
OSS Connector for AI/ML uses a configuration file at /etc/oss-connector/config.json to control logging, dataset prefetching, and checkpoint upload concurrency.
Create the configuration file:
mkdir -p /etc/oss-connector/ && touch /etc/oss-connector/config.jsonAdd the following default configuration:
{
    "logLevel": 1,
    "logPath": "/var/log/oss-connector/connector.log",
    "auditPath": "/var/log/oss-connector/audit.log",
    "datasetConfig": {
        "prefetchConcurrency": 24,
        "prefetchWorker": 2
    },
    "checkpointConfig": {
        "prefetchConcurrency": 24,
        "prefetchWorker": 4,
        "uploadConcurrency": 64
    }
}
These defaults work for most training workloads. For a full list of configuration parameters, see Configure OSS Connector.
Load a dataset from OSS
OssMapDataset maps an OSS prefix to a PyTorch map-style dataset, supporting random access by index. This makes it a drop-in replacement for local Dataset objects.
from osstorchconnector import OssMapDataset
from torch.utils.data import DataLoader

ENDPOINT    = "oss-cn-hangzhou-internal.aliyuncs.com"  # Internal endpoint; ECS and bucket must be in the same region.
OSS_URI     = "oss://<your-bucket>/mnist/"             # OSS URI of your dataset prefix.
CRED_PATH   = "/root/.alibabacloud/credentials"        # Path to your credentials file.
CONFIG_PATH = "/etc/oss-connector/config.json"         # Path to the connector configuration file.

dataset = OssMapDataset.from_prefix(
    OSS_URI,
    endpoint=ENDPOINT,
    cred_path=CRED_PATH,
    config_path=CONFIG_PATH,
)

# Inspect the first item.
item = dataset[0]
content = item.read()
Pass the dataset to a DataLoader as you normally would:
loader = DataLoader(dataset, batch_size=64, shuffle=True)For the full OssMapDataset API, see OssMapDataset.
Save and load checkpoints with OSS Checkpoint
Writing checkpoints directly to OSS removes the need for local disk space during training, keeps your checkpoints durable and accessible across machines, and avoids the extra step of uploading local files after each epoch.
from osstorchconnector import OssCheckpoint
import torch

ENDPOINT             = "oss-cn-hangzhou-internal.aliyuncs.com"
CHECKPOINT_WRITE_URI = "oss://<your-bucket>/epoch.ckpt"  # OSS path to write checkpoints.
CHECKPOINT_READ_URI  = "oss://<your-bucket>/epoch.ckpt"  # OSS path to read checkpoints.
CRED_PATH            = "/root/.alibabacloud/credentials"
CONFIG_PATH          = "/etc/oss-connector/config.json"

checkpoint = OssCheckpoint(
    endpoint=ENDPOINT,
    cred_path=CRED_PATH,
    config_path=CONFIG_PATH,
)

# Save a checkpoint.
with checkpoint.writer(CHECKPOINT_WRITE_URI) as writer:
    torch.save(model.state_dict(), writer)

# Load a checkpoint.
with checkpoint.reader(CHECKPOINT_READ_URI) as reader:
    state_dict = torch.load(reader)
model.load_state_dict(state_dict)
For the full OssCheckpoint API, see OssCheckpoint.
End-to-end example: train a CNN on MNIST
The following example builds a handwriting recognition model using PyTorch. It loads the MNIST dataset from OSS with OssMapDataset and saves and restores model checkpoints with OssCheckpoint.
import io
import torch
import torch.nn as nn
import torch.optim as optim
import torchvision.transforms as transforms
from PIL import Image
from torch.utils.data import DataLoader
from osstorchconnector import OssMapDataset
from osstorchconnector import OssCheckpoint

# Hyperparameters.
EPOCHS        = 1
BATCH_SIZE    = 64
LEARNING_RATE = 0.001

# OSS configuration.
# Replace the placeholders with your actual bucket name and region endpoint.
ENDPOINT             = "oss-cn-hangzhou-internal.aliyuncs.com"  # Internal endpoint; ECS and bucket must be in the same region.
OSS_URI              = "oss://<your-bucket>/mnist/"              # OSS URI of the dataset prefix.
CHECKPOINT_WRITE_URI = "oss://<your-bucket>/epoch.ckpt"         # OSS path to write checkpoints.
CHECKPOINT_READ_URI  = "oss://<your-bucket>/epoch.ckpt"         # OSS path to read checkpoints.
CONFIG_PATH          = "/etc/oss-connector/config.json"         # Path to the connector configuration file.
CRED_PATH            = "/root/.alibabacloud/credentials"        # Path to the credentials file.

# Initialize the checkpoint object.
checkpoint = OssCheckpoint(endpoint=ENDPOINT, cred_path=CRED_PATH, config_path=CONFIG_PATH)

# Define a simple convolutional neural network (CNN).
class SimpleCNN(nn.Module):
    def __init__(self):
        super(SimpleCNN, self).__init__()
        self.conv1 = nn.Conv2d(1, 32, kernel_size=3, stride=1, padding=1)
        self.conv2 = nn.Conv2d(32, 64, kernel_size=3, stride=1, padding=1)
        self.adaptive_pool = nn.AdaptiveAvgPool2d((7, 7))
        self.fc1 = nn.Linear(64 * 7 * 7, 128)
        self.fc2 = nn.Linear(128, 10)

    def forward(self, x):
        x = nn.ReLU()(self.conv1(x))
        x = nn.MaxPool2d(2)(x)
        x = nn.ReLU()(self.conv2(x))
        x = nn.MaxPool2d(2)(x)
        x = self.adaptive_pool(x)
        x = x.view(x.size(0), -1)
        x = nn.ReLU()(self.fc1(x))
        x = self.fc2(x)
        return x

# Image pre-processing pipeline.
trans = transforms.Compose([
    transforms.Resize(256),
    transforms.CenterCrop(224),
    transforms.ToTensor(),
    transforms.Normalize(mean=[0.5], std=[0.5]),
])

def transform(object):
    try:
        img = Image.open(io.BytesIO(object.read())).convert('L')
        val = trans(img)
    except Exception as e:
        raise e

    # Extract the label from the object path.
    # Expected path format: oss://<bucket>/mnist/<label>/<filename>
    try:
        label = int(object.name.split('/')[-2])
    except (ValueError, IndexError):
        label = 0  # Default label; adjust based on your dataset structure.

    return val, torch.tensor(label)

# Load the dataset and create a DataLoader.
train_dataset = OssMapDataset.from_prefix(
    OSS_URI,
    endpoint=ENDPOINT,
    transform=transform,
    cred_path=CRED_PATH,
    config_path=CONFIG_PATH,
)
train_loader = DataLoader(
    train_dataset,
    batch_size=BATCH_SIZE,
    num_workers=32,
    prefetch_factor=2,
    shuffle=True,
)

# Set up the model, loss function, and optimizer.
model     = SimpleCNN()
criterion = nn.CrossEntropyLoss()
optimizer = optim.Adam(model.parameters(), lr=LEARNING_RATE)

# Train and save a checkpoint after each epoch.
for epoch in range(EPOCHS):
    for i, (images, labels) in enumerate(train_loader):
        optimizer.zero_grad()
        outputs = model(images)
        loss = criterion(outputs, labels)
        loss.backward()
        optimizer.step()
        if (i + 1) % 100 == 0:
            print(f'Epoch [{epoch + 1}/{EPOCHS}], Step [{i + 1}/{len(train_loader)}], Loss: {loss.item():.4f}')

    with checkpoint.writer(CHECKPOINT_WRITE_URI) as writer:
        torch.save(model.state_dict(), writer)
        print("Checkpoint saved.")

# Restore the model from the checkpoint.
try:
    with checkpoint.reader(CHECKPOINT_READ_URI) as reader:
        state_dict = torch.load(reader)
    model = SimpleCNN()
    model.load_state_dict(state_dict)
    model.eval()
    print("Checkpoint loaded successfully.")
except Exception as e:
    print(f"Failed to load checkpoint: {e}")
What's next
OssMapDataset API reference — full parameter list and iterable dataset options
OssCheckpoint API reference — advanced checkpoint configuration
Configure OSS Connector — tune prefetch concurrency and upload settings for your workload
Configure access credentials — use temporary credentials or ECS instance RAM roles