ossfs is a tool that mounts Object Storage Service (OSS) buckets to a local Linux system. Your applications can then access objects in OSS using standard file system operations, such as open and read. ossfs automatically converts these operations into OSS API calls.
ossfs is available in two versions: 1.0 and 2.0. Version 2.0 is re-architected for modern, compute-intensive applications. It offers significant performance upgrades but has some limitations on POSIX semantics. It is the primary version for future development. Use ossfs 2.0 for applications such as AI training, inference, or autonomous driving simulation, especially if you cannot use OSS software development kits (SDKs) or the OSS Connector for AI/ML to accelerate model training. In contrast, ossfs 1.0 provides more comprehensive support for POSIX semantics and is suitable for daily use in scenarios that do not have high performance requirements.
Prerequisites
Operating environment
ossfs 2.0 uses Filesystem in Userspace (FUSE).
System architecture | Operating system | Version |
x86_64 | CentOS | CentOS 7, CentOS 8 |
Alibaba Cloud Linux | Alibaba Cloud Linux 2, Alibaba Cloud Linux 3 | |
Ubuntu | Ubuntu 20.04 LTS and later LTS versions | |
Debian | Debian 11 and later | |
aarch64 | Alibaba Cloud Linux | Alibaba Cloud Linux 3 |
Install ossfs 2.0
Alibaba Cloud Linux
Run the command that corresponds to your system architecture to download the installation package.
For x86_64 architecture:
sudo wget https://gosspublic.alicdn.com/ossfs/ossfs2_2.0.5_linux_x86_64.rpmFor aarch64 architecture:
sudo wget https://gosspublic.alicdn.com/ossfs/ossfs2_2.0.5_linux_aarch64.rpm
Run the command that corresponds to your system architecture to install ossfs 2.0.
For x86_64 architecture:
sudo yum install ossfs2_2.0.5_linux_x86_64.rpm -yFor aarch64 architecture:
sudo yum install ossfs2_2.0.5_linux_aarch64.rpm -y
Run the following command to verify that ossfs 2.0 is installed.
ossfs2 --versionThe following output is returned:
Version ID: 2.0.5 Commit ID: 08539976558311f7a8f5282c30d94198d48c125c Build Time: 2025-12-19.01:50:42.UTCNoteThe ossfs2 executable is installed at
/usr/local/bin/ossfs2. If yourPATHenvironment variable is customized, you can access the program using its absolute path/usr/local/bin/ossfs2.
CentOS
Run the following command to download the installation package.
sudo wget https://gosspublic.alicdn.com/ossfs/ossfs2_2.0.5_linux_x86_64.rpmRun the following command to install ossfs 2.0.
sudo yum install ossfs2_2.0.5_linux_x86_64.rpm -yRun the following command to verify that ossfs 2.0 is installed.
ossfs2 --versionThe following output is returned:
Version ID: 2.0.5 Commit ID: 08539976558311f7a8f5282c30d94198d48c125c Build Time: 2025-12-19.01:50:42.UTCNoteThe ossfs2 executable is installed at
/usr/local/bin/ossfs2. If yourPATHenvironment variable is customized, you can access the program using its absolute path/usr/local/bin/ossfs2.
Ubuntu
Run the following command to download the installation package.
sudo wget https://gosspublic.alicdn.com/ossfs/ossfs2_2.0.5_linux_x86_64.debRun the following command to install ossfs 2.0.
sudo dpkg -i ossfs2_2.0.5_linux_x86_64.debRun the following command to verify that ossfs 2.0 is installed.
ossfs2 --versionThe following output is returned:
Version ID: 2.0.5 Commit ID: 08539976558311f7a8f5282c30d94198d48c125c Build Time: 2025-12-19.01:50:42.UTCNoteThe ossfs2 executable is installed at
/usr/local/bin/ossfs2. If yourPATHenvironment variable is customized, you can access the program using its absolute path/usr/local/bin/ossfs2.
Configure ossfs 2.0
To mount a bucket, you must create a configuration file that contains your bucket information and access credentials. This file is referenced during the mount process.
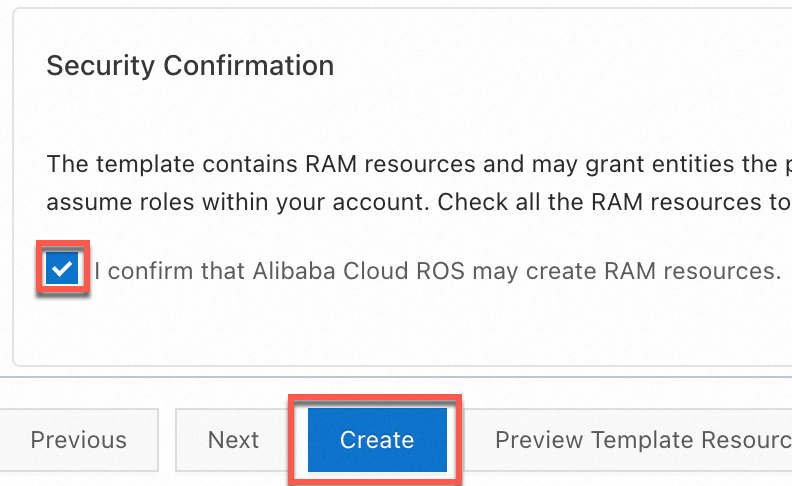
Go to the Create Stack page of the ROS console. In the Security Confirmation section, select the check box, and then click Create.
After the stack is created, copy the new AccessKey pair from the Outputs tab.

Configure the environment variables for your OSS access credentials.
export OSS_ACCESS_KEY_ID=LTAI******************
export OSS_ACCESS_KEY_SECRET=8CE4**********************
You can set the file name and path for the ossfs 2.0 configuration file. For example, you can create the
/etc/ossfs2.conffile.sudo touch /etc/ossfs2.confAdd the mount information to the configuration file. The following example shows the configuration for mounting an entire bucket in read-only mode.
NoteTo view the endpoint for a bucket, go to the Buckets page. Select the target bucket. In the navigation pane on the left, click Overview. On the Overview page, find the region in the Port section. The following figure shows an example for a bucket in the China (Hangzhou) region.

Open the ossfs 2.0 configuration file that you created. Configure the file based on the following example, which uses an internal Endpoint in the China (Hangzhou) region, and then save the file. To ensure faster and more stable data transmission, use an internal or OSS accelerator Endpoint to mount buckets from an instance that is in a VPC in the same region. Do not use a public Endpoint with ossfs because high latency and unstable internet connectivity can cause stuttering.
# The Endpoint of the region where the bucket is located
--oss_endpoint=https://oss-cn-hangzhou-internal.aliyuncs.com

# The bucket name
--oss_bucket=bucketName

# Mount in read-only mode
--ro=true
Mount and access
Create a mount directory.
You can specify the path for the mount directory as needed. For example, create the
/tmp/ossfs2-bucketdirectory.mkdir /tmp/ossfs2-bucketExecute the mount command.
Run the following command to mount the bucket specified in the
ossfs2.conffile. The bucket is mounted to the local/tmp/ossfs2-bucket/directory in read-only mode. To mount the bucket in read/write mode, remove the--ro=trueoption from theossfs2.conffile.ossfs2 mount /tmp/ossfs2-bucket/ -c /etc/ossfs2.confAccess the mounted bucket.
After the bucket is mounted, you can access the objects in the bucket as you would local files. For example, run the
sudo ls -lh /tmp/ossfs2-bucket/command to list the files in the mounted bucket.
Unmount the bucket.
When you no longer need the mounted bucket, run the following command to unmount it.
sudo umount /tmp/ossfs2-bucket/
References
For more information, see Mount options for ossfs 2.0.
For more information, see Mount a bucket to a local system using ossfs 2.0.