OpenSearch LLM-based Conversational Search Edition allows you to import a variety of data, including structured data, unstructured data, web pages, and tables. This topic describes how to import data in the OpenSearch console.
Data structure
The primary table uses a fixed data structure, which contains the following fields: score, id, title, category, url, content, and timestamp.
Field | Type | Description |
score | FLOAT | The score of the document. |
id | LITERAL | The unique ID of the document. |
title | TEXT | The title of the document. |
category | LITERAL_ARRAY | The category of the document. |
url | LITERAL | The URL of the document. |
content | TEXT | The content of the document. |
timestamp | INT | The timestamp of the document, which indicates the document freshness. |
When you upload structured data, the score, title, category, url, and timestamp fields are optional.
The score and timestamp fields are relevant to document retrieval. For more information about how to configure the two fields, see Document retrieval parameters.
The value of the category field can contain multiple items that are separated with commas (,). For more information, see Custom parameters.
Preparations
Log on to the OpenSearch console.
In the top navigation bar, select the region in which your instance resides. In the upper-left corner, select OpenSearch LLM-Based Conversational Search Edition.
On the Instance Management page, find the instance that you want to manage and click Manage in the Actions column. In the left-side pane, choose Configuration Center > Data Configuration and select a data import method based on your business requirements.
Upload files
Click Import File. The Import File panel appears.

Unstructured data: You can upload a file in the DOC, DOCX, PDF, HTML, TXT, PPT, or PPTX format. The size of a single file cannot exceed 128 MB. You can upload multiple files at a time.
NoteIf a Word file contains too many images, we recommend that you convert the file format to PDF to speed up the upload.
Structured data: You can upload a JSON or Excel file that is encoded in UTF-8. The size of a single file cannot exceed 128 MB. You can upload multiple files at a time. You can click Data Sample to view the data format.
NoteA table name can contain letters, digits, and underscores (_). The name can be up to 20 characters in length.
A field name can contain letters and underscores (_) and cannot start with an underscore (_). The name can be up to 30 characters in length.
A maximum of 30 fields in each Excel file can be imported and queried. Excess fields are ignored.
You can call the PushKnowledgeDocuments API operation to push multiple documents at a time.
Import data from web pages
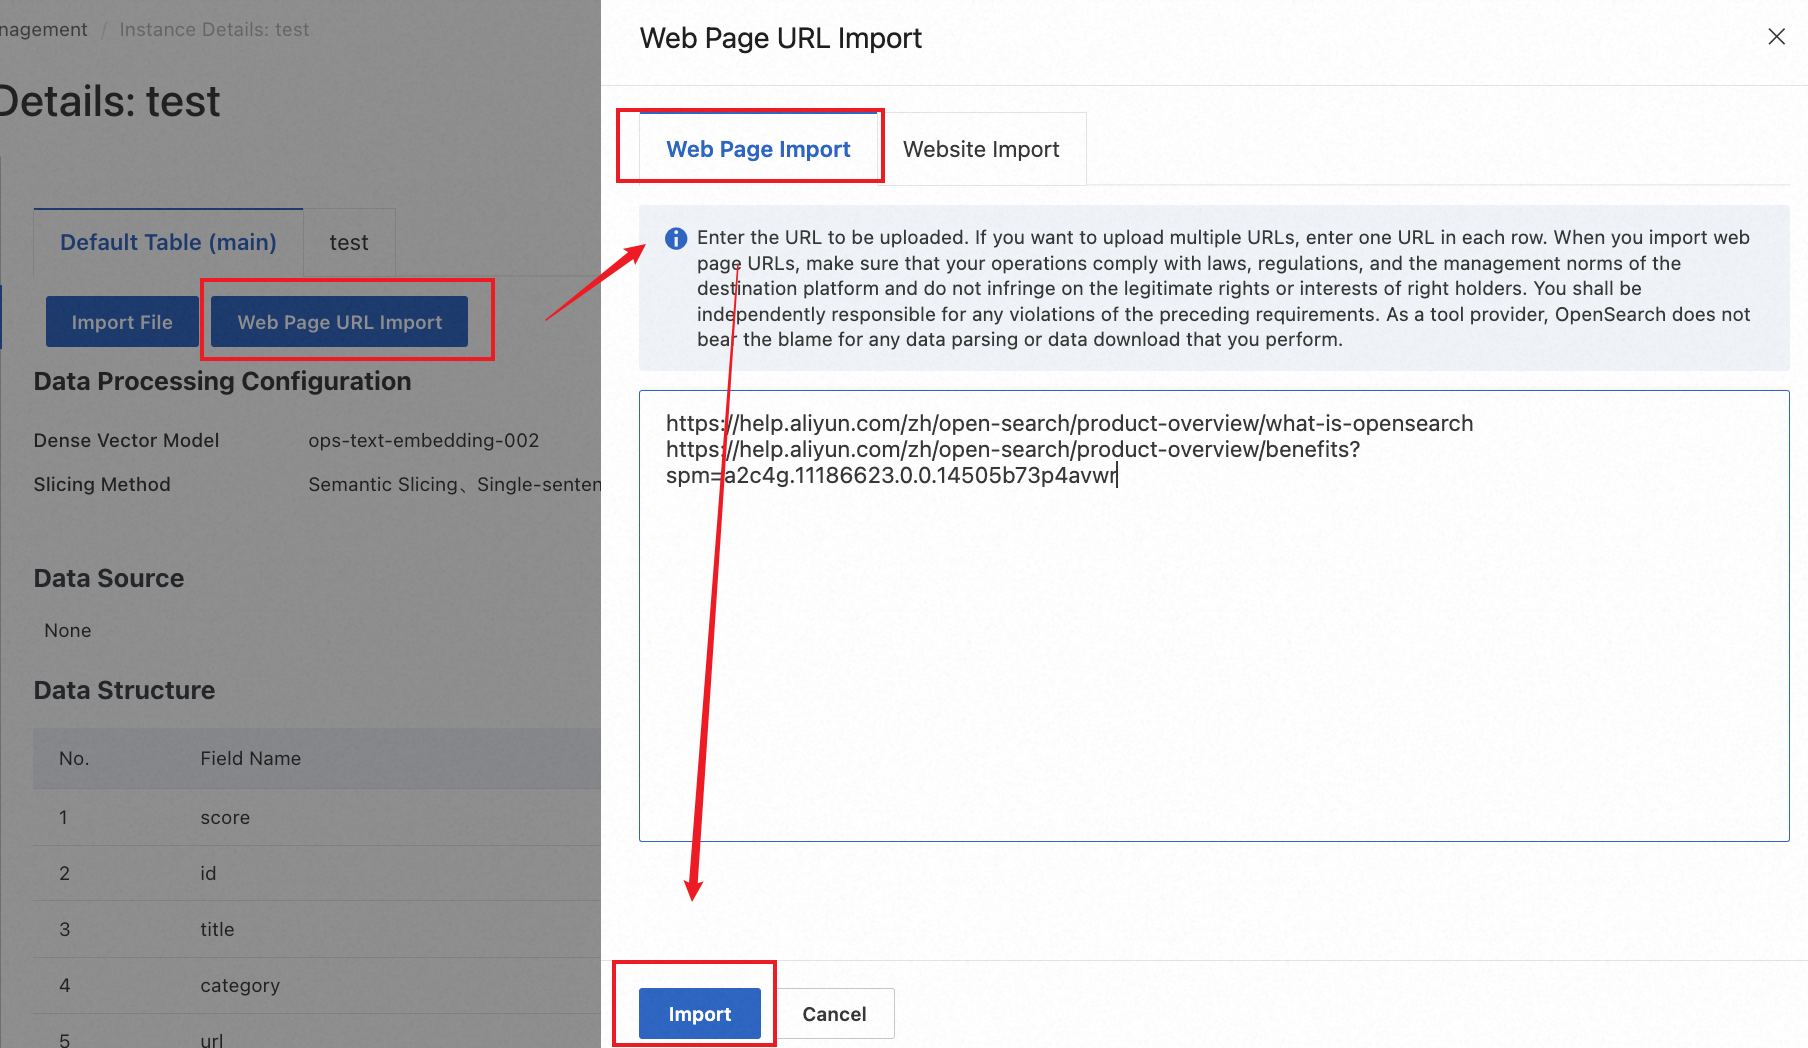
Click Web Page URL Import. On the Web Page Import tab of the Web Page URL Import panel, enter the URLs one per line, and then click Import.
Import data from a website
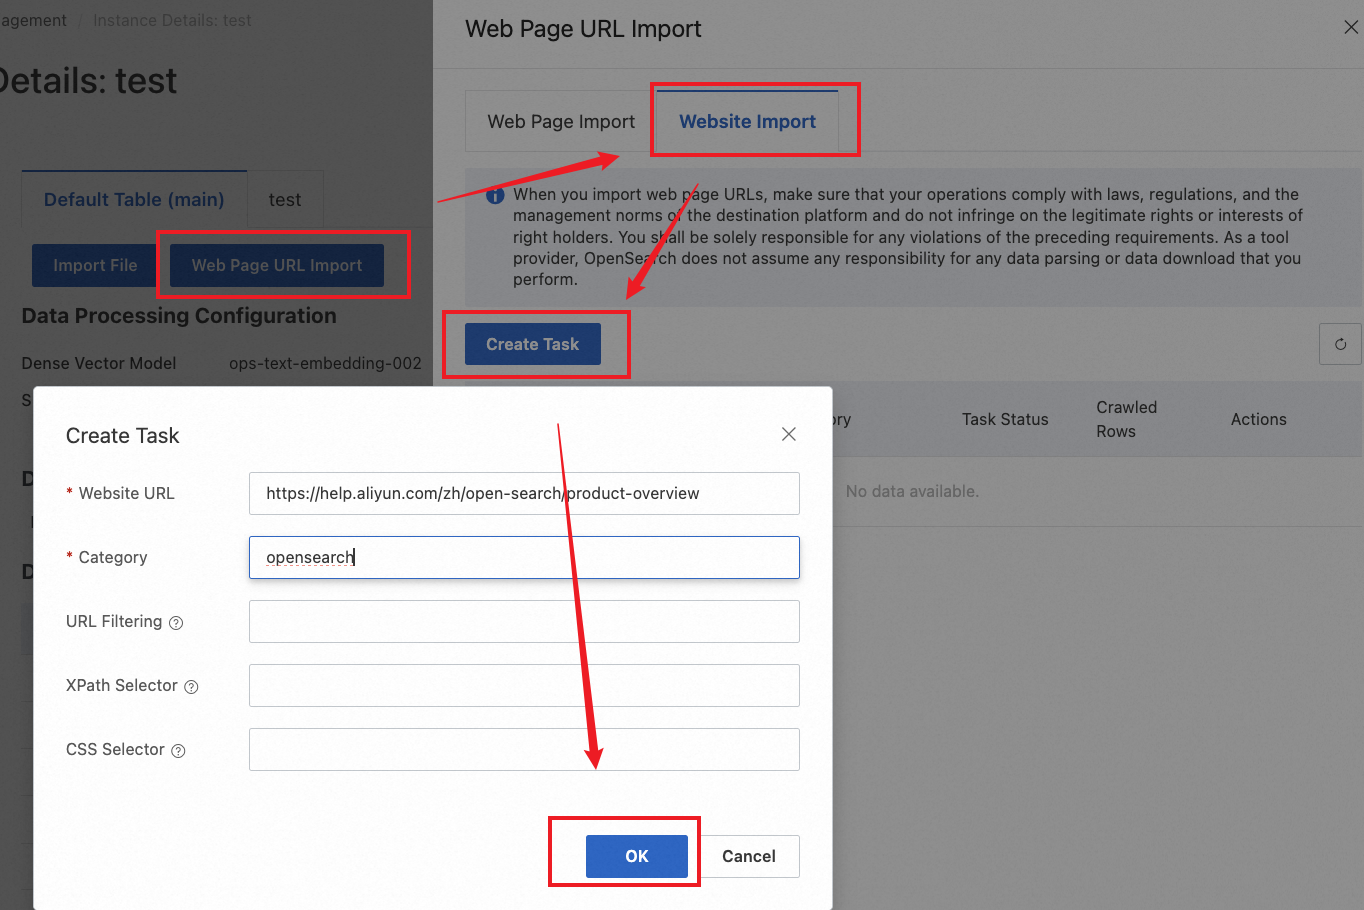
Click Web Page URL Import. In the Web Page URL Import panel, click the Website Import tab. On the Website Import tab, click Create Task. In the Create Task dialog box, configure the Website URL and Category parameters and click OK. You can configure the URL Filtering, XPath Selector, and CSS Selector parameters based on your business requirements.
 Note
NoteWebsite URL: the URL of the website whose content you want to import.
Category: the category of the content to be imported.
URL Filtering: the URL filtering rule. The default rule is a regular expression that starts with the website URL. For example, if the website URL is http://www.abc.com/, the default regular expression is http://www\.abc\.com/.*.
XPath Selector: the selector that specifies the elements to be imported. For example, if you want to import content in the div tag, set this parameter to //div.
CSS Selector: the selector that specifies the elements to be imported. For example, if you want to import data in the <div class="content">Web Page Content</div> format, set this parameter to div.content.
URLs that end with .png, .jpg, or .jpeg are not supported.
After you configure the parameters, click OK. You can view the number of web pages that are crawled. Then, click OK to import the content of the website.

Import tables
For more information, see Implement table-based conversational search.
Query data
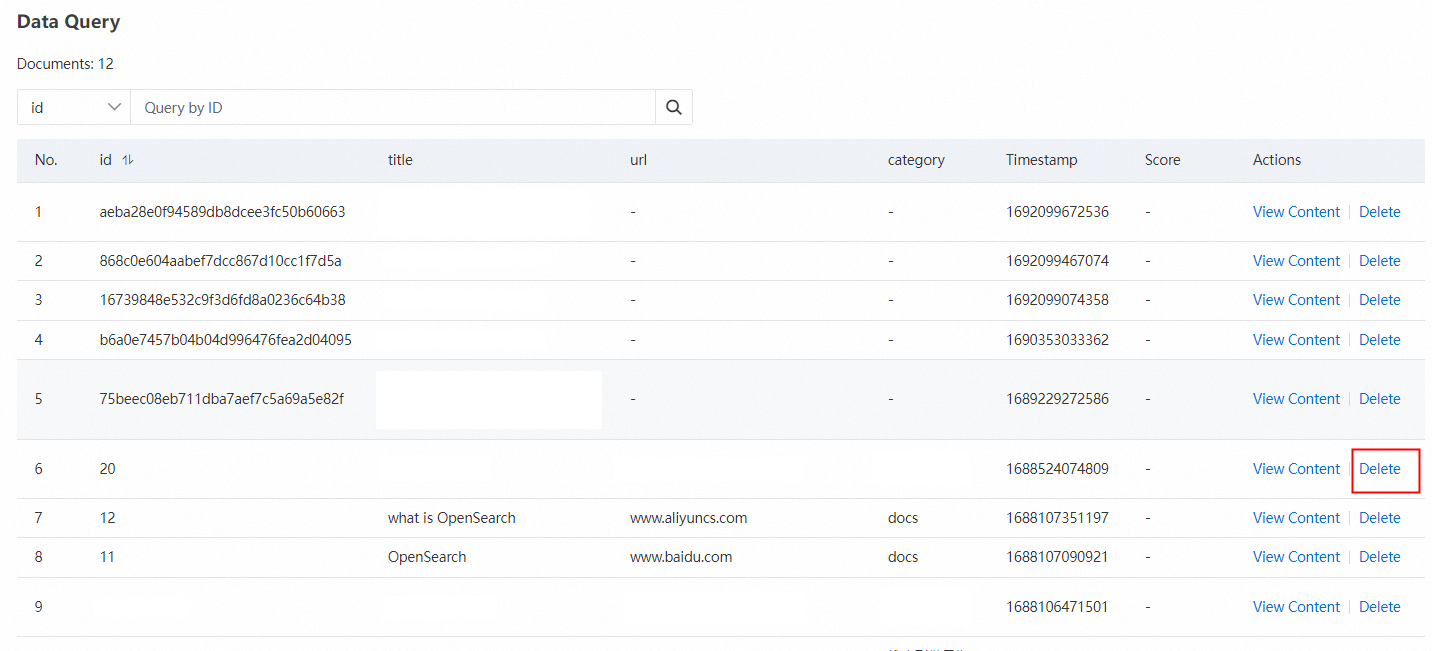
After documents are uploaded, you can view the total number of documents in the Data Query section. You can also perform a Q&A test on the Q&A test page. In addition, you can view or delete a document based on the primary key.
View a document
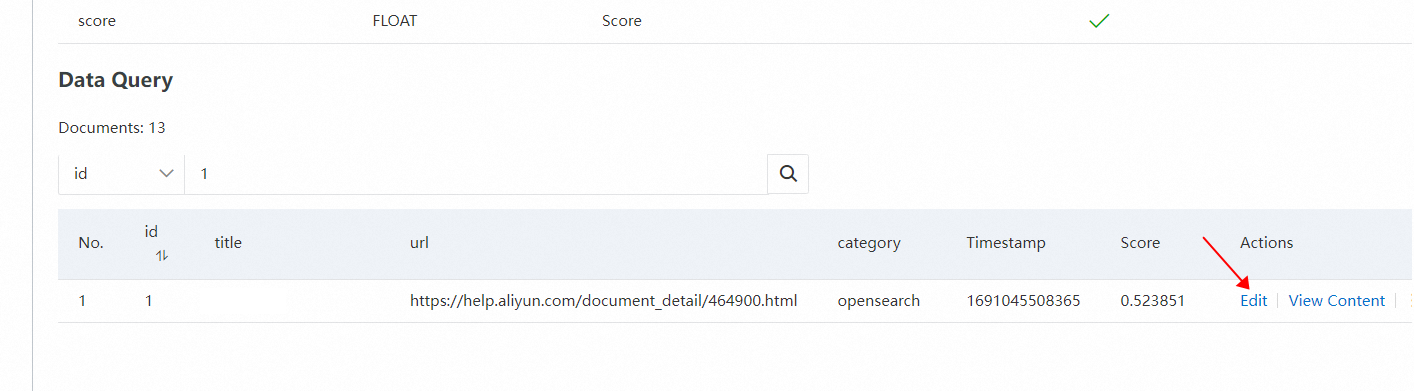
Select the id field from the drop-down list, enter the ID of a document, and then click the Search icon to find the document. Then, you can view the details of the document.
Delete a document
Select the id field from the drop-down list, enter the ID of a document, and then click the Search icon to find the document. Choose More > Delete in the Actions column to delete the document.
If the storage capacity is insufficient, the document will fail to be deleted. You need to expand the storage capacity first.
Edit a document
Select the id field from the drop-down list, enter the ID of a document, and then click the Search icon to find the document. Click Edit in the Actions column to modify the editable fields for the document.

Usage notes
The primary key value of each document is unique. If two documents have the same primary key value, the more recent document overwrites the document that was imported earlier.
The size of the structured data that you upload at a time cannot exceed 2 MB.
The size of an unstructured data file that you upload cannot exceed 128 MB.
After the data is uploaded, the wait time before you can query data is subject to the amount of data to be updated.