This topic describes how to use a remote device to reproduce issues and perform remote debugging.
Prerequisites
Resource plans for remote debugging are purchased, or your resource usage does not exceed the free quota. For more information, see Pricing.
(Optional) The iOS app that you want to debug is uploaded. For more information about how to upload an app, see Upload an app.
References
You can apply for a remote device of a specific model to perform test tasks to reproduce issues. Perform the following operations:
Apply for a remote device
In the left-side navigation pane, choose Testing Services > Device Farm. The Device Farm page appears.
Enter a keyword in the search box to search for remote devices of the specified brand or model. For example, you can enter Apple. You can also click Show Filter to show filter conditions. You can specify one or more conditions to filter the remote devices that meet the specified conditions.
NoteThe filter conditions include Brand, Android Version, iOS Version, Harmony Version, Resolution , and Others.
In the remote device list, move the pointer over an Apple device and click Use Now. The remote debugging page of the specified device appears.
Remote device description
A remote device is used to simulate the basic operations on a device on web pages.
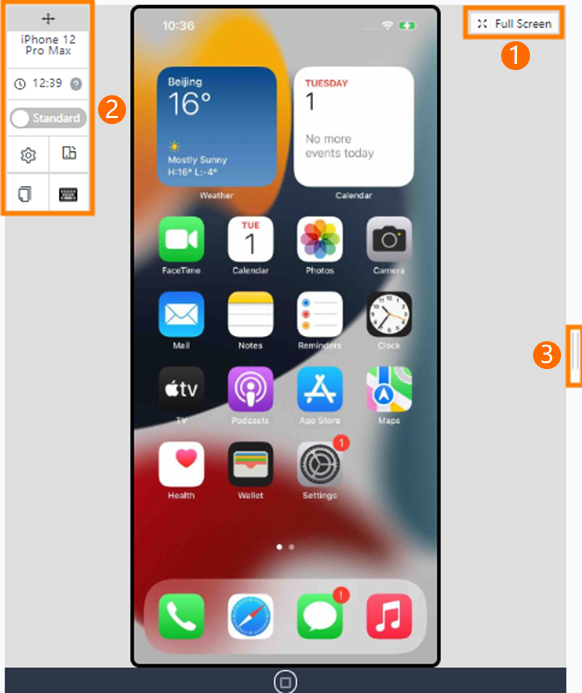
No. | UI element | Control | Description |
1 | System settings toolbar | Terminal type | The brand and model of the remote device. |
Usage duration |
| ||
High/Standard | Switches between high definition and standard definition. | ||
Go to System Settings | Navigates to the System Settings page. | ||
Rotate Screen | Switches between the landscape mode and the portrait mode. | ||
Obtain the device clipboard content | Copies the content in the clipboard of the remote device to the Mobile Testing console. | ||
Shortcut keyboard | The window for shortcut inputs. You can enter letters, digits, and common special characters. | ||
2 | Full Screen icon | - | Shows the remote device in full screen mode. |
3 | Home key | - | The Home key of the iOS device. |
4 | Window size adjustment slider | - | Controls the window size of the remote device. |
Install an app
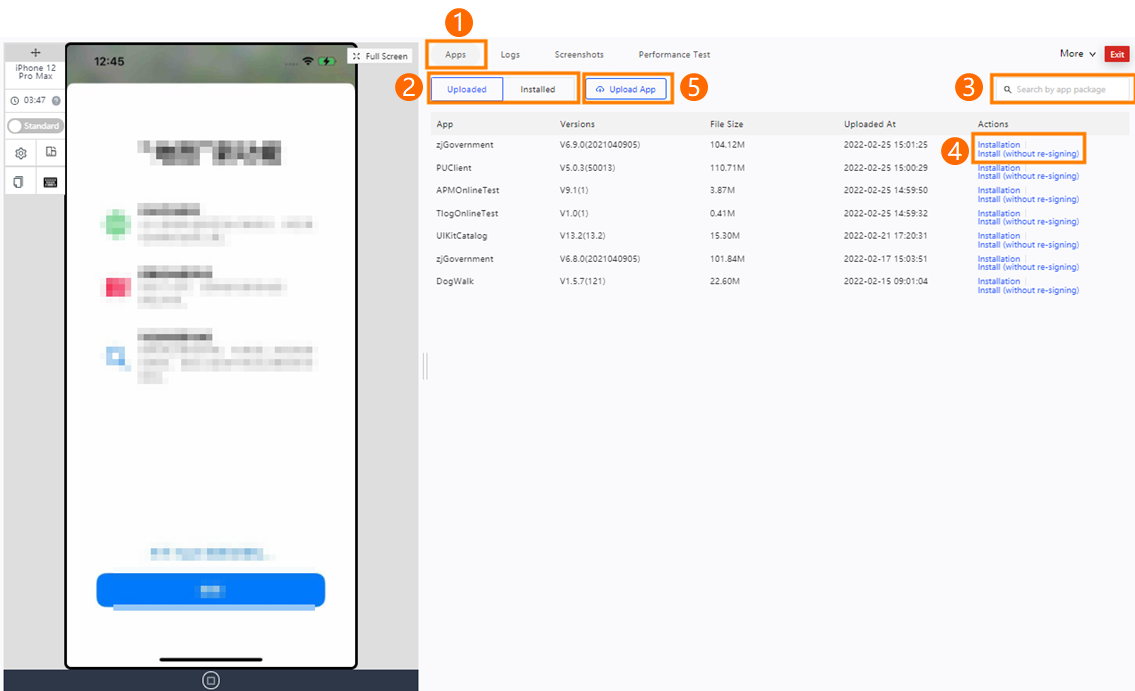
Go to the remote debugging page of the specified device. The Apps tab appears by default.
Search for the app that you want to debug.
If the app that you want to debug is uploaded and installed, click Uploaded or Installed to filter apps.
Then, enter a keyword in the search box to search for the app by name. Fuzzy match is supported.
Upload the app that you want to debug. If the app that you want to debug is not uploaded, click Upload Test App to upload the app. For more information about how to upload an app, see Upload an app.
Install the app that you want to debug. If the app is uploaded but not installed, click Installation or Install (without re-signing) in the Actions column to install the app on the remote device.
NoteThe Installation and Install (without re-signing) methods have the following differences:
Installation: supports debug packages. The packages can be installed after they are re-signed by Mobile Testing.
Install (without re-signing): supports packages that are signed by using enterprise certificates. The packages can be installed directly by Mobile Testing without re-signing.
View logs
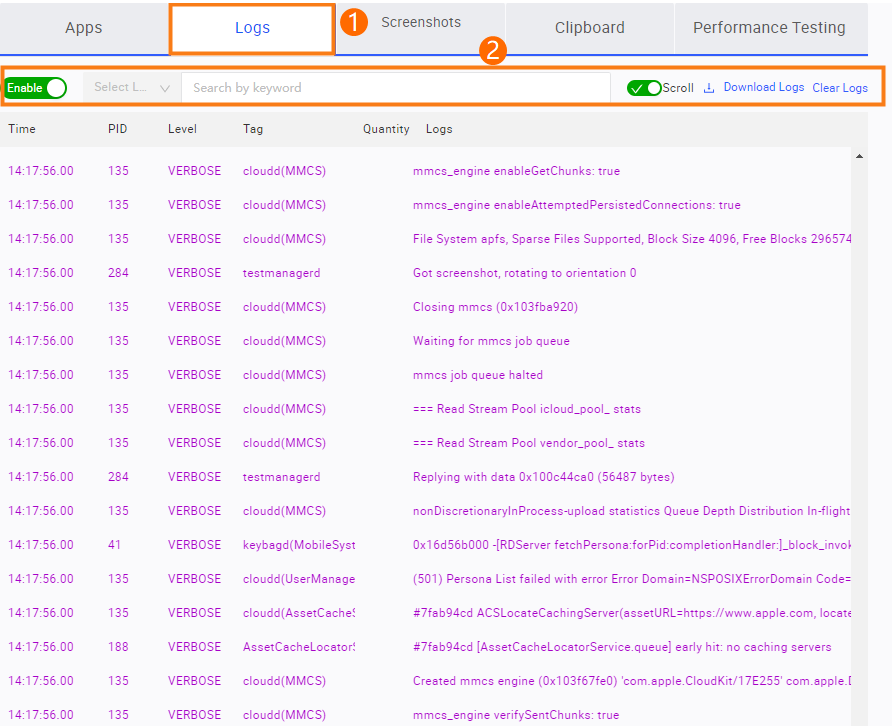
1. On the remote debugging page of the specified device, click the Logs tab.
2. On the Logs tab, turn on the logging switch to start recording the logs of the device.
3. Select a level from the Select Level drop-down list to show logs of the specified level.
4. Enter a keyword in the search box to search for log information. Fuzzy match is supported.
5. Turn on Scroll to scroll through the latest log entries in the log list.
6. Click Download Logs to download log information as a text file to your local device.
7. Click Clear Logs to clear the log list.
Take screenshots or record screens
Go to the Screenshots tab
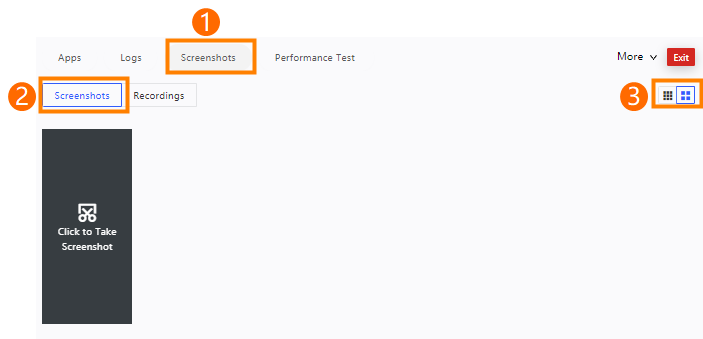
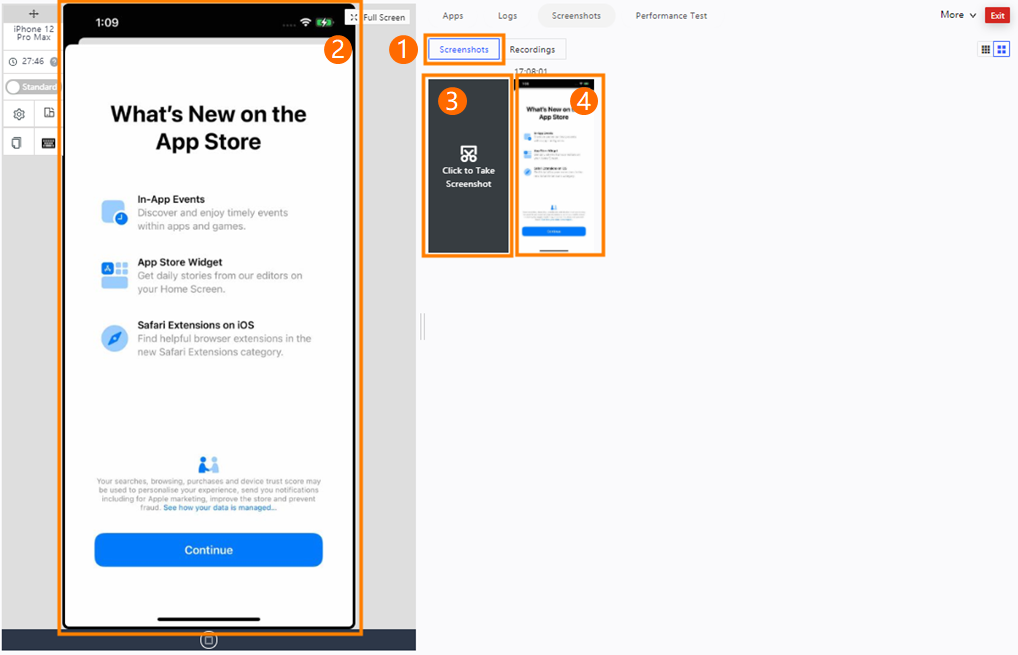
1. On the remote debugging page of the specified device, click the Screenshots tab.
2. On the Screenshots tab, check the Screenshots and Recordings subtabs.
3. Click the Screenshots subtab to view screenshots and take screenshots. Click the Recordings subtab to view recordings and record screens.
4. Click the Large Image or Small Image icon to switch the display mode of the screenshots or recordings.
Take screenshots
1. Click the Screenshots subtab.
2. In the left-side window, perform operations on the app that is installed on the remote device.
3. Click the Click to Take Screenshot action button to take a screenshot of the current app UI on the device. The screenshot that you took is displayed on the Screenshots subtab.
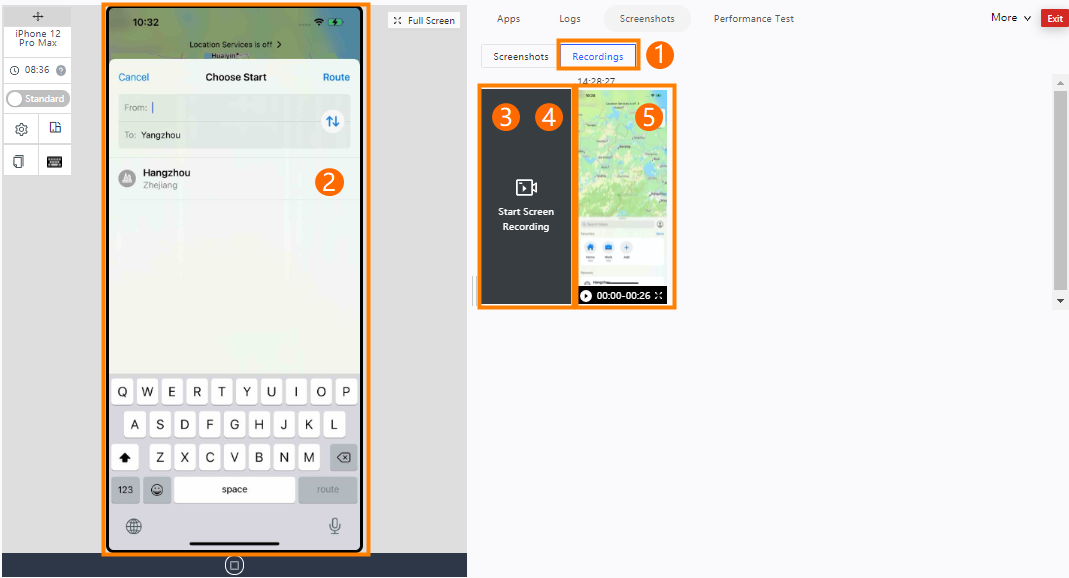
Record screens
1. Click the Recordings subtab.
2. Click the Start Screen Recording action button to start screen recording. After you click the Start Screen Recording action button, the Start Screen Recording action button changes to the Stop Screen Recording action button.
3. In the left-side window, perform operations on the app that is installed on the remote device.
4. Click the Stop Screen Recording action button to stop screen recording. The recording is displayed on the Recordings subtab.
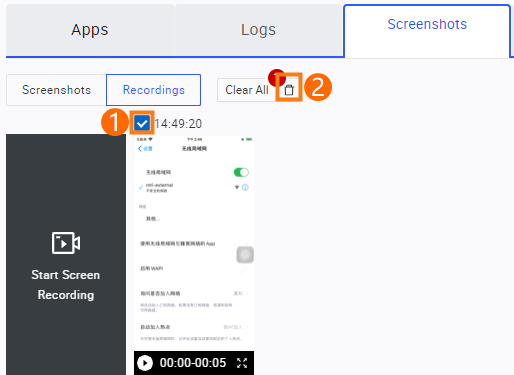
Edit screenshots or recordings
1. Move the pointer over the screenshots or recordings that you want to edit and select the corresponding check boxes. You can also click All to select all screenshots or recordings.
2. Select one or more screenshots or recordings and click the Download icon to download them. You can also click the Delete icon to delete them.
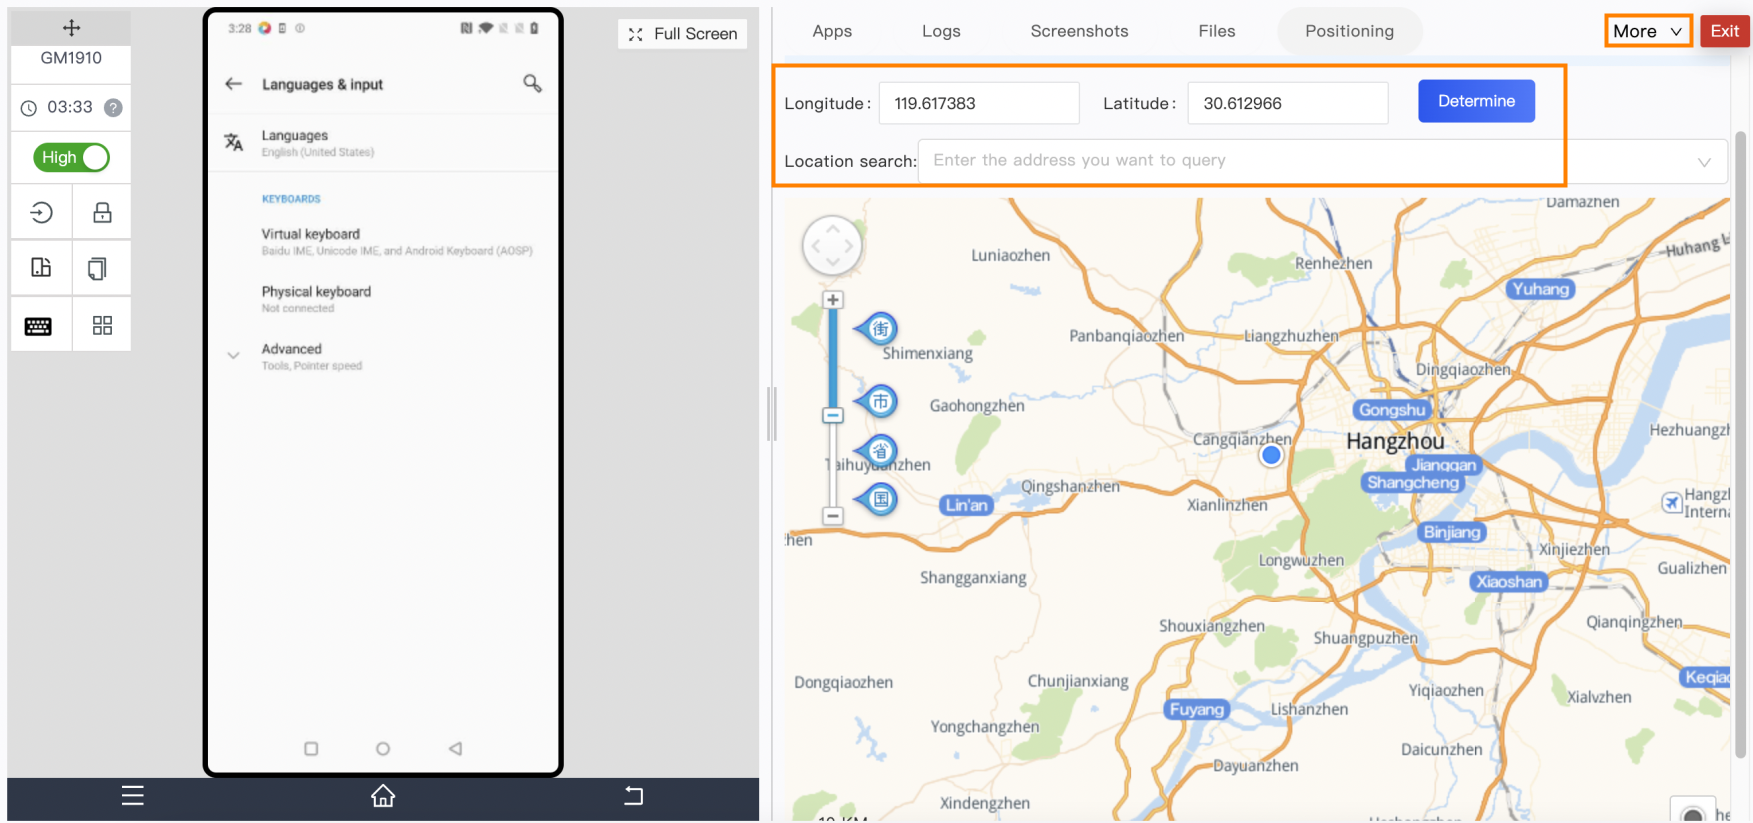
Perform a positioning test
On the remote debugging page of the specified device, click More and then select Positioning. The Positioning tab appears.
In the left-side window, start the installed app that you want to test. For information about how to install an app, see Install an app.
Use one of the following methods to specify a location that you want to search:
Configure the Longitude and Latitude parameters. Then, click Determine.
Enter a location that you want to search in the Location search field and press Enter.
If the positioning succeeds, the "Virtual positioning succeeded" message appears.
NoteYou must enable the positioning feature on your remote device.
You must enable the positioning feature in your browser and allow the browser to share your location.
Make sure that you perform a positioning test over the Internet. The map can be displayed only if you use the Internet.
Perform a QR code scanning test
On the remote debugging page of the specified device, click More and then select Scan code. The Scan code tab appears.
Click the upload section to select a file or drag the file to the upload section to upload the file to the specified directory.
If the file is uploaded, the File uploaded! message appears.
In the left-side window, start the installed app that you want to test. Use the QR code scanning feature of the app. For information about how to install an app, see Install an app.
Select Album for QR code scanning.
Select a photo on which you want to perform a QR code scanning test from the album. Then, the system automatically scans the photo.

After the scanning is complete, delete the QR code image from Photos and Recently Deleted. Otherwise, Mobile Testing saves the QR code image to Recently Deleted.
Run a performance test
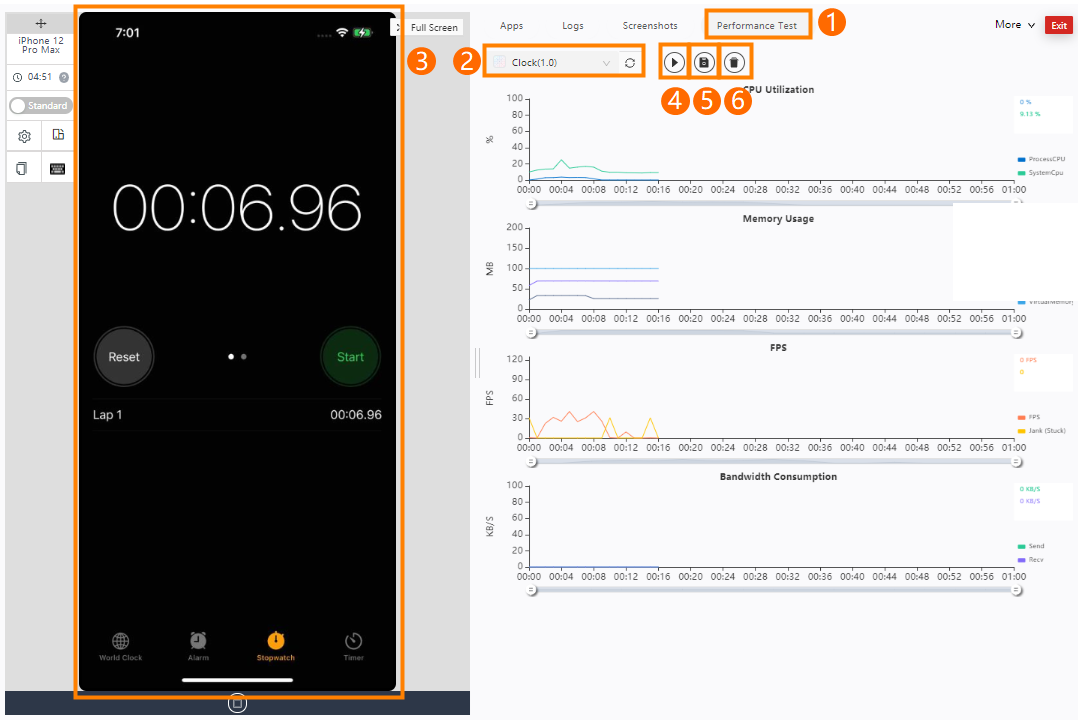
1. On the remote debugging page of the specified device, click More and then select Performance Test. The Performance Test tab appears.
2. Select the app that you want to test from the app drop-down list.
3. Click the  icon to start plotting the performance data of the specified process of the specified app. After you click the icon, the icon changes to the
  icon.
icon.
4. In the left-side window, perform operations on the app and view the changes in the plotted data.
Move the pointer over a trend chart. You can then view the instantaneous value of a specific point in time.
5. Click the  icon. In the Save to Test Case panel, enter a task name in the Task Name field, select a directory and a test case to which you want to save the results, and then click OK.
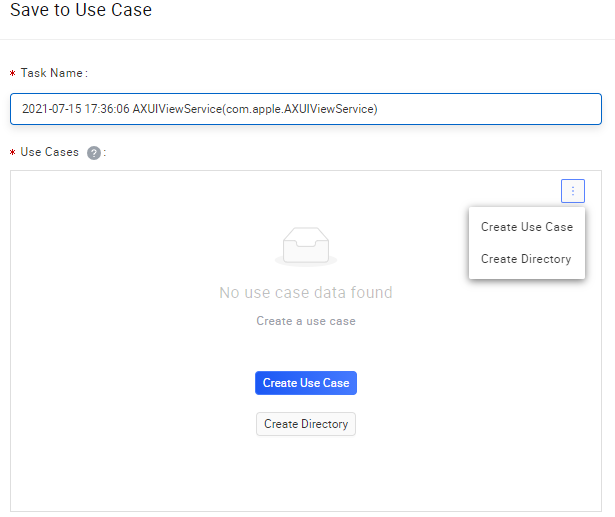
You must configure a directory and a test case before you save results. If no directory or test case is configured, click Create Test Case or Create Directory to create a test case or a directory. The created directory and test case are displayed in Test Case hierarchy tree on the Performance Testing page. For more information, see Manage test cases.
6. Click the icon to finish plotting performance data.
7. Click the  icon to clear the plotted data.
For information about a performance test report and the description of the corresponding data, see View a test report.