This topic describes how to create a script.
Prerequisites
A test case library is created and associated with a specified app. For more information, see Create a test case library.
Create a script
Log on to the Mobile Testing console.
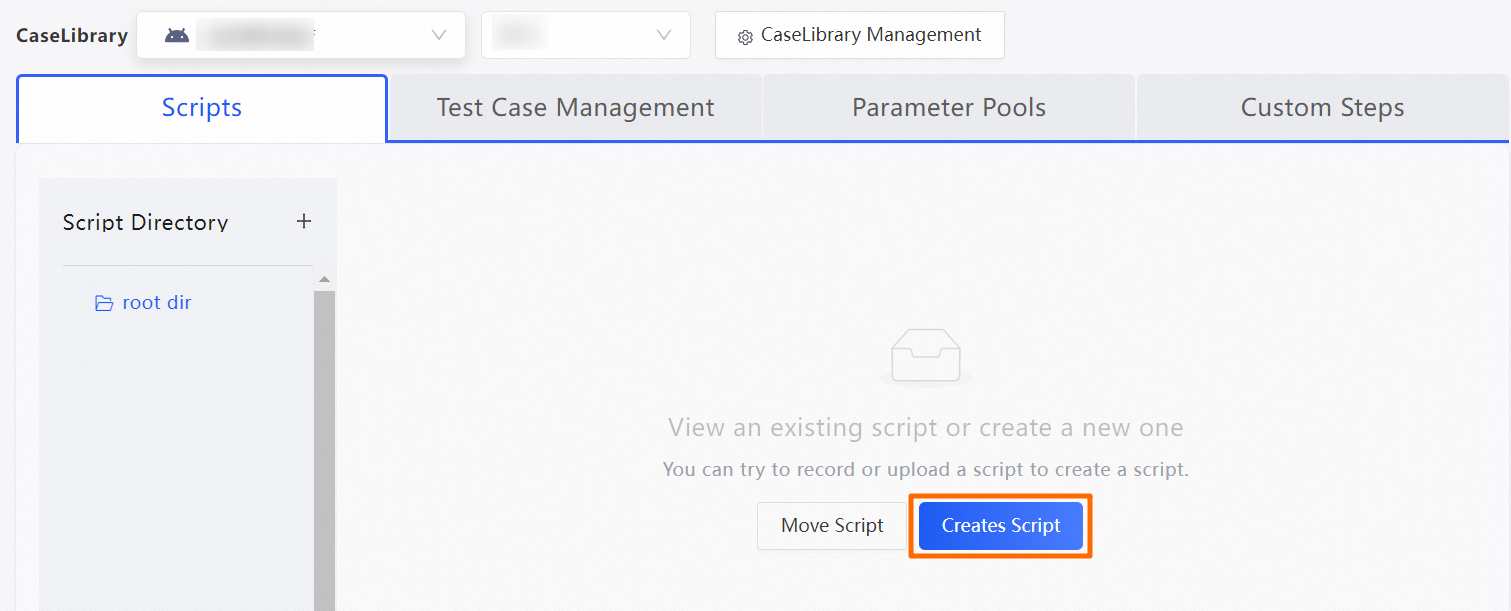
In the left-side navigation pane, choose Testing Management > Test Case. The Scripts tab appears.
Select a test case library and a test case library version from the Case Library drop-down list.

On the Scripts tab, click Create Script. The Create Script panel appears.

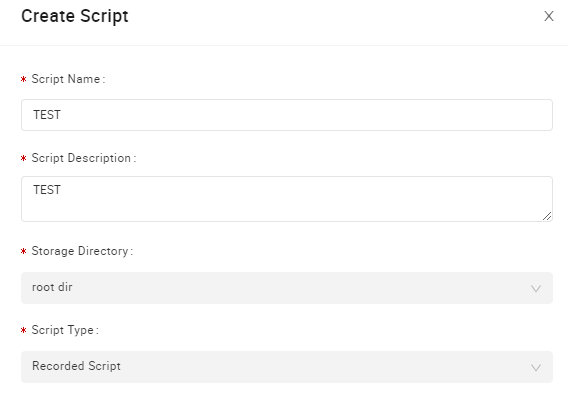
In the Create Script panel, specify the script information.

Configure the parameters as described in the following table.
Parameter
Description
Script Name
The name of the script.
The name must be a string.
The name must be 2 to 50 characters in length.
The name can contain letters, digits, underscores (_), and hyphens (-).
The name must be unique.
Script Description
The description of the script. The description facilitates subsequent query and review.
Storage Directory
The directory to which to upload the script.
NoteYou must specify the script directory in advance. By default, the script is saved to the root directory. For more information, see Create a script directory.
Script Type
The type of the script. Valid values:
Recorded Script: the test script that is generated by using the online recording feature.
Uploaded Script: the test script that is written by a user. When you set Script Type to Uploaded Script, the Uploaded Script parameter is displayed.
Uploaded Script
When you set Script Type to Uploaded Script, you must select and upload a script file.
NoteFor information about how to write a script, see Write an Android test script or Write an iOS test script.
The script file must be packaged as a ZIP file. Only ZIP files can be uploaded.
The script package must contain the
main.pyfile.Uploaded scripts cannot be edited.
Click Next and select a device to record the script. For information about how to record a script, see Record a script.