This topic describes how to add the scan feature with the standard User Interface (UI) to your project. It also explains how to set the title of the scan interface.
Use the scan feature with the standard UI
Open Android Studio. In the
activity_main.xmlfile, reset the button style and change the button ID tostandard_ui_btn.<?xml version="1.0" encoding="utf-8"?> <androidx.constraintlayout.widget.ConstraintLayout xmlns:android="http://schemas.android.com/apk/res/android" xmlns:app="http://schemas.android.com/apk/res-auto" xmlns:tools="http://schemas.android.com/tools" android:layout_width="match_parent" android:layout_height="match_parent" tools:context=".MainActivity"> <Button android:id="@+id/standard_ui_btn" android:layout_width="match_parent" android:layout_height="wrap_content" android:layout_marginTop="48dp" android:background="#108EE9" android:gravity="center" android:text="Use Scan with Standard UI" android:textColor="#ffffff" app:layout_constraintEnd_toEndOf="parent" app:layout_constraintHorizontal_bias="0.498" app:layout_constraintStart_toStartOf="parent" app:layout_constraintTop_toTopOf="parent" /> </androidx.constraintlayout.widget.ConstraintLayout>In the
MainActivityclass, override the button's click event to implement the scan feature. The following is the sample code:private ScanRequest scanRequest = new ScanRequest(); @Override protected void onCreate(Bundle savedInstanceState) { super.onCreate(savedInstanceState); setContentView(R.layout.activity_main); findViewById(R.id.standard_ui_btn).setOnClickListener(new View.OnClickListener(){ @Override public void onClick(View v) { MPScan.startMPaasScanActivity(MainActivity.this, scanRequest, new ScanCallback() { @Override public void onScanResult(final boolean isProcessed, final Intent result) { if (!isProcessed) { // The user presses the physical back button or the back button in the upper-left corner. return; } // Note: This callback runs in a subthread. runOnUiThread(new Runnable() { @Override public void run() { if (result == null || result.getData() == null) { // The scan failed. Toast.makeText(MainActivity.this, "Scan failed. Please try again.", Toast.LENGTH_SHORT).show(); return; } // The scan is successful. new AlertDialog.Builder(MainActivity.this) .setMessage(result.getData().toString()) .setPositiveButton(R.string.confirm, null) .create() .show(); } }); } }); } }); }In the project's
AndroidManifest.xmlfile, add read and write permissions and network access permissions.<uses-permission android:name="android.permission.READ_EXTERNAL_STORAGE" /> <uses-permission android:name="android.permission.INTERNET" />In the
build.gradle(:app)file of the project's main module, add the following configuration: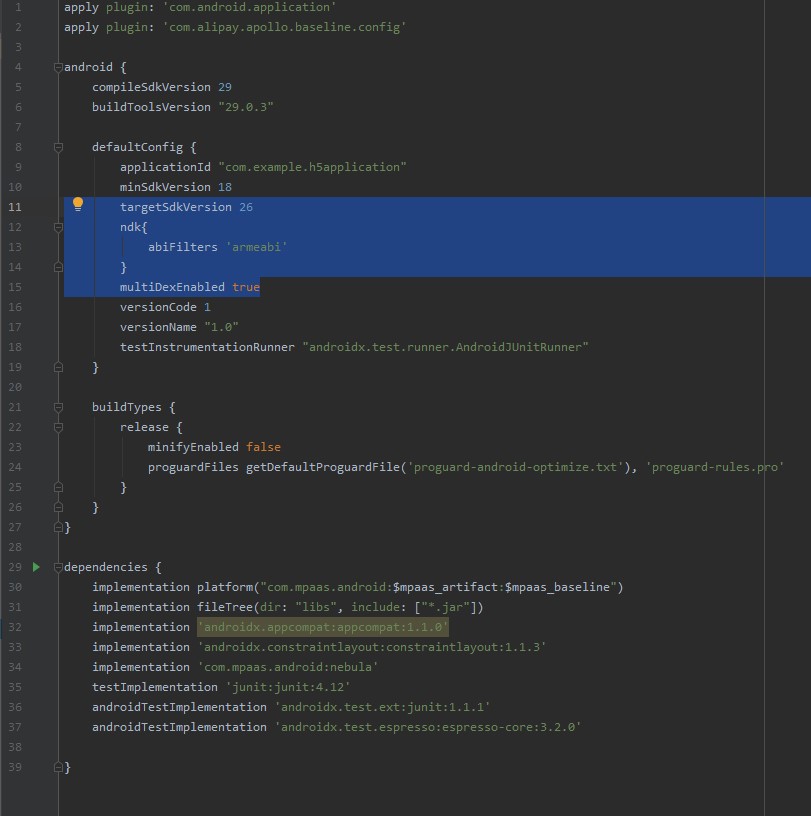
Compile and run the project to install the application on your phone. After you open the application, the interface appears as shown in the following figure:
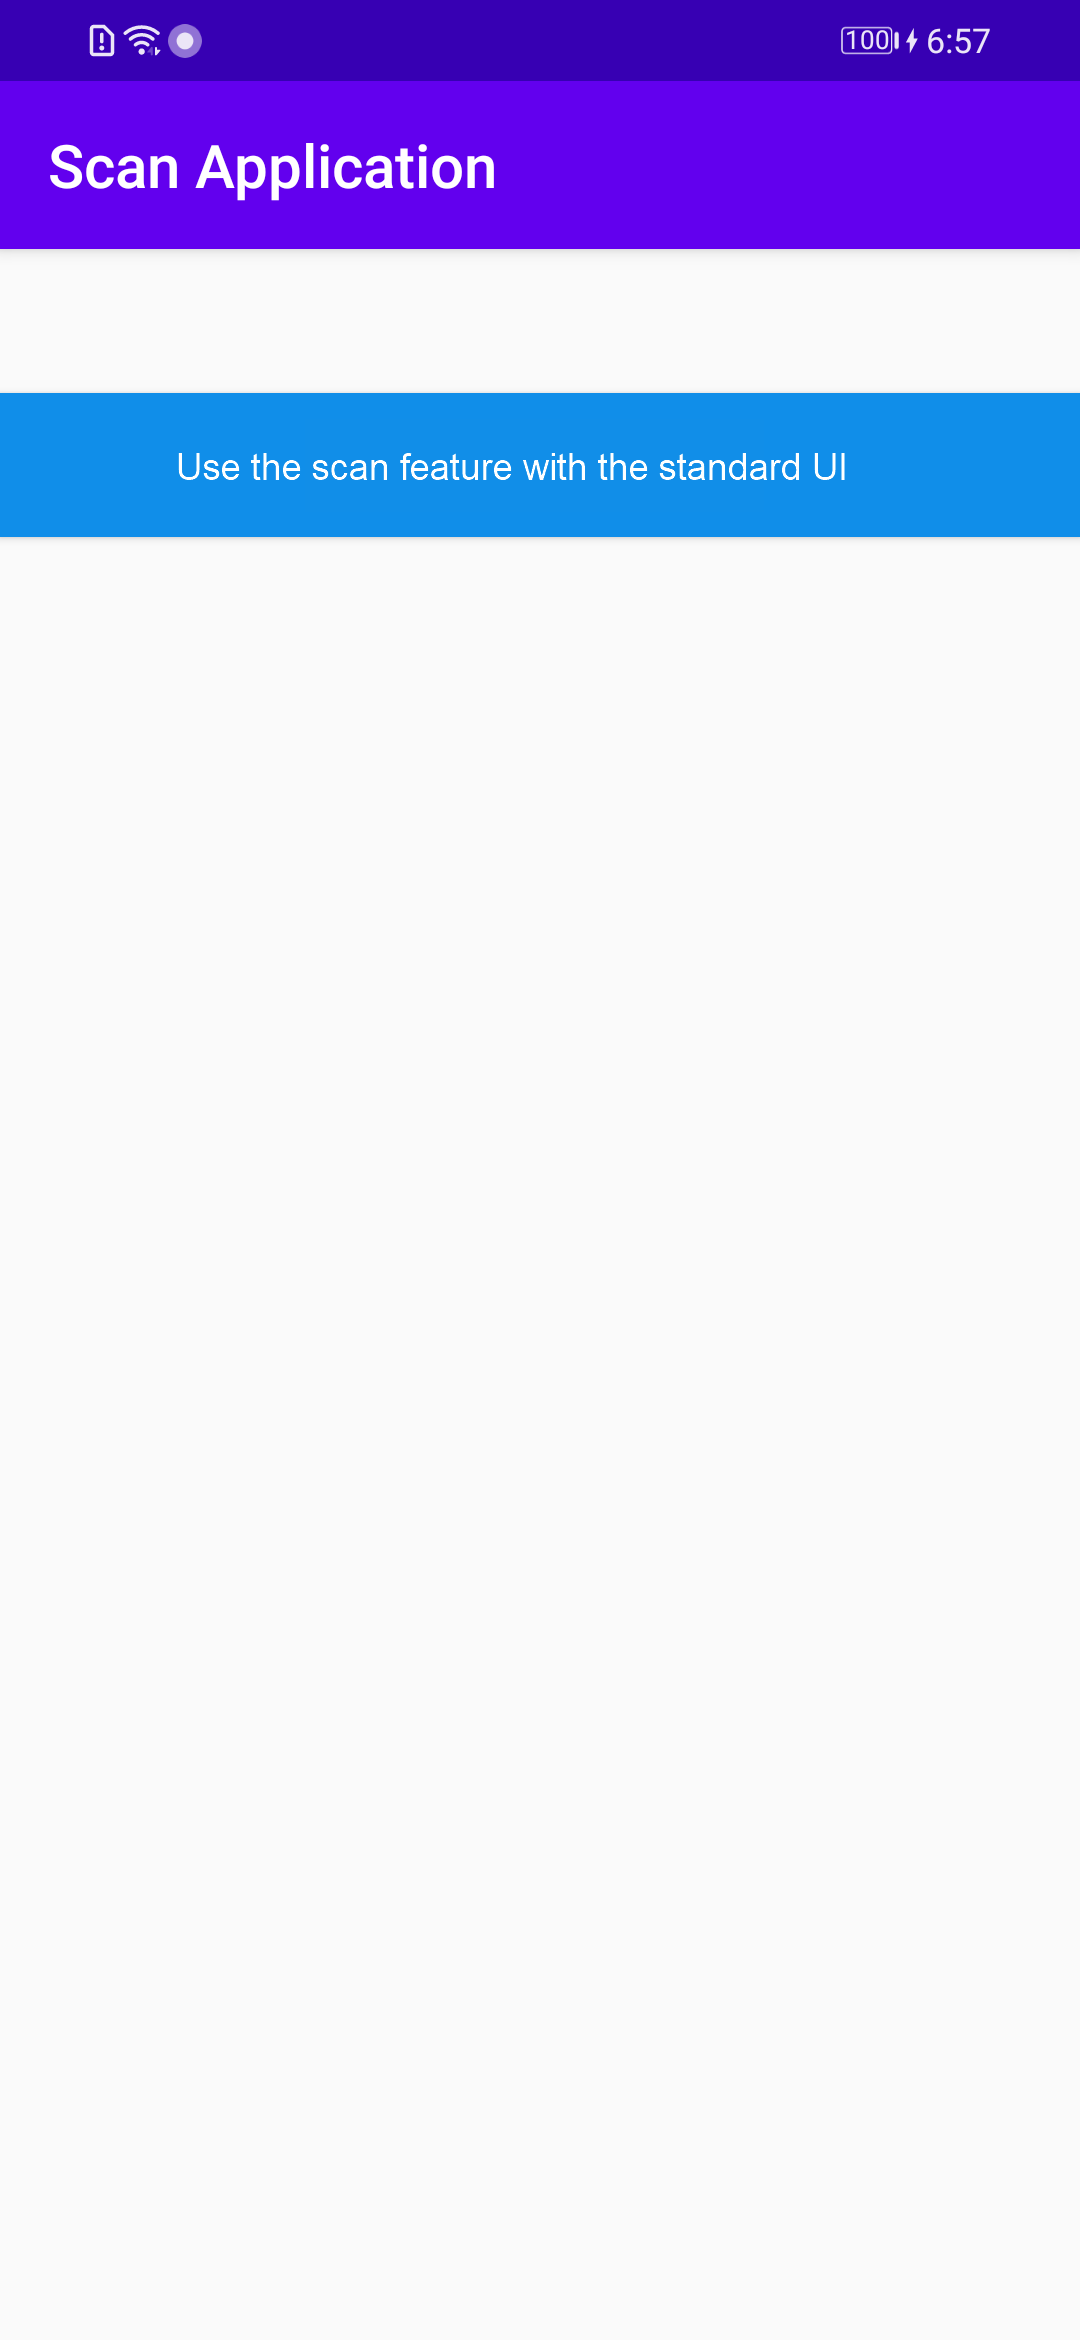
Click Use Scan with Standard UI to open the scan interface.
Scan the following QR code. The interface displays the information retrieved from the QR code.

Set the title of the scan interface
In the
activity_main.xmlfile, add a button and set its ID tobtn_title.<Button android:id="@+id/btn_title" android:layout_width="match_parent" android:layout_height="wrap_content" android:layout_marginTop="128dp" android:background="#108EE9" android:gravity="center" android:text="Set Scan Interface Title with Standard UI" android:textColor="#ffffff" app:layout_constraintEnd_toEndOf="parent" app:layout_constraintHorizontal_bias="0.0" app:layout_constraintStart_toStartOf="parent" app:layout_constraintTop_toTopOf="parent" />In the
com.example.scanapplicationpackage, create theDialogUtilclass.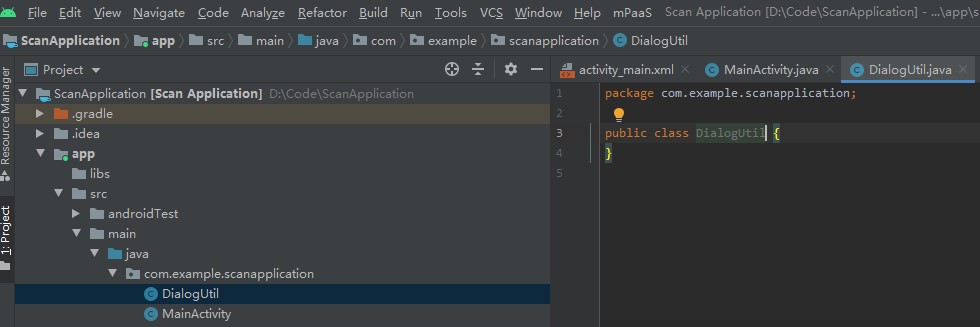
In the
DialogUtilclass, set the style for the dialog.public interface PromptCallback { void onConfirm(String msg); } public static void prompt(Activity activity, final PromptCallback callback) { final EditText edit = new EditText(activity); new AlertDialog.Builder(activity) .setTitle("Enter text") .setView(edit) .setPositiveButton("OK" , new DialogInterface.OnClickListener() { @Override public void onClick(DialogInterface dialog, int which) { if (callback != null) { String text = edit.getText().toString().trim(); callback.onConfirm(text); } dialog.dismiss(); } }) .setNegativeButton("Cancel", new DialogInterface.OnClickListener() { @Override public void onClick(DialogInterface dialog, int which) { dialog.dismiss(); } }) .create() .show(); }In the
MainActivityclass, add the following code to set the scan interface title when thebtn_titlebutton is clicked.findViewById(R.id.btn_title).setOnClickListener(new View.OnClickListener() { @Override public void onClick(View v) { DialogUtil.prompt(MainActivity.this, new DialogUtil.PromptCallback() { @Override public void onConfirm(String msg) { scanRequest.setTitleText(msg); } }); } });Compile and run the project to install the application on your phone. After you open the application, the interface appears as shown in the following figure:
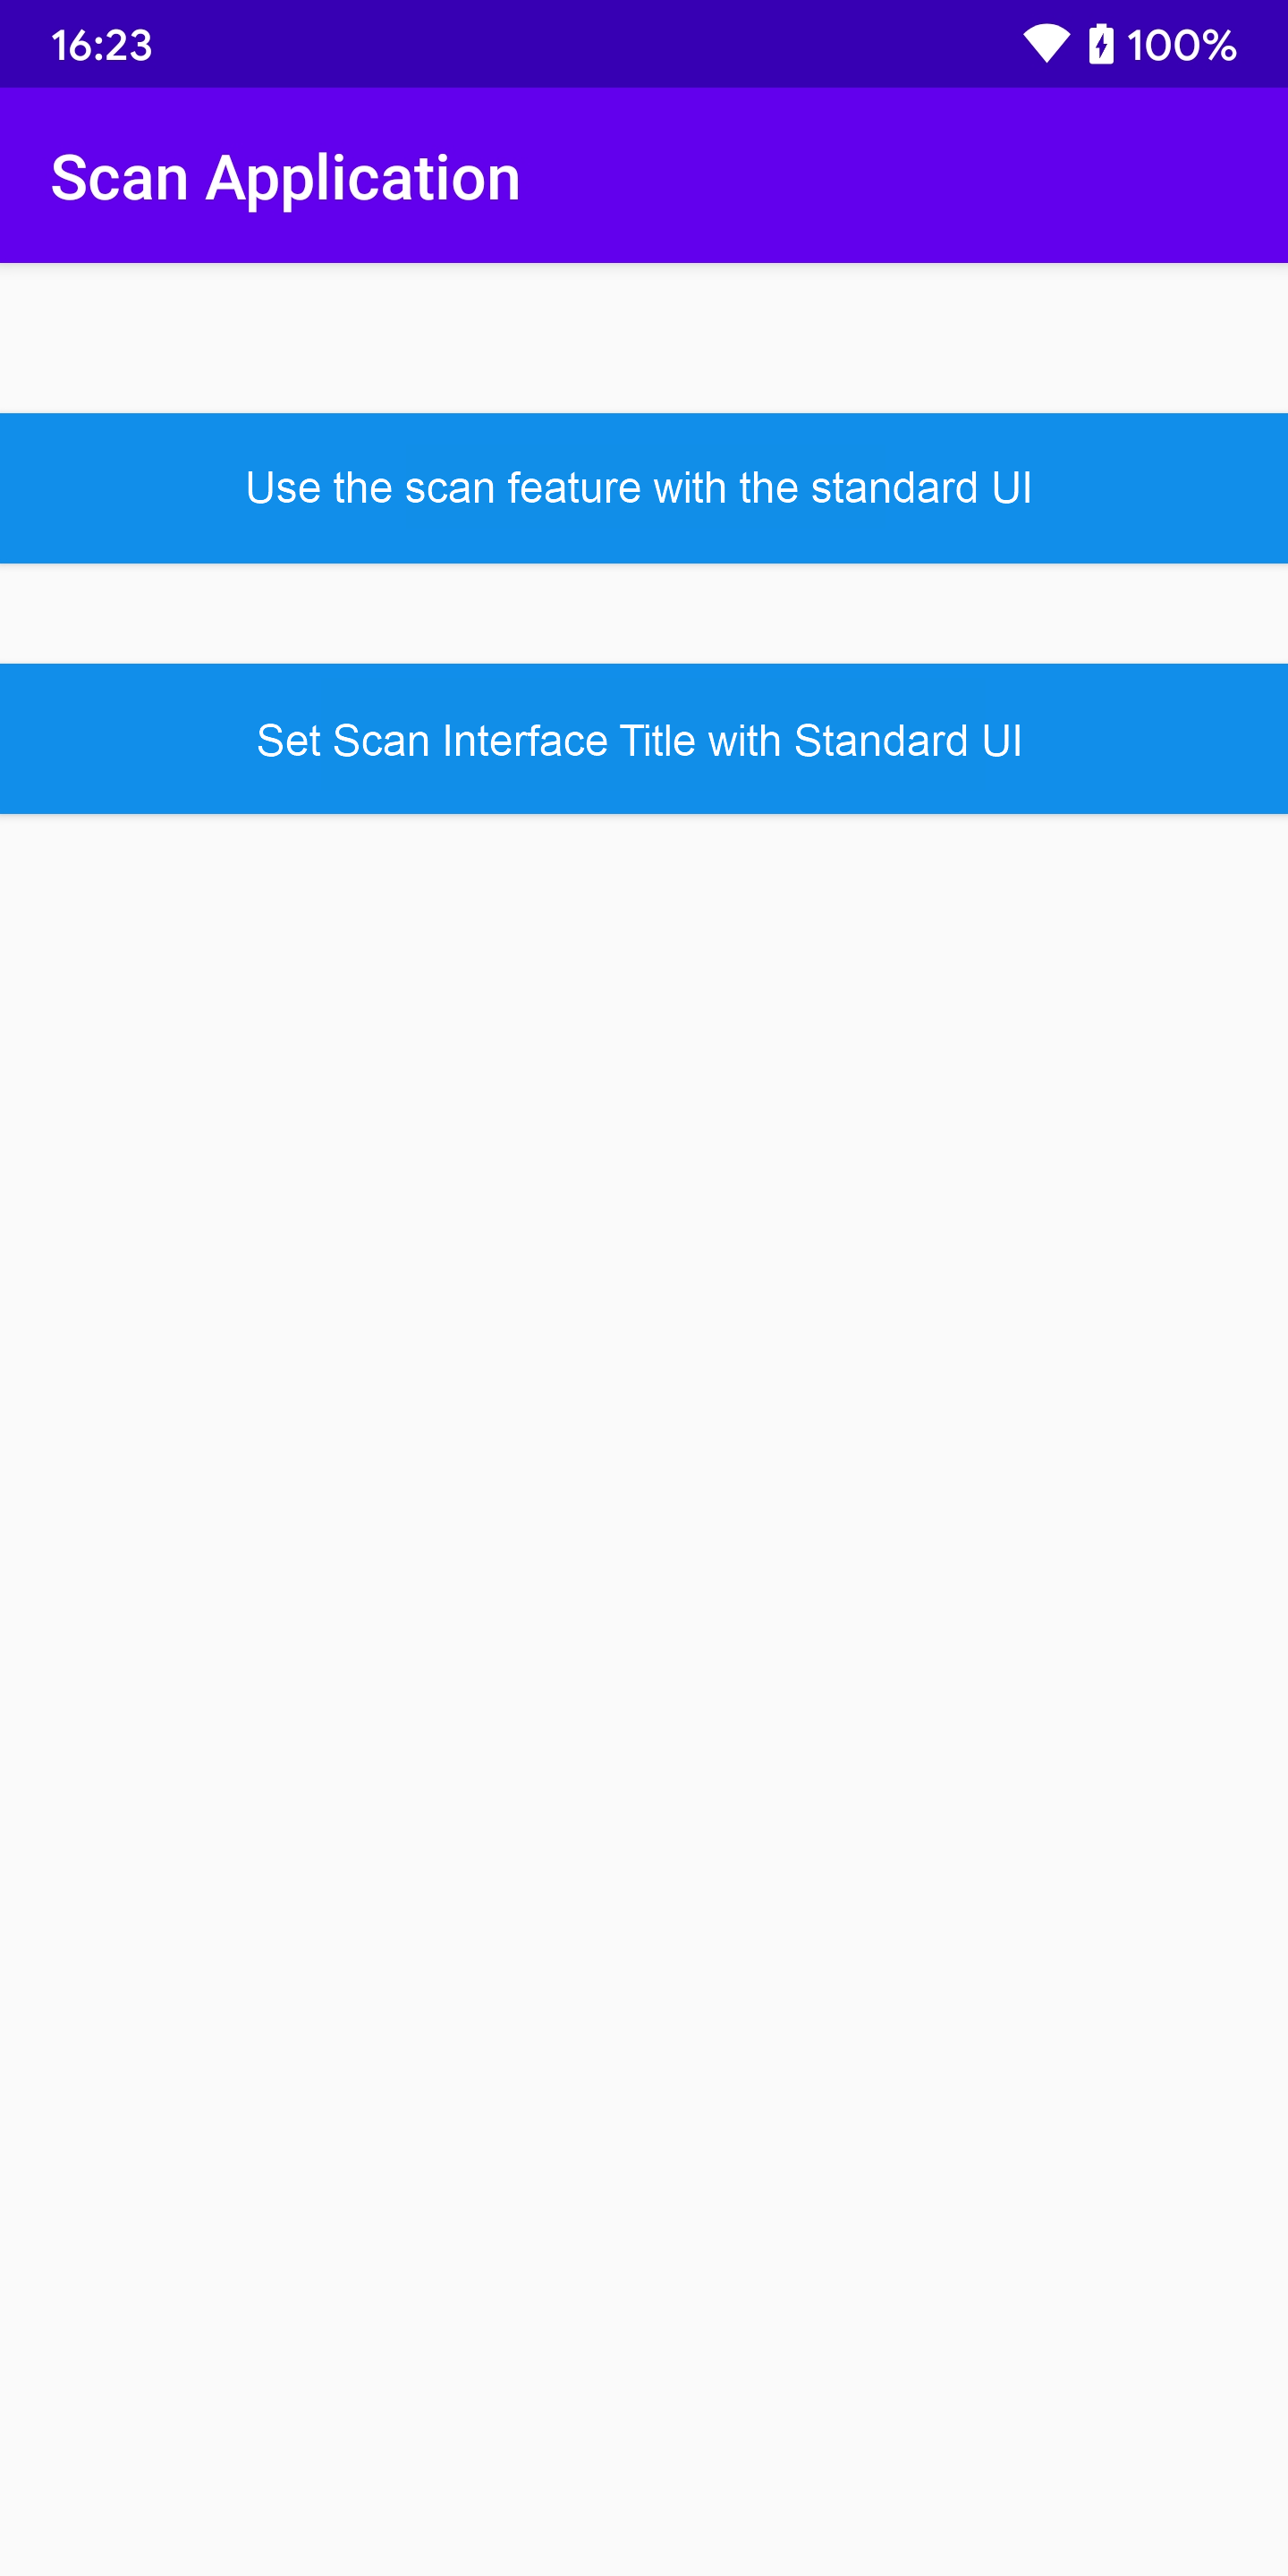
Click Set Scan Interface Title with Standard UI. Enter the desired title. For example, enter mPaaS and click OK.
Click Use Scan with Standard UI. The title that you entered in the previous step appears in the upper-left corner of the scan page. This confirms that you have successfully set the scan title using the standard UI.