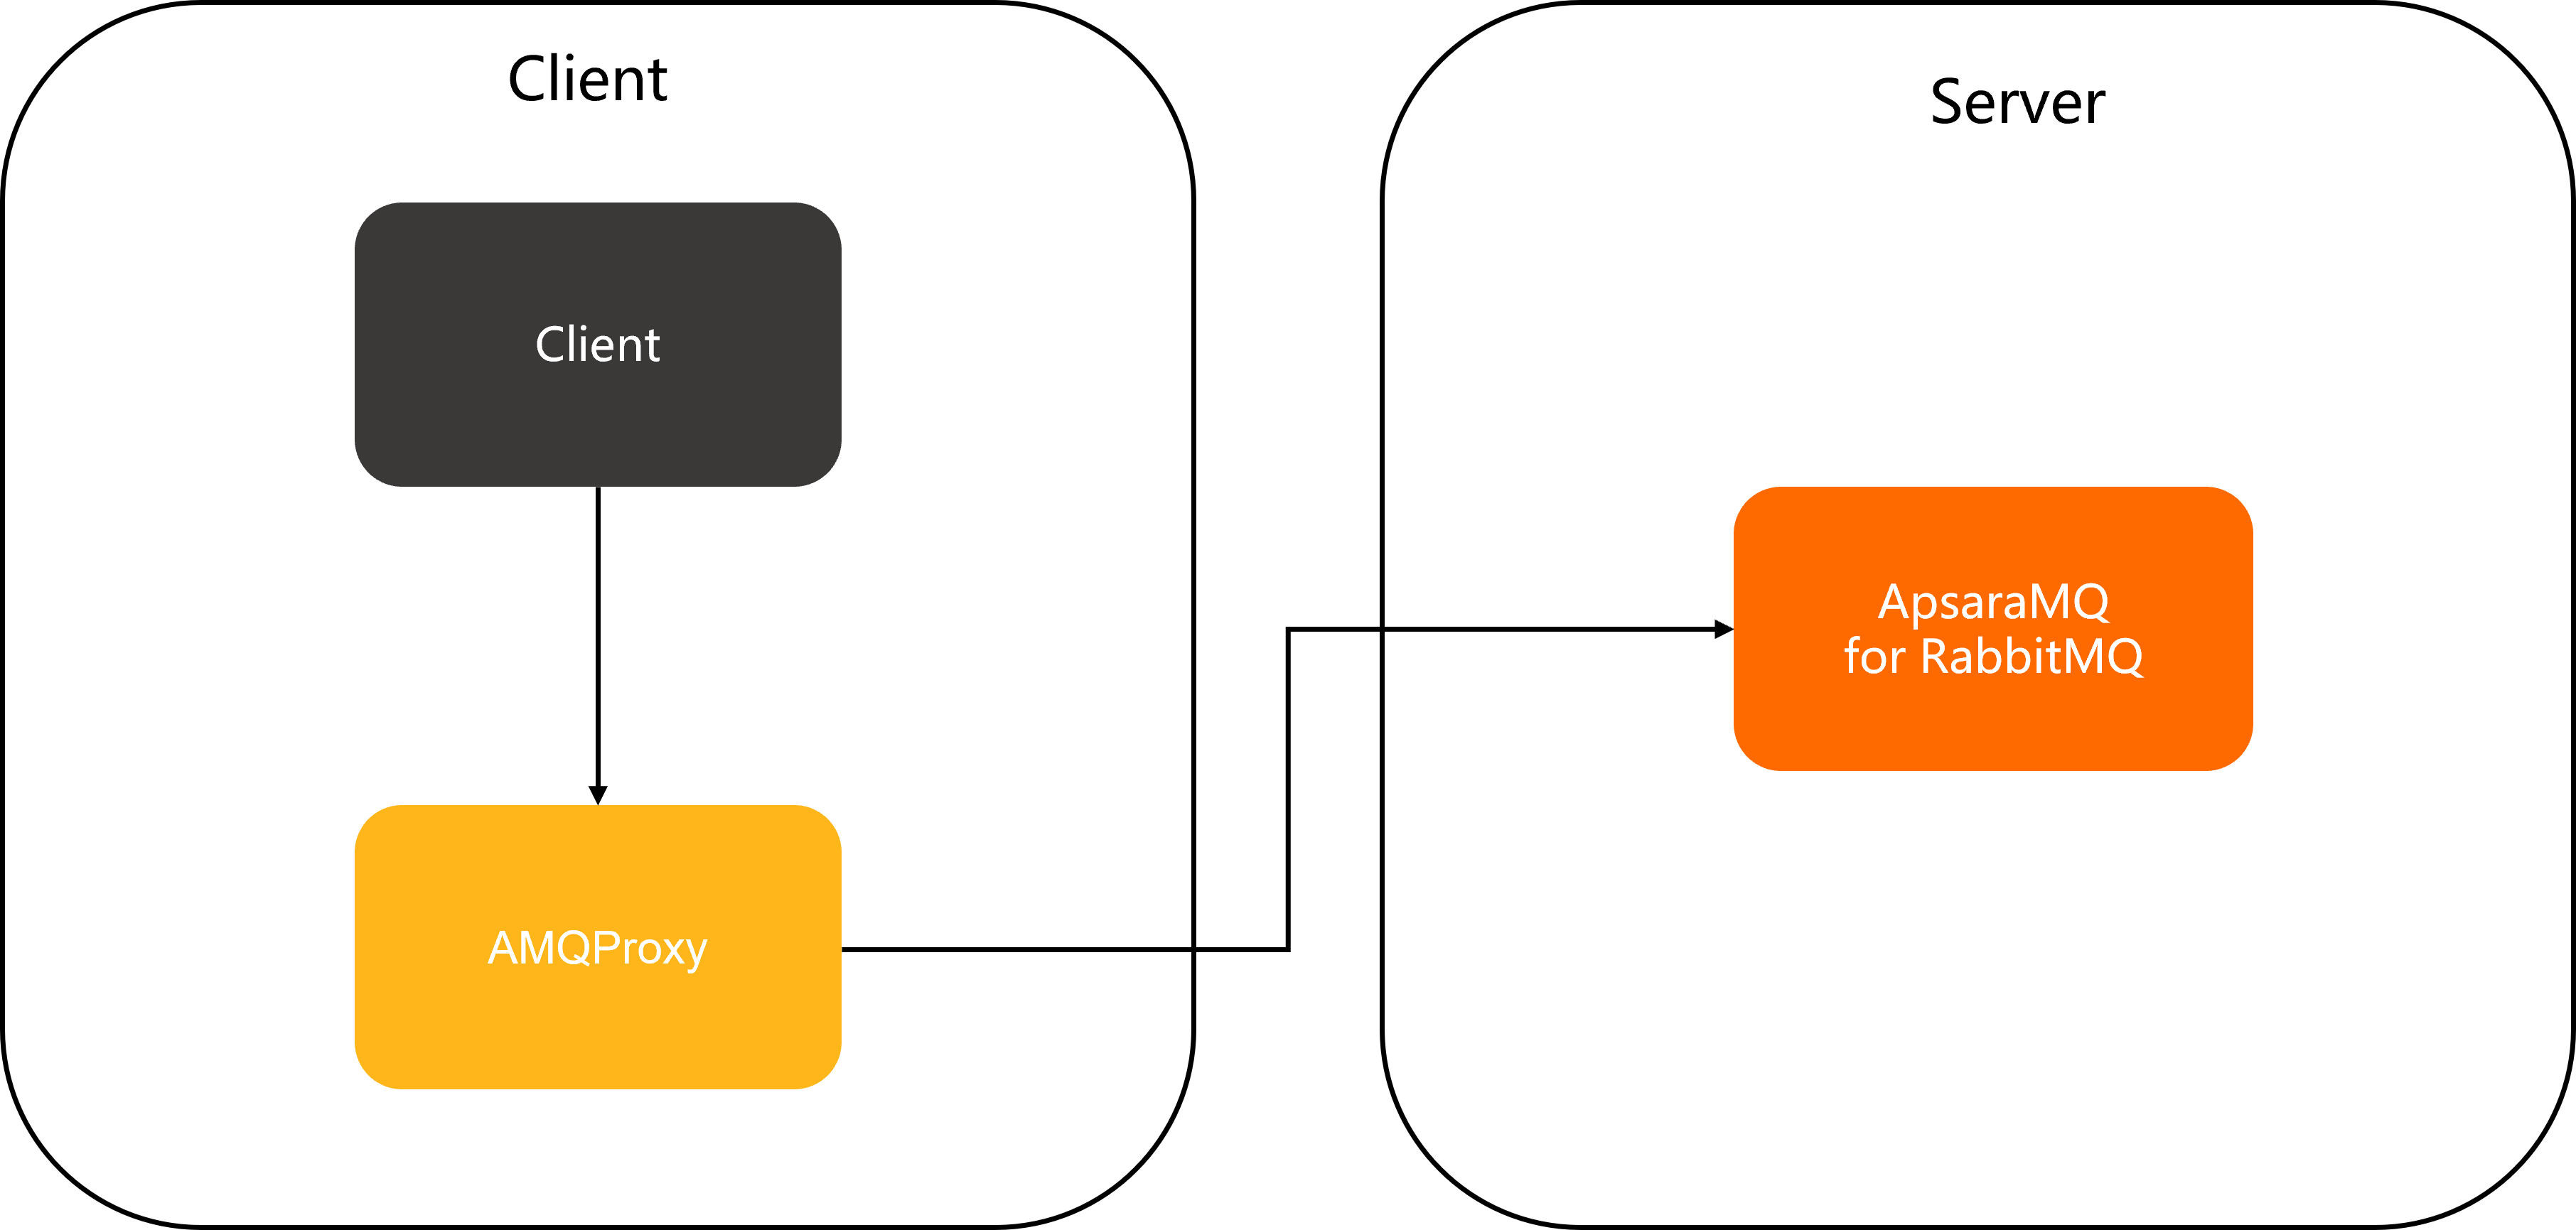
AMQProxy is an open source Advanced Message Queuing Protocol (AMQP) proxy service that reuses AMQP connections. This proxy service allows clients that support only short-lived connections, such as PHP clients, to use persistent connections. This reduces both network and ApsaraMQ for RabbitMQ resource consumption.
Prerequisites
If you want to use an SSL connection between AMQProxy and ApsaraMQ for RabbitMQ, make sure that OpenSSL is installed on your client server. For more information, see Downloads.
SSL connections to ApsaraMQ for RabbitMQ are not supported in a VPC environment.
Background information
Clients for some languages, such as PHP, cannot use persistent connections. They frequently open and close connections. This consumes a large amount of network and ApsaraMQ for RabbitMQ resources, which places a significant load on ApsaraMQ for RabbitMQ.
AMQProxy
AMQProxy is an open source AMQP proxy service provided by Cloud AMQP. It allows clients to maintain persistent connections with ApsaraMQ for RabbitMQ. After you deploy AMQProxy on a client server, all requests between the client and ApsaraMQ for RabbitMQ are routed through AMQProxy.
AMQProxy handles connection requests from clients as follows:
-
When a client requests to open a connection, AMQProxy checks for a suitable connection to reuse based on the username, password, and Vhost. If a match is found, AMQProxy reuses the connection. Otherwise, AMQProxy opens a new connection to ApsaraMQ for RabbitMQ on behalf of the client.
-
When a client requests to close a connection, AMQProxy immediately sends an OK acknowledgement but does not close the actual connection to ApsaraMQ for RabbitMQ. When the client later requests a new connection, AMQProxy reuses the existing connection.
For more information about AMQProxy, see AMQProxy.
Deploy AMQProxy
-
Run the following command to download the AMQProxy package.
wget https://github.com/cloudamqp/amqproxy/releases/download/v0.4.4/amqproxy-0.4.4-1.linux-x86_64-static.tar.gzNoteThis topic uses AMQProxy 0.4.4 as an example. For more information about other versions of AMQProxy, see Releases.
-
Run the following command to decompress the AMQProxy package.
tar -xzvf amqproxy-0.4.4-1.linux-x86_64-static.tar.gz -
Run the following command to navigate to the AMQProxy directory.
cd amqproxy/ -
Run the following command to start AMQProxy.
./amqproxy -l LISTEN_ADDRESS -p LISTEN_PORT AMQP_URLParameter
Description
LISTEN_ADDRESS
The IP address of AMQProxy. Because you deploy AMQProxy on the client server, you can use the local address 127.0.0.1.
LISTEN_PORT
The listening port for AMQProxy. Client requests are sent to AMQProxy through this port. You can use any available port, such as 5673.
AMQP_URL
The URL of the ApsaraMQ for RabbitMQ instance. The format is
{amqp|amqps}://{endpoint}.-
amqp: The AMQP protocol. Use this protocol for non-SSL connections.
-
amqps: The AMQP/SSL protocol. Use this protocol for SSL connections.
-
endpoint: The endpoint of the ApsaraMQ for RabbitMQ instance. You can find the endpoint on the Instance Details page in the ApsaraMQ for RabbitMQ console. For more information, see View instance details.
The following is an example command:
./amqproxy -l 127.0.0.1 -p 5673 amqps://188XXX420.mq-amqp.cn-hangzhou-a.aliyuncs.comThe following is an example response:
Proxy upstream: 188XXX420.mq-amqp.cn-hangzhou-a.aliyuncs.com:5671 TLS
Proxy listening on 127.0.0.1:5673
0 clients                0 upstreams
Parameter
Description
clients
The number of connections between clients and AMQProxy.
upstreams
The number of connections between AMQProxy and the ApsaraMQ for RabbitMQ instance.
-
-
In your client code, change the host and port to the IP address and listening port of AMQProxy.
factory.setHost("127.0.0.1");
factory.setPort(5673);