Learn how to manage default commands and create your own commands.
Extension management is supported for Visual Studio and JetBrains IDE plug-in only, not available for Qoder CN IDE.
|
Supported edition |
Enterprise Dedicated Edition |
For Enterprise Dedicated Edition, Qoder CN admins and global admins can manage commands and control the access in Extension of the Qoder CN console. And authorized developers with command access can then type the leading slash / to get these commands.
-
Make sure Qoder CN is updated to version 1.4.0 or above to use the feature.
-
It usually takes 5–10 minutes for the feature to take effect after you enable or modify a command. Developers can then use the commands in the IDE.
Manage commands
View commands
Qoder CN admins and global admins can go to the Extensions section in the console to see both default and user-defined commands.

Click a card to enter the details page. You can see basic information, access control, and usage.
Create commands
To create your own command, click Create Command in Extensions, and follow the steps below:
Step 1: Enter basic information

-
Name: The command name can be 1 to 64 characters long. It must include uppercase and lowercase letters, numbers, underscores, and spaces. This name is displayed to developers when they type the leading slash
/in Qoder CN. Make sure it is easy to read and follows a standard format. -
Description: Explain how and when to use the command. Keep it under 200 characters.
-
Icon: Choose an icon and color for the command from the available options.
-
Access control:
-
Public: Members authorized to access Qoder CN
-
Private: Members authorized to access the commands
-
Step 2: Configure command details

-
Prompt: Up to 5,000 characters. You can enter system identity prompts and requirements prompts.
-
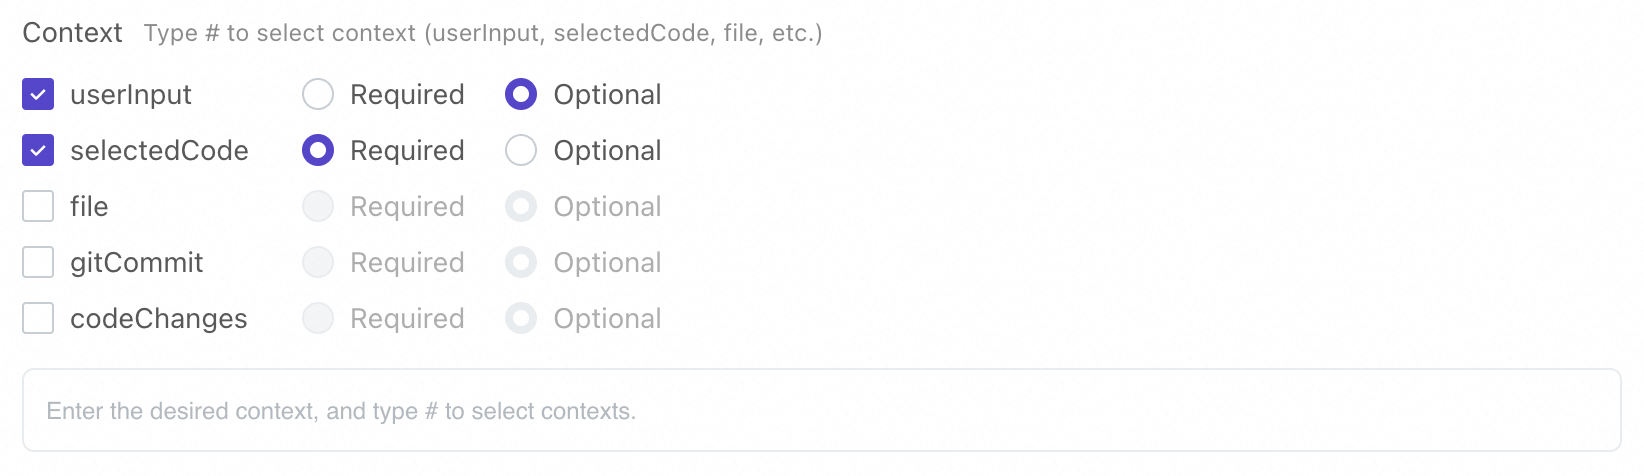
Context: Select contexts such as
#userInputand#selectedCodeso that developers can get a list of contexts when they type#in Qoder CN. -
Chat History: When the switch is turned on, running the command will get chat history.
Manage access control
After creating a command, you can manage access control on the command details page.
-
For a public command, click View under Access Control and you'll be redirected to the authorization management page to see authorized developers.

-
For a private command, click View under Access Control and you'll see the access control navigation drawer. You can add or remove members. Only authorized developers can be added.

Enable or disable commands
-
You need to enable the commands in the console so developers with access can use the
/command to invoke them in Qoder CN. -
After you enable the commands, it may take 5–10 minutes to take effect. Once it's active, developers can use it in Qoder CN
Test the command before rolling it out to a larger user base.. Follow these steps:
-
Change the command access to Private.
-
Add only testers to the list.
-
Turn on the switch to enable the command.
-
Testers can then test the command in the Qoder CN.
Once the tests are passed, configure the access control based on requirements.

To disable a command, toggle the switch to turn it off. Once disabled, the command will no longer appear when developers attempt to invoke the command using the leading slash/ .
Modify commands
In the command details, click the Modify button in the upper right corner to modify the command.
Delete commands
To delete a command, click the Delete button in the upper right corner. Confirm to remove the command permanently. Be careful, as this action is irreversible.
Use commands
Developers with access can invoke the command by typing the leading slash / in Qoder CN's chat box.

Examples
Command configuration
The following table lists the details of a command.
|
Command name |
API reference generation |
|
Icon |
Any icon |
|
Description |
The command generates API references after API development is complete. |
|
Access control |
Set the access control based on your business requirements. |
|
Prompt |
|
|
Context configuration |
Generate an API reference in Markdown format based on |