Troubleshoot exceptions during the installation and operation of MCP servers, and learn details about how to handle missing environments, service initialization failures, and configuration errors.
Failed to add service or install
1. npx environment missing
2. uvx environment missing
3. Unable to initialize MCP Client
Error message: failed to initialize MCP client: context deadline exceeded
Possible causes:
MCP service parameters may have errors affecting service initialization.
Resource pull failure due to network connections.
Network security restrictions from your company may block MCP service initialization.
Troubleshooting steps:
1. Click copy complete command.
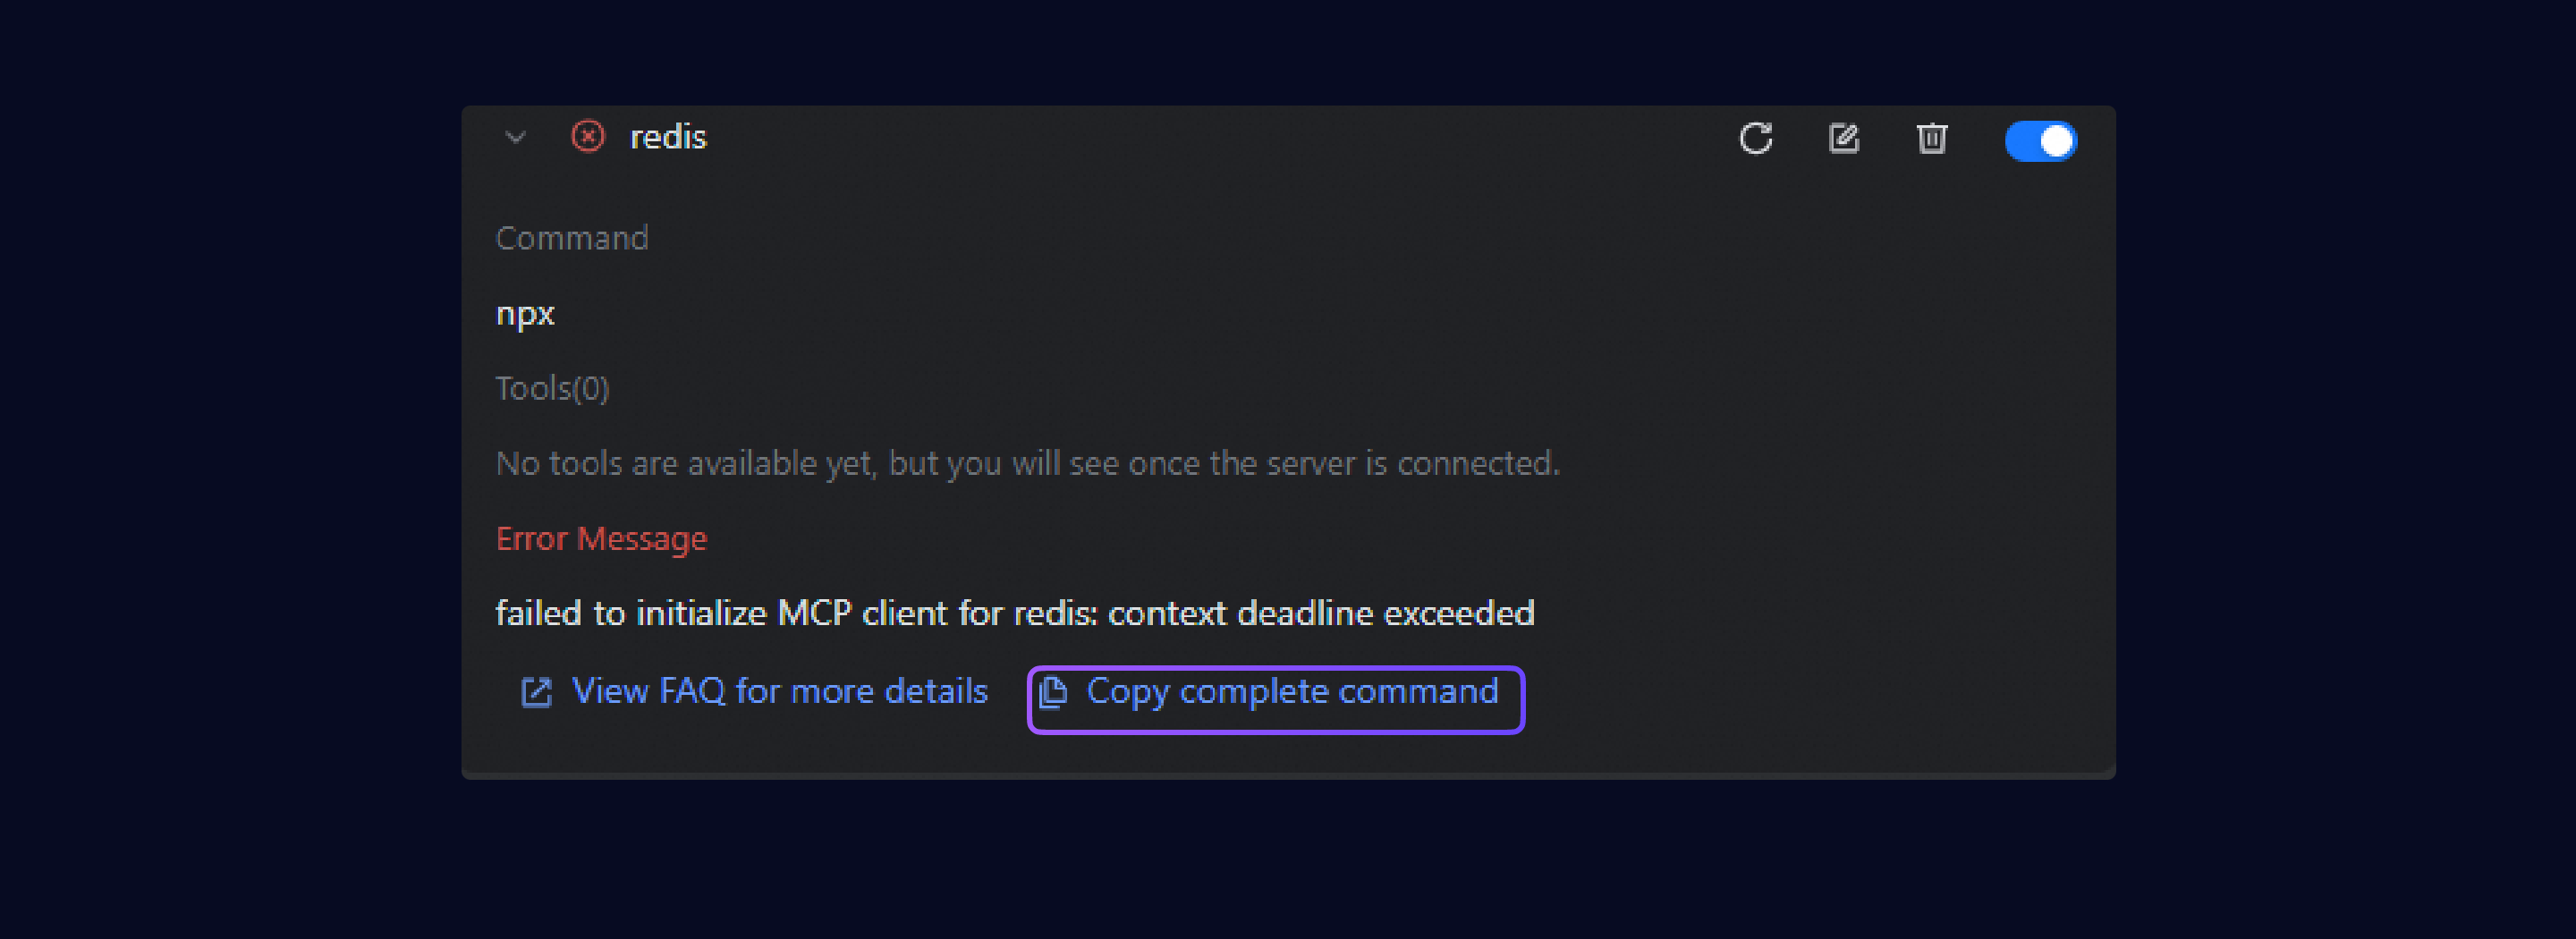
2. Run the command in the terminal to get error details.

3. Analyze the error and fix it.
Common issue 1: Configuration error
In the example above, the error message shows that the connection failure is caused by an incorrect Redis connection URL configuration. Check and edit the MCP service to correct the URL configuration.
Common issue 2: Resource pull failure
If the command fails to run due to resource pull issues, execute the following command in the command line to add a mirror source, then restart the Lingma process and try again.
Windows
npm config set registry https://registry.npmmirror.commacOS
export UV_INDEX_URL=https://mirrors.aliyun.com/pypi/simple/Common issue 3: Node.js execution blocked by security components
Authorize or whitelist the Node.js process or related files according to the messages.
Tool use related issues
If you have concerns with MCP services provided by ModelScope, contact ModelScope Developer Group with DingTalk group number: 44837352.
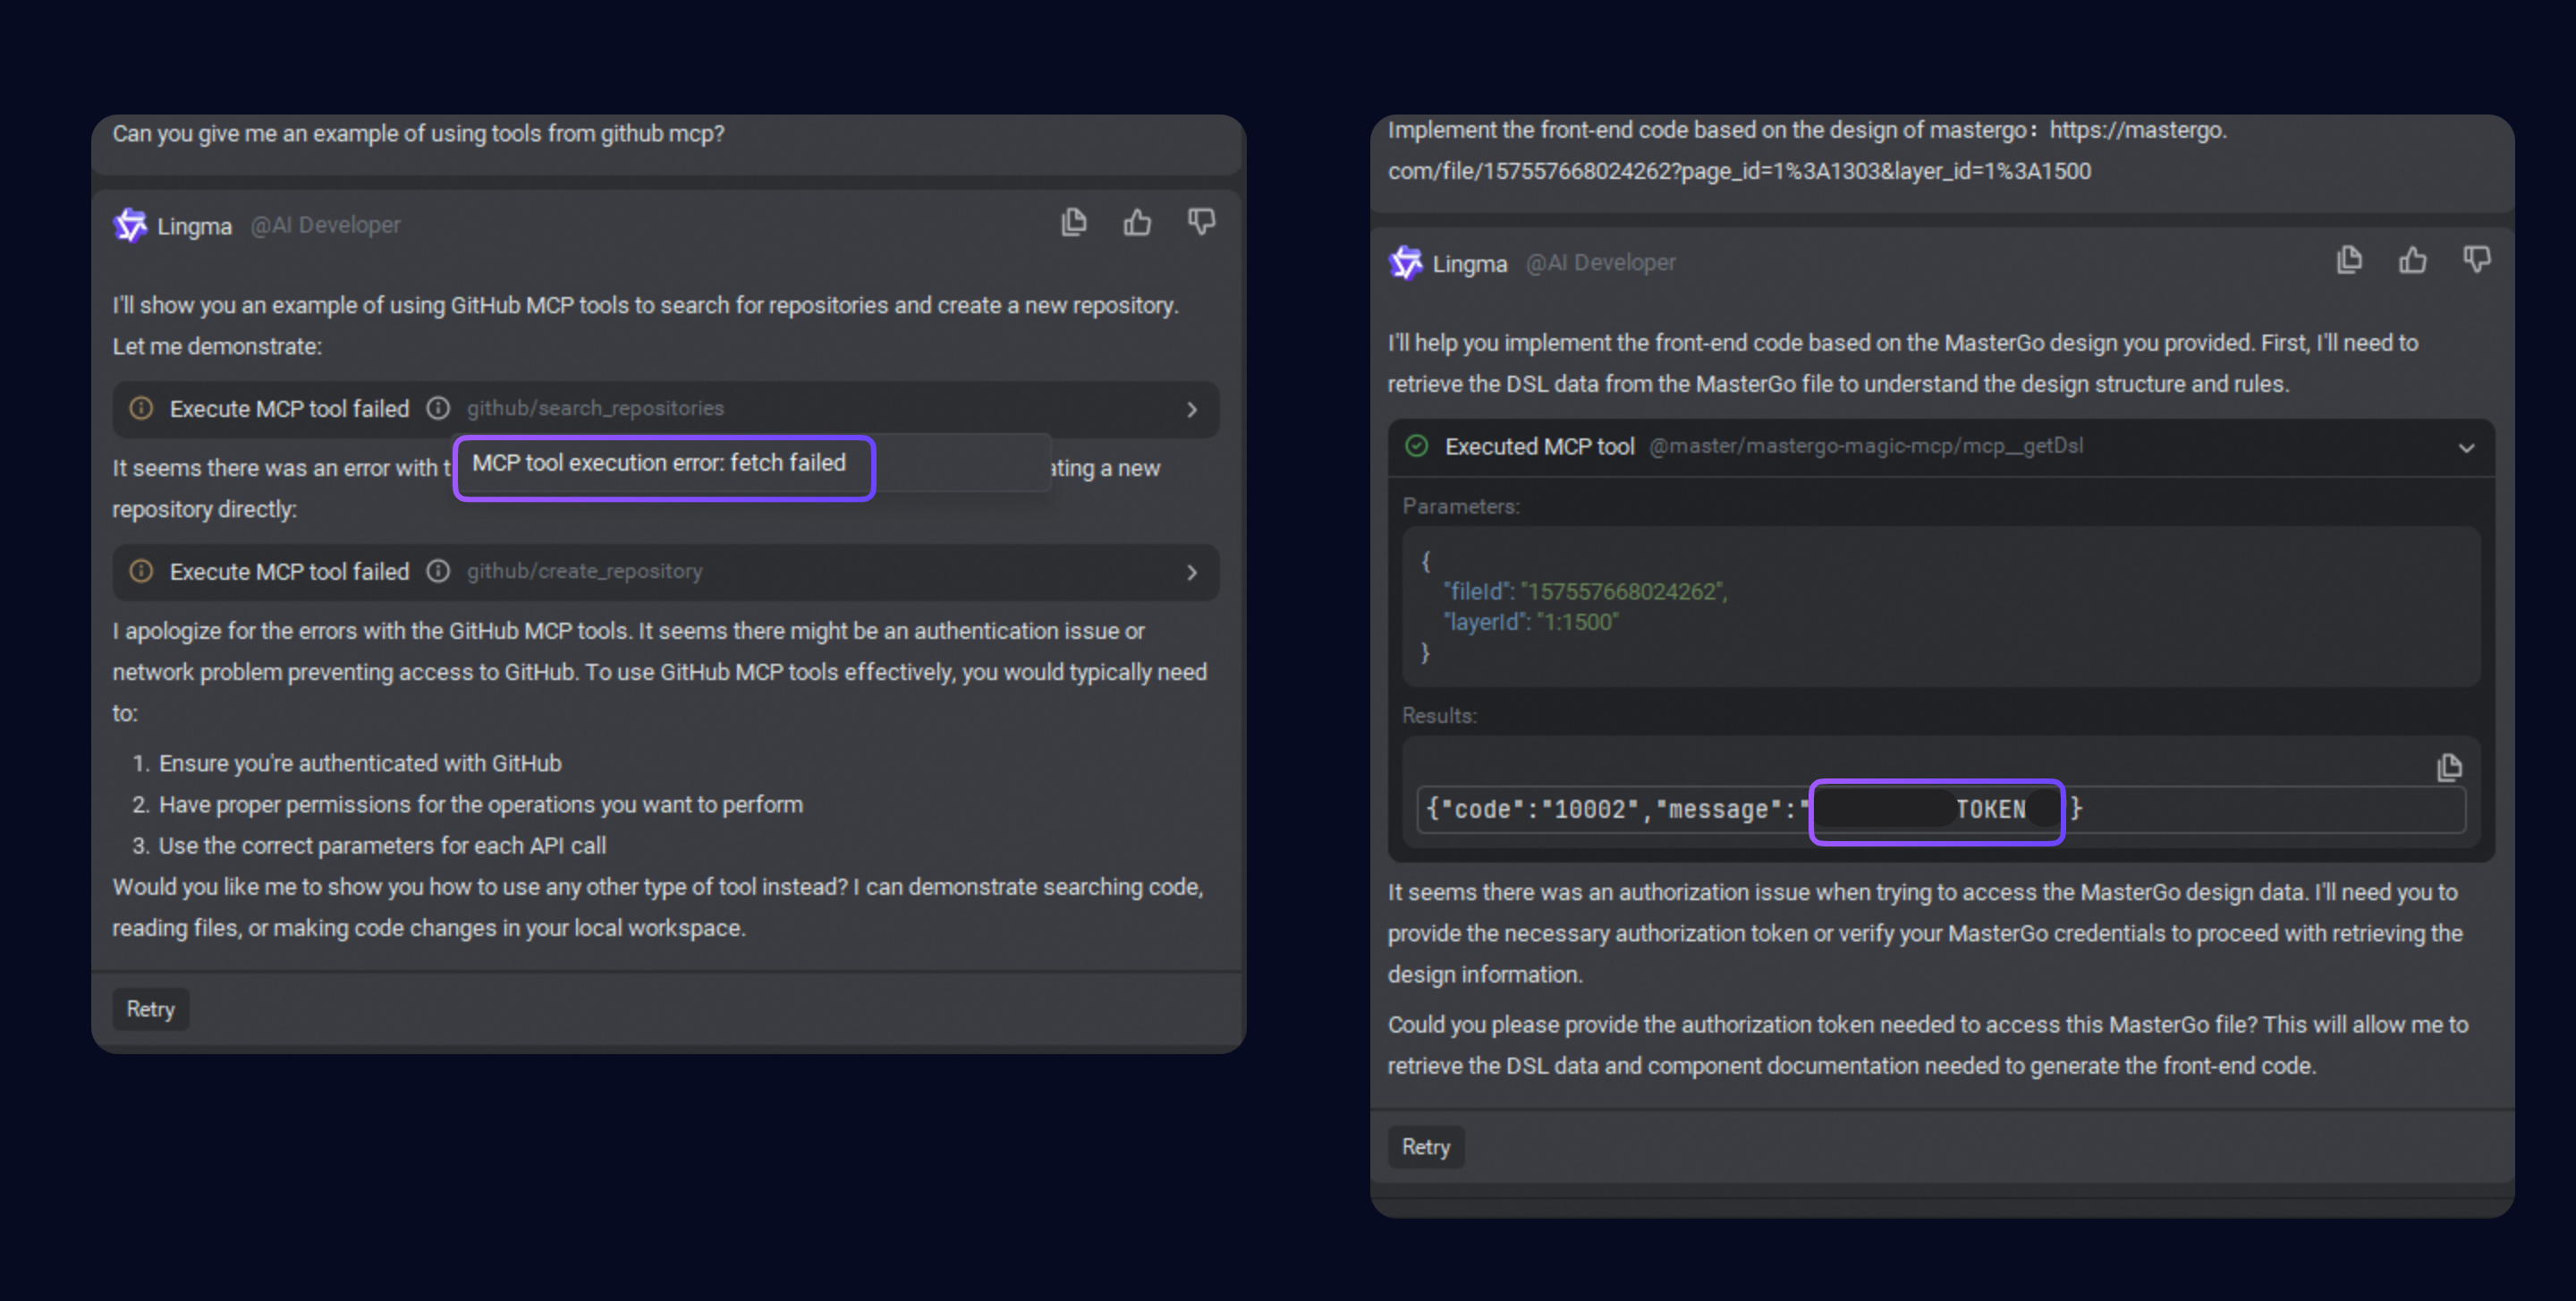
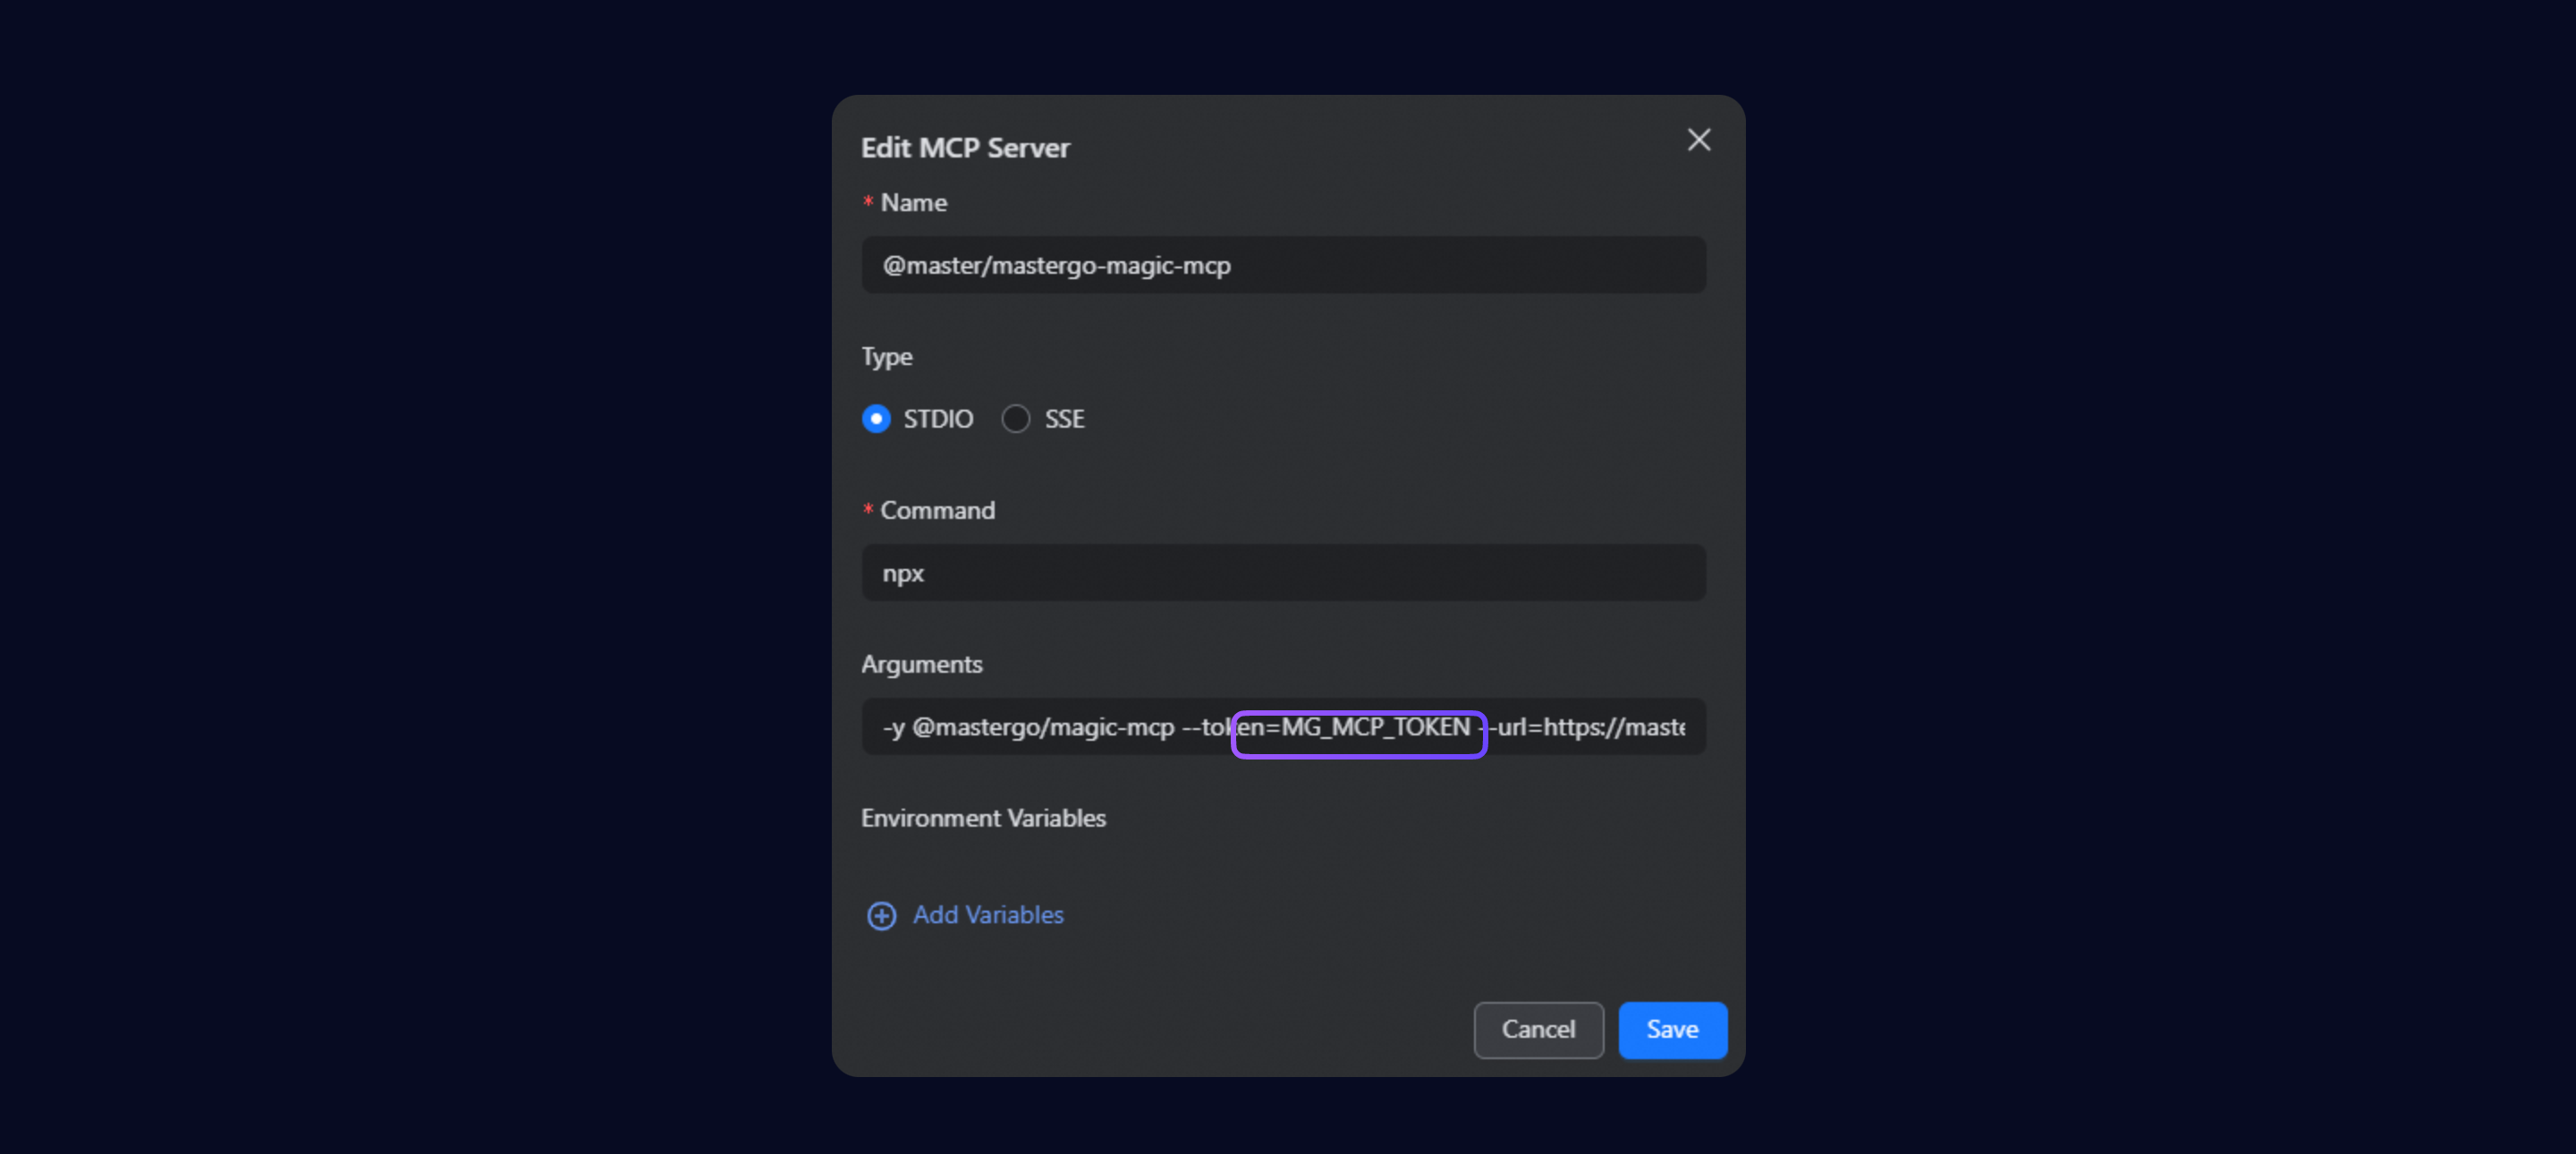
1. Failed to execute tools due to environment variable or parameter input errors.
If exceptions or unexpected results are shown when calling MCP tools, check the error messages first in the tool bar and analyze and troubleshoot accordingly. Important Some MCP services (such as Mastergo and Figma) include API_KEY or TOKEN in the arguments. These parameters still need to be manually configured upon installation. |
|
|
|
2. LLMs cannot call MCP tools.
Confirm that you are in Agent mode.
ImportantIf no project directory is opened, the system will only enter Ask mode and cannot call MCP tools. Load the corresponding project directory and switch to Agent mode.
Confirm that the MCP service is in a connected state:
If the service connection is interrupted, click
 on the right side of the interface, and the system will automatically attempt to restart the MCP service.
Usage suggestion: Avoid using similar naming for MCP services and their tools (such as TextAnalyzer-Pro and TextAnalyzer-Plus both containing a tool named fetchText with similar functionality), to prevent ambiguity when calling MCP services.
3. Cannot open MCP tools page under Settings, and the page shows blank.
The page displays blank and there is an error message in idea.log like: "WARN - #c.i.u.j.JBCefApp - JCefAppConfig.class is not from a JBR module".
Cause: Android Studio default settings do not support JCEF, causing personal settings, MCP, and other pages to fail to load.
Solution:
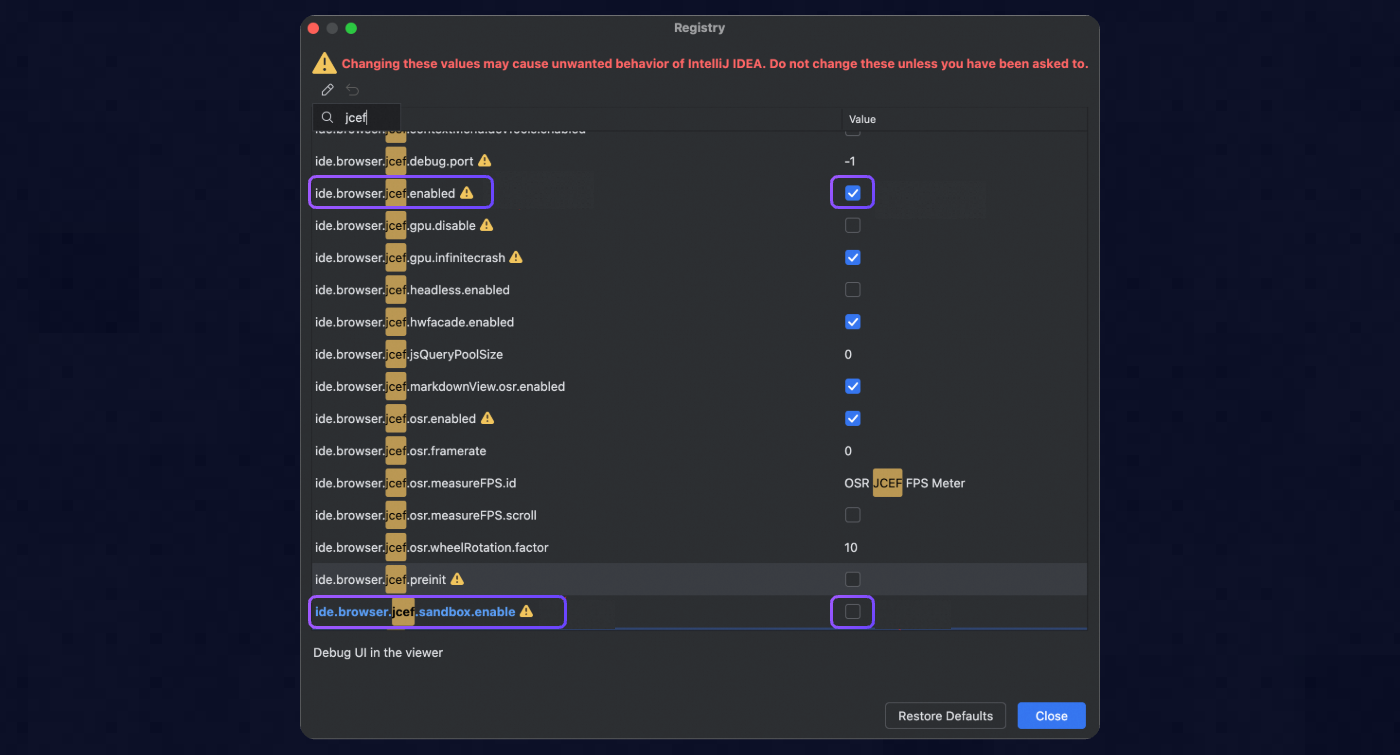
Configure JCEF: In the IDE, select , and in the popup input box, type Registry and open it.
Enable the option
ide.browser.jcef.enabled.Disable the option
ide.browser.jcef.sandbox.enable.
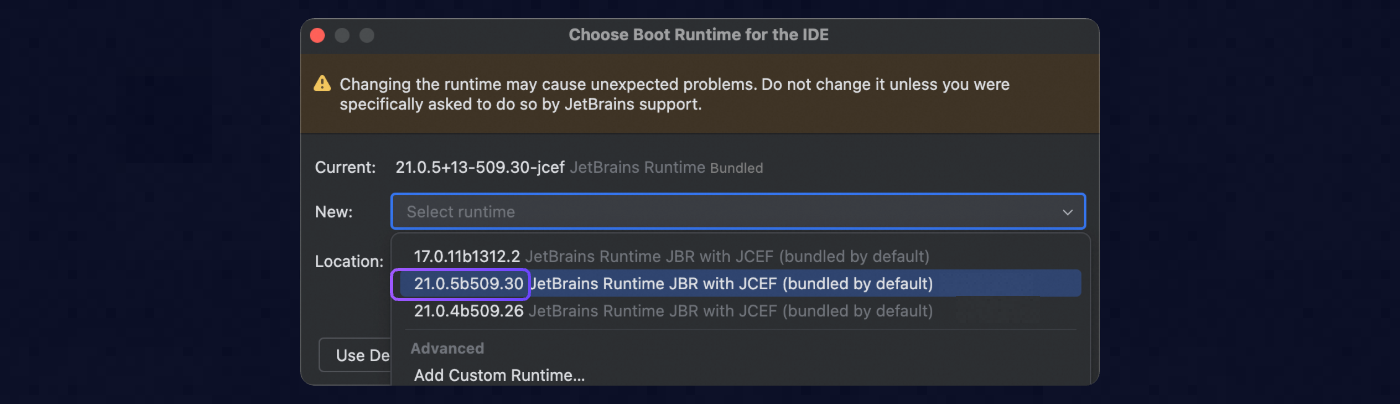
Configure IDE Runtime: Select , type Choose Boot Runtime for the IDE in the chat box and open it. Select a newer JCEF Runtime version, and then confirm.