Qoder CN offers two installation options: the standalone Qoder CN IDE, or the Qoder CN plugin for your existing IDE. Log in after installation to get started.
The Qoder CN IDE now integrates enhanced context engineering and agents to understand your codebase and handle complex tasks. Future updates will focus on the Qoder CN IDE and the JetBrains plugin. VS Code extension updates will be less frequent. If you encounter issues with the VS Code extension, switch to the Qoder CN IDE for better support.
Qoder CN IDE
The Qoder CN IDE is an all-in-one coding environment with built-in AI assistance. No plugins required.
-
Supported OS: Windows 10/11 (x64), macOS 11.0, Linux x64 (.deb/.rpm), or later.
-
Download URL: https://qoder.com.cn/download.
JetBrains IDEs plugin
Install Qoder CN in JetBrains IDEs on macOS, Windows, or Linux.
Step 1: Prerequisites
-
Windows 7 or later, macOS, or Linux.
-
JetBrains IDE version 2020.3 or later. Qoder CN supports the following IDEs:
-
IntelliJ IDEA (Ultimate, Community, and Education editions)
-
Android Studio
-
CLion
-
GoLand
-
PhpStorm
-
PyCharm (Professional, Community, and Education editions)
-
Rider
-
RubyMine
-
RustRover
-
WebStorm
-
...
-
Browse the full list on the JetBrains IDE tool finder.
Step 2: Install Qoder CN
The following steps use Qoder CN in IntelliJ IDEA as an example.
For the best experience, use the New UI theme. Upgrade your IDE to the latest version, then enable New UI in settings under Appearance & Behavior.
Method 1: Install from the plugin marketplace
-
Open IntelliJ IDEA settings. In the plugin marketplace, search for and install the Qoder CN plugin.
-
Restart IntelliJ IDEA.
Method 2: Install from a local file
-
Download the ZIP package for JetBrains IDEs:
-
In IntelliJ IDEA, go to settings. In the Plugins section, click the gear icon and select Install Plugin from Disk. Choose the downloaded ZIP file.
-
Restart IntelliJ IDEA.
Step 3: Log in and start coding
-
After you restart IntelliJ IDEA, click the Qoder CN icon in the side navigation bar. In the Qoder CN assistant window, click Log in.
-
You are redirected to the login page. After logging in, you can start using Qoder CN. Installation and login.
VS Code extension
Install Qoder CN in VS Code on macOS, Windows, or Linux.
Step 1: Prerequisites
-
Windows 7 or later, macOS, or Linux.
-
Visual Studio Code version 1.68.0 or later.
Step 2: Install Qoder CN
Method 1: Install from the marketplace
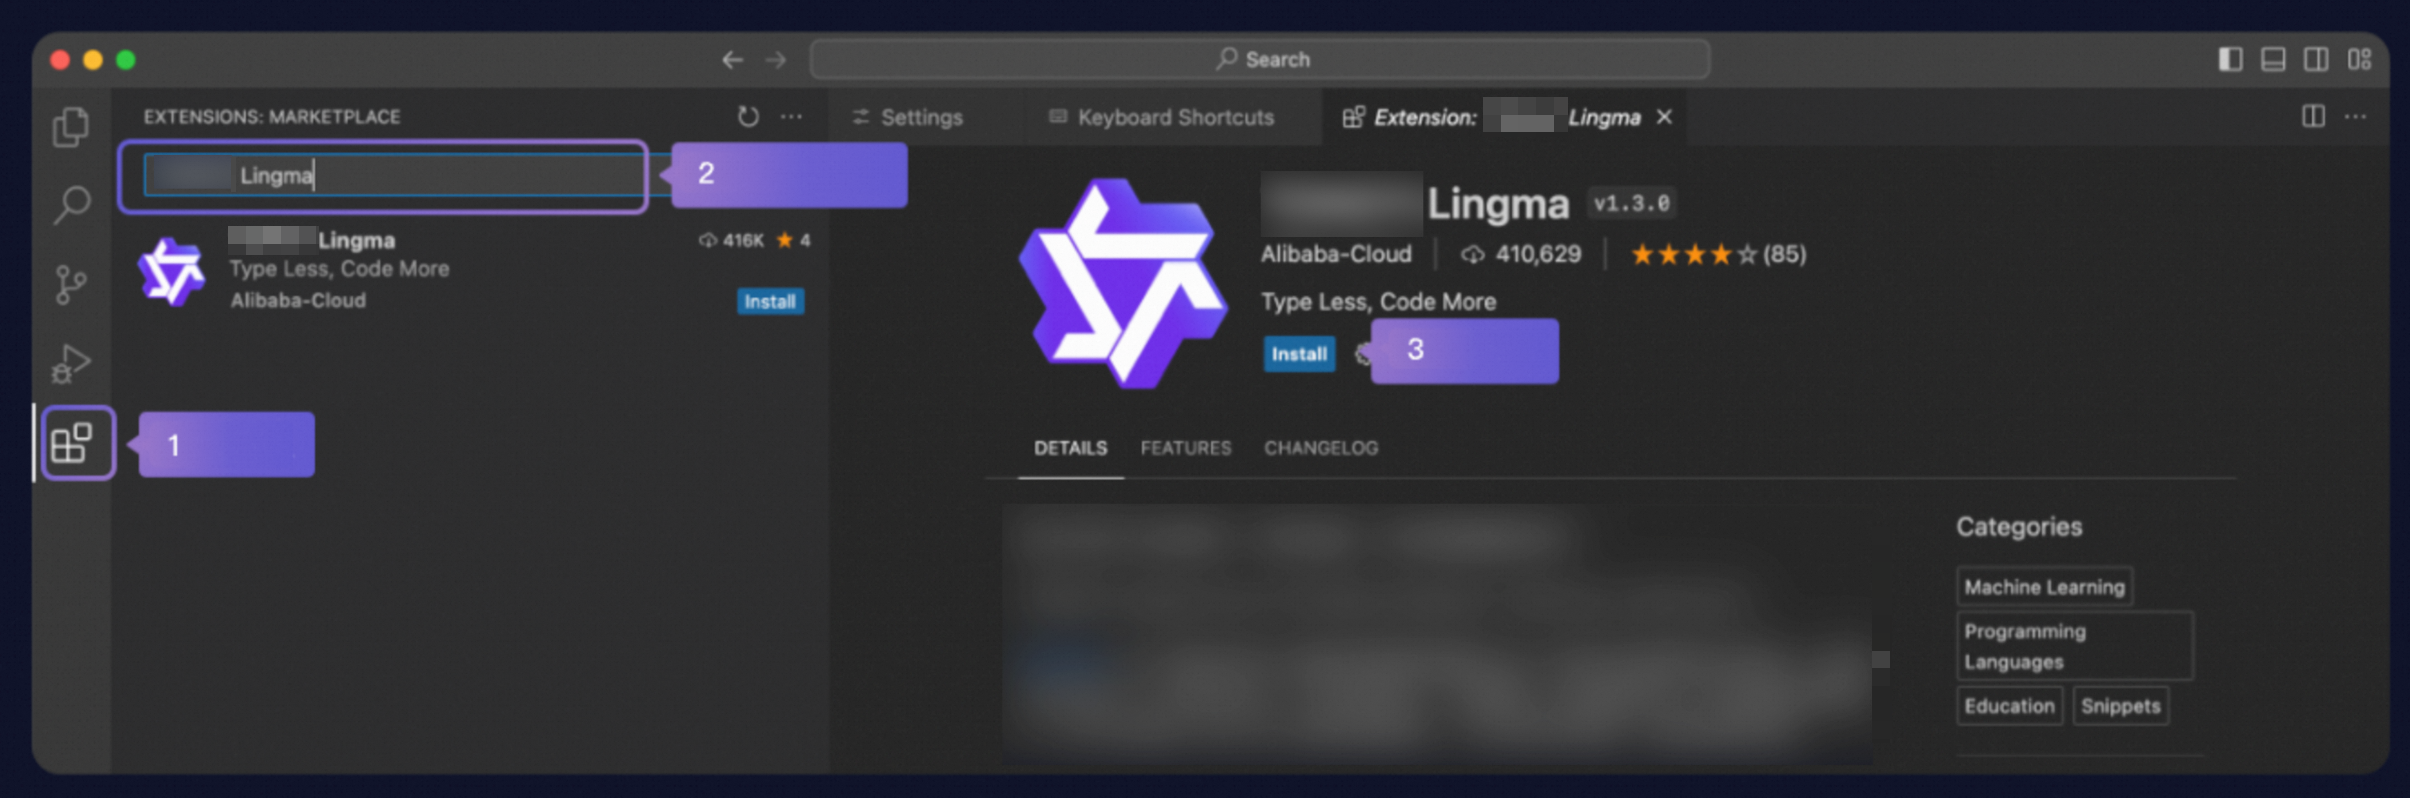
Click Install Now to install directly from the VS Code Marketplace. Restart VS Code after installation.
-
In VS Code, open the Extensions view. Search for and install the Qoder CN extension.
-
Restart Visual Studio Code.
Method 2: Install from a local file
-
Download the VSIX package for VS Code:
-
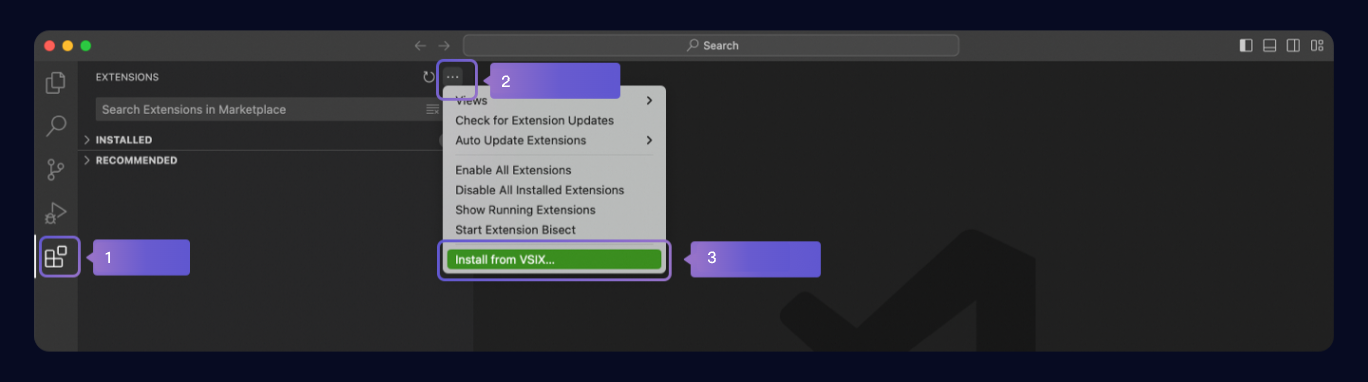
In VS Code, open the Extensions view. Click the More Actions (...) icon, select Install from VSIX..., and choose the downloaded file.
-
Restart Visual Studio Code.
Step 3: Log in and start coding
-
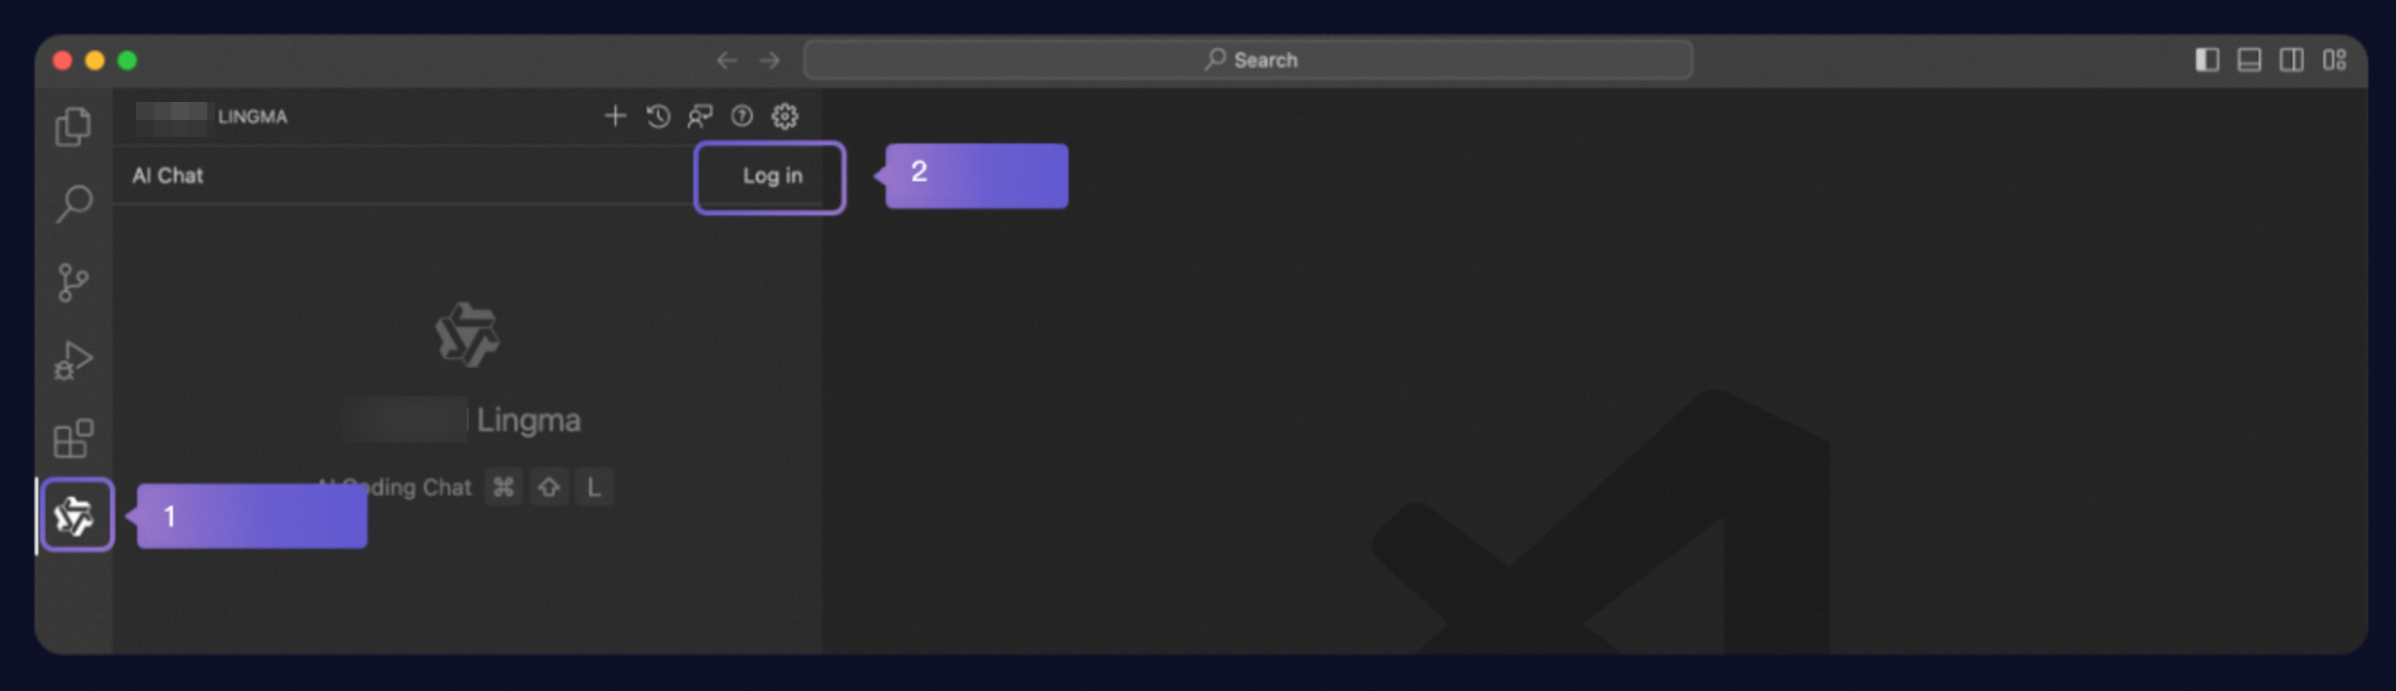
After you restart Visual Studio Code, click the Qoder CN icon in the side navigation bar. In the Qoder CN assistant window, click Log in.
 Important
If the Qoder CN icon is missing from the side bar, right-click the bar and select Qoder CN to add it.

-
You are redirected to the login page. After logging in, you can start using Qoder CN. Installation and login.