A flow transports media from a source to one or more output destinations. In MediaConnect, the media transmission feature of Intelligent Media Services (IMS), you can create, configure, and manage flows.
Prerequisites and limitations
Before you create a flow in MediaConnect, review the following:
Familiarity with MediaConnect — Understand the basics of the media transmission feature before you create a flow. For more information, see Overview and Get started with MediaConnect.
Region availability — MediaConnect is available only in some regions. For more information, see limited regions.
Billing — A running flow incurs fees, even when no audio or video data is input. For billing details, see Media transmission billing.
Create a flow
Log on to the Intelligent Media Services (IMS) console.
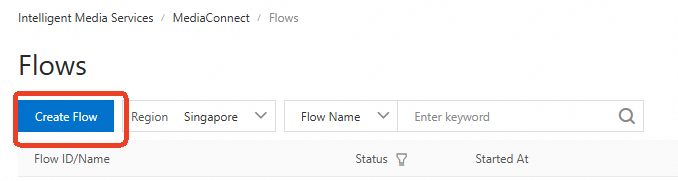
In the left-side navigation pane, choose MediaConnect > Flows, and then click Create Flow.
Configure the flow information.
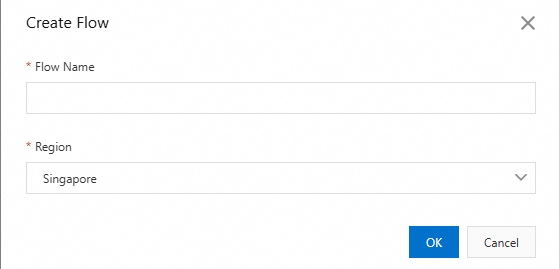
The following table describes the parameters.
Parameter
Description
Flow Name
Enter a custom name. The name can contain digits, letters, underscores (_), and hyphens (-). The maximum length is 64 characters.
Region
Valid values: Singapore, Germany (Frankfurt), China (Beijing), Saudi Arabia (Riyadh).
After you create the flow, it appears on the Flows page.
Configure a flow
After you create a flow, configure the source, the output, and other settings to meet your business requirements. On the Flows page, click the flow ID to open the flow details page. If the flow that you created is not listed, check whether a region filter is applied to the query conditions.
To manage sources and outputs after the flow starts running, see Manage a flow.
Add a source
Choose a source type based on how your stream reaches the flow:
Output from another flow — The flow uses the output of another flow as its source, which connects the two flows.
RTMP-PULL/SRT-Caller — Use this type if you already have an RTMP or SRT pull URL. The flow pulls the stream from that URL.
RTMP-PUSH/SRT-Listener — The flow generates an RTMP or SRT ingest URL. Push your stream to the generated URL.
For details about source configuration, see Add a source to a flow.
Configure source failover
Source failover uses a primary source and a backup source, so that one flow has two source addresses that you can configure as needed. When the primary source becomes unavailable, the flow automatically switches to the backup source and keeps working, which improves the stability of your business.
To enable source failover, add one source, enable source failover, and then add another source as the backup source. The backup source must use the same protocol type as the primary source. The ingest client can push streams to the primary source URL and the backup source URL at the same time. The flow receives the primary source first. If the primary source becomes unstable or abnormal, the flow stops receiving the primary source and receives the backup source instead.
Note the following behavior:
Default primary source — The default primary source is Source Stream 1.
Disabling failover — If both a primary source and a backup source exist, you cannot disable source failover.
Primary source removal — If source failover is enabled and you remove the primary source, the backup source automatically becomes the primary source.
Add an output
After you configure the source, configure the output. Choose an output type based on how you deliver the stream to its destination:
Output to another flow — The output of this flow becomes the source of another flow, which connects the two flows.
RTMP-PUSH/SRT-Caller — Use this type if you already have an RTMP or SRT ingest URL. The flow pushes the stream to that URL.
RTMP-PULL/SRT-Listener — The flow generates an RTMP or SRT pull URL from which viewers can pull the stream.
A flow supports multiple outputs, and the outputs can use different output types.
For details about output configuration, see Add an output to a flow.
Manage a flow
After a flow starts running, manage its basic information, status, sources, and outputs on the flow details page.
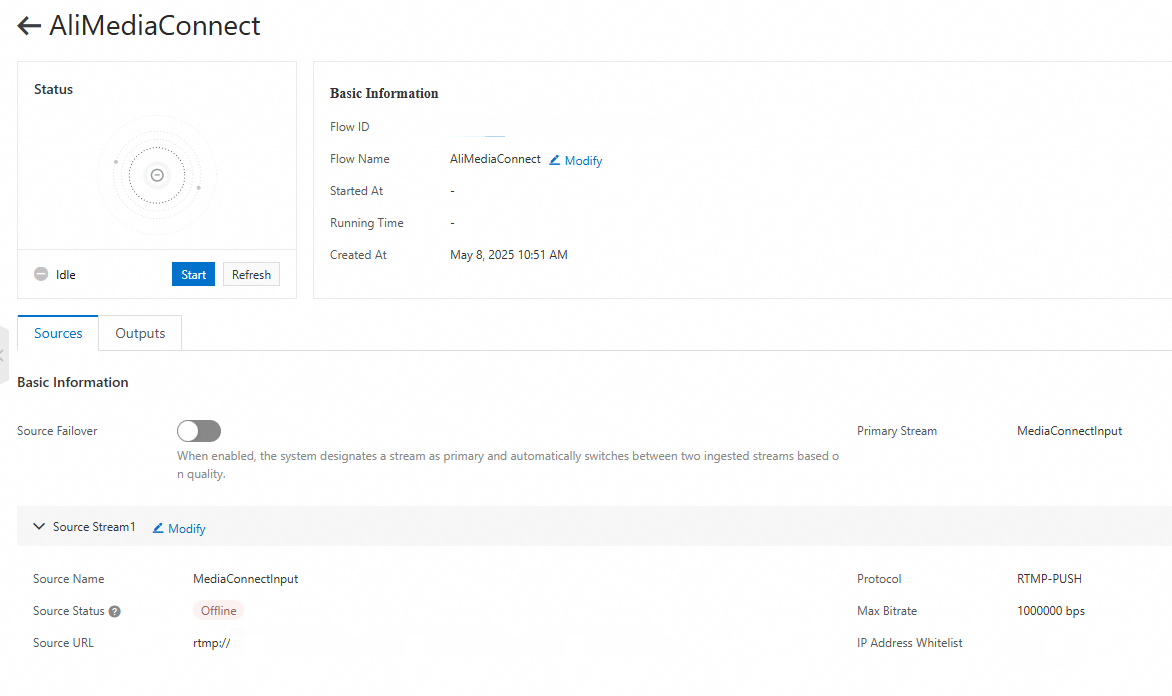
View basic information
The flow details page displays the following basic information:
Flow ID — Automatically generated after the flow is created.
Flow Name — Cannot be edited when the flow is running.
Started At — If the flow is running, shows the time of the most recent startup.
Running Time — If the flow is running, shows the time elapsed since the most recent startup.
Created At — The time when the flow was created.
View flow status
Status: idle, running, starting, or restoring. The following diagram shows an example of flow status transitions:

Start or stop a flow
You can start a flow only after you add a source, and a flow works only when it is running. If the current flow is connected to other flows (for example, the source of the current flow is the output of another flow, or the output of the current flow is the source of another flow), start those connected flows as well.
Suppose your business involves three flows that are connected as follows:

To make sure that the flows work together, start them in the order Flow 3 > Flow 2 (current flow) > Flow 1, unless your business scenario requires otherwise. Flow 1 is the data entry point, and starting it may generate a data stream. For example, if the source protocol of Flow 1 is RTMP-PULL, Flow 1 actively pulls the stream from the configured URL after it starts.
Similarly, stop the flows in the order Flow 1 > Flow 2 (current flow) > Flow 3, unless your business scenario requires otherwise. Flow 1 is the data entry point, so stop the data entry first.
Before you stop a flow, make sure that the operation does not affect your business.
If a connected flow serves more than the current flow (for example, its source URL also provides stream ingest), do not stop that connected flow.
Refresh flow information
Click Refresh to get the latest flow information, such as the flow status and the running time.
Manage sources
You cannot edit sources when the flow is running.
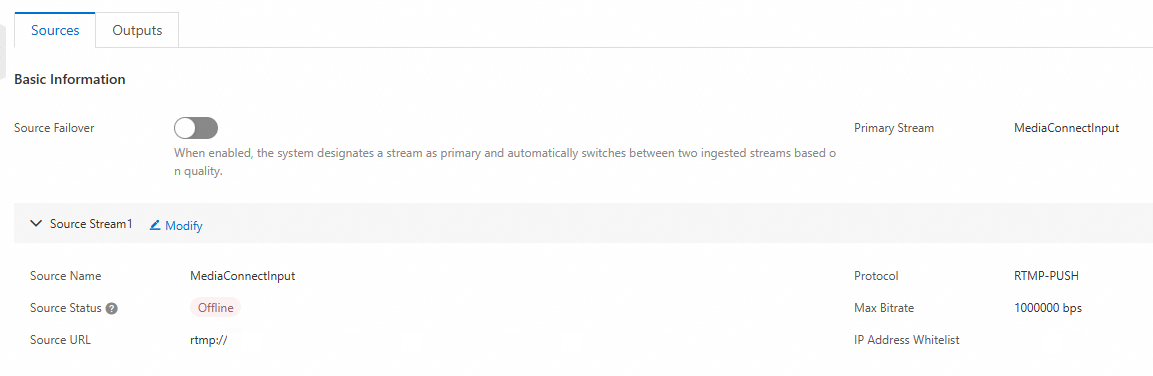
Online indicates that audio or video data is being received. Offline indicates no data input.
Edit a source
The source name and the protocol type cannot be modified.
To modify a source while maintaining business stability, follow these steps:
Stop flow.
Back up the source configuration.
Modify the source configuration.
Start flow.
Remove a source
Before you remove a source, note the following:
If only one source exists, delete the associated outputs before you remove the source.
Before removal, make sure that the source is no longer used by your business.
If another flow uses this source as its output, update the output configuration of that flow after you remove the source.
To remove a source while maintaining business stability, follow these steps:
Stop flow.
Back up the output configurations.
Delete the output configuration.
Back up the source configuration.
Click Delete Source to remove the source.
To remove the primary or backup source, follow these steps:
Stop flow.
Back up the source configuration.
Remove the source.
Manage outputs
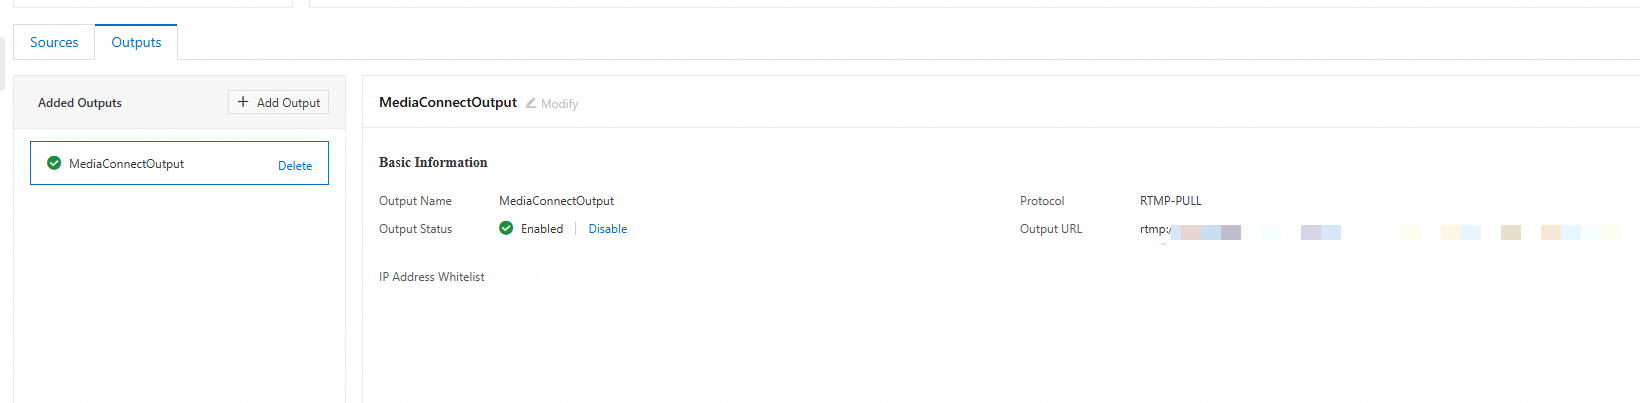
Output configurations support hot updates. You can add, edit, or delete an output without stopping the flow.
Enable an output
Outputs are enabled by default after they are added. If you disabled an output for your business, click Enable to enable it again. After the output is enabled, the flow pushes audio and video data to this destination when it receives input.
To enable an output while maintaining business stability, follow these steps:
Check the output configurations. If a flow uses this output as its source, start that flow.
When you operate the target flow, repeat step 1 as needed for your business.
Enable the output.
Disable an output
After you disable an output, the flow stops pushing audio and video data to this destination. Before you disable an output, make sure that the operation does not affect your business.
To disable an output while maintaining business stability and avoiding extra fees, follow these steps:
Disable the output.
Check the output configurations. If a flow uses this output as its source, stop that flow.
When you operate the target flow, repeat step 2 as needed for your business.
Edit an output
Besides switching between the enabled and disabled states, you can adjust output parameters, such as the output URL and the IP address blacklists and whitelists.
The output name and the protocol type cannot be modified.
You can edit an output only when it is disabled.
To edit an output while maintaining business stability, follow these steps:
Deactivate the output configuration.
Back up the output configuration.
Modify the output configuration.
Enable output configuration.
Delete an output
Deleting an output is not recommended. If an output is no longer used by your business, disable it instead. Disabling retains the configuration for future reference or re-enabling.
Before deletion, make sure that the output is no longer used by your business.
If another flow uses this output as its source, update the source configuration of that flow after you delete the output.
If you must delete an output for your business, follow these steps:
Deactivate the output configuration.
Back up the output configuration.
Delete the output.
Delete a flow
Deleting a flow is not recommended. If a flow is no longer used by your business, stop it instead. After you stop a flow, it no longer processes data, but its configuration is retained for future reference or restart.
Before you delete a flow, make sure that the related business no longer uses it.
If you must delete a flow for your business, follow these steps:
Stop flow.
Back up the flow configuration, including the source and output configurations.
Delete the output configuration.
Remove the source stream.
Delete the flow.