Connect an outbound OpenLDAP directory to IDaaS to sync organizations and accounts from IDaaS to OpenLDAP, and optionally delegate authentication to OpenLDAP so users can log on to IDaaS with their LDAP credentials.
Use the network endpoint feature to sync LDAP data and delegate authentication without opening public ports on your LDAP server.
Prerequisites
Before you begin, make sure you have:
An IDaaS instance with console access
An OpenLDAP server with an administrator account that has at least read permission
The administrator account in Distinguished Name (DN) format — for example,
cn=admin,ou=Technical Department,dc=example,dc=com(Optional) A dedicated network access endpoint if you want to access your LDAP server over an Alibaba Cloud VPC private network
Connect to OpenLDAP
The connection flow has three steps: establish the connection, choose sync scenarios, and configure field mapping.
Step 1: Establish the connection
Log on to the IDaaS console. Select your IDaaS instance and click Console in the Actions column.IDaaS console
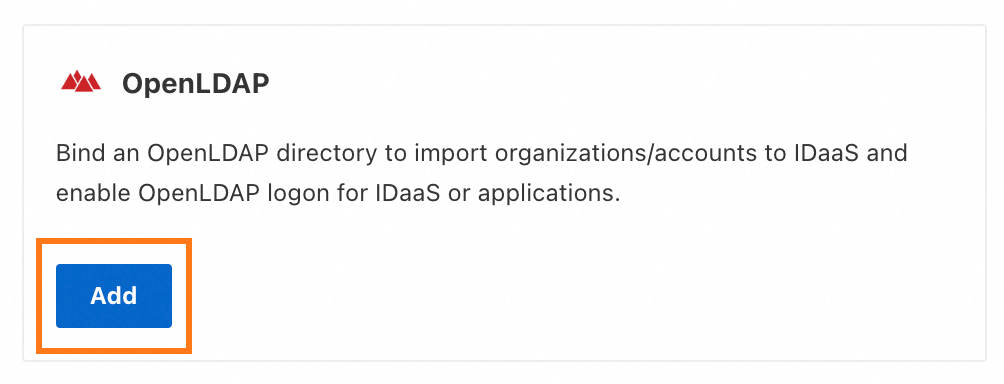
Go to IdPs > Outbound > Add Outbound. Find OpenLDAP in the list and click Add.
On the Connect to OpenLDAP panel, fill in the following fields.
Field Description Display Name The name users see when they log on to IDaaS or use an integrated application. Network Access Endpoint Controls how IDaaS routes requests to your LDAP server. Shared endpoints use fixed public egress IPs — add these IPs to your LDAP server's allowlist. Dedicated endpoints use custom private or public egress IPs and can access your LDAP server over an Alibaba Cloud VPC private network, removing the need to open public ports. For details, see Network endpoints. Server address The address of your LDAP server. The default LDAP port is 389 — for example, 127.0.0.1:389. Use port 636 when enabling LDAPS or StartTLS.Enable StartTLS Encrypts the LDAP connection using StartTLS. Enabling this significantly improves transmission security. See LDAP security configuration for setup details. Administrator Account The LDAP account IDaaS uses to read directory data for sync and delegated authentication. Must have at least read permission and must be in DN format — for example, cn=admin,ou=Technical Department,dc=example,dc=com.Administrator Password The password for the administrator account. 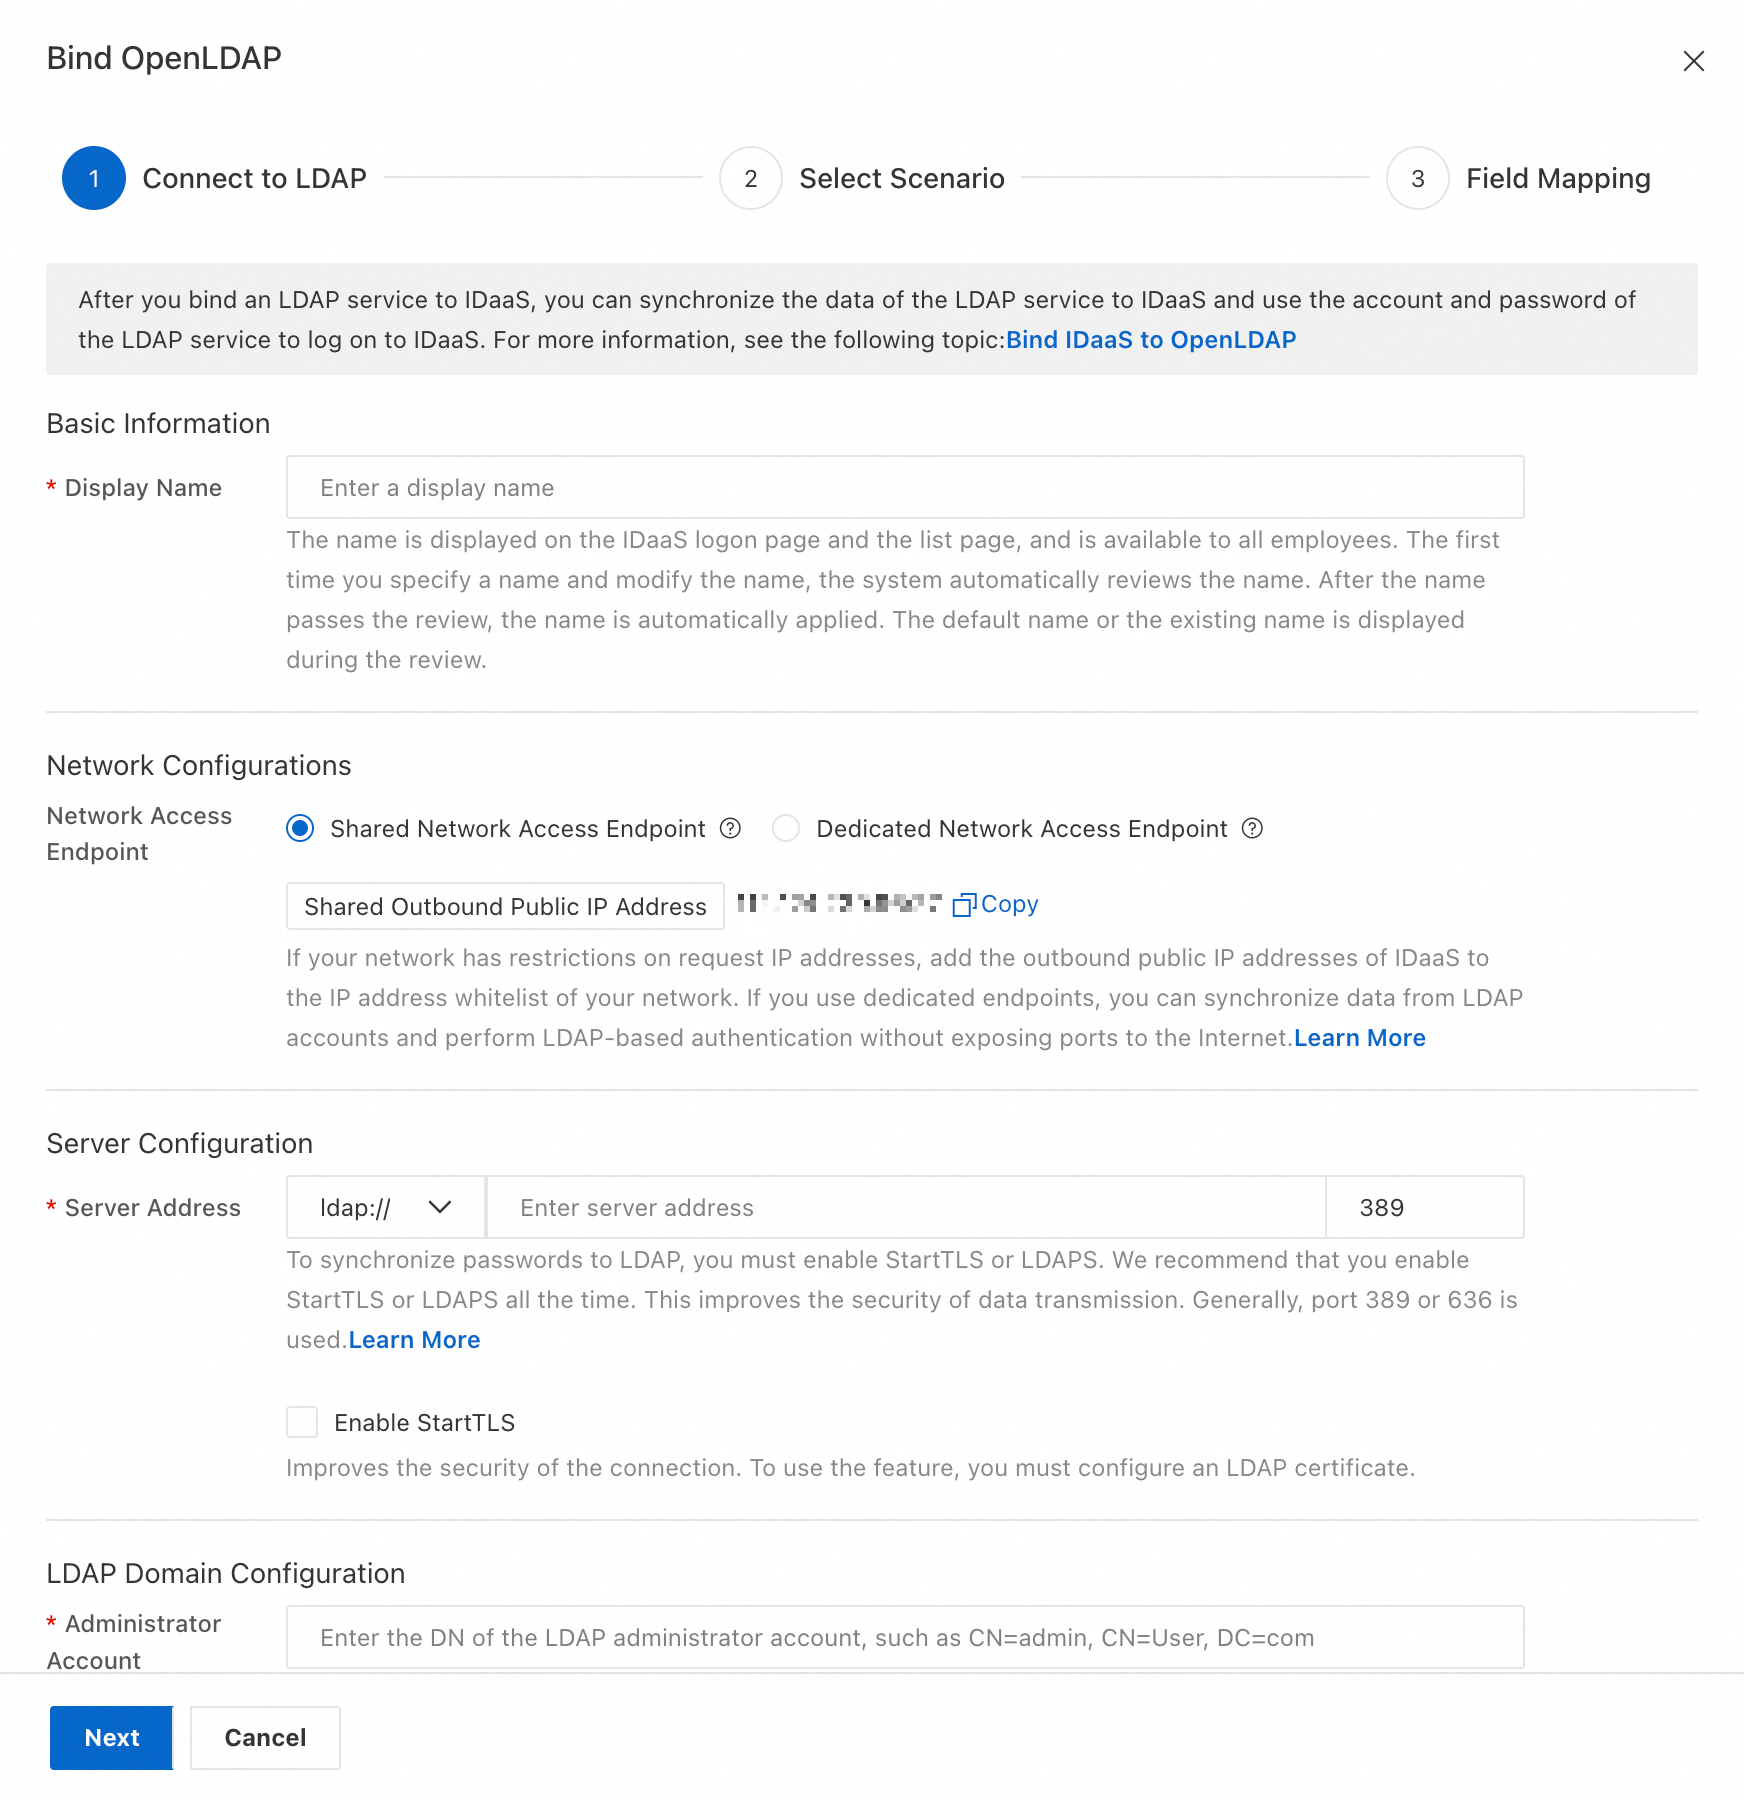
Click Next.
Step 2: Select scenario
On the Select Scenario page, choose which operations IDaaS performs against your LDAP directory.
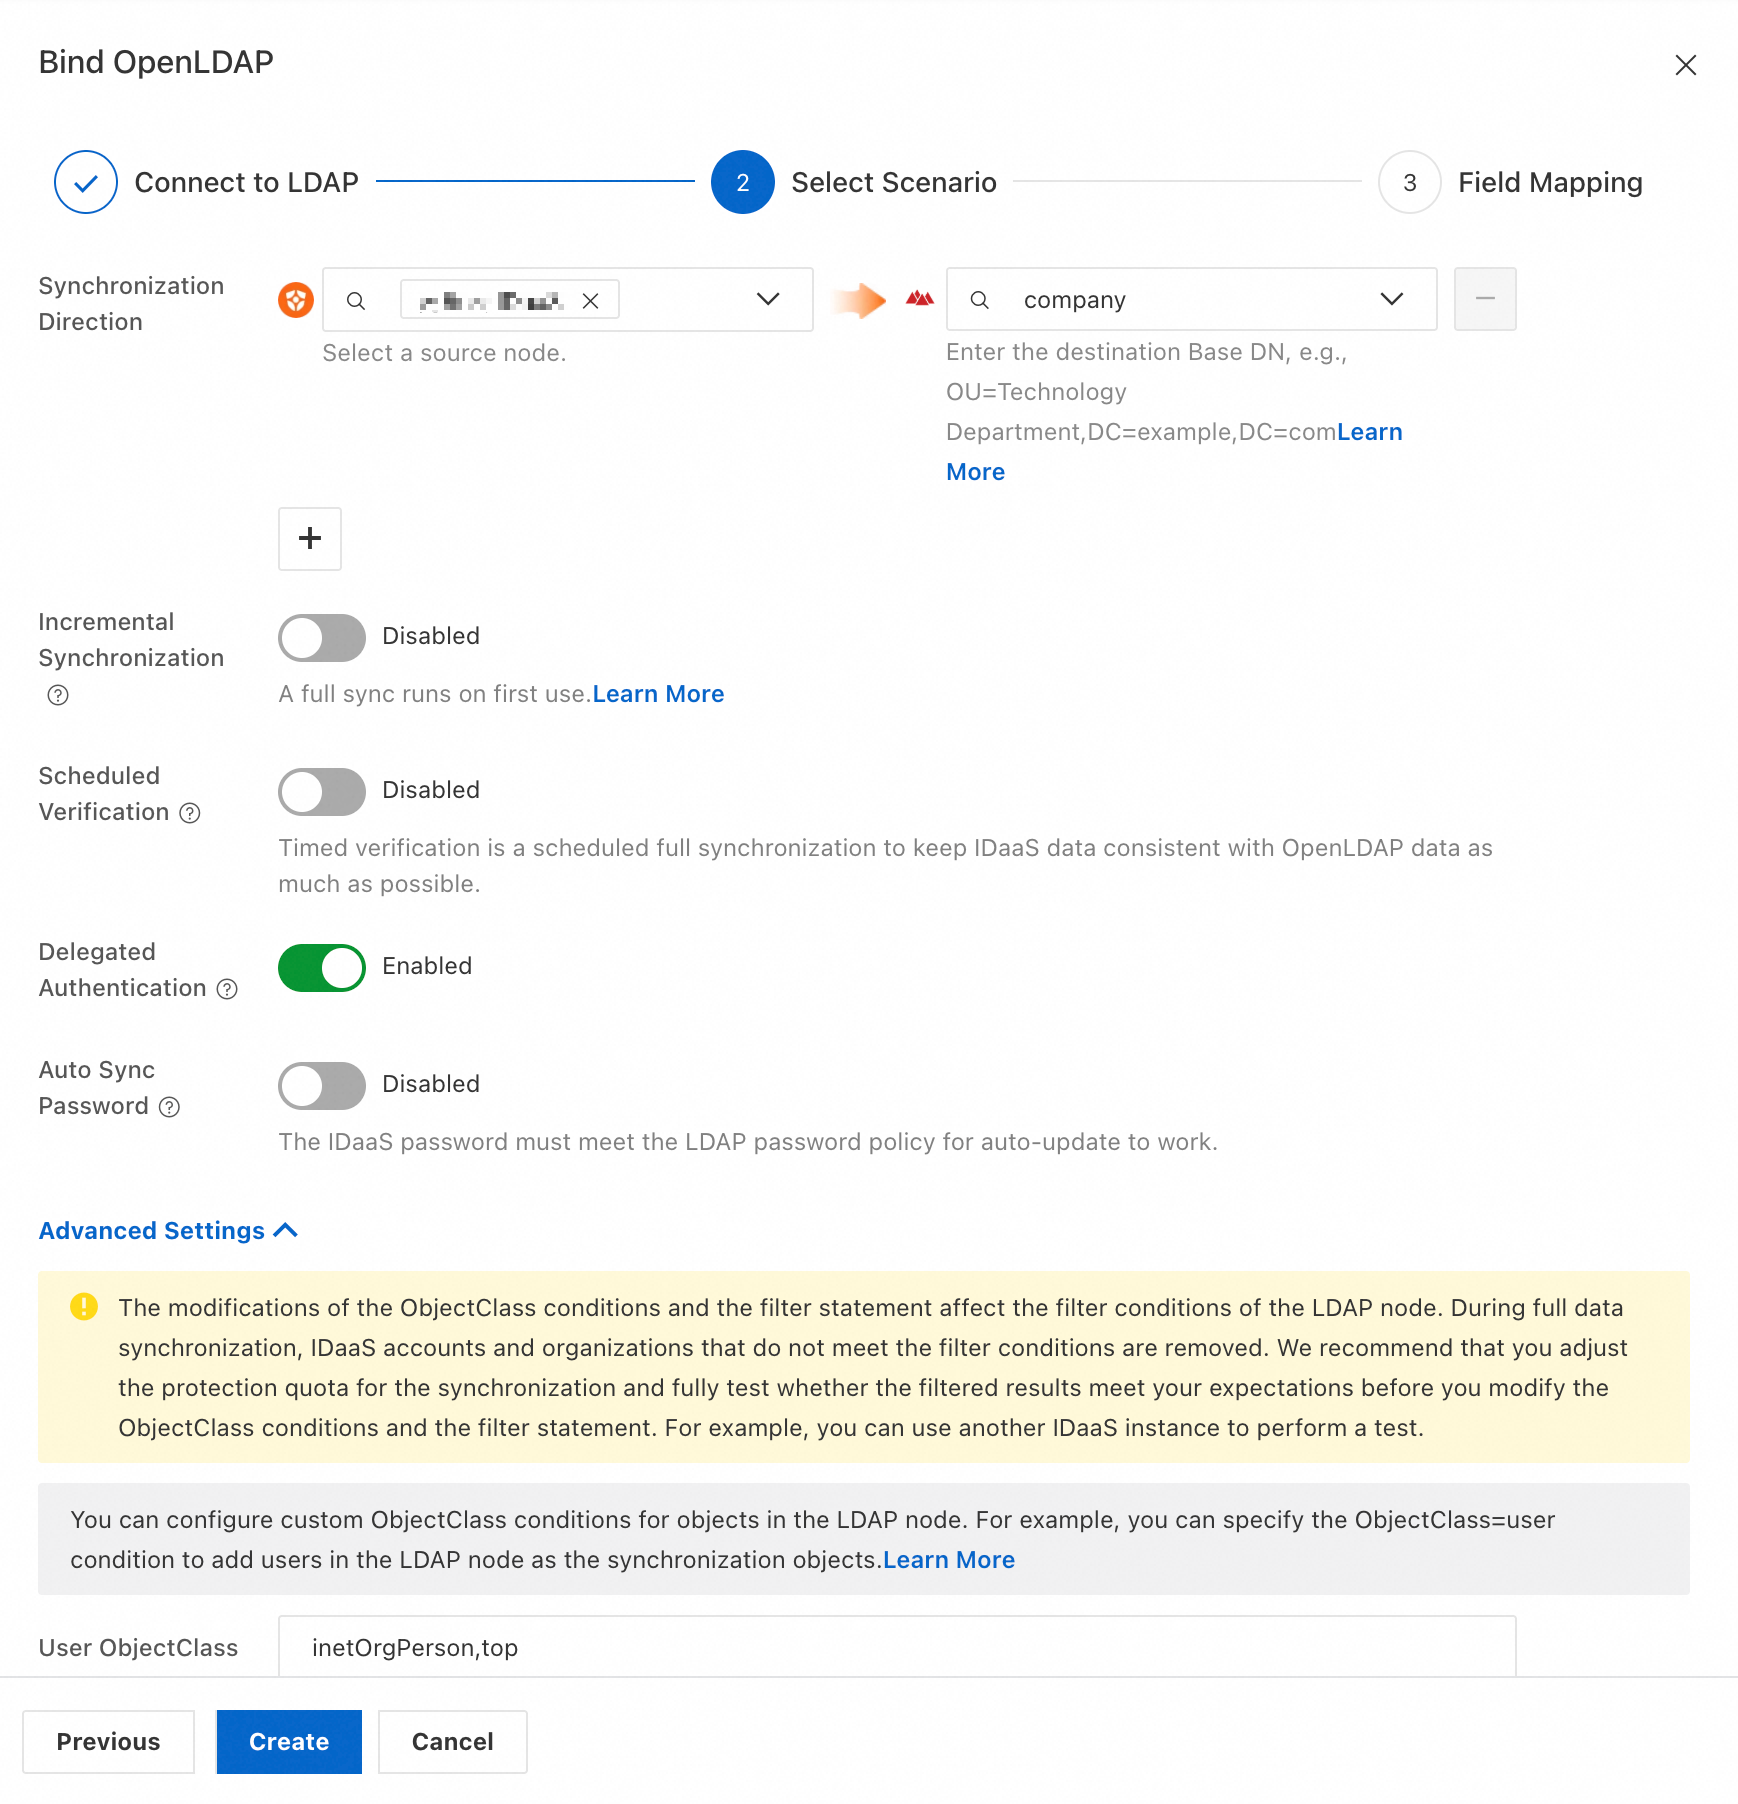
Basic configuration
| Setting | What it does |
|---|---|
| Synchronization Direction | Pushes data from a source IDaaS node to LDAP. Set Source Node to an IDaaS node and Target Node to the DN of the LDAP destination node. The root DN is typically your domain — for example, dc=example,dc=com. |
| Incremental Provisioning | Exports changes made in IDaaS to LDAP in real time. |
| Scheduled Verification | Runs a full sync on a schedule to keep IDaaS and LDAP data consistent. |
| Delegated Authentication | Lets users log on to IDaaS using their LDAP account credentials. |
| Automatic Password Update | Syncs IDaaS account passwords to LDAP when users are provisioned. Requires an SSL connection. IDaaS account passwords must also meet your LDAP password policy. |
Advanced configuration
| Setting | What it does |
|---|---|
| User ObjectClass / Organization ObjectClass | Defines how IDaaS identifies users and organizations in LDAP. Objects whose objectClass matches the specified value are treated as users or organizations. For example, inetOrgPerson,posixAccount,top for users and organizationalUnit for organizations. Change these only if your directory uses a custom schema. If you customize ObjectClass, keep the values consistent across all objects — inconsistent values cause IDaaS to misclassify or skip objects during sync. |
| User RDN / Organization RDN | The attribute IDaaS uses as the Relative Distinguished Name (RDN) when writing objects to LDAP. IDaaS uses ou as the RDN for organizations by default. Change this only if your LDAP schema requires a different attribute. |
| User Sign-in ID | The LDAP attributes IDaaS queries when a user attempts to log on via delegated authentication. IDaaS matches the attribute value against the user's login input, then verifies the password. Separate multiple attributes with a comma to create an OR relationship — a user can log on with any of the specified attributes. Make sure each attribute corresponds to the same LDAP user; otherwise, the user cannot log on. Typical attributes: uid, mobile phone number, email address, employee ID. |
Step 3: Configure field mapping
Field mapping controls how IDaaS fields correspond to LDAP attributes. Configure this step if you have existing LDAP data you want to link to IDaaS accounts, or if you want to use specific IDaaS field values as LDAP attribute values — for example, using an IDaaS mobile number as the LDAP username.
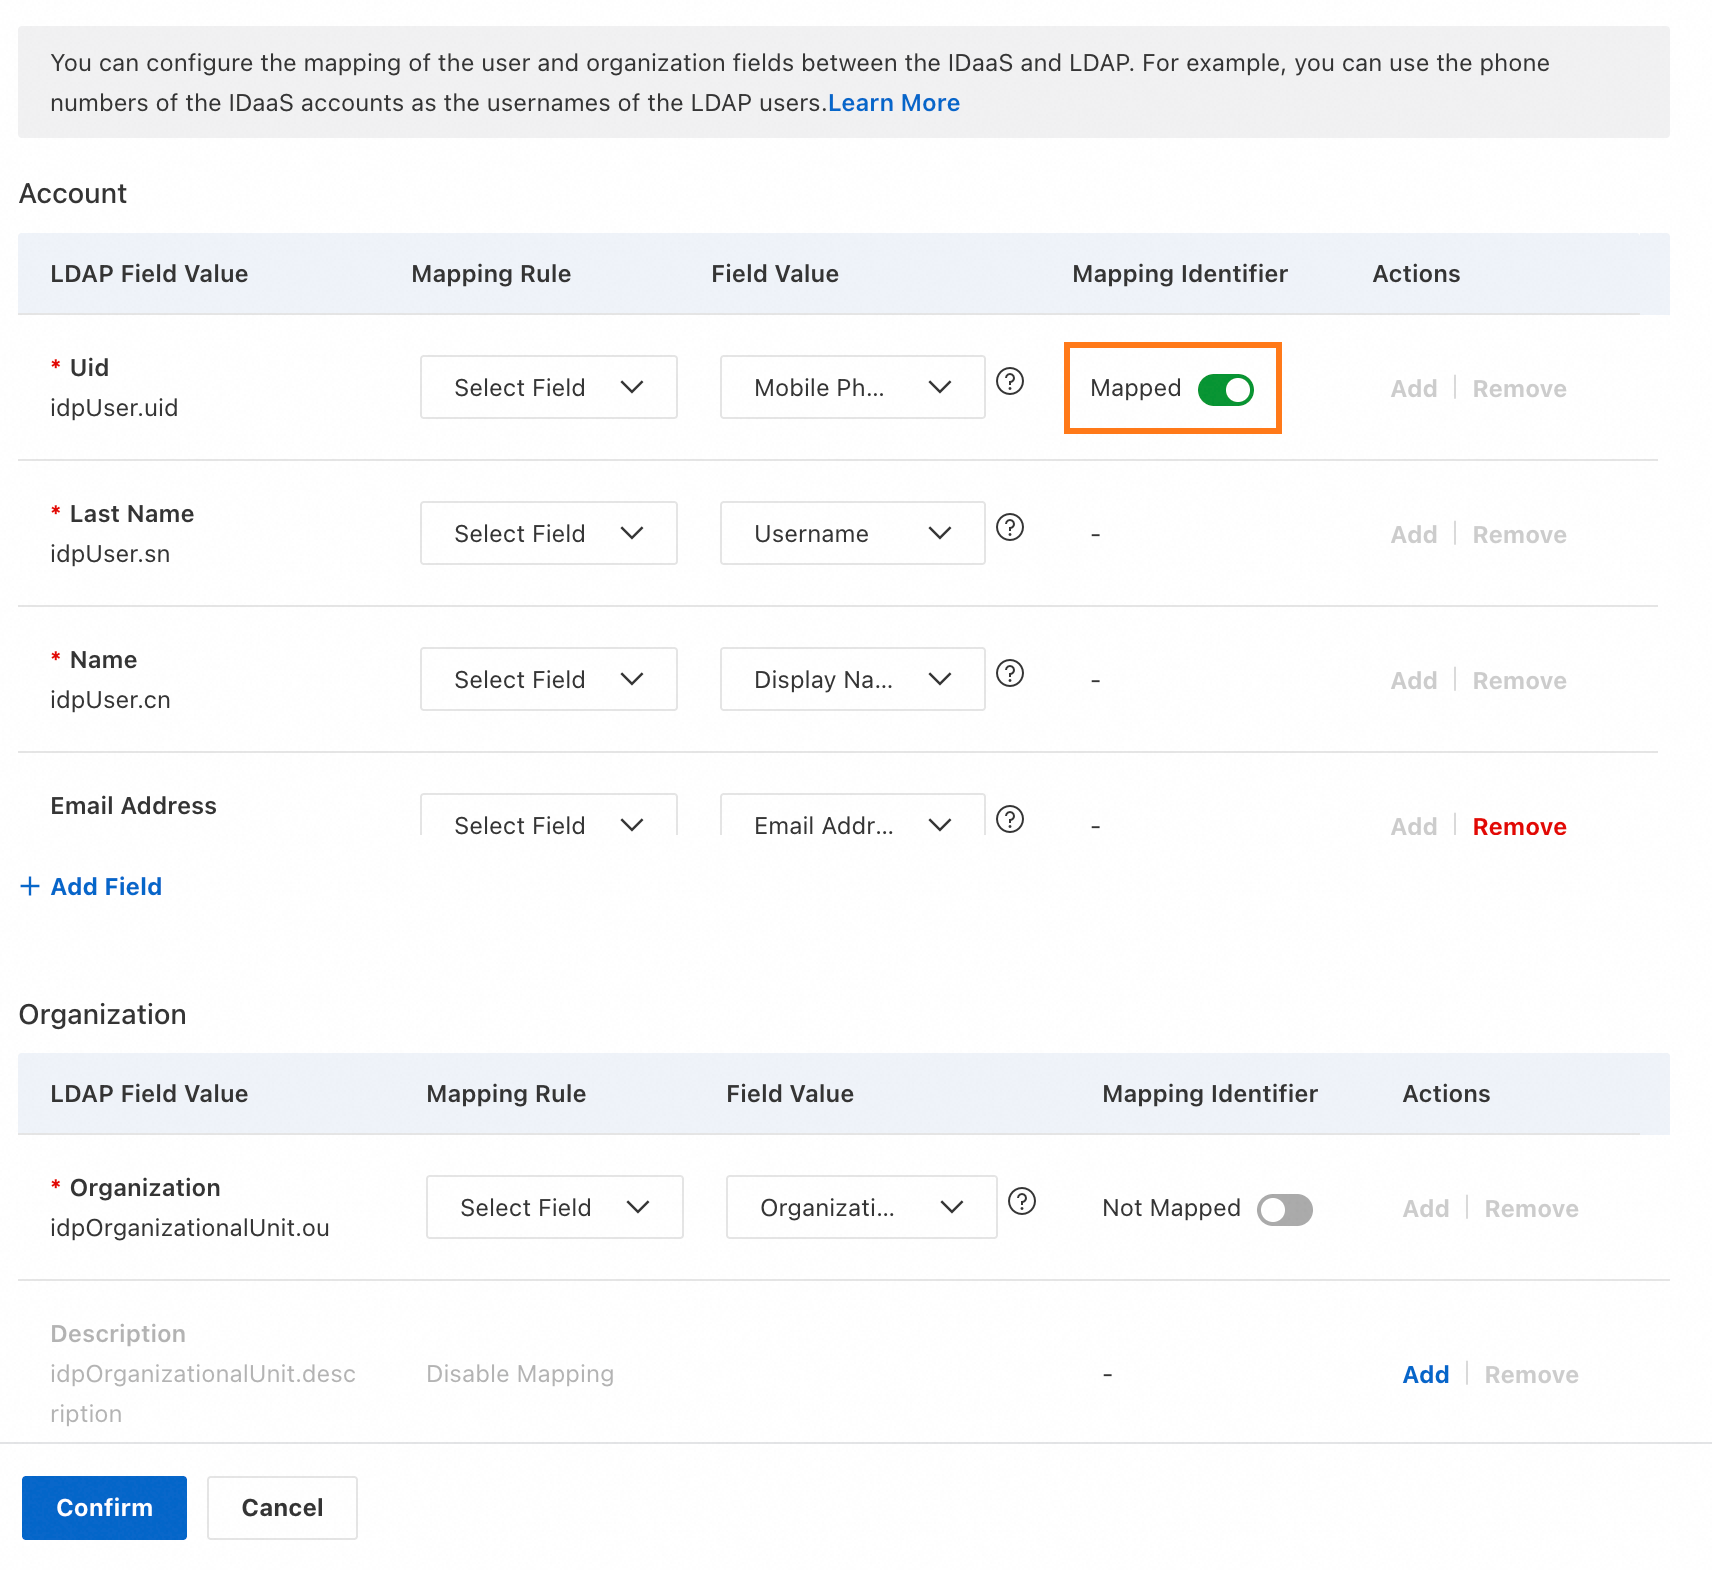
To match an IDaaS field to an LDAP account during sync, enable Mapping Identifier for that field — for example, the Mobile Phone field shown above.
When you're done, click Save and Push to save the configuration and immediately trigger a full sync from the source IDaaS node to the target LDAP node. To save the configuration without triggering a sync, click Save Only.
For a full reference on field mapping options, see Field mapping.
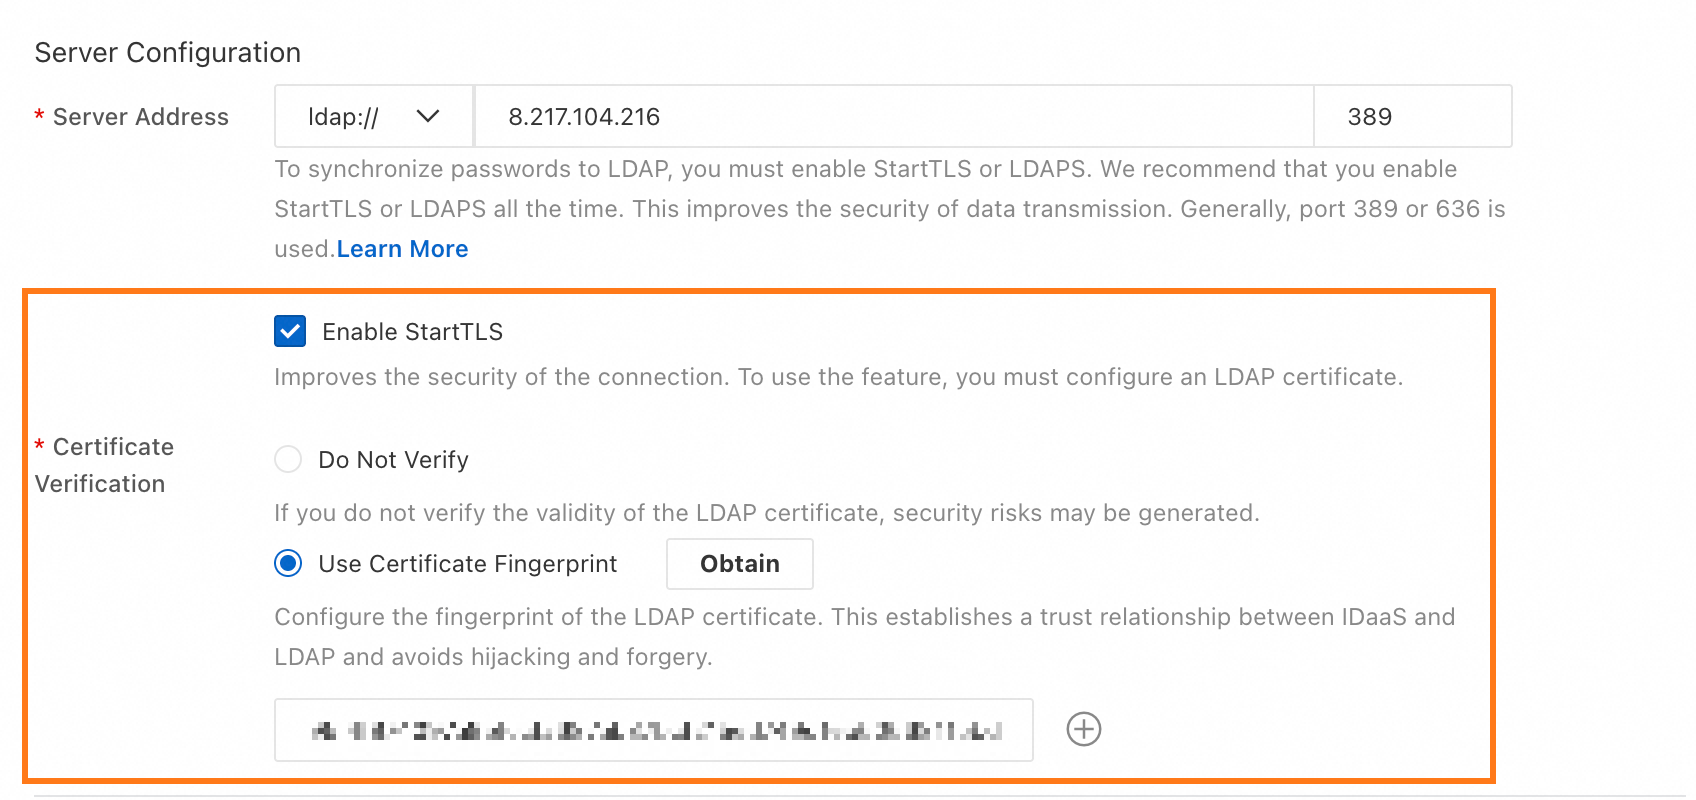
LDAP security configuration
By default, LDAP transmits data in plaintext. Use LDAPS or StartTLS to encrypt data in transit — configure a certificate in your LDAP server first, then enable the corresponding option in IDaaS.
After you configure the certificate, IDaaS can retrieve the certificate fingerprint with a single click. This establishes a trust relationship between IDaaS and the LDAP certificate, protecting against certificate forgery.
LDAP personalization
ObjectClass
In LDAP, an ObjectClass is a named set of attributes that defines what an object represents — a user, an organization, or a computer. Every object in LDAP must have at least one objectClass.
For example, if you set User ObjectClass to inetOrgPerson,posixAccount,top in IDaaS, any LDAP object with those classes is treated as a user. To view the objectClass values assigned to an object, edit it directly in your LDAP directory tool.
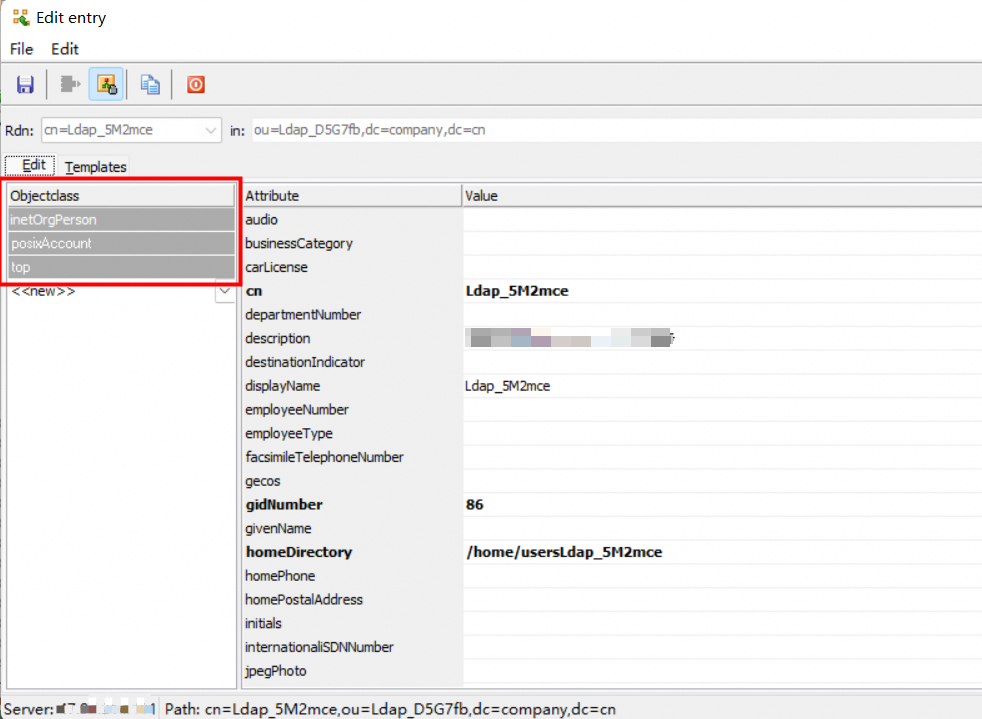
If you customize ObjectClass for users or organizations, keep the values consistent across your directory. Inconsistent ObjectClass values cause IDaaS to misclassify or skip objects during sync.
Logon identity
During delegated authentication, IDaaS uses the attributes configured in User Sign-in ID to locate the user in LDAP and verify their password.
Common logon identity attributes: uid, mobile phone number, email address, employee ID. Define these when first creating the LDAP connection or later in the Delegated Authentication settings.
If you configure multiple attributes, make sure that each attribute corresponds to the same LDAP user. Otherwise, the user cannot use delegated authentication.
LDAP synchronization configuration
Get the base DN
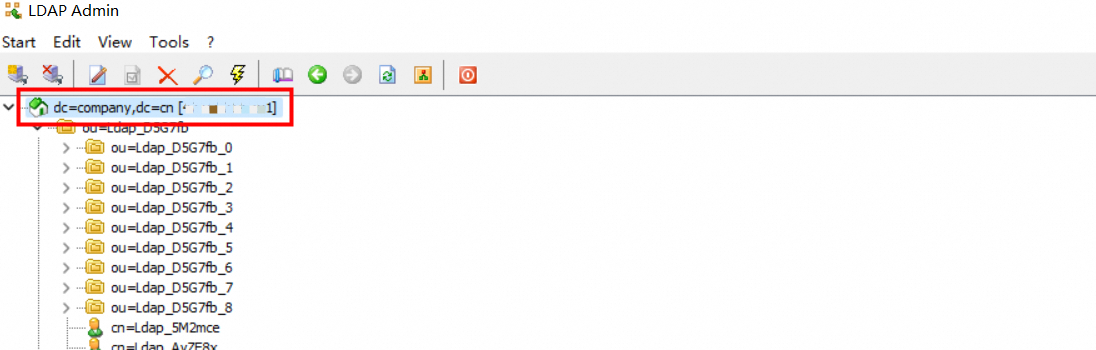
The Base DN is the LDAP node path that scopes all IDaaS operations — IDaaS only queries and syncs data under this node. Set the Base DN for the target node in Synchronization Direction.
DN format: ou=AnOrganization,dc=example,dc=com. The root DN is typically your domain: dc=example,dc=com. To find a node's DN, view or edit it directly in your LDAP directory tool.
When you configure a target sync node in IDaaS, IDaaS records the node's entryUUID as a fingerprint alongside the Base DN. If the node path changes and the Base DN no longer matches the stored fingerprint, IDaaS blocks further sync to prevent data errors. Reconfigure the target node in IDaaS to resume sync.
Scheduled check
IDaaS automatically runs a full sync of all data under the source IDaaS node according to the Scheduled Check interval. To run a full sync immediately without waiting for the next scheduled run, trigger it manually from the IDaaS console.