After you complete the Android SDK integration process, you can use the custom resolution feature of HTTPDNS to resolve a business domain name to an invalid IP address and verify that the integration is successful. This topic describes the specific testing methods and steps.
Validation Principle
HTTPDNS sends resolution requests directly to Alibaba Cloud DNS servers using HTTP or HTTPS protocols. This bypasses the system’s Local DNS and prevents resolution failures caused by network environments.
Error injection testing relies on HTTPDNS’s custom resolution feature. You can set the resolution result for a target business domain name to an invalid IP address to manually inject a controllable parsing error. When making network requests in an error-injected environment:
If the request succeeds, the app still uses Local DNS for resolution and returns a normal IP address. This indicates that HTTPDNS integration failed.
If the request fails, the app used the invalid IP address returned by HTTPDNS. This indicates that HTTPDNS integration succeeded.
Test Preparation
Test device: An Android phone or emulator with internet access.
App status: EMAS HTTPDNS SDK integrated.
Test domain name: A business domain name configured and properly resolved in the Alibaba Cloud HTTPDNS console.
Testing Steps
Step 1: Normal Network Validation
Connect the test device to any available Wi-Fi network and keep the default DNS settings.

With HTTPDNS disabled, open the app and trigger any network request that accesses a domain name, such as loading the home page or making API calls.
Confirm that the request returns normally.
This step establishes a baseline and ensures that the app and service function correctly in a normal network environment.
Step 2: Error Injection (Custom Resolution)
Log on to the EMAS console.
In the left navigation pane, choose Resolution Management > Custom Resolution.
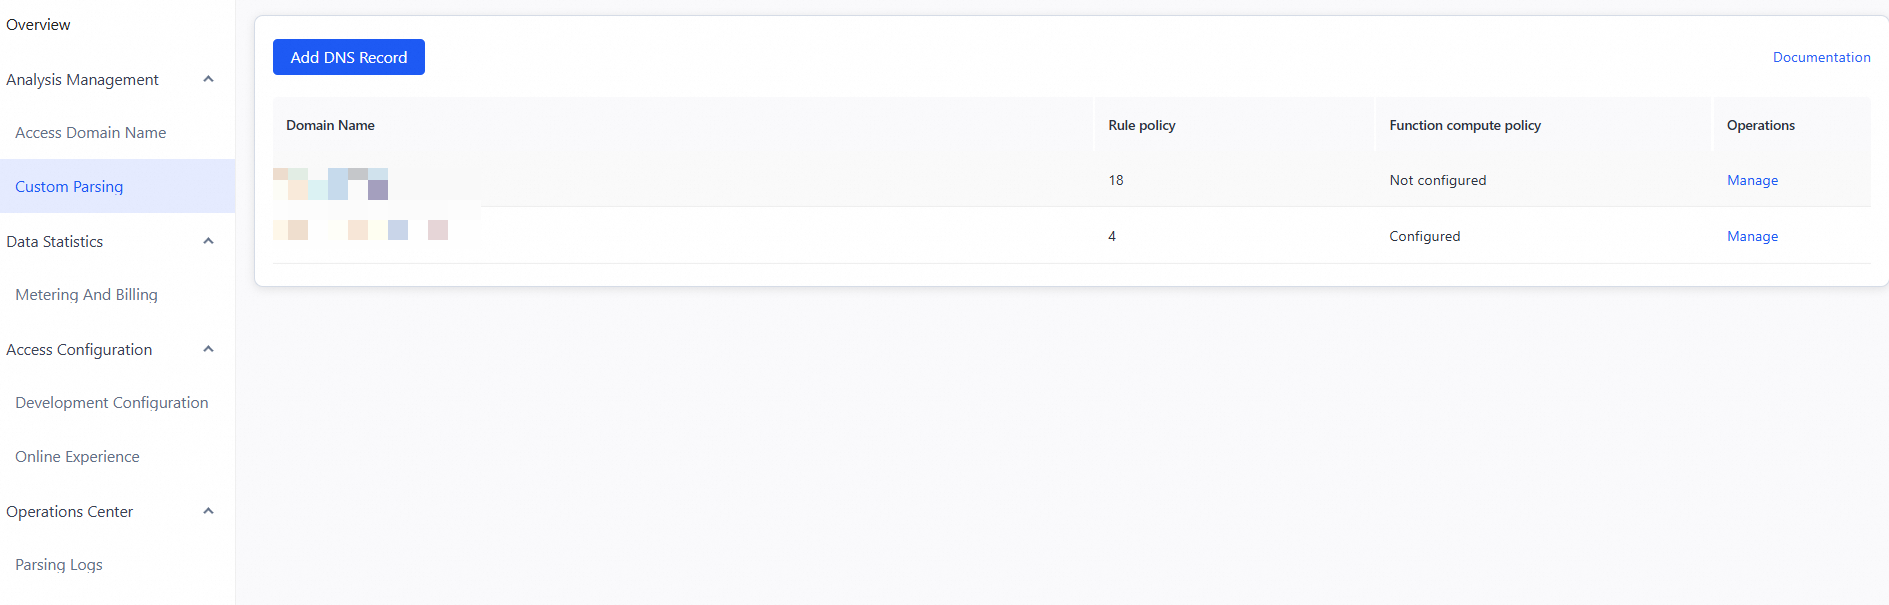
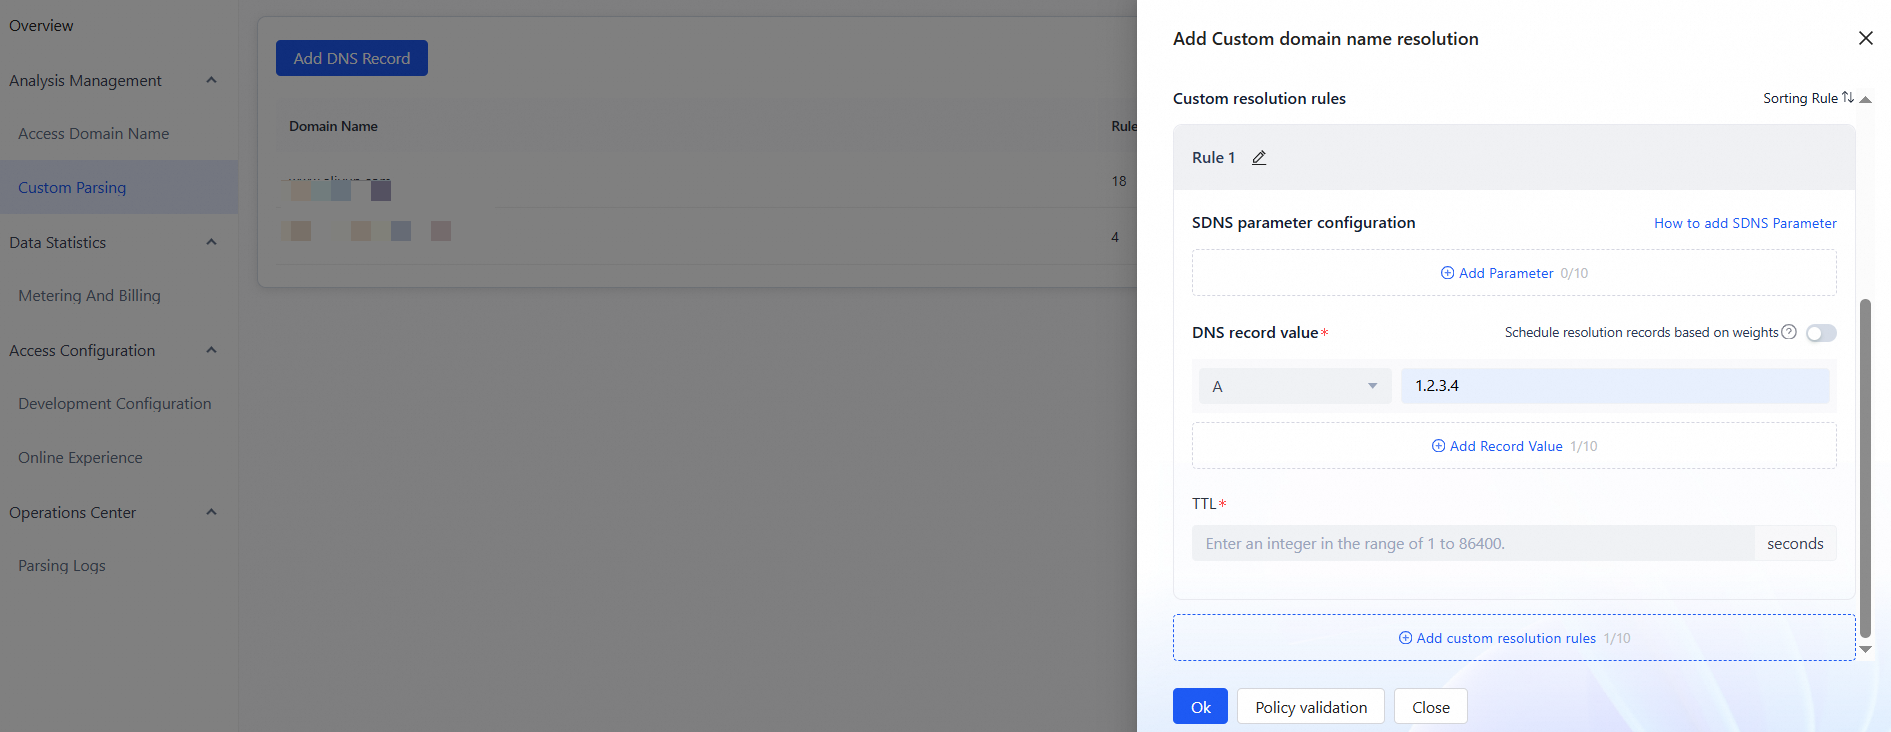
Refer to Configure rule-based custom DNS resolution to add a custom DNS record and set it to resolve to an invalid IP address.
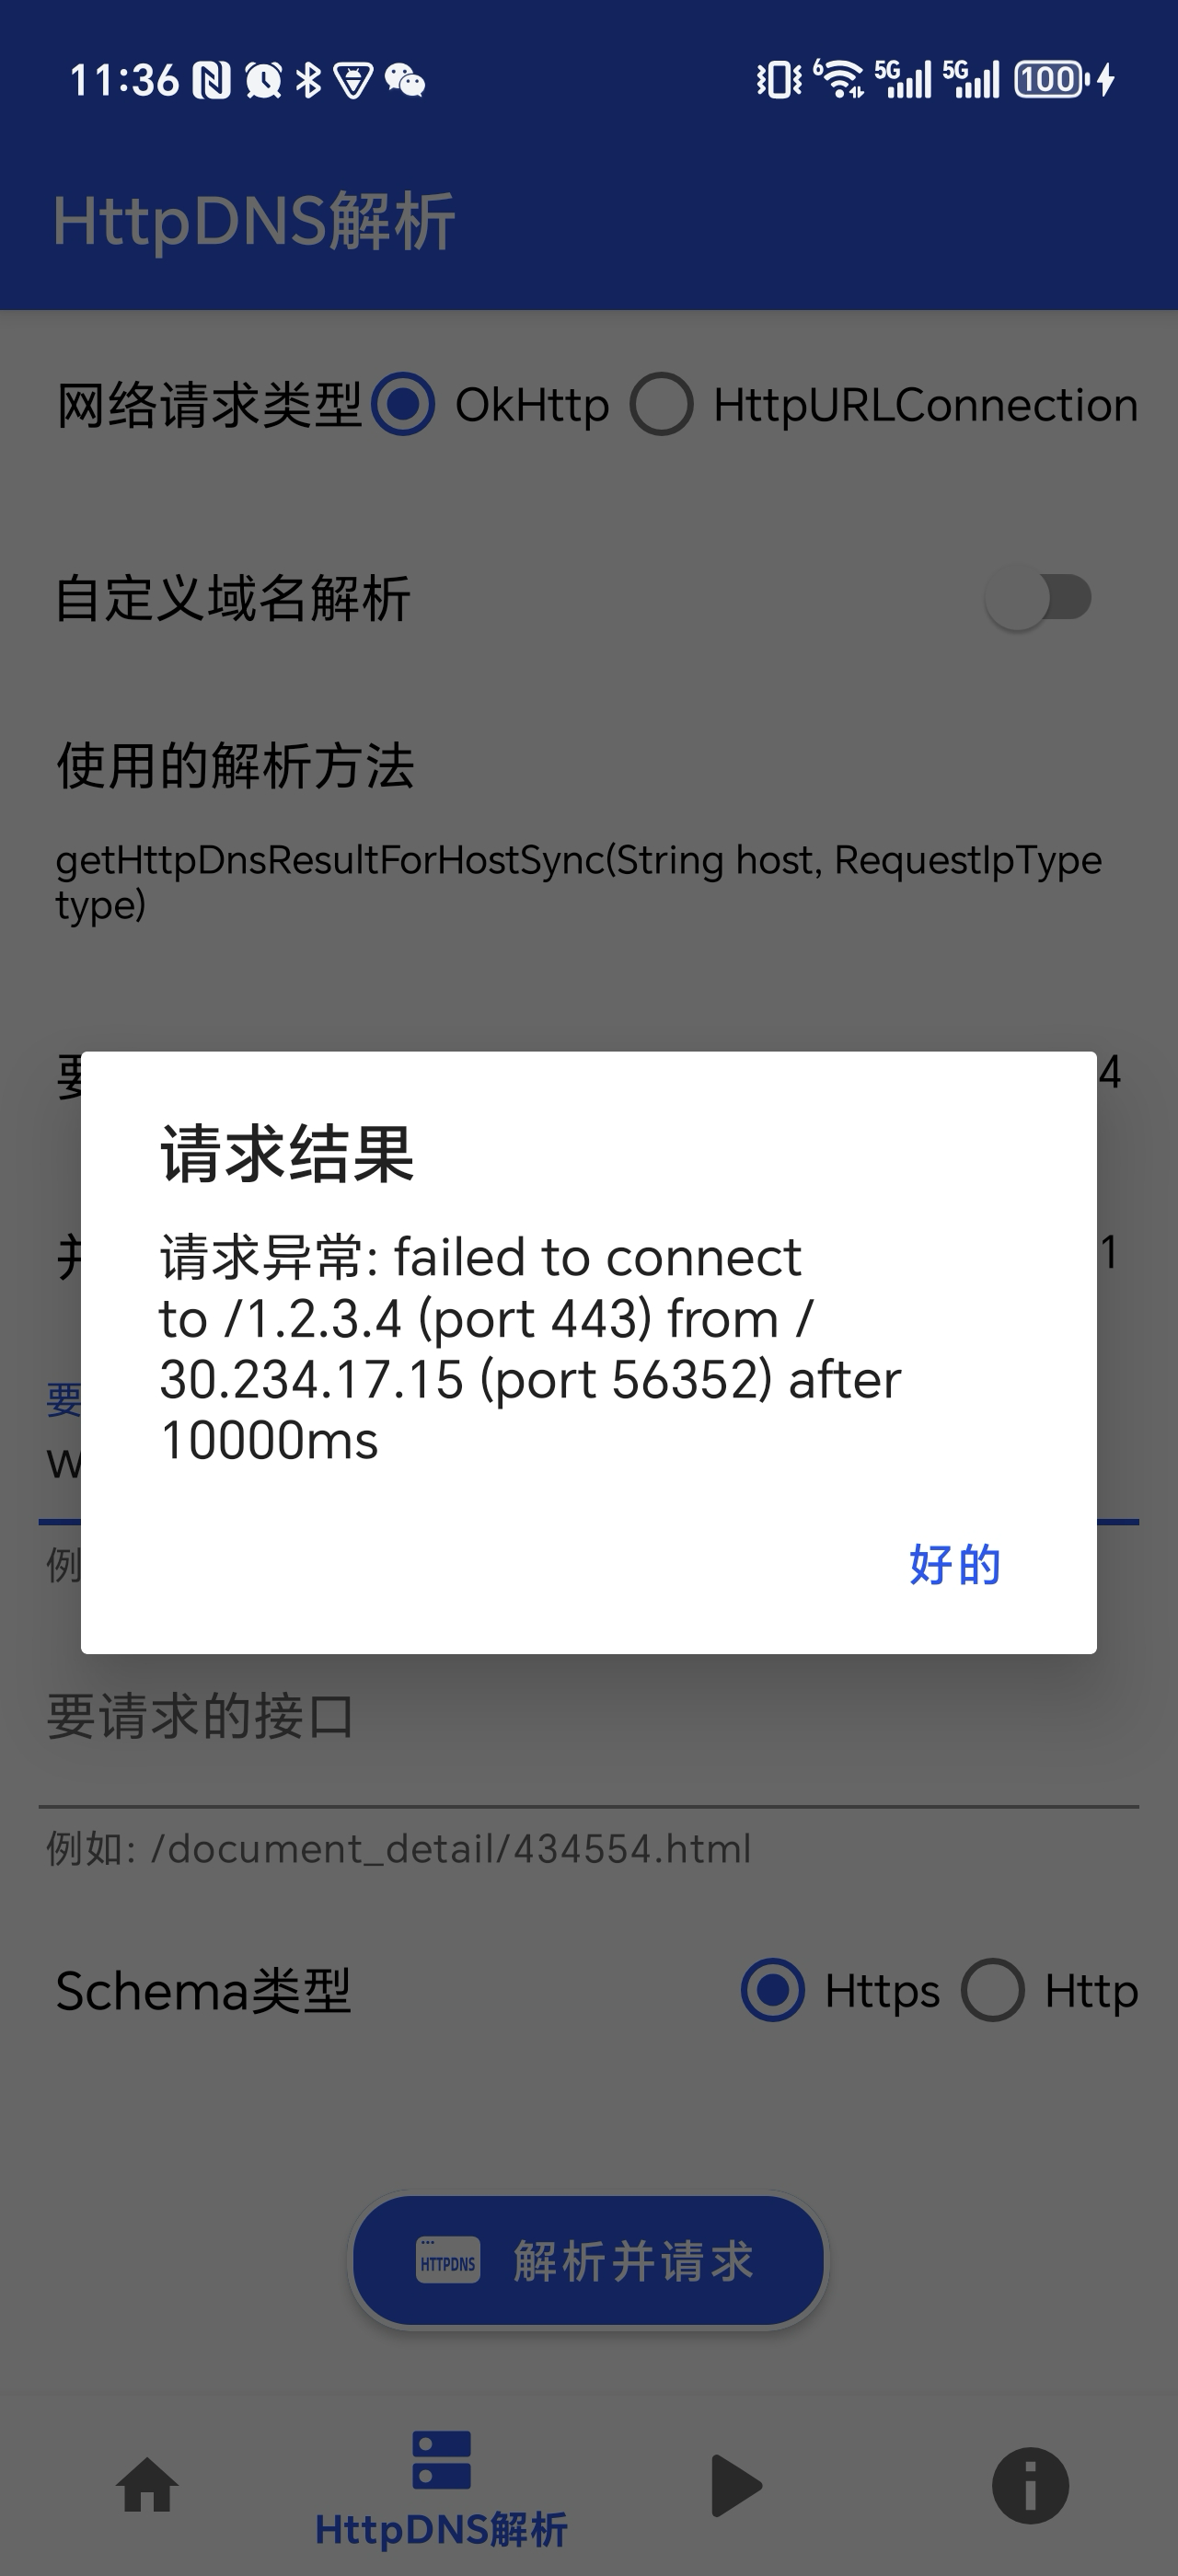
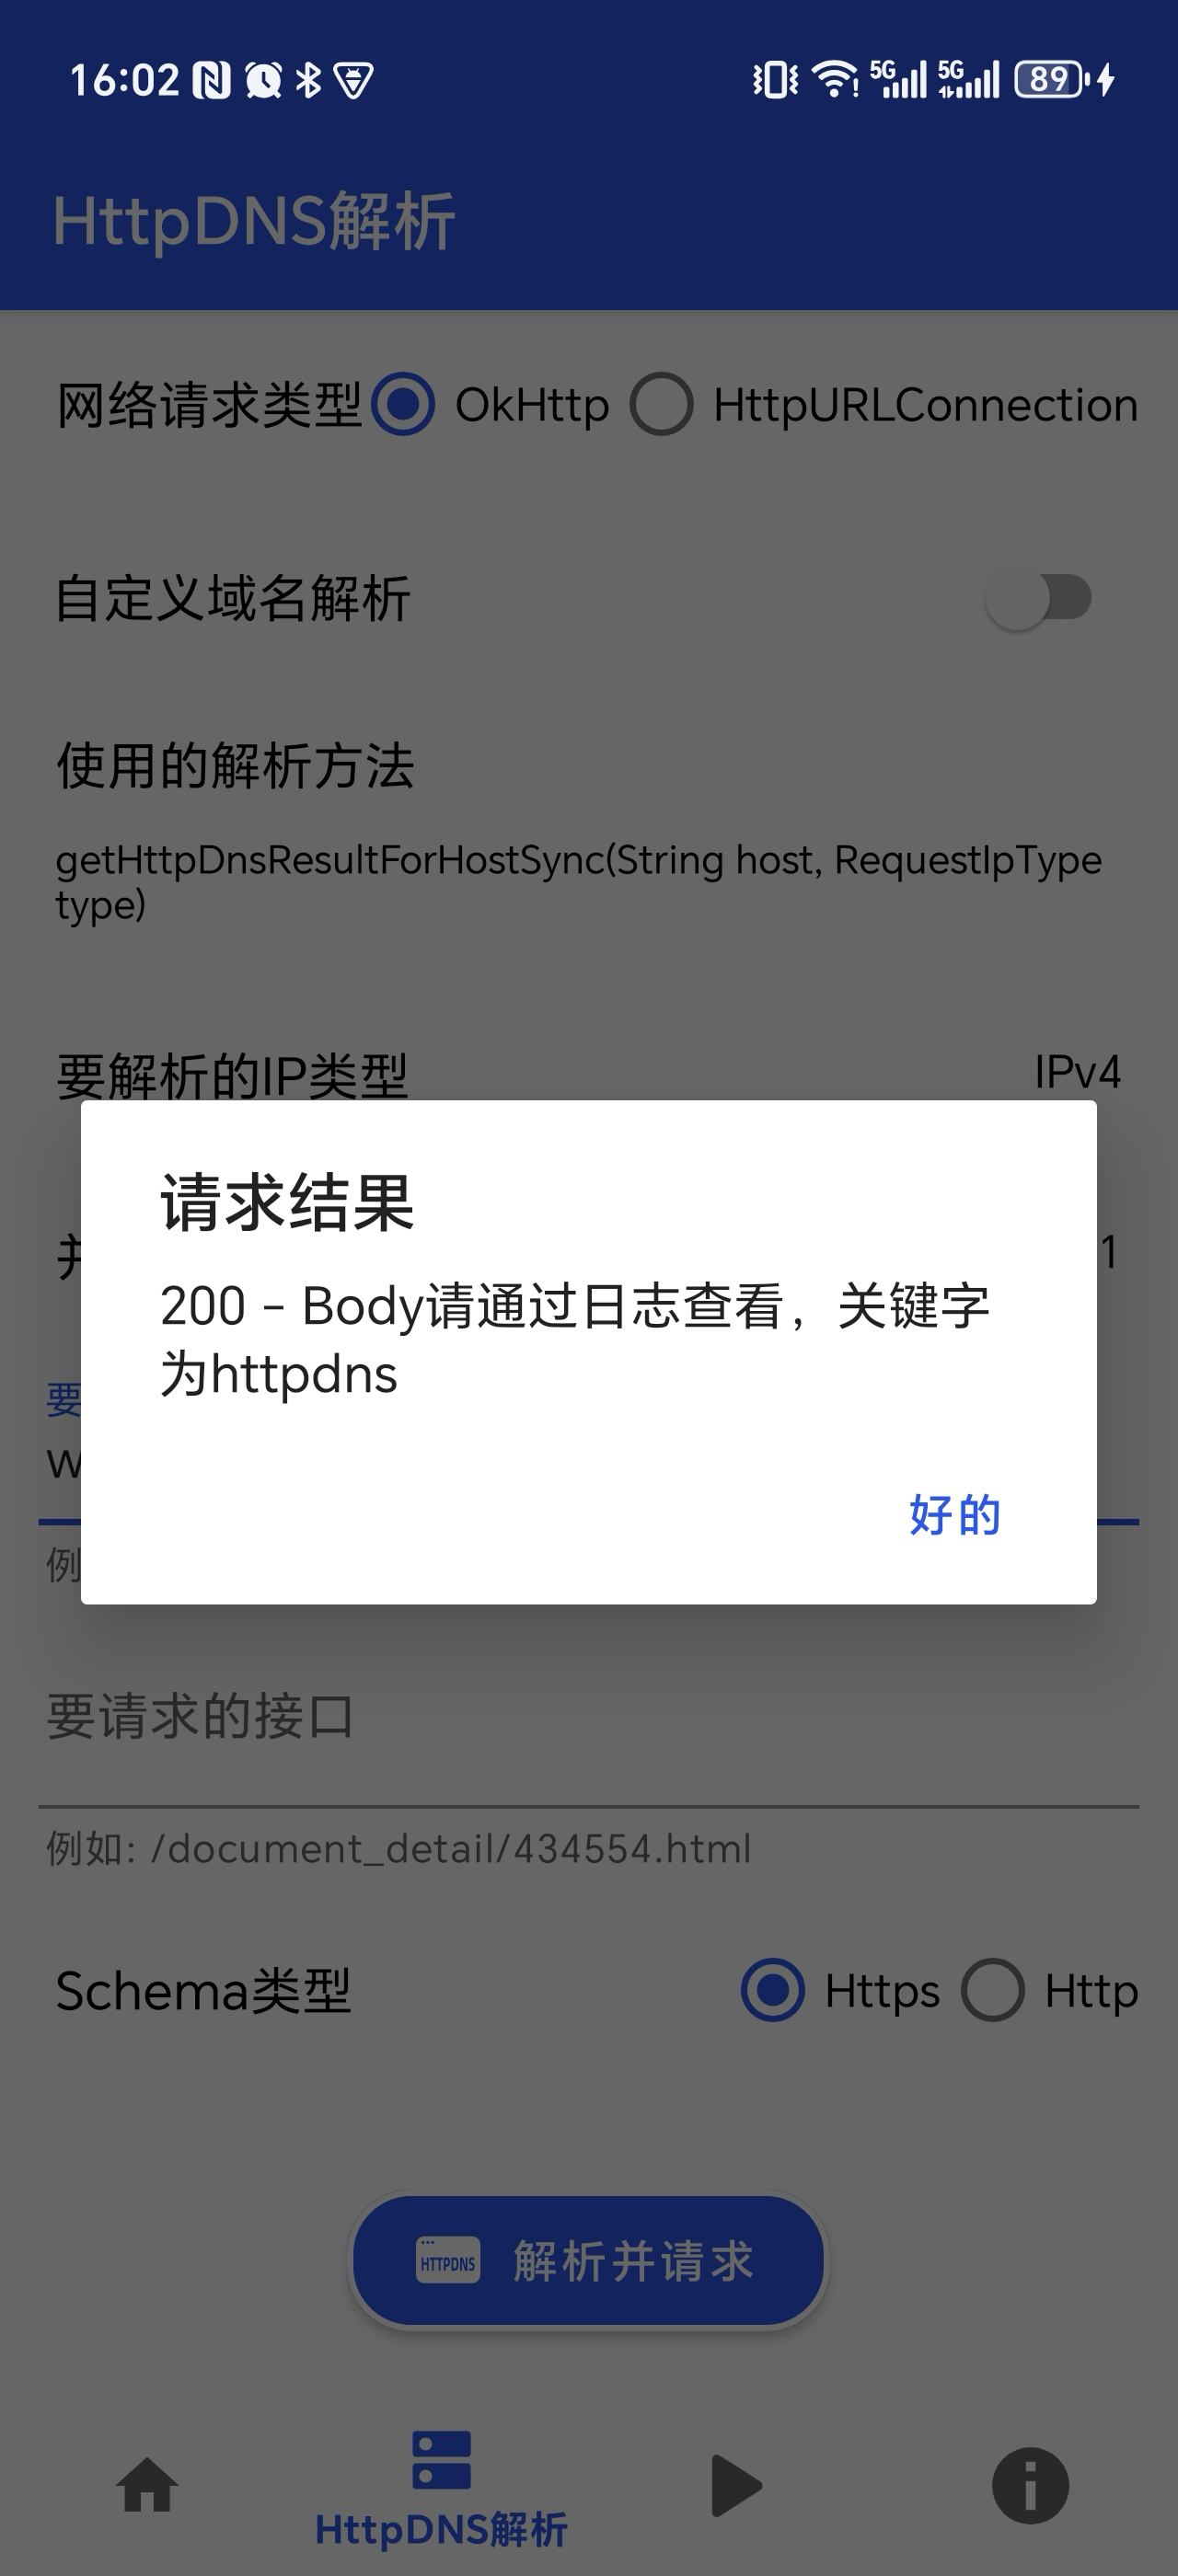
Step 3: Validate in an Error-Injected Environment
Enable HTTPDNS and start the application on the test device.
Trigger the same business requests as in Step 1, such as loading the home page or making API calls.
Observe the request results:
Request Result
Conclusion
Example
Network request failed
Domain name resolution completed by HTTPDNS. An invalid IP address was returned, causing the network request to fail. This indicates successful HTTPDNS integration.
Network request successful
If the first request succeeds, a cache miss might have caused a fallback to Local DNS. Wait a moment, then retry.
If multiple requests succeed, it means resolution still relies on Local DNS and did not use HTTPDNS. A normal IP address was returned, and the request completed. HTTPDNS integration failed.
 Note
NoteWhen using a synchronous non-blocking interface for domain name resolution, we recommend enabling setPreResolveHosts and setEnableExpiredIp to ensure that the local cache contains usable resolution results and avoid falling back to Local DNS due to cache misses, which could otherwise affect validation accuracy.