Network connectivity lets you connect an EMR Serverless Spark workspace to your virtual private cloud (VPC), giving Spark jobs access to data sources and services inside that VPC. This guide walks through connecting Spark SQL and JAR jobs to a Hive Metastore (HMS) by configuring a network connection.
After you connect a workspace to a VPC, Spark jobs route traffic through that VPC. If your jobs also need to reach public endpoints (for example, OSS over the public network), deploy an Internet NAT gateway in the VPC and configure SNAT. Without this, public endpoints are unreachable. For more information, see Use the SNAT feature of an Internet NAT gateway to access the internet.
Prerequisites
Before you begin, ensure that you have:
-
A DataLake cluster on the EMR on ECS page that includes the Hive service and uses Built-in MySQL for Metadata. For more information, see Create a cluster.
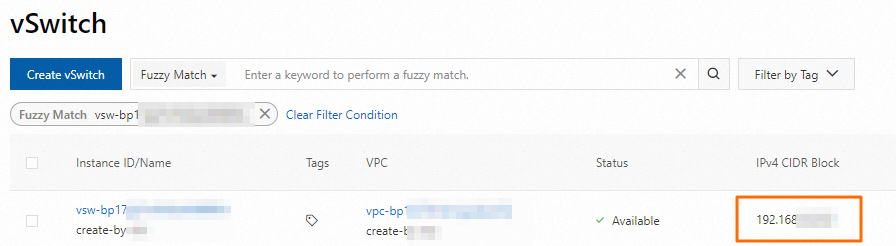
Supported zones
vSwitches are only available in specific zones.
Step 1: Add a network connection
-
Log on to the EMR console.
-
In the left navigation pane, choose EMR Serverless > Spark.
-
On the Spark page, click the workspace name.
-
In the left navigation pane, click Network Connection.
-
On the Network Connection page, click Create Network Connection.
-
In the Create Network Connection dialog box, configure the following parameters and click OK. The connection is ready when its Status changes to Succeeded.
Parameter Description Name Enter a name for the connection. VPC Select the same VPC as your EMR cluster. If no VPC is available, click Create VPC to create one in the VPC console. For more information, see VPCs and vSwitches. vSwitch Select a vSwitch in the same VPC as your EMR cluster. The vSwitch must be in a supported zone (see Supported zones). If no vSwitch is available in the required zone, create one in the VPC console. For more information, see Create and manage vSwitches. 
Step 2: Add a security group rule to the EMR cluster
When a Spark job runs, traffic flows from the vSwitch CIDR block into your VPC. To allow that traffic to reach the HMS service, add an inbound rule to the EMR cluster's security group.
-
Get the CIDR block of the vSwitch you selected in Step 1. Log on to the VPC console and go to the vSwitches page to find the CIDR block.
-
Log on to the EMR on ECS console.
-
On the EMR on ECS page, click the cluster ID.
-
On the Basic Information tab, in the Security section, click the link next to Cluster Security Group.
-
On the Security Group Details page, go to the Rules section and click Add Rule. Configure the following parameters and click OK.
ImportantDo not set Authorization Object to
0.0.0.0/0. An overly permissive rule exposes your cluster to attacks from the public internet.Parameter Value Protocol TCP (default). For Kerberos authentication, select UDP and open port 88 instead. For more information, see Enable Kerberos authentication. Source The CIDR block of the vSwitch from step 1. Destination (Current Instance) Specify the destination port to allow access. For example, 9083.
(Optional) Step 3: Set up a Hive table
Skip this step if you already have a Hive table to query.
-
Use SSH to log on to the master node of your EMR cluster. For more information, see Log on to a cluster.
-
Enter the Hive command line:
hive -
Create a table:
CREATE TABLE my_table (id INT, name STRING); -
Insert sample data:
INSERT INTO my_table VALUES (1, 'John'); INSERT INTO my_table VALUES (2, 'Jane'); -
Verify the data:
SELECT * FROM my_table;
(Optional) Step 4: Build and upload a JAR artifact
Skip this step if you plan to use a Spark SQL job.
-
Create a Maven project on your local machine with the following class:
-
Build the JAR:
mvn packageThis produces
sparkDataFrame-1.0-SNAPSHOT.jarin thetarget/directory. -
Upload the JAR to your workspace:
-
On the EMR Serverless Spark page for your workspace, click Artifacts in the left navigation pane.
-
On the Artifacts page, click Upload File and upload
sparkDataFrame-1.0-SNAPSHOT.jar.
-
Step 5: Create and run a job
JAR job
-
On the EMR Serverless Spark page, click Development in the left navigation pane.
-
Click New, enter a name, select Application(Batch) > JAR, and click OK.
-
In the job editor, configure the following parameters. Leave all other parameters at their default values. For Spark Configuration, enter the following, replacing
<hms-private-ip>with the private IP address of the HMS master node:Parameter Value Main JAR Resource Select sparkDataFrame-1.0-SNAPSHOT.jar.Main Class com.example.DataFrameExampleNetwork Connection Select the network connection created in Step 1. Spark Configuration See below. spark.hadoop.hive.metastore.uris thrift://<hms-private-ip>:9083 spark.hadoop.hive.imetastoreclient.factory.class org.apache.hadoop.hive.ql.metadata.SessionHiveMetaStoreClientFactoryTo find the private IP address, go to the Nodes page of the EMR cluster and expand the emr-master node group.
-
Click Run.
-
After the job completes, go to Execution Records at the bottom of the page and click Logs to view the output on the Log Exploration tab.
Spark SQL job
-
Create and start a Spark SQL session. For more information, see Manage SQL sessions. When configuring the session, set the following:
-
Network Connection: Select the network connection created in Step 1.
-
Spark Configuration: Enter the following, replacing
<hms-private-ip>with the private IP address of the HMS master nodespark.hadoop.hive.metastore.uris thrift://<hms-private-ip>:9083 spark.hadoop.hive.imetastoreclient.factory.class org.apache.hadoop.hive.ql.metadata.SessionHiveMetaStoreClientFactoryTo find the private IP address, go to the Nodes page of the EMR cluster and click the
 icon next to the emr-master node group.
-
-
On the EMR Serverless Spark page, click Development in the left navigation pane.
-
Click the
 icon to create a new file.
 -
In the New dialog box, enter a name (for example,
users_task), leave the type as SparkSQL, and click OK. -
Select the catalog, database, and SQL session instance. Enter the following query and click Run:
When deploying SQL code that uses an external metastore to a workflow, specify the table in
db.table_nameformat and select the default database in thecatalog_id.defaultformat from the Catalog option.SELECT * FROM default.my_table;Results appear in the Execution Results section at the bottom of the page.
