Monstache synchronizes data from ApsaraDB for MongoDB to Alibaba Cloud Elasticsearch in real time by tailing MongoDB oplogs. This tutorial walks you through a complete setup, using a movie dataset to demonstrate full-sync, incremental sync, and Kibana-based data analysis.
Monstache synchronizes and subscribes to data in real time based on MongoDB oplogs. It supports the change streams and aggregation pipelines of MongoDB, and enables data synchronization between MongoDB databases and later versions of Elasticsearch clusters. For more information about Monstache features, see Features.
Prerequisites
Before you begin, ensure that you have:
An Alibaba Cloud account with permissions to create ECS instances, ApsaraDB for MongoDB instances, and Elasticsearch clusters
Basic familiarity with Linux command-line operations
How it works
Monstache uses the MongoDB oplog as an event source. Every insert, update, and delete in MongoDB is recorded in the oplog; Monstache tails the oplog and propagates changes to Elasticsearch in near real time. Because the oplog is a replica set feature, your MongoDB instance must be a replica set or sharded cluster instance — standalone instances are not supported.
Step 1: Create the required resources
Create the following resources in the same virtual private cloud (VPC). Placing all three in the same VPC ensures data is transmitted over the internal network securely and at high speed.
Create an Elasticsearch cluster. During creation, enable the Auto Indexing feature. An Elasticsearch V6.7 Standard Edition cluster is used in this tutorial. For details, see Create an Alibaba Cloud Elasticsearch cluster and Configure the YML file.
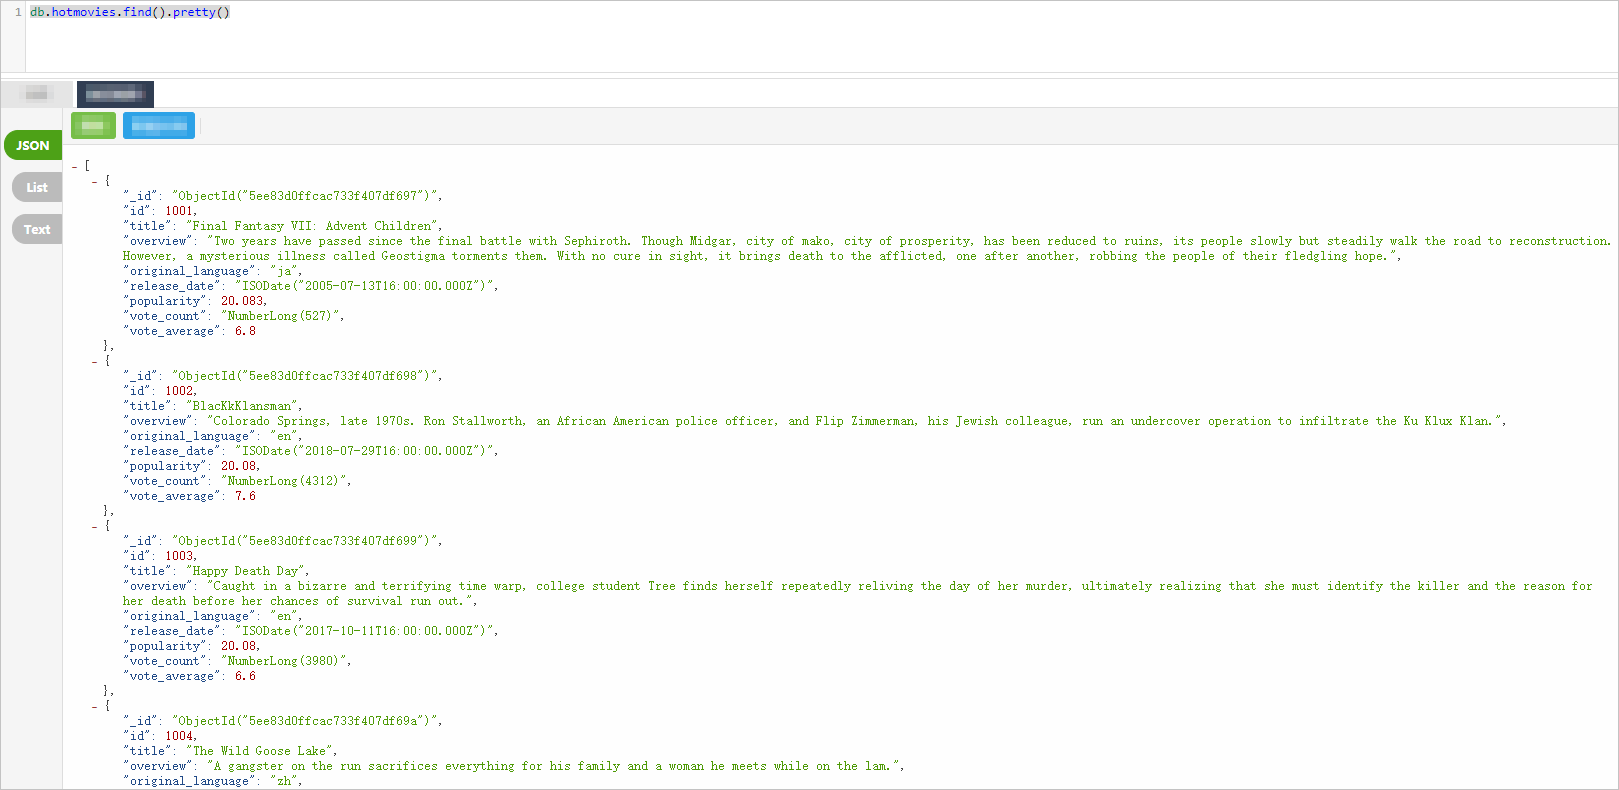
Create an ApsaraDB for MongoDB replica set instance. An ApsaraDB for MongoDB V4.2 replica set instance is used in this tutorial. Prepare your test data after creation — the following figure shows part of the movie dataset used as an example. For details, see Quick start for replica set instances.
ImportantThe ApsaraDB for MongoDB instance must be a replica set instance or sharded cluster instance. Monstache uses the oplog as its event source, which is only available on these instance types.
Create an Elastic Compute Service (ECS) instance. The ECS instance hosts Monstache and must run Linux. For details, see Create an instance by using the wizard.
You must ensure that the version of Monstache you install is compatible with your ApsaraDB for MongoDB instance and Elasticsearch cluster versions. For version compatibility information, see Monstache version.
Step 2: Install Monstache
Install Monstache on the ECS instance by building from source. Before you install Monstache, make sure that you have configured Go environment variables.
Log on to the ECS instance. For details, see Connect to a Linux instance by using a password or key.
NoteA common (non-root) user is used in this example.
Download and extract Go.
wget https://dl.google.com/go/go1.14.4.linux-amd64.tar.gz
tar -xzf go1.14.4.linux-amd64.tar.gz
Configure Go environment variables. Open
~/.bash_profile:vim ~/.bash_profileAdd the following lines.
GOPROXYpoints to the Alibaba Cloud Go module proxy, which improves download speed.export GOROOT=/home/test1/go export GOPATH=/home/go/ export PATH=$PATH:$GOROOT/bin:$GOPATH/bin export GOPROXY=https://mirrors.aliyun.com/goproxy/Apply the changes:
source ~/.bash_profileClone the Monstache repository.
NoteIf the error
git: command not foundappears, install git first:sudo yum install -y git.git clone https://github.com/rwynn/monstache.gitSwitch to the rel5 branch and install.
cd monstache
git checkout rel5
sudo go install
Verify the installation.
monstache -vExpected output:
5.5.5
Step 3: Configure and start data synchronization
Monstache uses TOML for configuration. In this tutorial, data is synchronized from the hotmovies and col collections in the mydb database.
In the monstache directory, create a configuration file.
vim config.tomlAdd the following configuration. Replace the placeholder values with your actual endpoints and credentials.
# connection settings
mongo-url = "mongodb://<your_mongodb_user>:<your_mongodb_password>@dds-bp1aadcc629******.mongodb.rds.aliyuncs.com:3717"
elasticsearch-urls = ["http://es-cn-mp91kzb8m00******.elasticsearch.aliyuncs.com:9200"]

# collections to sync (full-sync on startup, then tail oplogs)
direct-read-namespaces = ["mydb.hotmovies","mydb.col"]

# to use MongoDB change streams instead of oplog tailing (requires MongoDB 3.6+):
#change-stream-namespaces = ["mydb.col"]

# filter to specific collections (oplog listener only, does not trigger a full-sync):
#namespace-regex = '^mydb\.col$'

# Elasticsearch credentials
# For production use, create a dedicated account instead of using the default elastic account.
# Assign only the permissions the account needs. See Use the RBAC mechanism provided by
# Elasticsearch X-Pack to implement access control.
elasticsearch-user = "elastic"
elasticsearch-password = "<your_es_password>"

# number of concurrent Go threads pushing documents to Elasticsearch
elasticsearch-max-conns = 4

# propagate collection and database deletions to Elasticsearch
dropped-collections = true
dropped-databases = true

# save sync progress to monstache.monstache so sync can resume after a restart
resume = true
resume-strategy = 0

# enable debug logging (logs all requests to Elasticsearch)
verbose = true

# high availability mode: processes sharing the same cluster-name cooperate
cluster-name = 'es-cn-mp91kzb8m00******'

# index mappings: override the default database.collection index name
[[mapping]]
namespace = "mydb.hotmovies"
index = "hotmovies"
type = "movies"

[[mapping]]
namespace = "mydb.col"
index = "mydbcol"
type = "collection"
Key parameters:
Parameter Description mongo-urlConnection string for the primary node of your ApsaraDB for MongoDB instance. Get it from the instance details page in the ApsaraDB for MongoDB console. Before connecting, add the ECS instance's private IP address to the MongoDB instance whitelist. See Configure a whitelist for a sharded cluster instance. elasticsearch-urlsInternal endpoint of your Elasticsearch cluster in the format http://<endpoint>:9200. Get it from the Basic Information page of your cluster. See View the basic information of a cluster.direct-read-namespacesCollections to copy from MongoDB on startup (full-sync), specified as database.collection. See direct-read-namespaces.change-stream-namespacesUse MongoDB change streams instead of oplog tailing. When configured, oplog tailing is disabled. Requires MongoDB 3.6+. See change-stream-namespaces. namespace-regexRegular expression to filter which collections Monstache listens to. This is a filter on the change event listener only — it does not trigger a full-sync. elasticsearch-userUsername for Elasticsearch authentication. Default is elastic.elasticsearch-passwordPassword for the Elasticsearch user. If forgotten, reset it. See Reset the access password for an Elasticsearch cluster. elasticsearch-max-connsNumber of concurrent Go threads writing to Elasticsearch. Default is 4.dropped-collectionsWhen true(default), deletes the mapped Elasticsearch index when a MongoDB collection is dropped.dropped-databasesWhen true(default), deletes mapped Elasticsearch indexes when a MongoDB database is dropped.resumeWhen true, saves oplog timestamps tomonstache.monstacheso sync can resume after a restart without data loss. Automatically set totruewhencluster-nameis configured. See resume.resume-strategyResume strategy (valid only when resumeistrue).0uses timestamps. See resume-strategy.verboseWhen true, enables debug logging including Elasticsearch request traces. Default isfalse.cluster-nameEnables high availability mode. Monstache processes sharing the same cluster-namecoordinate with each other. See cluster-name.mappingOverrides the default index name (which is database.collection). See Index Mapping.NoteMonstache supports many more configuration parameters. For advanced scenarios such as script-based transformation, GridFS indexing, or complex filtering, see Monstache config and Advanced.
Start Monstache.
monstache -f config.tomlThe
-fflag loads the specified configuration file. Becauseverbose = trueis set in the configuration, Monstache logs all Elasticsearch request traces.
Step 4: Verify data synchronization
Use the Data Management (DMS) console for MongoDB queries and the Kibana console for Elasticsearch queries.
For DMS access, see Connect to a replica set instance by using DMS.
For Kibana access, see Log on to the Kibana console.
Check document counts after full-sync
Run the following queries to confirm the same document count appears in both systems.
MongoDB:
db.hotmovies.find().count()Expected output:
[
10000
]
Elasticsearch:
GET hotmovies/_countExpected output:
{
  "count" : 10000,
  "_shards" : {
    "total" : 5,
    "successful" : 5,
    "skipped" : 0,
    "failed" : 0
  }
}
Test insert synchronization
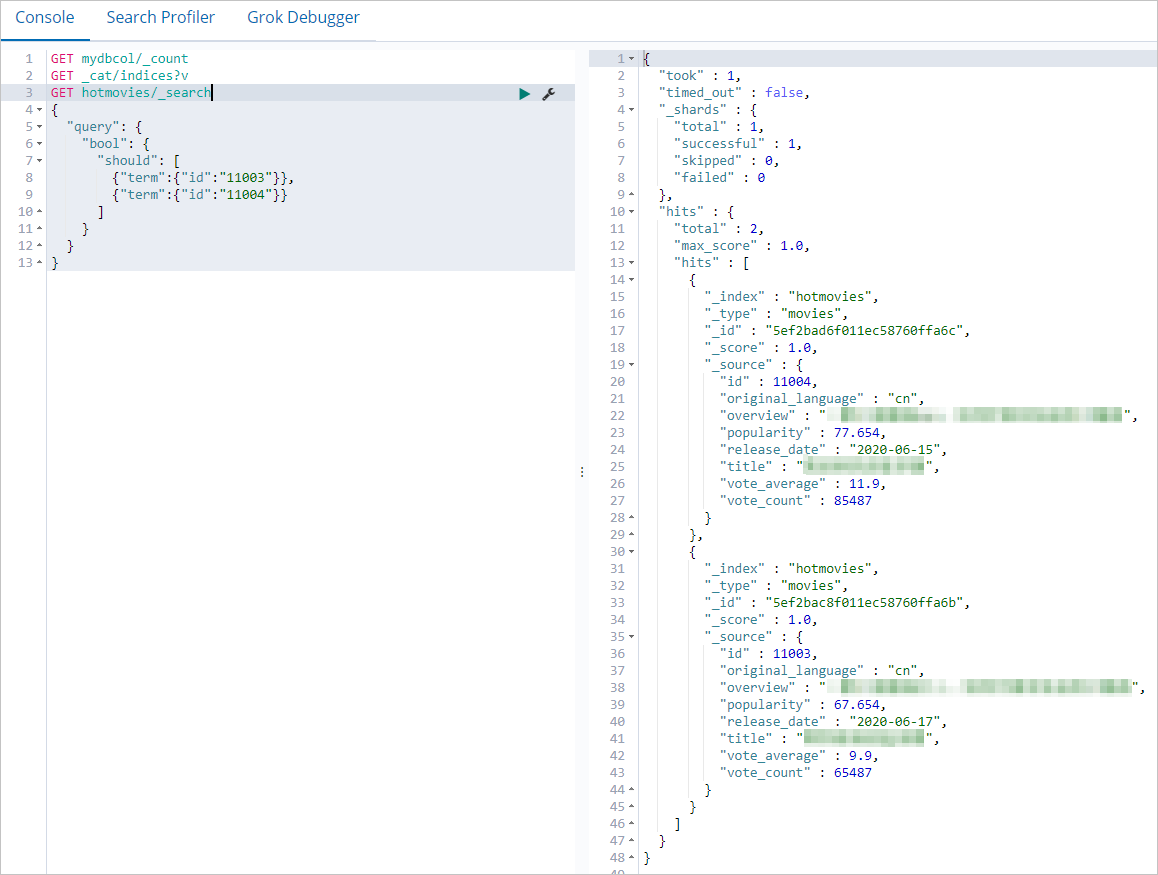
Insert two documents in MongoDB:
db.hotmovies.insert({id: 11003,title: "Beauty",overview: "How a group of IT women with high IQ become outstanding",original_language:"cn",release_date:"2020-06-17",popularity:67.654,vote_count:65487,vote_average:9.9})
db.hotmovies.insert({id: 11004,title: "Heroic Programmers",overview: "How a group of IT men with high IQ become outstanding",original_language:"cn",release_date:"2020-06-15",popularity:77.654,vote_count:85487,vote_average:11.9})
Query Elasticsearch to confirm the documents were synced:
GET hotmovies/_search
{
  "query": {
    "bool": {
      "should": [
        {"term":{"id":"11003"}},
        null
      ]
    }
  }
}
Test update synchronization
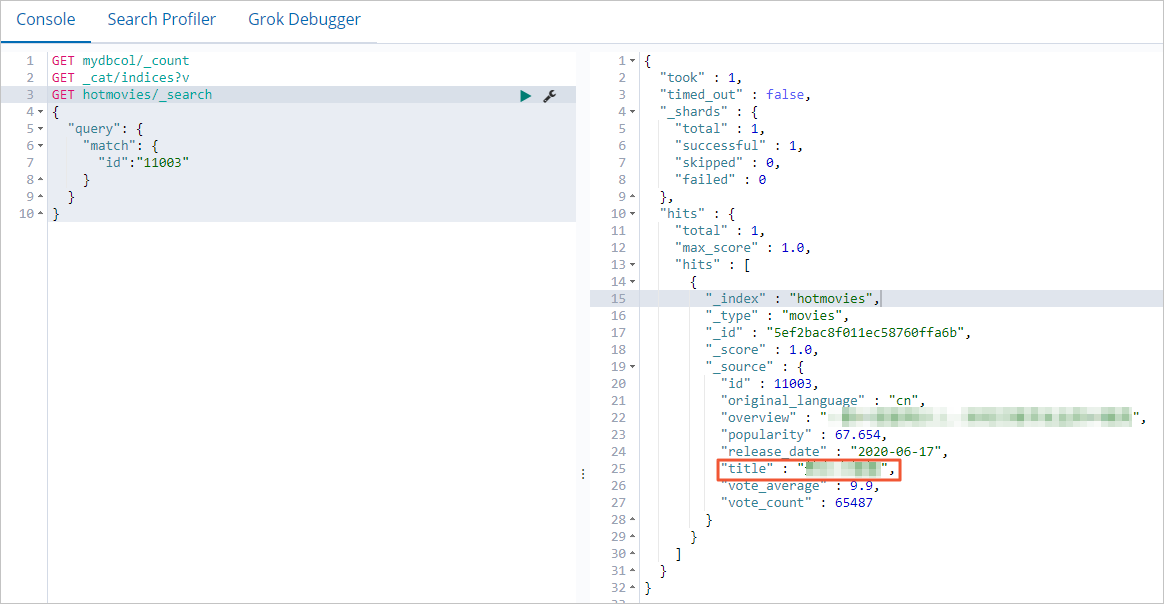
Update a document in MongoDB:
db.hotmovies.update({'title':'Beauty'},{$set:{'title':'Beautiful Programmers'}})Query Elasticsearch to confirm the update:
GET hotmovies/_search
{
  "query": {
    "match": {
      "id":"11003"
    }
  }
}
Test delete synchronization
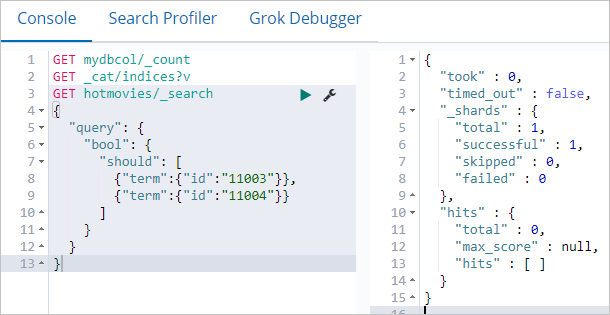
Remove the documents from MongoDB:
db.hotmovies.remove({id: 11003})
db.hotmovies.remove({id: 11004})
Query Elasticsearch to confirm the documents are gone:
GET hotmovies/_search
{
  "query": {
    "bool": {
      "should": [
        {"term":{"id":"11003"}},
        null
      ]
    }
  }
}
Step 5: Analyze data in Kibana
This tutorial uses Kibana V6.7.0. Navigation may differ in other versions.
Log on to the Kibana console. For details, see Log on to the Kibana console.
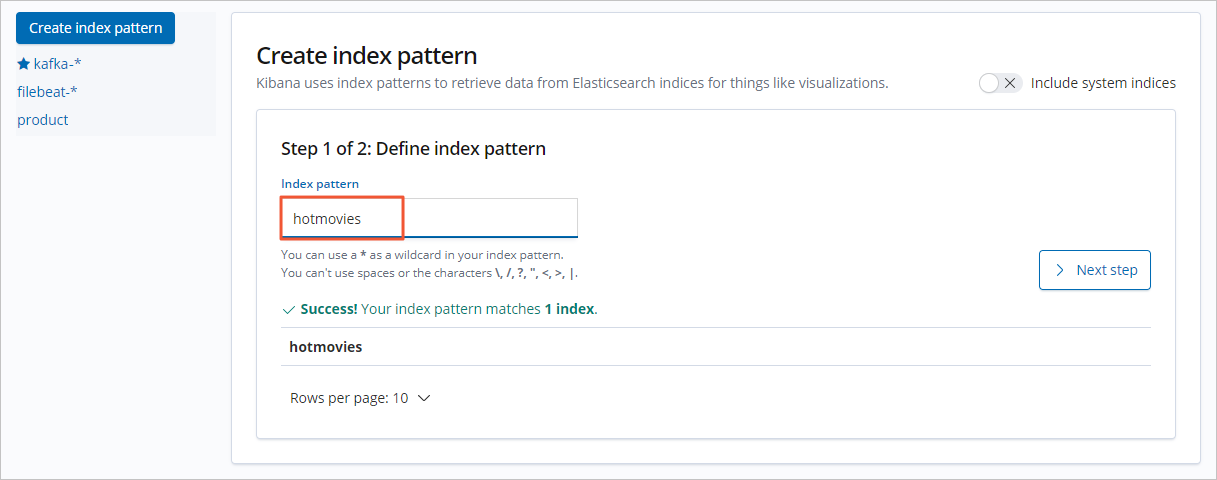
Create an index pattern.
In the left navigation pane, click Management.
In the Kibana section, click Index Patterns.
Click Create index pattern.
Set Index pattern and click Next step.
Set Time Filter field name to I don't want to use the Time Filter.
Click Create index pattern.
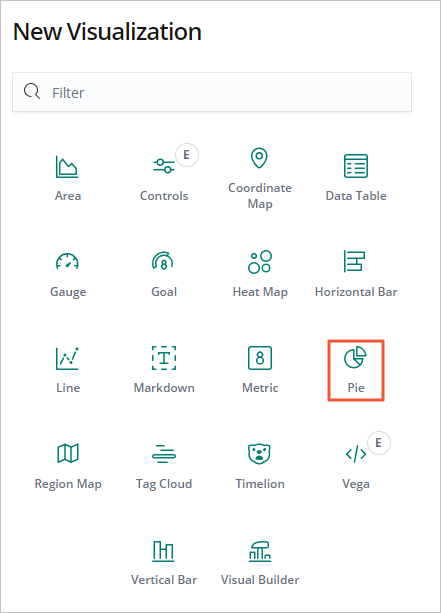
Create a pie chart for the top 10 popular movies.
In the left navigation pane, click Visualize.
Click + next to the search box.
In the New Visualization dialog box, click Pie.
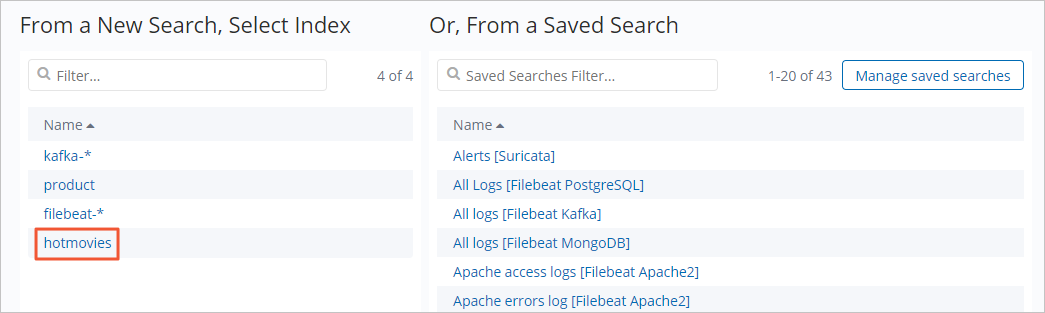
Click the hotmovies index pattern.
Configure the Metrics and Buckets sections as shown.
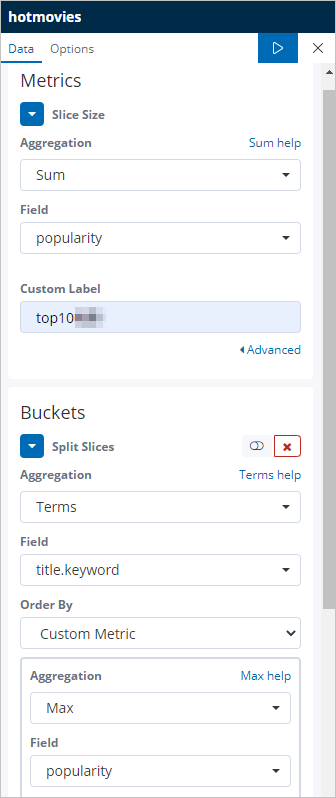
Click the
 icon to apply the configuration.
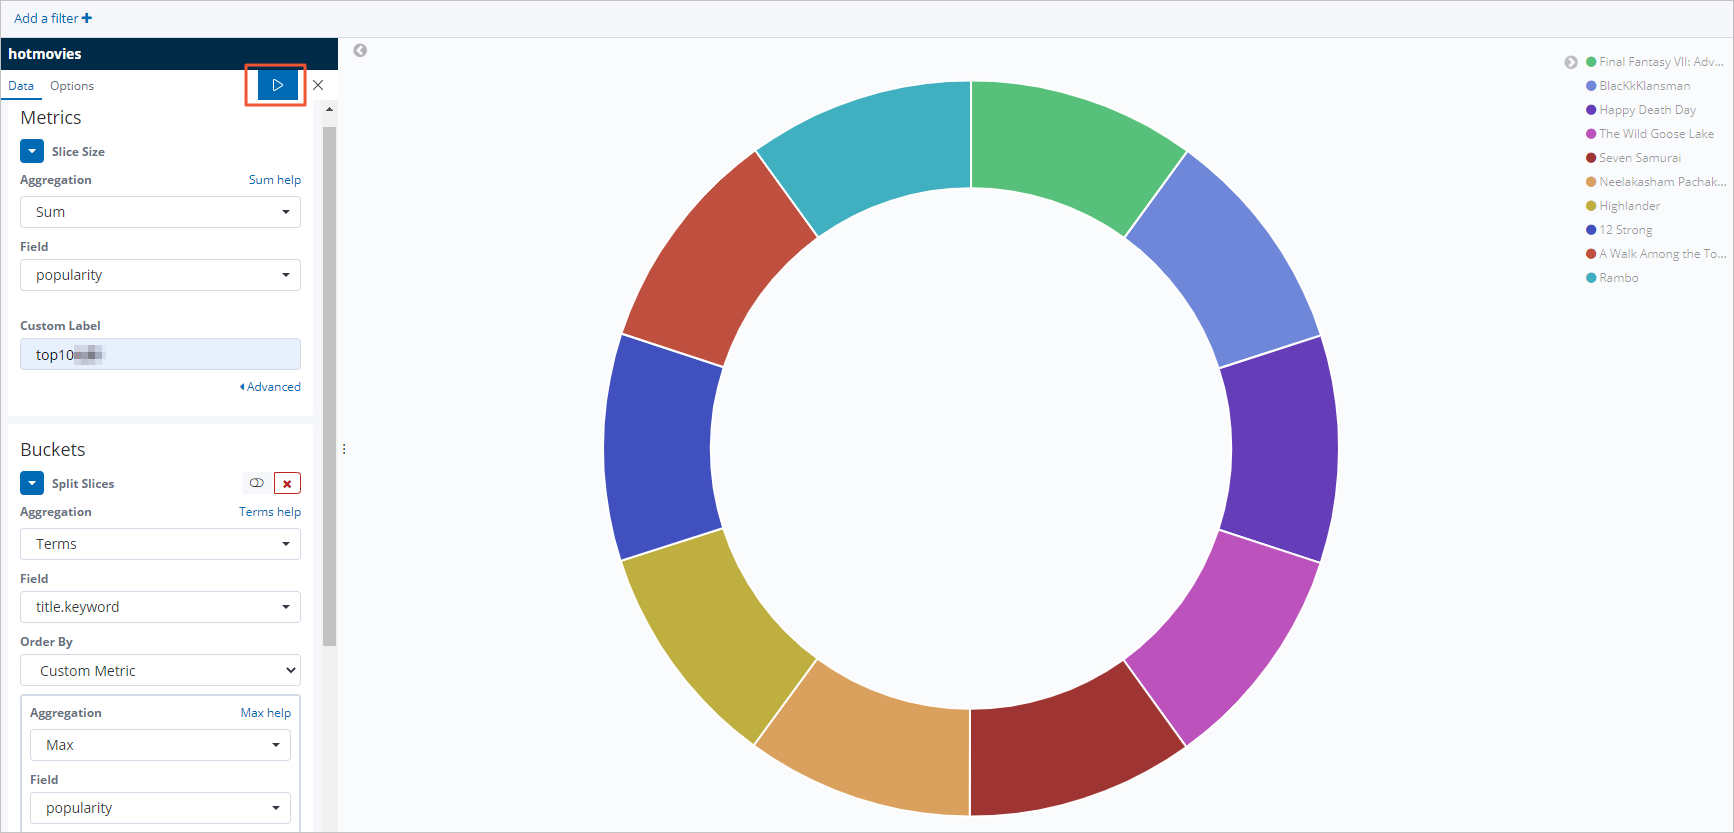
FAQ
After enabling high availability and increasing concurrency, data loss occurs. What should I do?
Check whether the Elasticsearch cluster is healthy first. If the cluster is in an abnormal state, refer to the Elasticsearch FAQ to diagnose and resolve cluster-level issues, then lower elasticsearch-max-conns and monitor for further data loss.
If the cluster is healthy, the issue is likely in Monstache. Check the Monstache documentation for known issues and configuration guidance.