Alibaba Cloud Elasticsearch empowers you to perform full-text searches, multi-dimensional queries, and statistical analysis on data sourced from a MySQL database. This guide details how to leverage DataWorks' Data Integration service to efficiently synchronize data from an ApsaraDB RDS for MySQL instance to an Alibaba Cloud Elasticsearch cluster.
This guide focuses on batch (offline) data replication. To synchronize data in real time, see Real-time synchronization from a full MySQL database to Elasticsearch.
Prerequisites
Before you begin, ensure the following conditions are met and be aware of these critical points:
Usage notes
Alibaba Cloud Elasticsearch target only: You can only synchronize data to Alibaba Cloud Elasticsearch clusters. Self-managed Elasticsearch clusters are not supported.
Regional consistency: The ApsaraDB RDS for MySQL instance, Elasticsearch cluster, and DataWorks workspace must all be located in the same Alibaba Cloud region.
Time zone consistency: All three services (MySQL, Elasticsearch, DataWorks) should ideally be in the same time zone to prevent time-related data discrepancies during synchronization.
Billing
Elasticsearch cluster fees: See Billing rules.
Data Integration resource group fees: See Resource group fees.
Procedure
Step 1: Prepare source data in MySQL
Create your database and table in your ApsaraDB RDS for MySQL instance.
Create a database. See General workflow to use ApsaraDB RDS for MySQL.
Create a table and insert data:
-- Create table
CREATE TABLE `es_test` (
    `id` bigint(32) NOT NULL,
    `name` varchar(32) NULL,
    `age` bigint(32) NULL,
    `hobby` varchar(32) NULL,
    PRIMARY KEY (`id`)
) ENGINE=InnoDB
DEFAULT CHARACTER SET=utf8;

-- Insert data
INSERT INTO `es_test` (`id`,`name`,`age`,`hobby`) VALUES (1,'user1',22,'music');
INSERT INTO `es_test` (`id`,`name`,`age`,`hobby`) VALUES (2,'user2',23,'sport');
INSERT INTO `es_test` (`id`,`name`,`age`,`hobby`) VALUES (3,'user3',43,'game');
INSERT INTO `es_test` (`id`,`name`,`age`,`hobby`) VALUES (4,'user4',24,'run');
INSERT INTO `es_test` (`id`,`name`,`age`,`hobby`) VALUES (5,'user5',42,'basketball');
Step 2: Purchase and configure a Data Integration resource group
Data synchronization tasks run within a Data Integration resource group. You must purchase one and attach the necessary network and workspace.
Log on to the DataWorks console.
In the top menu bar, select your region. In the left navigation pane, click Resource Groups.
Click Create Resource Group, configure the required parameters, and click Buy Now.
Attach VPC for network connectivity:
In the Actions column of the resource group you just created, click Network Settings.
In the Data Scheduling & Data Integration section, click Add VPC Association and attach the VPC to which your RDS instance and Elasticsearch cluster belong. This ensures Data Integration can connect to both.
ImportantAfter you attach a VPC, you must add the vSwitch CIDR block of the VPC to the internal-facing whitelists of the ApsaraDB RDS for MySQL and Elasticsearch clusters. For more information, see Configure IP address whitelist in ApsaraDB RDS for MySQL documentation and Manage IP address whitelists in Alibaba Cloud Elasticsearch documentation.
Attach DataWorks workspace:
Return to the Resource Groups page.
In the Actions column of the resource group, click Attach Workspace and select your target DataWorks workspace.
Step 3: Add data sources in DataWorks
Add the ApsaraDB RDS for MySQL and ElasticSearch data sources to the Data Integration service within DataWorks.
Go to the Data Integration page in DataWorks.
Log on to the DataWorks console.
In the left navigation pane, click Workspace.
In the Actions column of your target workspace, choose .
In the left navigation pane, click Data Source.
Add a MySQL data source.
On the Data Sources page, click Add Data Source.
On the Add Data Source page, search for and select MySQL.
In the Add MySQL Data Source dialog box, configure the data source parameters in the Basic Information section.
For more information , see Configure a MySQL data source.
In the Connection Configuration section, click Test Connectivity. If the connectivity status is Connected, the connection is successful.
Click Complete.
Add an Elasticsearch data source. See Add an Elasticsearch data source for detailed instructions.
Step 4: Configure and run an batch data synchronization task
Create and run an batch (offline) synchronization task within DataWorks. This example uses the codeless UI.
For code editor configuration, see Configure a sync node in the code editor, MySQL Reader, and Elasticsearch Writer.
This topic uses the legacy Data Studio page as an example to demonstrate how to create an offline sync task.
Access Data Studio.
Log in to the DataWorks console.
In the left navigation pane, click Workspace.
In the Actions column of your target workspace, choose .
Create a sync task.
On the Data Studio (
 icon) tab, choose , and follow the on-screen instructions to configure the workflow.
Add a node to the workflow.
During node creation, set node type to Data Integration, choose MySQL as the source and Elasticsearch as the destination, set it as a batch type, and enter a name.
Configure network and resources.
In the Data Source section, set Data Source to MySQL and select the data source you added previously.
In the My Resource Group section, select the Data Integration resource group you purchased.
In the Data Destination section, set Data Destination to Elasticsearch and select Data Source Name you added previously.
Click Next.
Configure task details.
In the Data Source section, select the specific MySQL table (e.g.,
es_test) to replicate.In the Data Destination section, configure Elasticsearch-specific parameters (e.g., target index, primary key).
In the Field Mapping section, set the mapping relationship between the source and destination fields.
ImportantEnsure that field mappings are explicitly validated and correctly aligned by field name—not by position or auto-inferred order. Misalignment (e.g., mapping a source string field like
nameto a target numeric field likeidof typelong) will cause Elasticsearch to reject the document, resulting in "dirty data" errors.
For more information, see Configure a task in the codeless UI.
Run the task.
(Optional) Configure scheduling properties for the task. In the right-side bar, click Scheduling and configure parameters. For more information, see Scheduling.
Save the task configuration.
Run the task.
If scheduling was configured, the task runs automatically.
To run immediately, click the Run icon.
If the log contains
Shell run successfully!, it indicates that the task ran successfully.
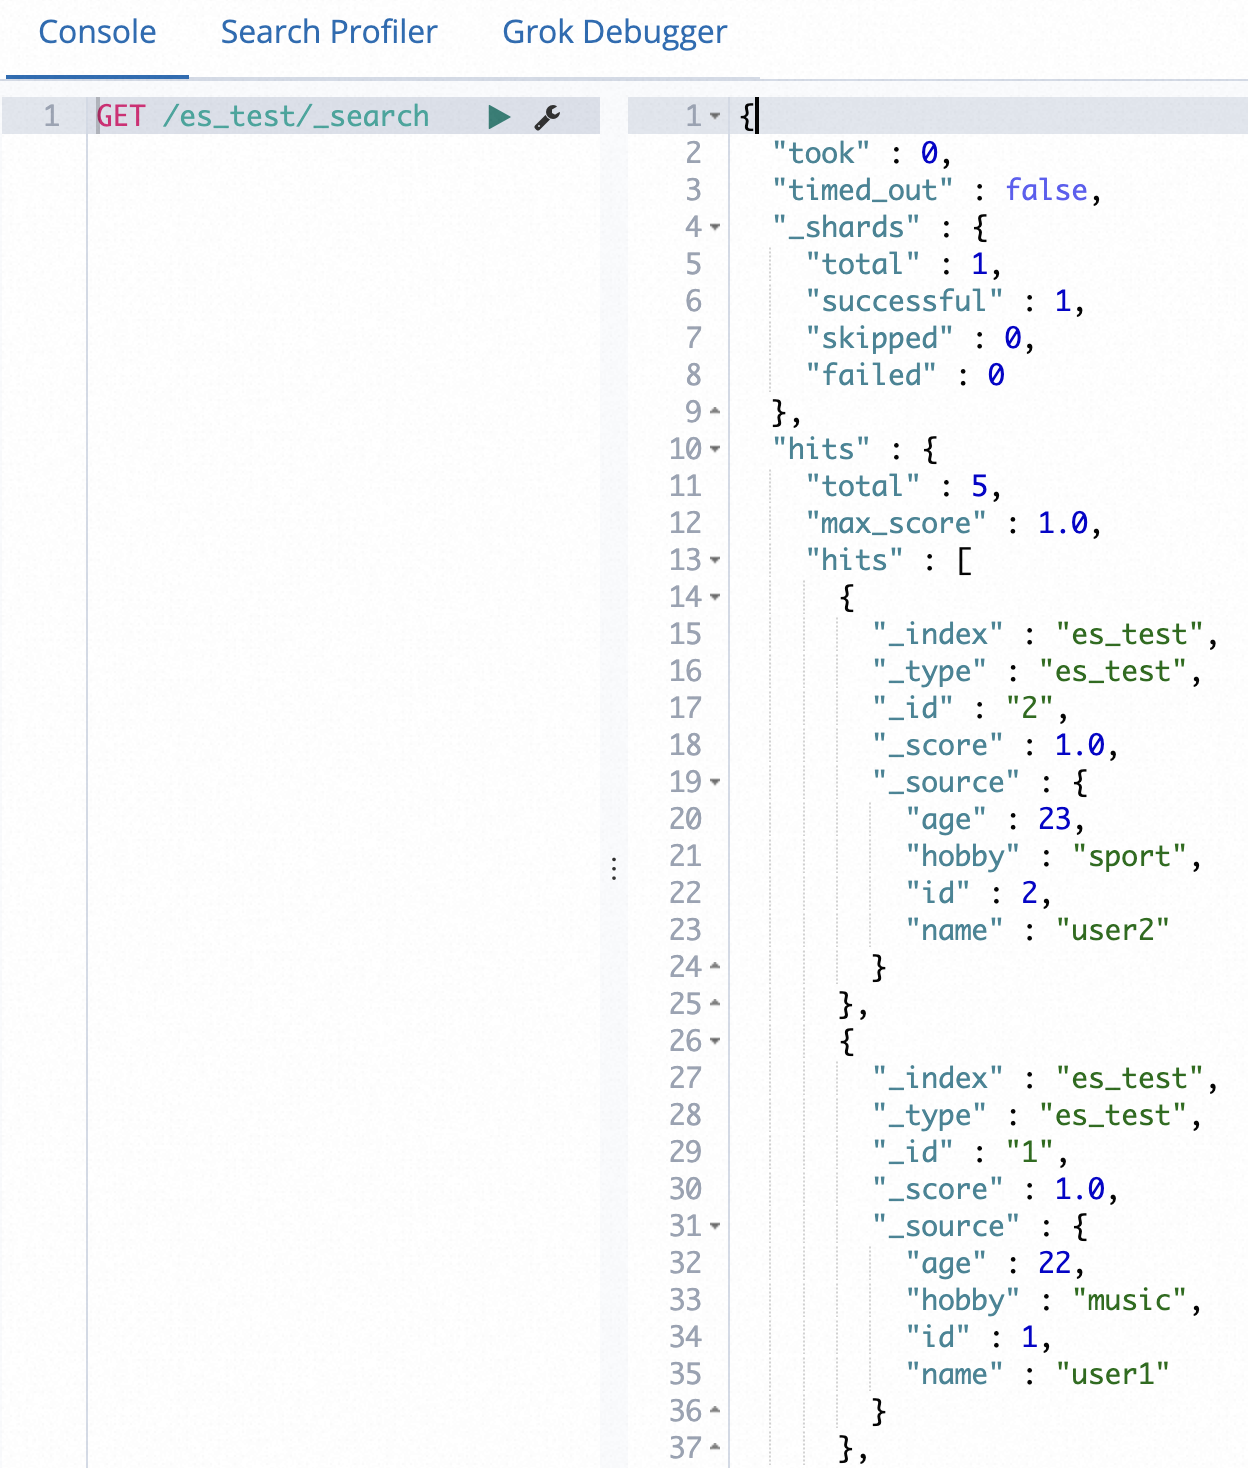
Step 5: Verify data synchronization result
In the Kibana console, choose Dev Tools.
In the Console, run the following command to view the synchronized data.
POST /es_test/_search?pretty
{
"query": { "match_all": {}}
}
Replace
es_testwith the index name that you specified in the data synchronization task.If the data is synchronized successfully, the following result is returned.