The points of presence (POPs) for ESA provide a serverless code execution environment. You can write business function code and configure trigger rules to run your code with elastic scaling and secure execution on POPs close to your users. This eliminates the need to configure servers or manage infrastructure, which significantly reduces O&M costs and improves response speed.
Step 1: Create a function
Log on to the ESA console. In the navigation pane on the left, select .
On the page, click Create.
Set Creation Method to Function Templates, select a function template as needed, and then click Next.

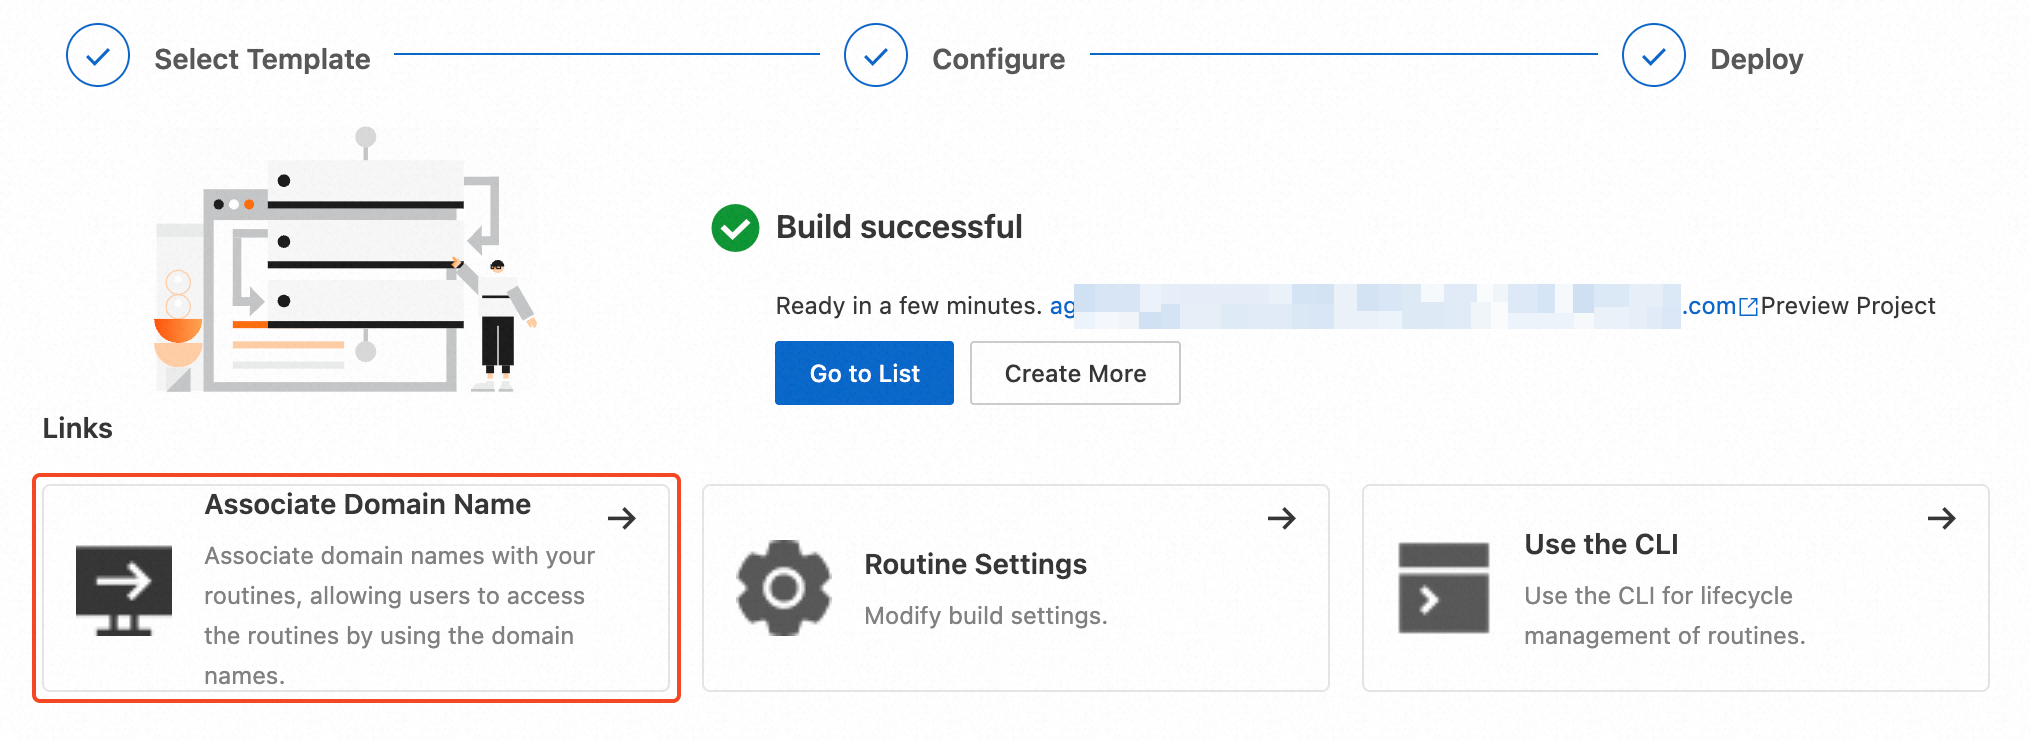
Enter a Routine Name and Description, preview the code details, and then click Submit.

After the build is complete, the system generates a public domain name. Access the domain name to preview the result. To attach a custom domain name, see Domain Name Configuration.


Step 2: Develop and debug the function
You can modify the function code and debug it locally as needed. Then, deploy the code to the staging environment. Continuously monitor the function's status and performance to ensure its stability and correct functionality.
Click Function Settings, select the Code tab, and then use
JavaScript ES6syntax to develop the function.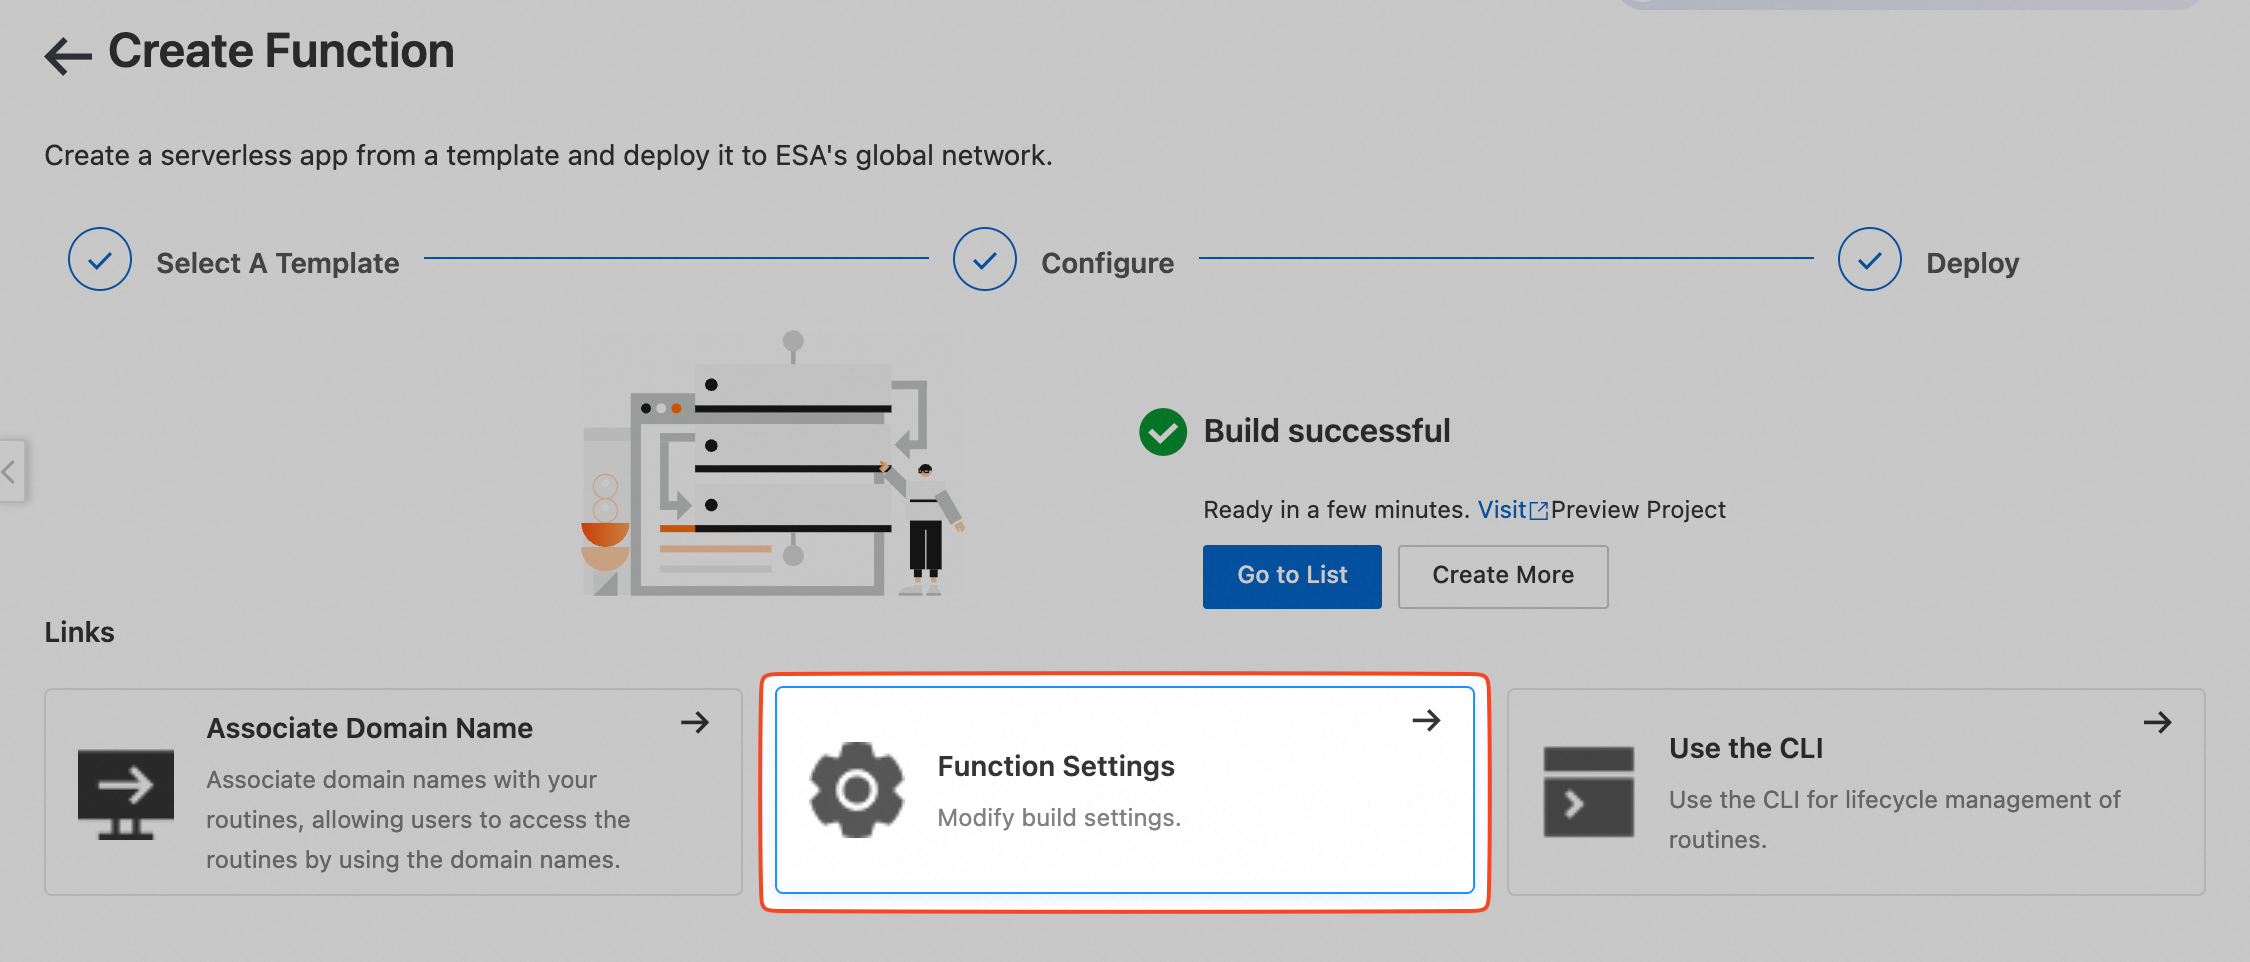
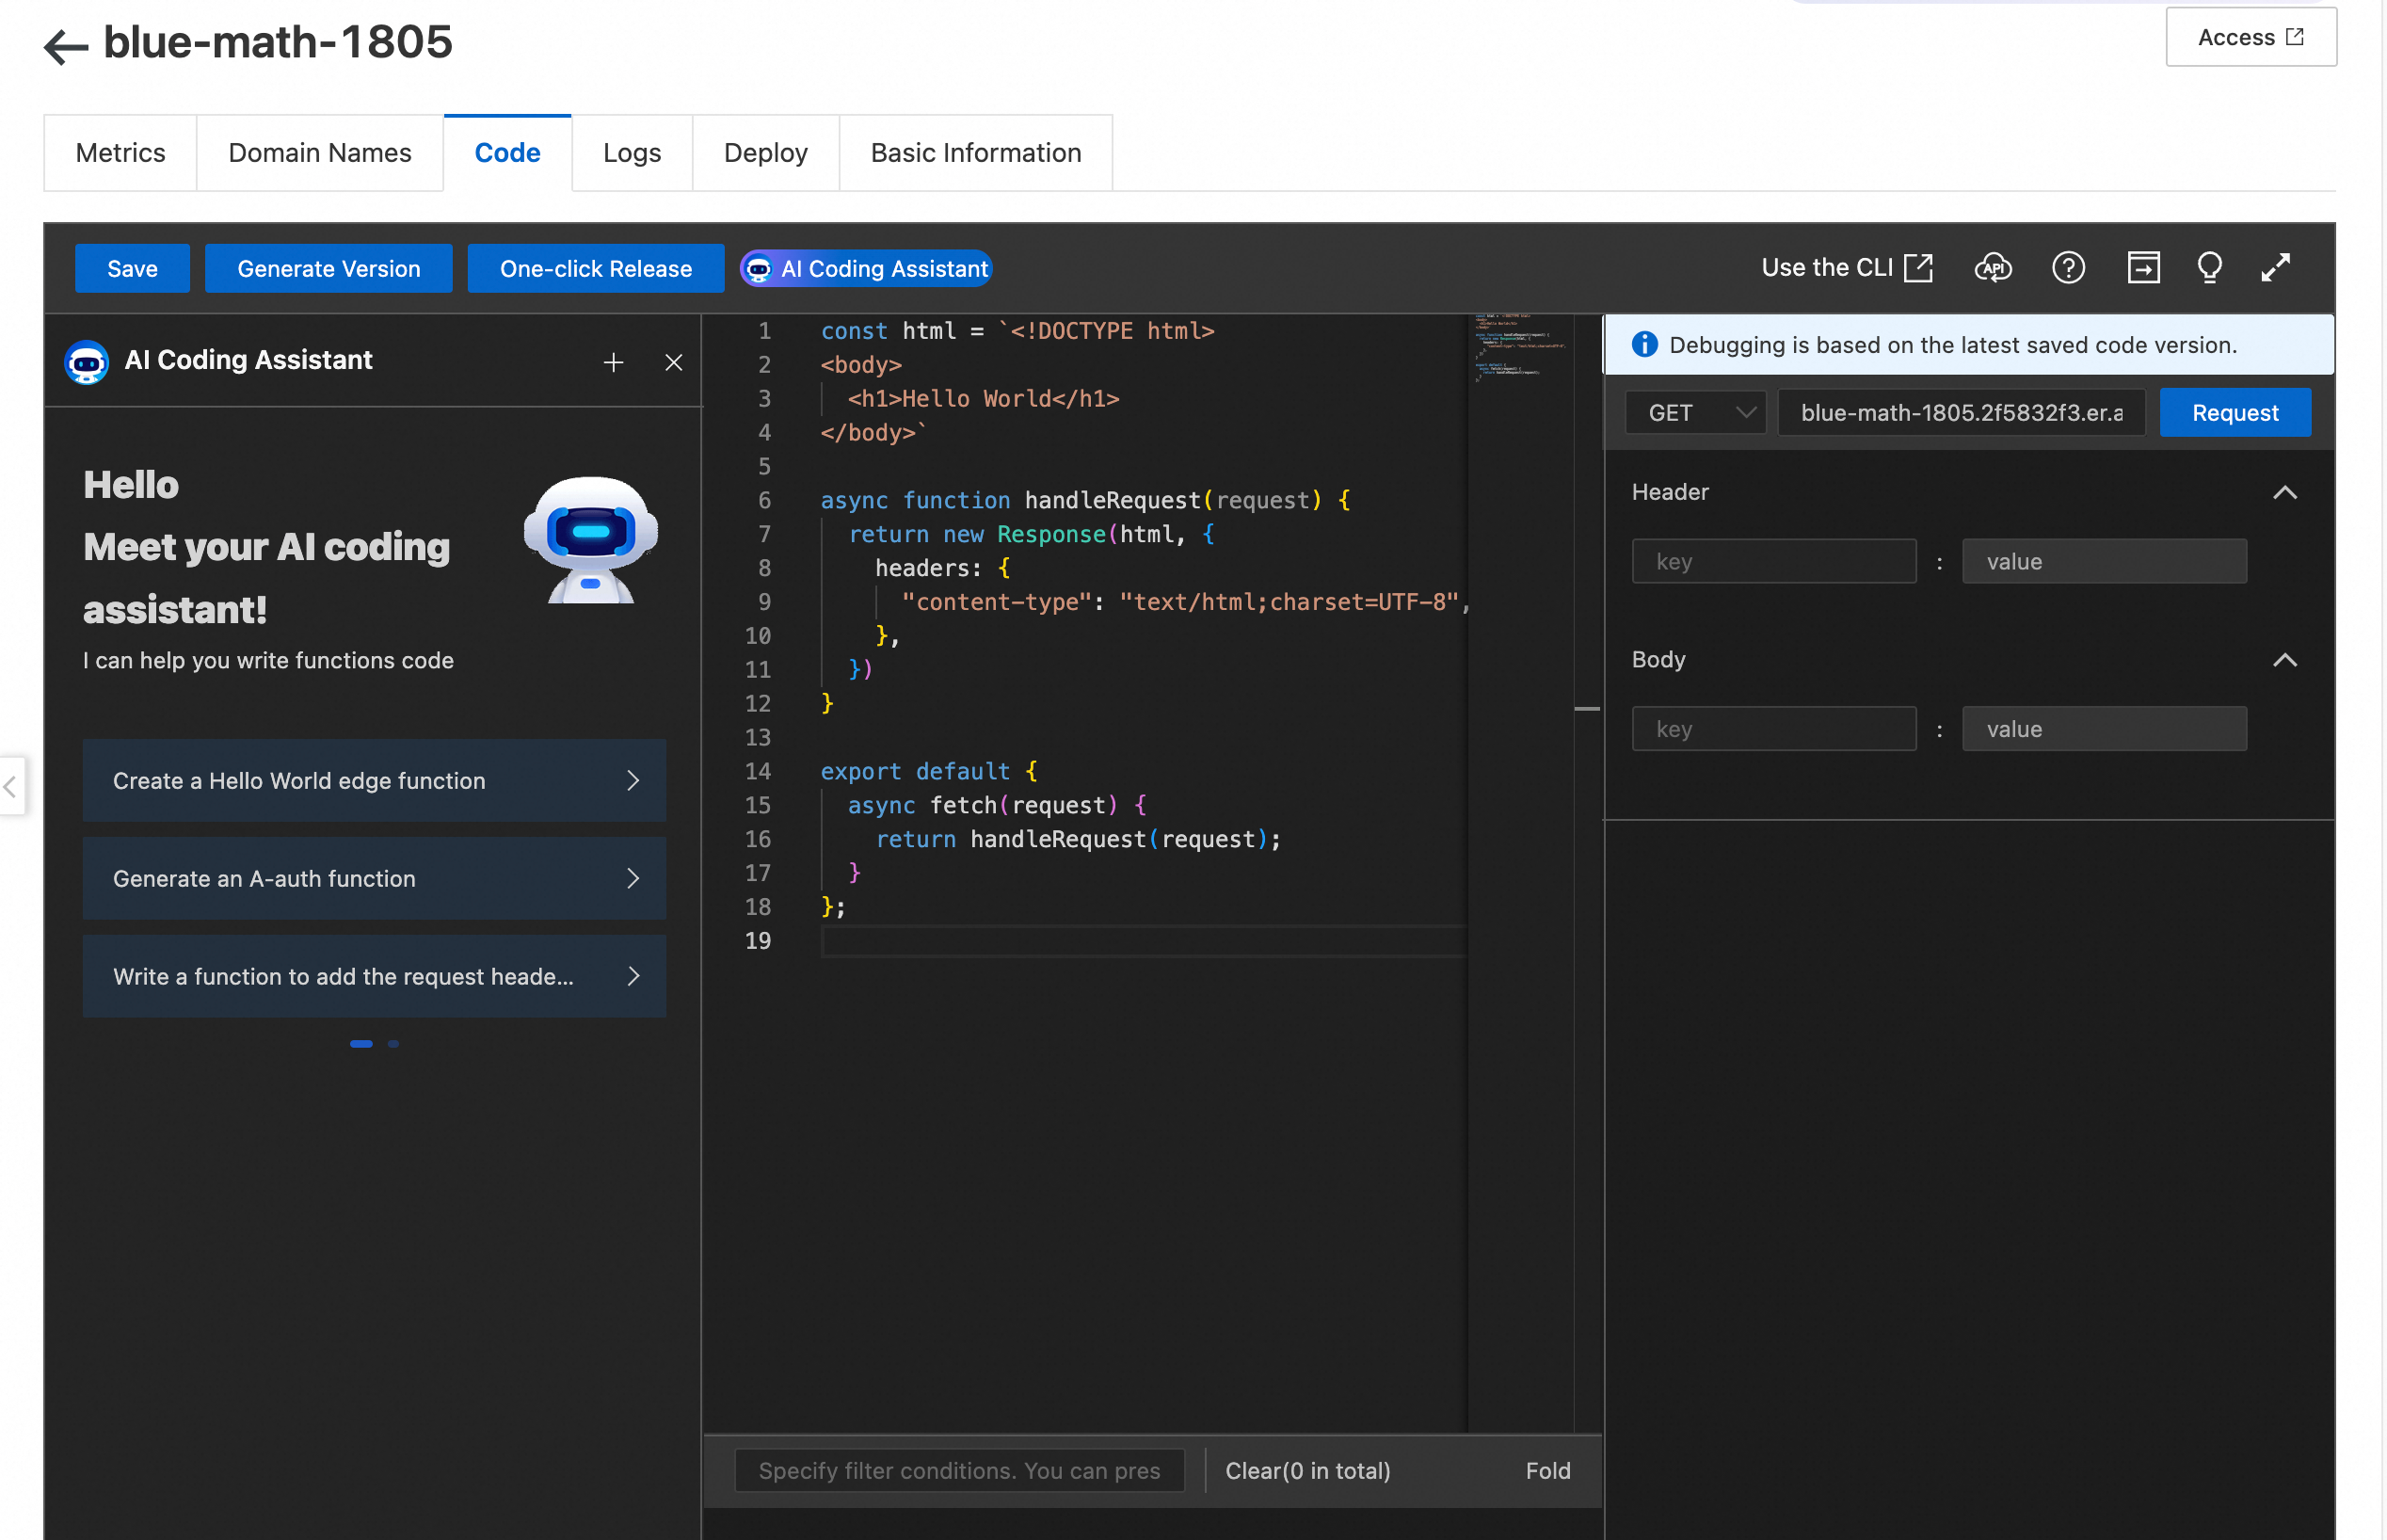
ESA provides a debugging environment to the right of the code editor in the console. After you finish developing your code, click Save in the menu bar. In the right-side toolbar, you can configure the HTTP request method, request header, and request body. Then, click the Request button. The console returns the response after the function processes the request.
After you debug the code, click Generate Version.
Select the Deploy tab and click Release. In the dialog box that appears, select Staging Environment to publish the function. The function becomes active on the edge testing POPs. You can use a real client to send requests by attaching a
Hostheader and view the results on the client.
Step 3: Publish the official version
After you validate that the function runs stably in the staging environment, you can publish the function code to the production environment.
Select the Deploy tab and click Release.
Select Production Environment, select the version to publish, and then click Release. This action deploys the selected version of the function code to all POPs in the production environment.

Bind a custom domain name
After you create the Page, add your site to ESA. Then, add a DNS record for your domain name that points to the public access link. This lets you access the Page using your custom domain name.
After the build is complete, click Associate Domain Name to associate a domain name from your site with the Page.
On the Domains page, you can bind a custom domain name by configuring a Custom Domains or a Routes.
Domain name
The domain binding feature associates a Page with your website's domain name. After the association is complete, you can use the domain name to access the Page.
In the Custom Domains section, click Add Domain Name.
Enter the custom domain name to bind, such as
page.example.com, and click OK.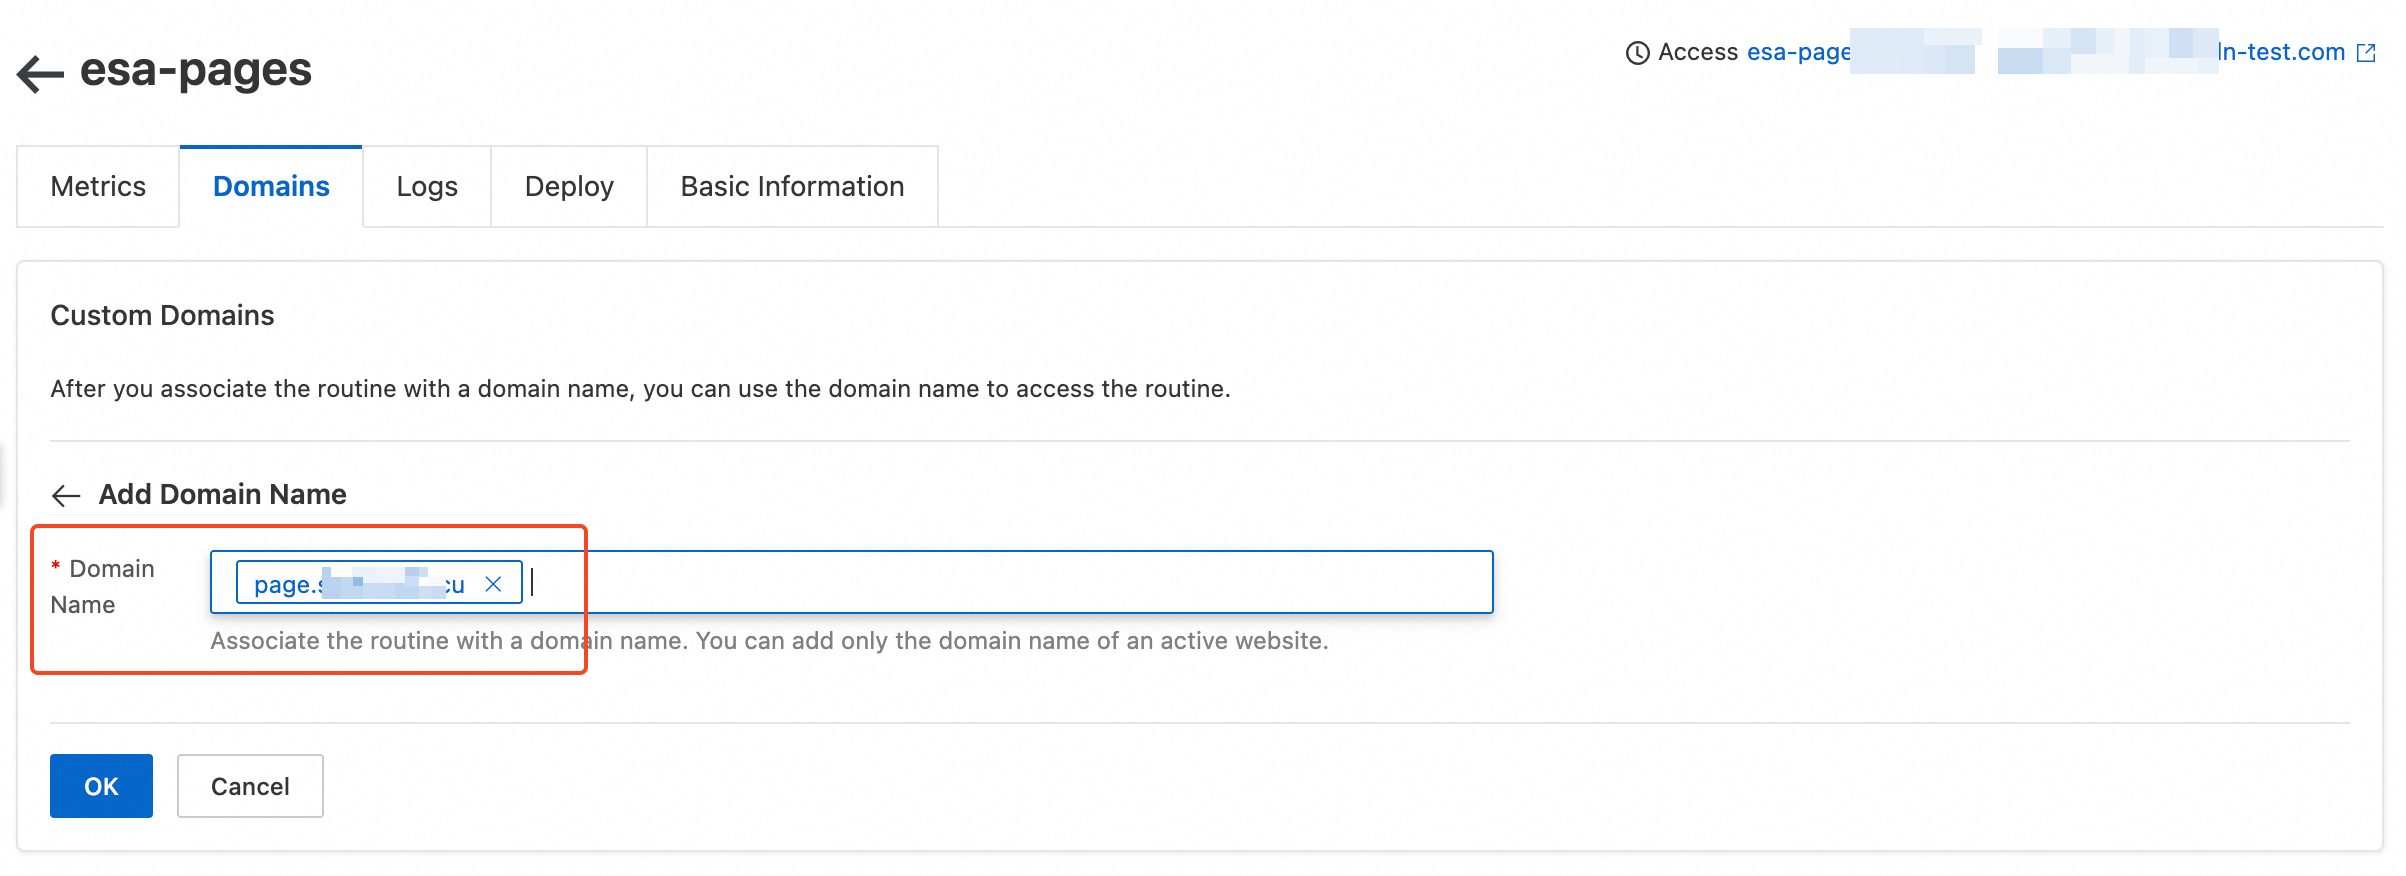
NoteFor domain names added using NS records, a DNS record is automatically created to point to the edge function.
For domain names added using a CNAME record, a CNAME value is automatically generated. You must manually add a CNAME record at your DNS provider.
Configuration via routing
You can use a route to map specific URLs to Pages. For example, if you configure a routing rule
example.com/a*for theexample.comsite, all requests for paths that match the rule, such as/a,/a1, and/a2, are processed by Pages. Other requests for paths that do not match the rule, such as/b,/c, and/d, continue to follow the acceleration, origin fetch, or caching flow.
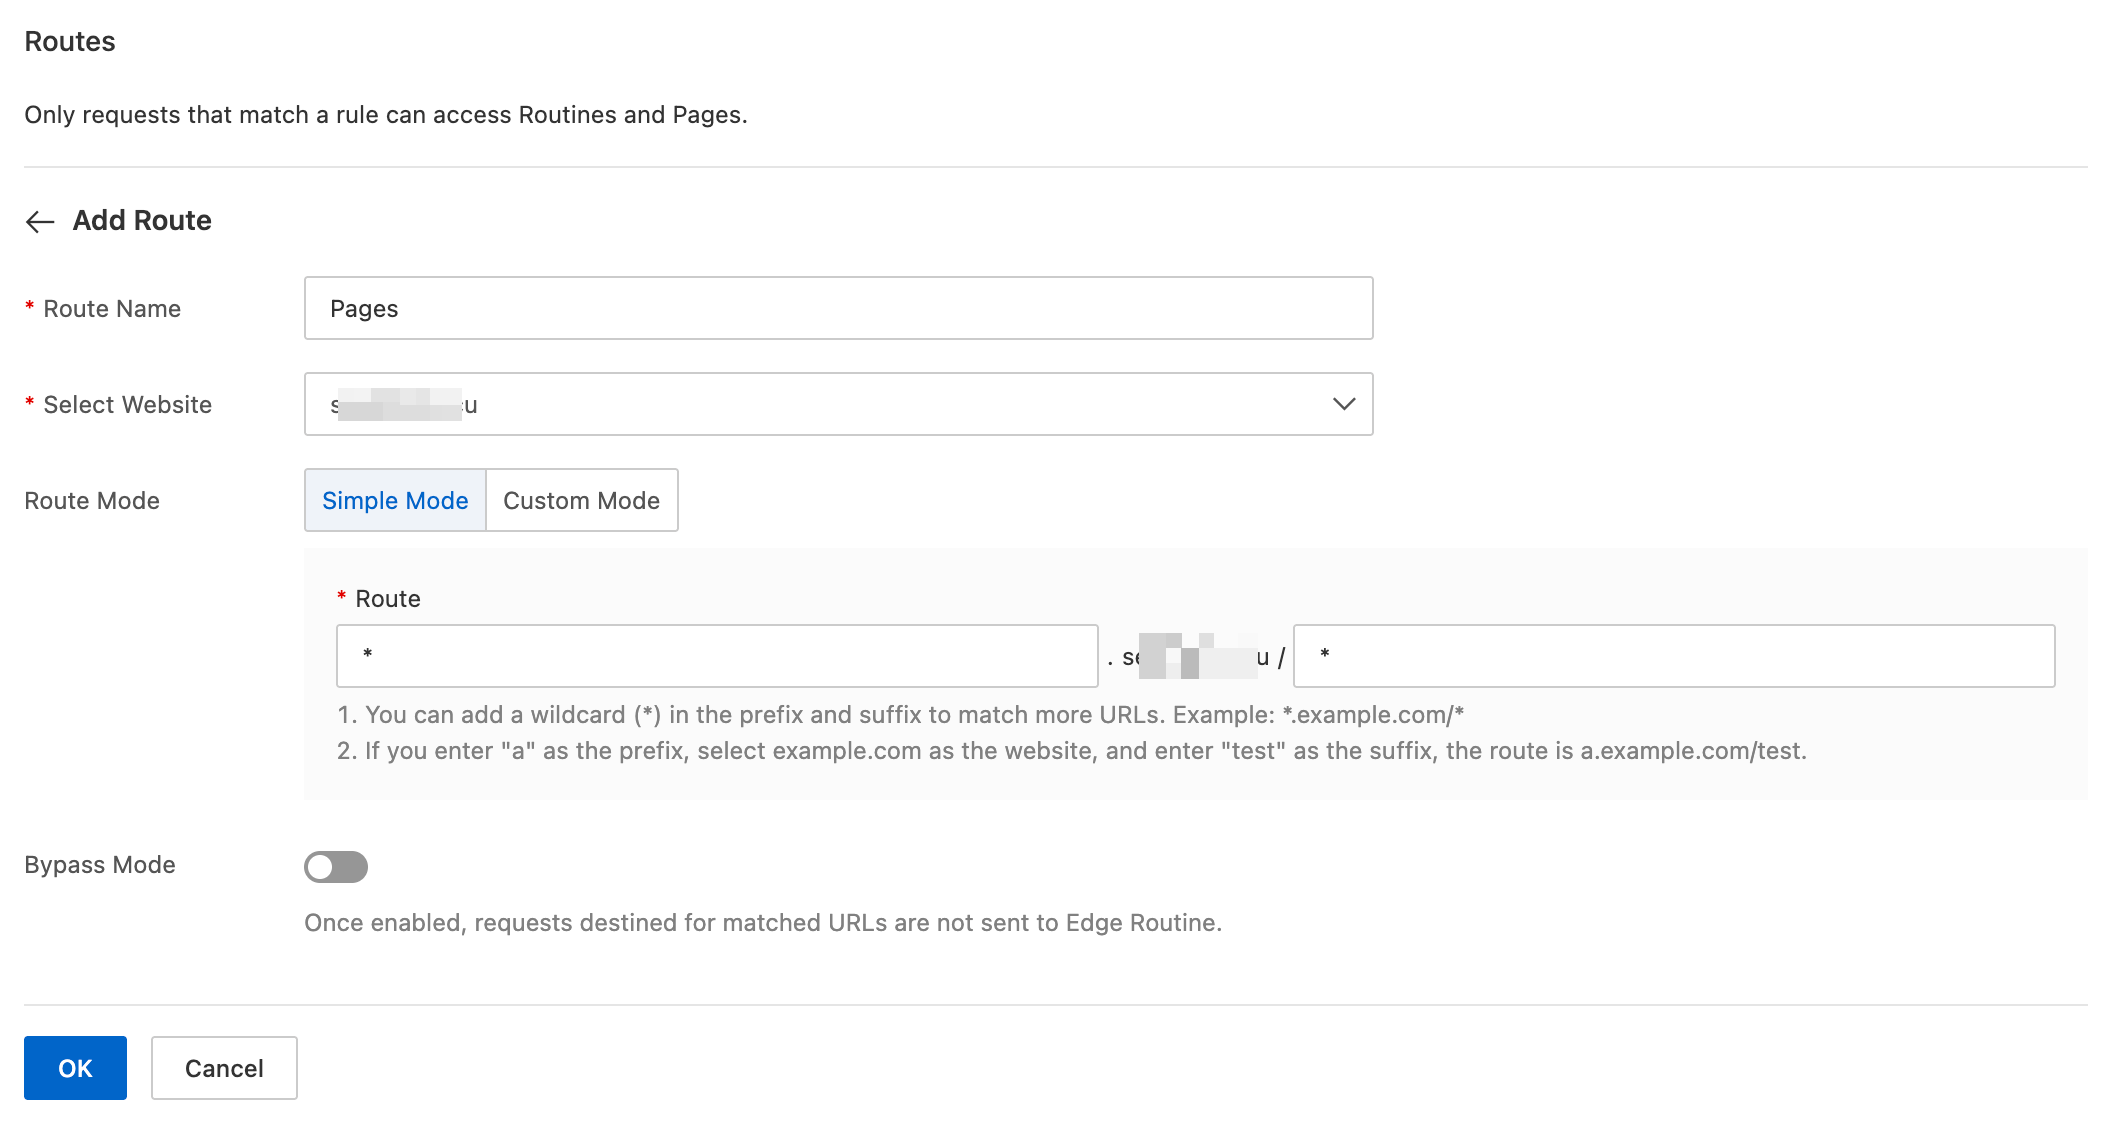
In the Routes section, click Add Route.
Enter a Route Name, such as
Pages. From the Select Website list, select the target site, such asexample.com. Simple Mode is selected by default. You can configure the prefix and suffix for the route as needed. The following are some examples:Example 1: If you set the route to
*.example.com/*, any request sent to http://pages.example.com/ orhttp://example.com/is forwarded to Pages.Example 2: If you set the route to
example.com/a*, any request sent tohttp://example.com/a,http://example.com/a1, orhttp://example.com/apiis forwarded to Pages.Example 3: If you set the route to
pages.example.com/api/*, any request sent tohttp://pages.example.com/api/and its subpaths, such ashttp://pages.example.com/api/usersorhttp://pages.example.com/api/products/123, is forwarded to Pages.
 Note
NoteIf the route you enter is a domain name with a prefix, such as
*.example.comorpages.example.com, you must also manually add a record to the DNS records in ESA. Otherwise, access will fail.If multiple function route rules are configured, they are matched from top to bottom. When a rule is matched, the system stops processing and does not check the remaining rules.
After the binding is complete, a DNS record is automatically generated for the corresponding site. If the site is added using NS records, it can be accessed directly with the custom domain name. If the site is added using a CNAME record, you must add a CNAME record at your DNS provider.

In a browser, access the custom domain name to view the created Page.