After you log on to an Elastic Compute Service (ECS) instance using Workbench, you can use the file management feature to perform operations such as uploading, downloading, and editing files through a visual interface.
Usage notes
File size limit: You can upload a file of up to 1200 MB to a Linux instance or a file of up to 100 MB to a Windows instance. If the file size exceeds the limit, use other file transfer methods.
Transfer speed: File transfers using Workbench may be slow during peak hours. If you experience slow transfer speeds, you can use other file transfer methods.
This feature is not supported for session management connections from the console.
Manage files on a Linux instance
Upload a file
How do I determine whether I am using Workbench 1.0 or 2.0?
Workbench 2.0
Log on to a Linux instance using Workbench.
Log on to the instance as the root user or a user with the required access permissions for the destination folder. Otherwise, the upload may fail due to insufficient permissions.
In the navigation pane on the left, click
 to open the file management page. Click the destination instance to expand the file tree.
An error message appears stating that the current logon method does not support file management when you click an instance in
Symptom
The error message shown in the following figure appears, and the ssm (session management) identifier is displayed after the instance name.

Cause
This feature is not supported when you connect to the instance using a session management connection.
Solutions
Solution 1: Use Workbench to log on to the instance using a terminal connection, and then retry the file transfer.
Solution 2: Upload or download files on the instance details page in the console.
Right-click the destination folder, click the Upload File button, and select the files that you want to upload.
Alternatively, you can double-click the destination folder in the left-side file tree. Then, in the pane that appears on the right, click Upload File or drag files to the pane to upload them.
Wait for the file transfer to complete.
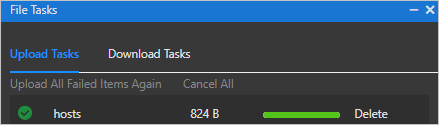
After the upload starts, the progress of the file upload task is displayed in the lower-right corner of the page.

Workbench 1.0
Log on to a Linux instance using Workbench.
Log on to the instance as the root user or a user with the required access permissions for the destination folder. Otherwise, the upload may fail due to insufficient permissions.
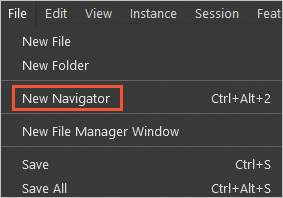
In the upper-left corner of the top menu bar, choose File > Open New File Tree.
Symptom

Cause
You may be connected to the instance using a session management connection. This feature is not supported for session management connections.
If you are not using a session management connection, try to refresh the page or reconnect to the instance.
Solutions
Solution 1: Use Workbench to log on to the instance using a terminal connection, and then retry the file transfer.
Solution 2: Upload or download files on the instance details page in the console.
In the file tree, right-click the destination folder, and then click Upload File.
Select the files to upload.
The upload is complete when a success message appears.
 Note
NoteIf a file fails to upload, you can retry the upload or delete the task. If multiple files fail to upload, you can click Re-upload All Failed Items to re-upload all of them.
You can modify, delete, download, or rename the uploaded files from the file list.
Download a file
How do I determine whether I am using Workbench 1.0 or 2.0?
Workbench 2.0
Log on to a Linux instance using Workbench.
Log on to the instance as the root user or a user with the required access permissions for the files to be downloaded. Otherwise, the download may fail due to insufficient permissions.
In the navigation pane on the left, click
to open the file management page. Click the destination instance to expand the file tree.An error message appears stating that the current logon method does not support file management when you click an instance in
Symptom
The error message shown in the following figure appears, and the ssm (session management) identifier is displayed after the instance name.
Cause
This feature is not supported when you connect to the instance using a session management connection.
Solutions
Solution 1: Use Workbench to log on to the instance using a terminal connection, and then retry the file transfer.
Solution 2: Upload or download files on the instance details page in the console.
Right-click the file that you want to download and click Download File.
You can also double-click the folder containing the file in the file tree on the left. Then, in the pane that opens, click
 > Download in the Actions column for the file.
Wait for the file transfer to complete.
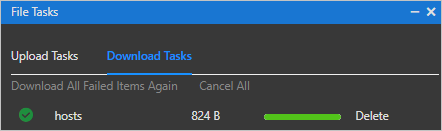
After you click Download, the progress of the file download task is displayed in the lower-right corner of the page.
Workbench 1.0
Log on to a Linux instance using Workbench.
Log on to the instance as the root user or a user with the required access permissions for the files to be downloaded. Otherwise, the download may fail due to insufficient permissions.
In the upper-left corner of the top menu bar, choose .
Symptom
Cause
You may be connected to the instance using a session management connection. This feature is not supported for session management connections.
If you are not using a session management connection, try to refresh the page or reconnect to the instance.
Solutions
Solution 1: Use Workbench to log on to the instance using a terminal connection, and then retry the file transfer.
Solution 2: Upload or download files on the instance details page in the console.
In the file tree, right-click the file that you want to download, and then click Download File.
The download is complete when a success message appears.
 Note
NoteIf a file fails to download, you can retry the download or delete the task. If multiple files fail to download, you can click Re-download All Failed Items to re-download all of them.
Create a file
How do I determine whether I am using Workbench 1.0 or 2.0?
Workbench 2.0
Log on to a Linux instance using Workbench
Log on as the root user or a user with read and write permissions. Otherwise, you cannot view or edit files.
In the menu bar on the left, click
to go to the file management page. Click the target instance to expand the file tree.In the file tree on the left, right-click the target folder and click New File.
In the New File dialog box, enter a file name and click OK.
Workbench 1.0
Log on to a Linux instance using Workbench.
Log on as the root user or a user with write permissions on the target folder. Otherwise, you may not be able to create files.
In the top menu bar, choose .
In the file tree on the left, right-click the target folder and click New File.
In the New File dialog box, enter a file name and click OK.
View or edit a file
How do I determine whether I am using Workbench 1.0 or 2.0?
Workbench 2.0
Log on to a Linux instance using Workbench
Log on as the root user or a user with read and write permissions. Otherwise, you cannot view or edit files.
In the menu bar on the left, click
to go to the file management page. Click the target instance to expand the file tree.Double-click the target file to view or modify its content.
You can directly edit the file on this page. After you finish editing, press
Ctrl+S(Windows) orCommand+S(Mac) to save the changes.
Workbench 1.0
Log on to a Linux instance using Workbench
Log on as the root user or a user with read and write permissions. Otherwise, you cannot view or edit files.
In the top menu bar, choose .
In the file tree on the left, double-click the target file to view its content.
You can directly edit the file on this page. After you finish editing, click the
 icon on the right side of the page to save the changes.
Delete a file
Before you delete a file, make sure that it is no longer used by any services and is not a system dependency to avoid affecting your business.
How do I determine whether I am using Workbench 1.0 or 2.0?
Workbench 2.0
Log on to a Linux instance using Workbench
Log on as the root user or a user with file deletion permissions. Otherwise, you cannot delete files.
In the menu bar on the left, click
to go to the file management page. Click the target instance to expand the file tree.In the file tree, right-click the target file and select Delete.
In the Confirm Deletion dialog box, confirm the information and click OK.
Workbench 1.0
Log on to a Linux instance using Workbench
Log on as the root user or a user with file deletion permissions. Otherwise, you cannot delete files.
In the top menu bar, choose .
In the file tree, right-click the target file and select Delete.
In the Confirm Deletion dialog box, confirm the information and click OK.
Manage files on a Windows instance
Upload a file
In the search box, search for and open This PC.
If you cannot find This PC, open File Explorer and then click This PC in the navigation pane on the left.
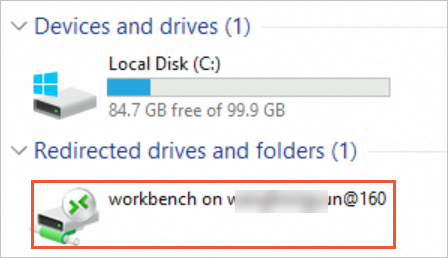
In the Redirected Drives And Folders section, double-click the workbench on xxx@ drive.
Drag the object file, such as test.txt, from your local computer to this folder.

Then, drag the object file from this folder to drive C or another drive.
ImportantWhen you reconnect to or exit the instance, Workbench automatically purges all uploaded file information from the Redirected Drives And Folders section to save space. This folder is used only for file transfers. Do not save your files in this folder.
Download a file
You cannot download empty files.
In the Windows search box, search for and open This PC.
In the Redirected Drives And Folders section, double-click the workbench on xxx@ drive.

Drag the object file from drive C or another drive to the Download folder. The file is then downloaded to your local computer.
FAQ
How do I determine whether I am using Workbench 1.0 or 2.0? How do I switch to 2.0?
You can identify the Workbench version based on the UI. In the upper-left corner, Workbench 2.0 displays the Workbench icon  , whereas Workbench 1.0 displays the word WORKBENCH. The left-side navigation pane is also different.
Workbench 2.0 | Workbench 1.0 |
|
|


To switch the Workbench version, click New Version in the upper-right corner to switch to 2.0, or click Previous Version to switch back to 1.0.
The file management page displays a message indicating that the current logon method does not support file management
Symptom
The error message shown in the following figure appears, and the ssm (session management) identifier is displayed after the instance name.
Cause
This feature is not supported when you connect to the instance using a session management connection.
Solutions
Solution 1: Use Workbench to log on to the instance using a terminal connection, and then retry the file transfer.
Solution 2: Upload or download files on the instance details page in the console.
The top menu bar cannot be found
Symptom: The menu bar and the File button are not displayed at the top of the Workbench interface.
Cause: The top menu bar is hidden.
Solution: Right-click the terminal interface and click Show/Hide Menu Bar.
The "Open new file tree" feature cannot be found when connecting to a Linux instance
Symptom
Cause
You may be connected to the instance using a session management connection. This feature is not supported for session management connections.
If you are not using a session management connection, try to refresh the page or reconnect to the instance.
Solutions
Solution 1: Use Workbench to log on to the instance using a terminal connection, and then retry the file transfer.
Solution 2: Upload or download files on the instance details page in the console.
A file fails to be uploaded from a local computer, and a "Permission Denied" error is reported
Symptom
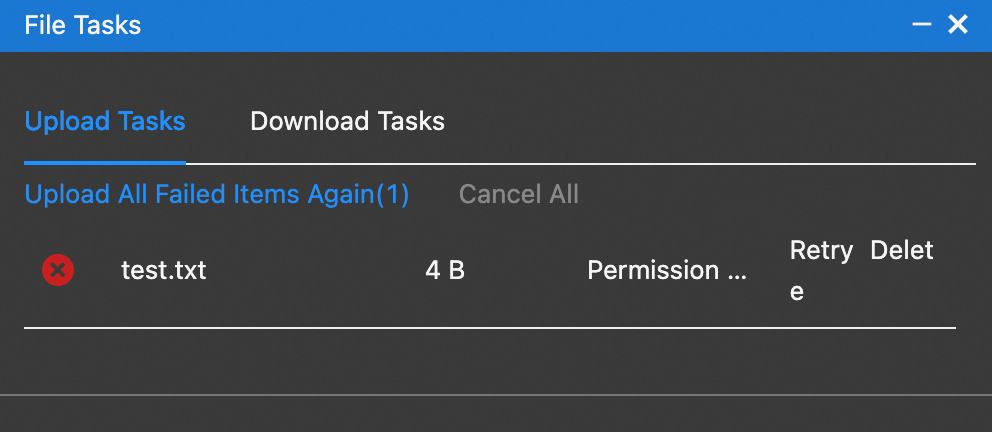
Cause
The user that you use to log on to the instance may not have write permissions for the destination folder. This causes the file upload to fail. For example, this error occurs if you log on to the instance as the
ecs-useruser and upload a file to the/optfolder.Solutions
Log on as the root user and upload the file.
Log on to the instance again as the root user and upload the file.
If you selected ecs-user as the logon username when you created the instance, you must set a password for the root user before you can log on to the instance as the root user. For more information, see Method 1: Reset the password of an instance online in the console.
Upload the file to the home directory of the current user.
For example, if you log on to the instance as the ecs-user user, you can upload files to the home directory of the ecs-user user, which is the
/home/ecs-userfolder.