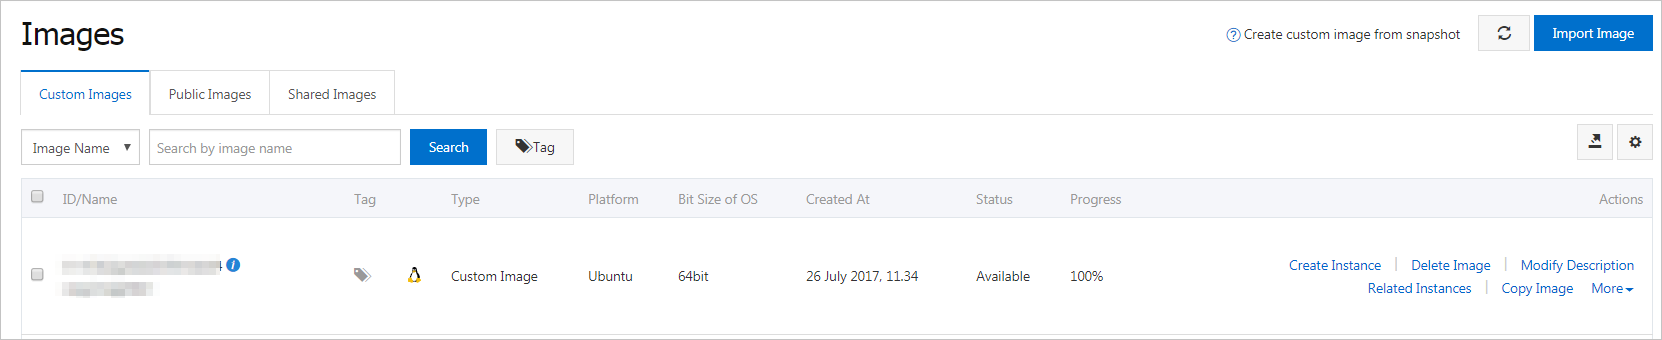
Download and install a language pack on a Windows Server ECS instance to change the display language.
Background
ECS provides only Chinese and English editions of Windows Server public images. To use another language, such as Arabic, German, Russian, or Japanese, change the preferred language on your ECS instance.
This example changes the display language from Chinese to Japanese on Windows Server 2012 and later, and creates a custom image to replicate the settings.
Procedure
-
Connect to the Windows instance. See Connect to a Windows instance by using Workbench.
-
Open PowerShell.
-
Temporarily disable WSUS:
Set-ItemProperty -Path 'HKLM:\SOFTWARE\Policies\Microsoft\Windows\WindowsUpdate\AU' -Name UseWUServer -Value 0 Restart-Service -Name wuauserv -
Set the preferred language.
Windows Server 2019 and later versions
-
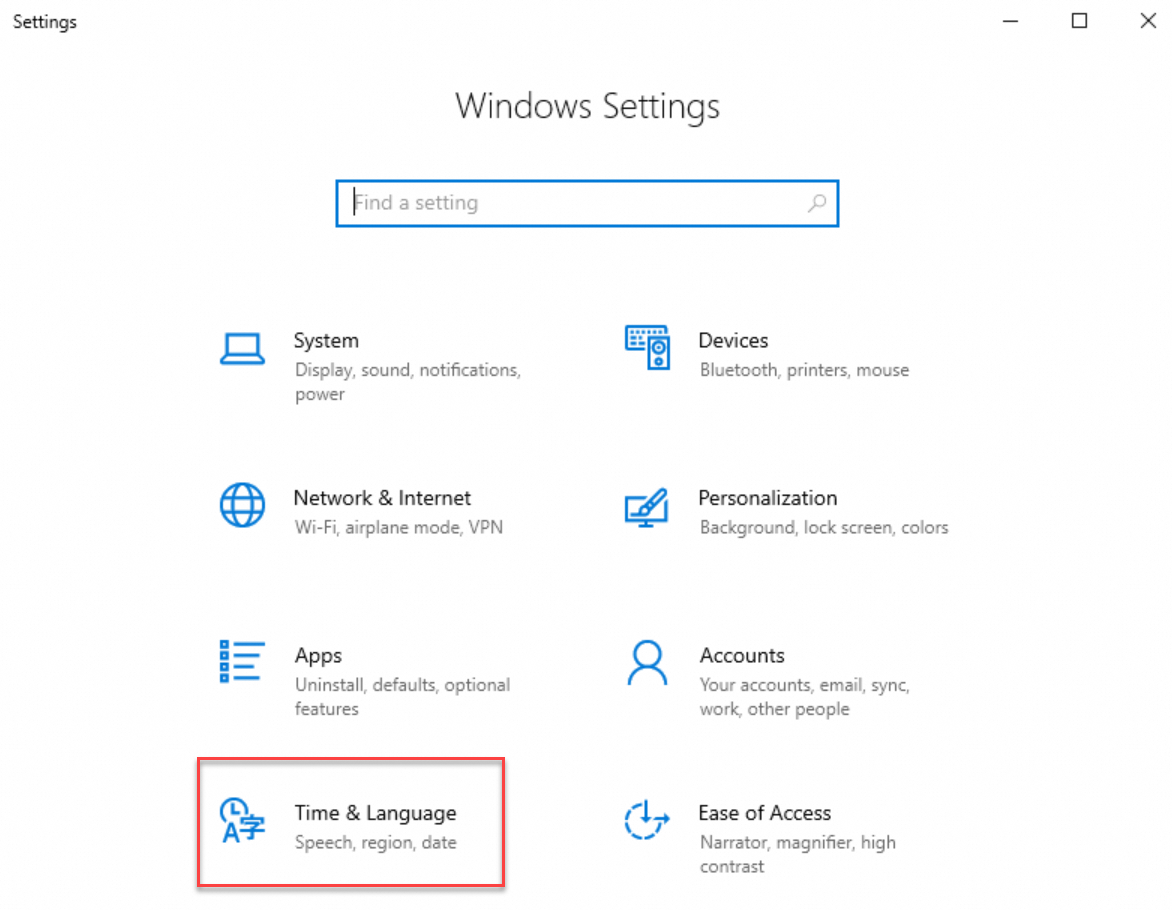
Open Windows Settings and select Time & Language.
-
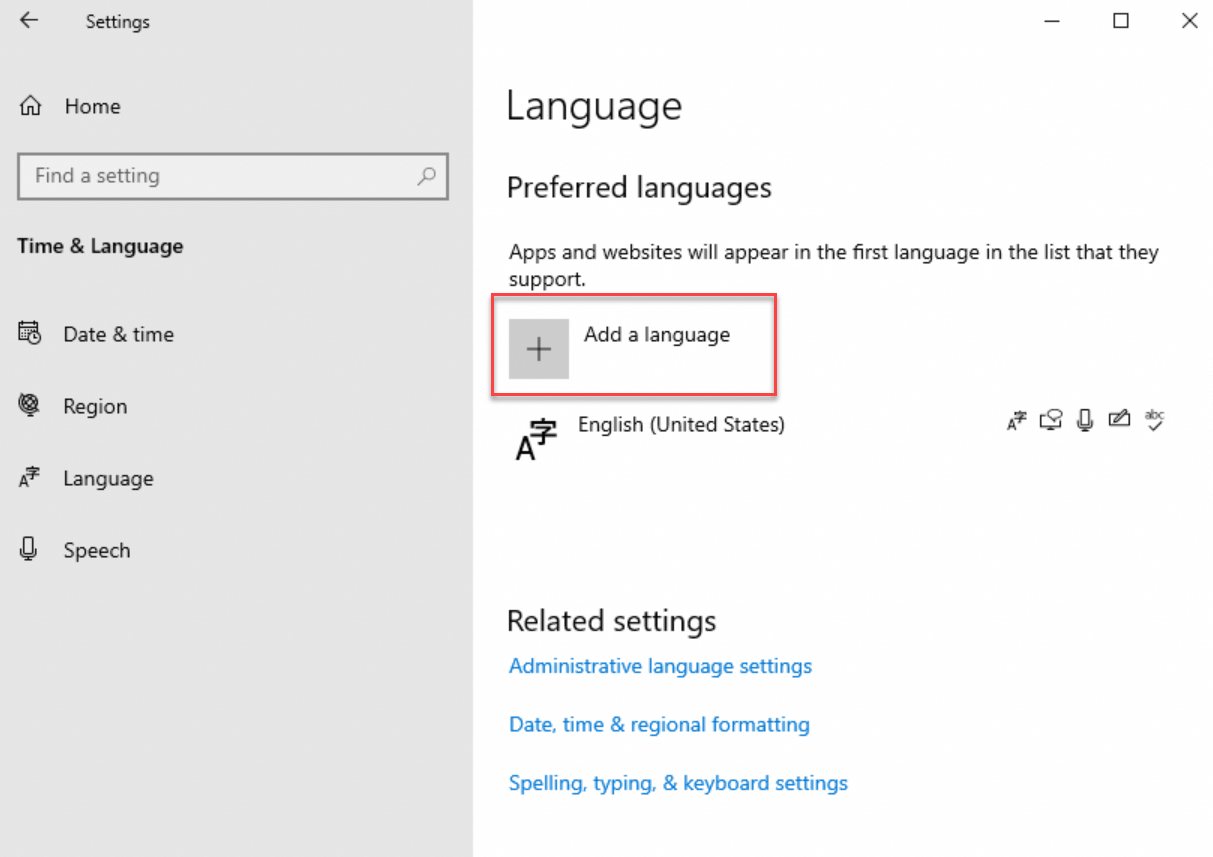
Click Language in the left-hand sidebar. Under Preferred Languages, click Add a language.
-
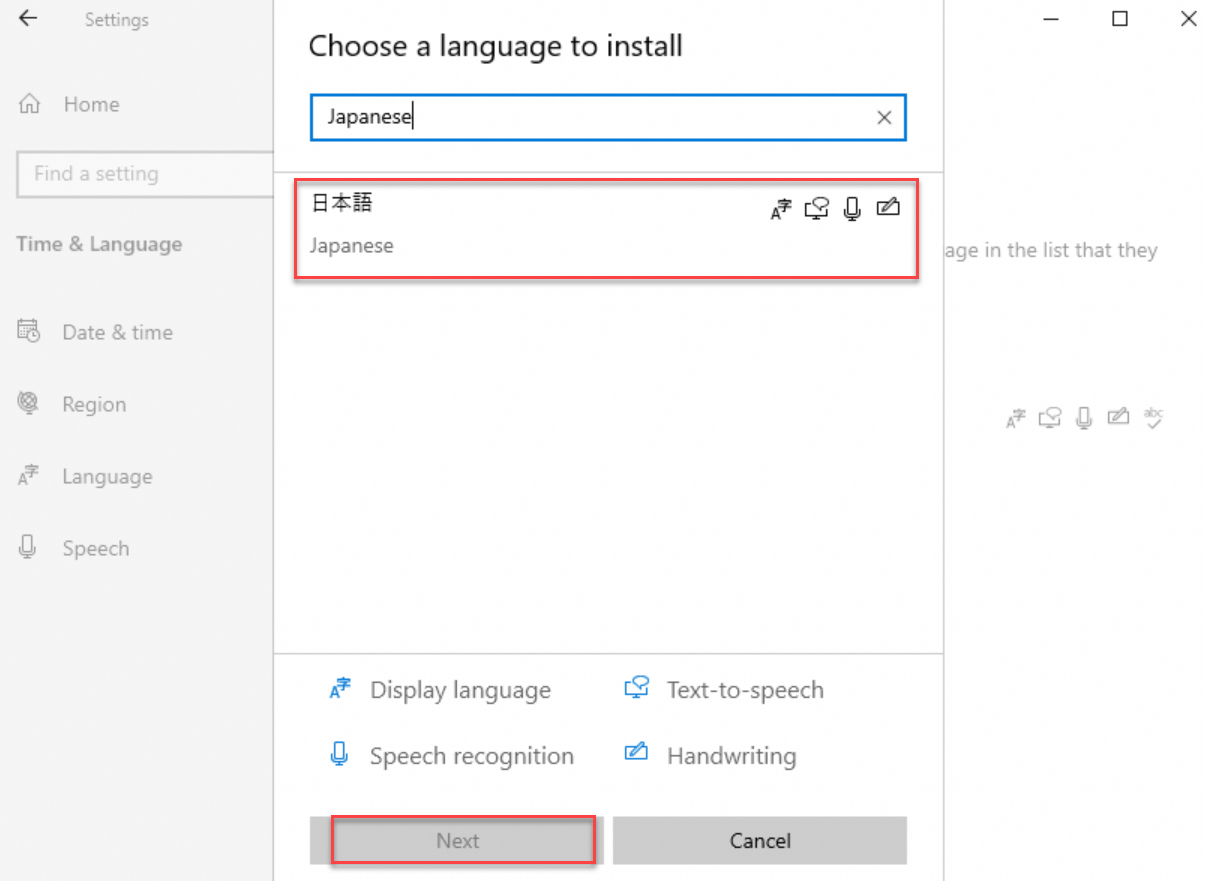
In the pop-up window, search for a language, such as , choose the language, and click Next.
-
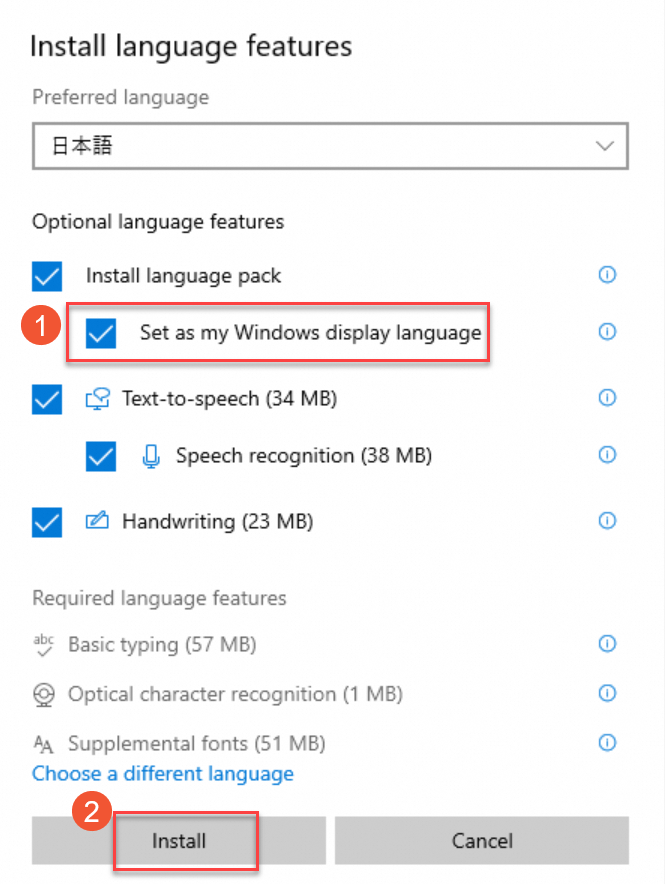
In the Install language features window, select Set as my Windows display language and click Install.
-
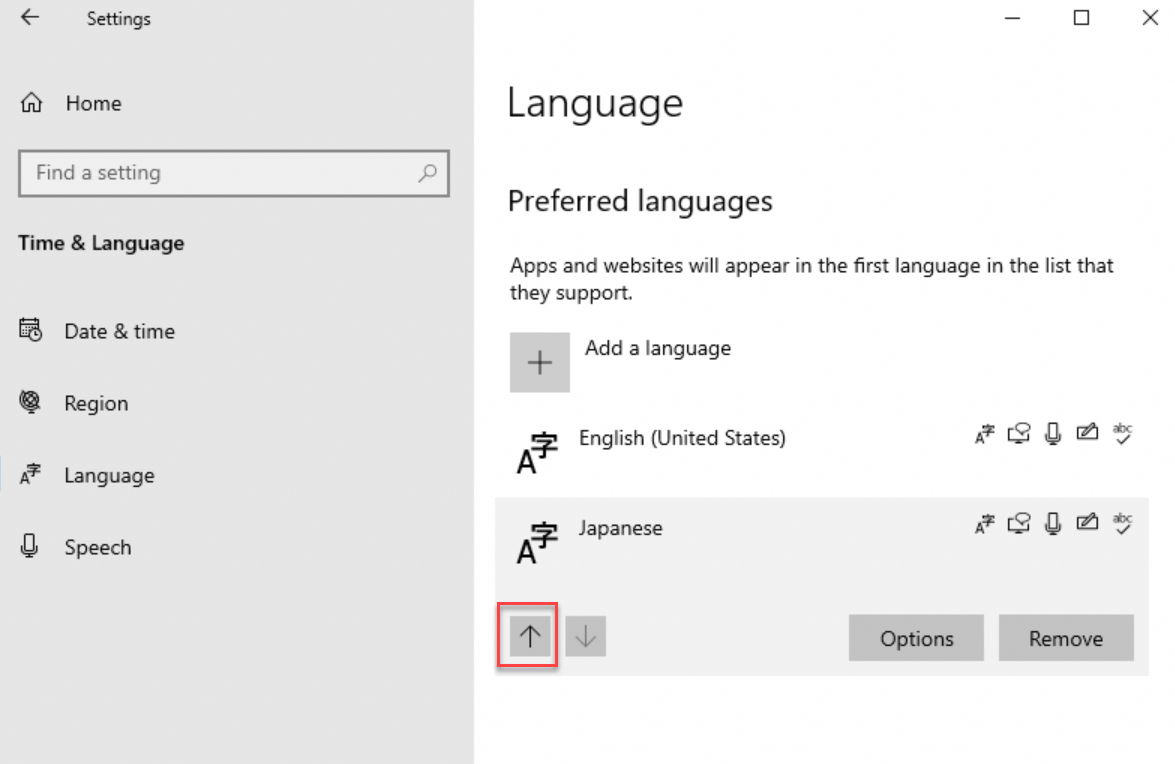
On the Language settings page, after the download completes, use the up arrow to raise the language priority.
-
Restart the instance from the ECS console. See Restart an instance.
-
Reconnect to the Windows instance. The display language is Japanese.
-
Open PowerShell ISE and enable WSUS:
Set-ItemProperty -Path 'HKLM:\SOFTWARE\Policies\Microsoft\Windows\WindowsUpdate\AU' -Name UseWUServer -Value 1 Restart-Service -Name wuauserv -
Go to Windows Update, check for security updates, and reinstall the updates that were installed before the language change.
Windows Server 2012 & 2016
-
Open Control Panel and navigate to .
-
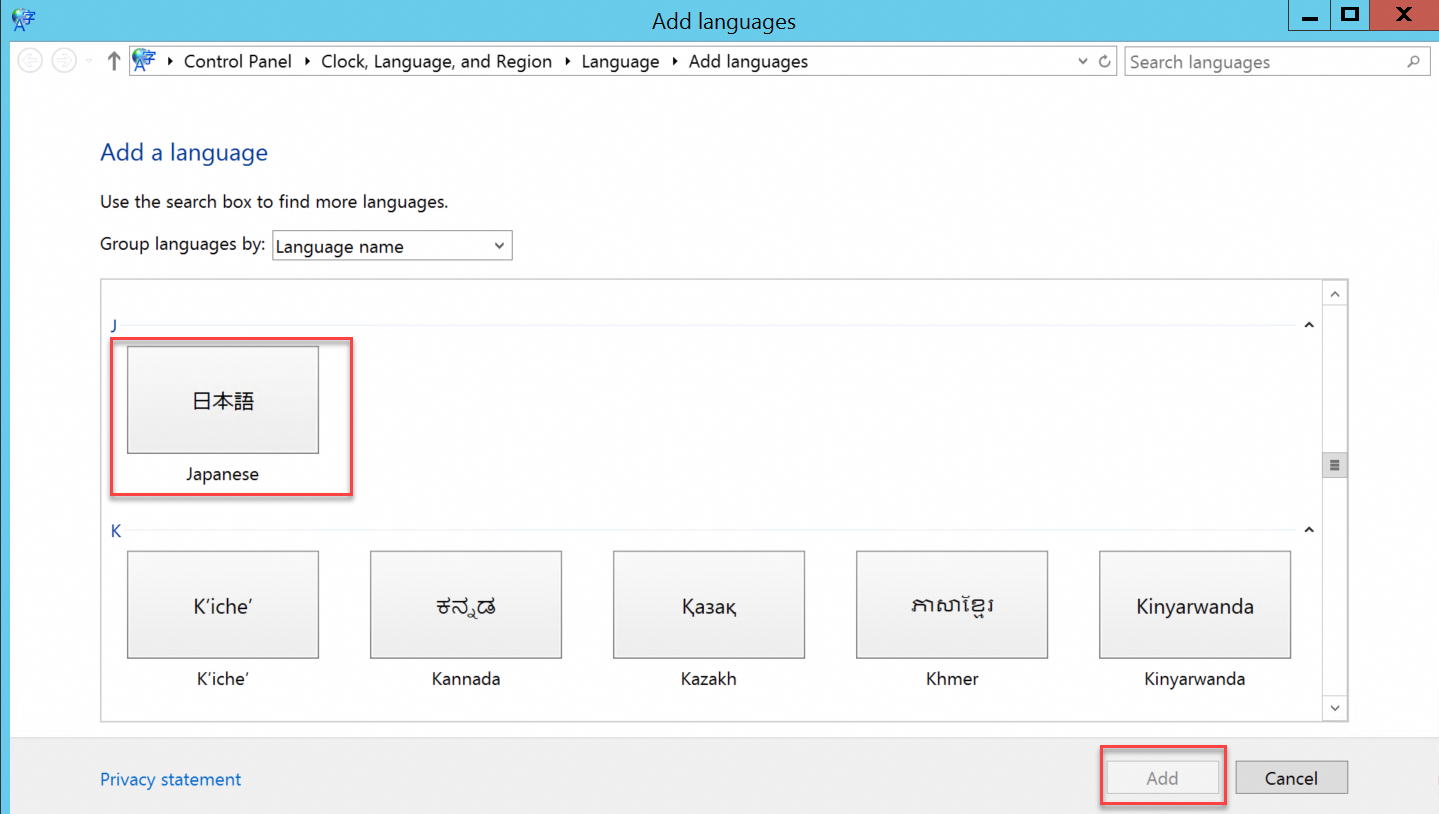
In the Add a language window, choose a language, such as , and click Add .
-
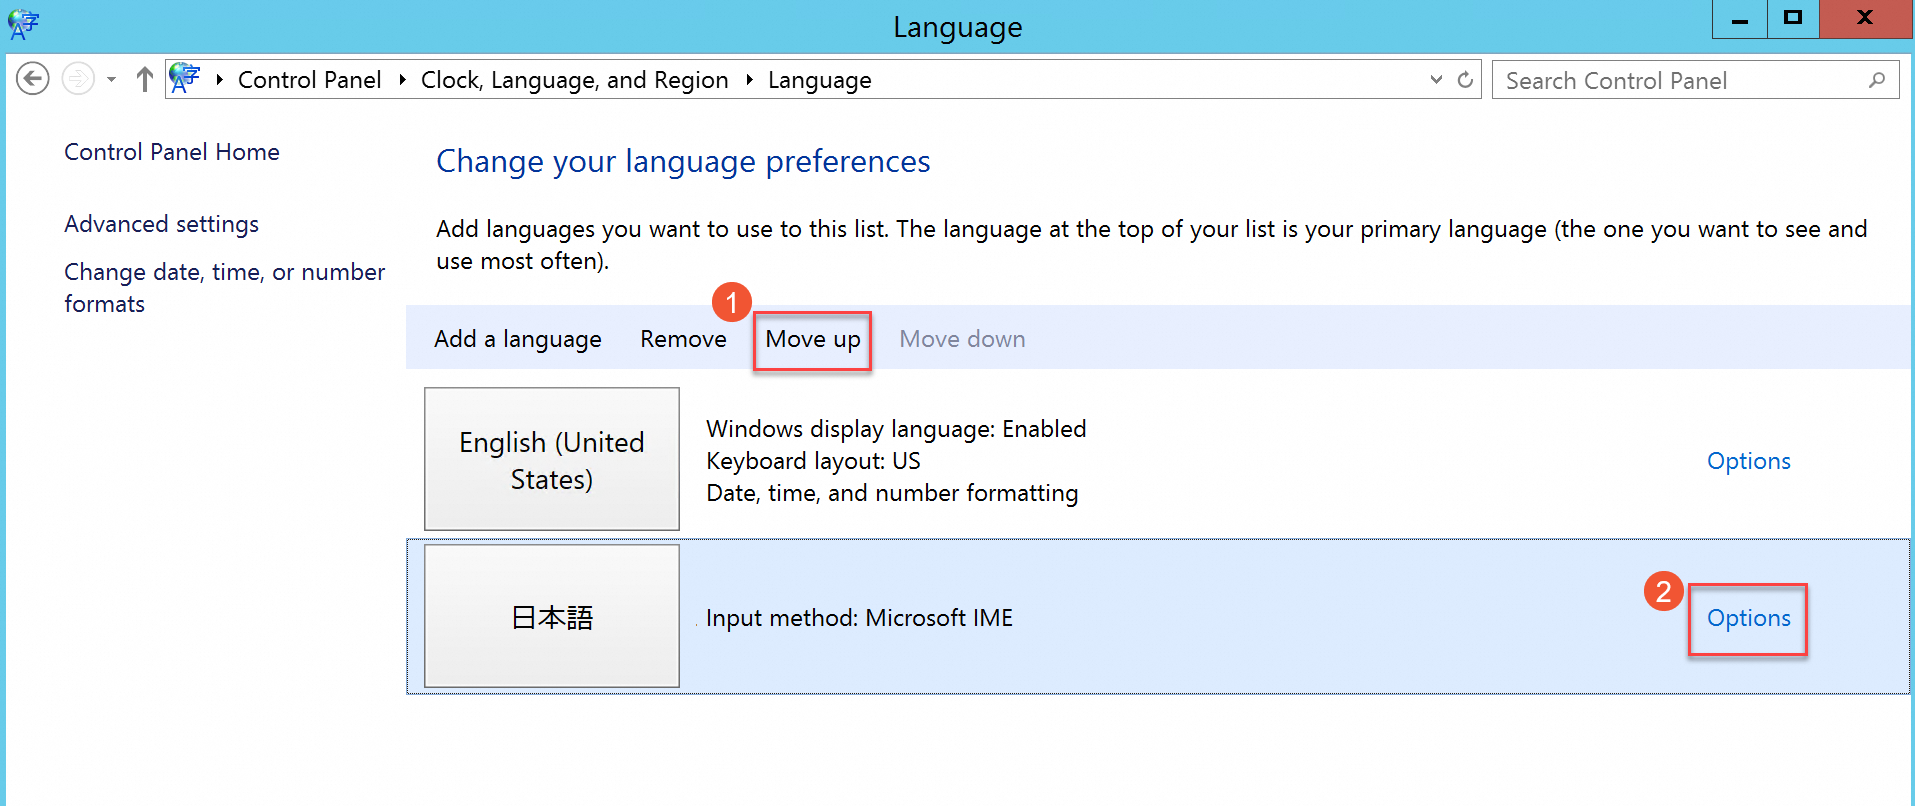
Choose a language, such as Japanese , and click Move Up to adjust the language priority.
-
Click Options next to the selected language to check for language updates online.
 Wait for the update check. After about three minutes, a download prompt appears. Click Download and install language pack.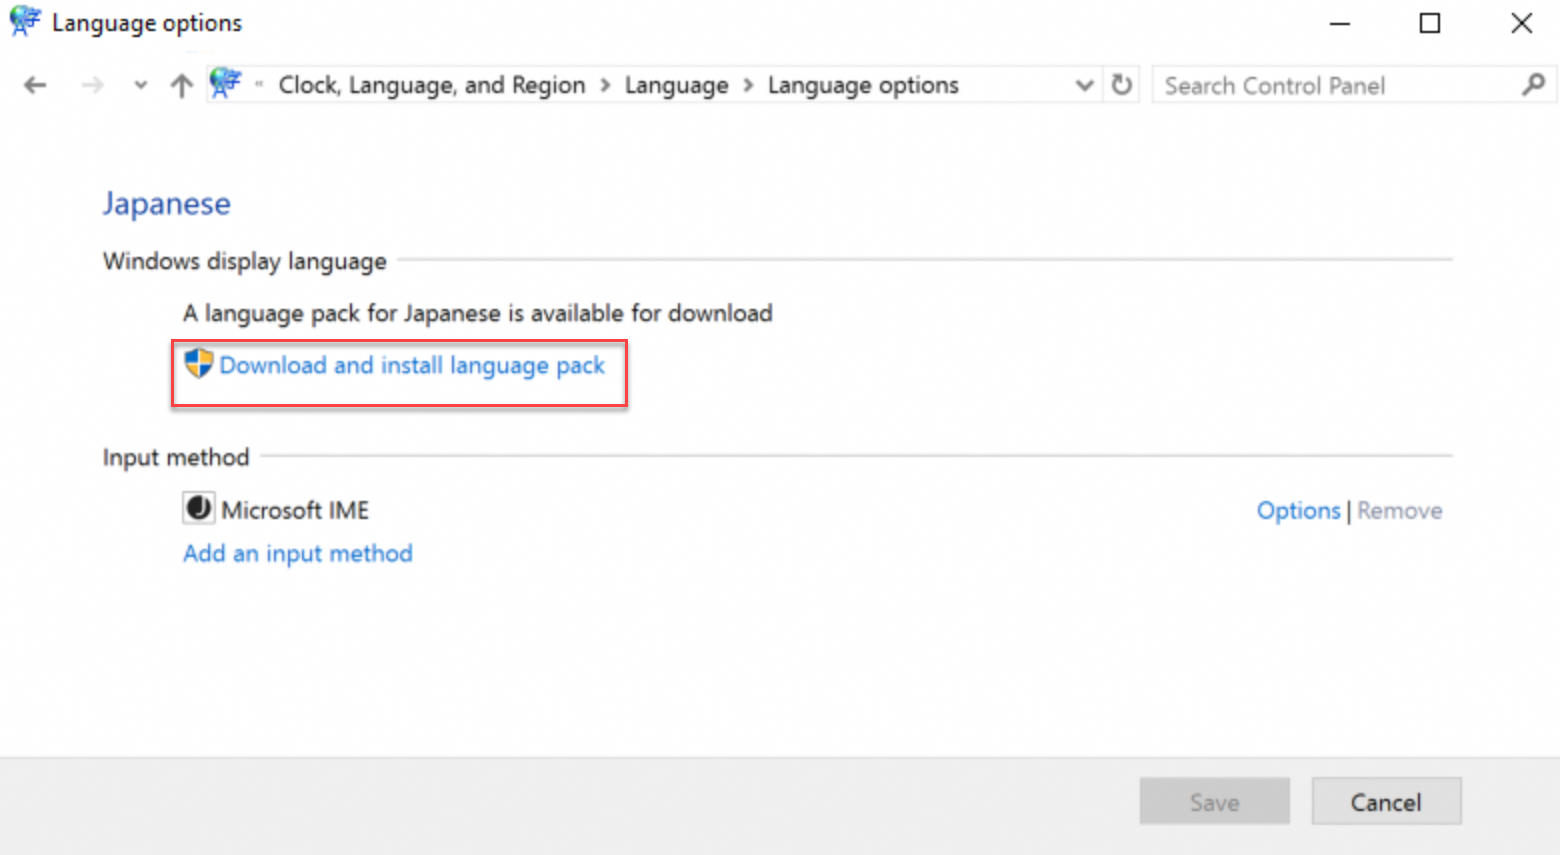
Wait for the installation to complete.
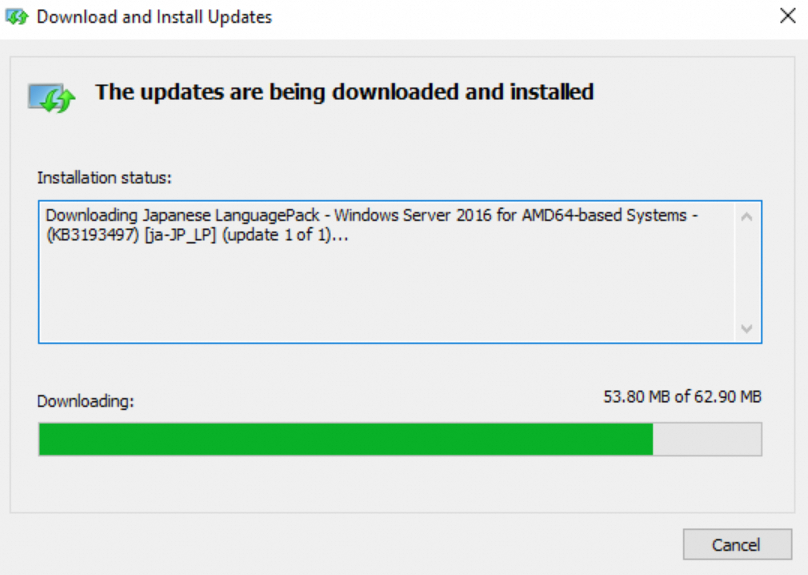
-
Restart the instance from the ECS console. See Restart an instance.
-
Reconnect to the Windows instance. The display language is Japanese.
-
Open PowerShell ISE and enable WSUS:
Set-ItemProperty -Path 'HKLM:\SOFTWARE\Policies\Microsoft\Windows\WindowsUpdate\AU' -Name UseWUServer -Value 1 Restart-Service -Name wuauserv -
Go to Windows Update, check for security updates, and reinstall the updates that were installed before the language change.
-
Next steps
To apply the same language settings to multiple instances:
-
Log in to the ECS console.
-
Create a custom image from the Windows instance. See Create a custom image from an instance.
-
Create instances from the custom image. See Create from custom image or shared image.