This topic describes how to configure firewall rules for an Elastic Compute Service (ECS) instance that runs Windows Server.
Overview
The following table describes firewall features and provides a link to the configuration procedure for each feature. In this example, an ECS instance that runs Windows Server 2022 is used.
Feature | Description |
Feature 1: Allow an application or feature to pass through Windows Defender Firewall | You can use this setting to allow a specific application or service to accept inbound connection requests from the Internet or other networks to ensure that the application or service can work as expected without being blocked by Windows Defender Firewall. For example, you can allow software, such as file sharing software or instant messaging software, to pass through Windows Defender Firewall. |
You can allow or block access to specific local ports from the Internet or other networks to reduce the chances of malware or attackers exploiting the ports. For example, if you do not need to use the FTP service that uses port 21 by default, you can deny access to port 21 to prevent threats. | |
You can use this setting to allow or block specific IP addresses from accessing your programs, services, or ports. This reduces the chances of malware or attackers exploiting vulnerabilities for intrusions. For example, you can allow the IP address of an on-premises computer to connect to the instance. |
Feature 1: Allow an application or feature to pass through Windows Defender Firewall
Connect to a Windows ECS instance by using Virtual Network Computing (VNC). For more information, see Connect to an instance by using VNC.
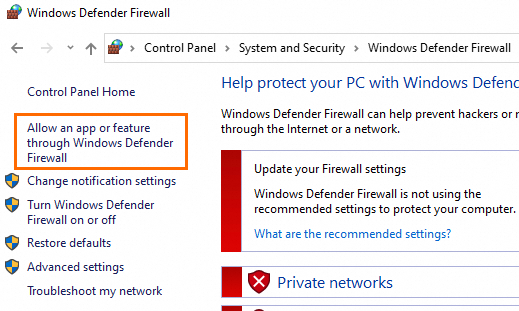
Choose .
In the left-side navigation pane of the Windows Defender Firewall window, click Allow an app or feature through Windows Defender Firewall.
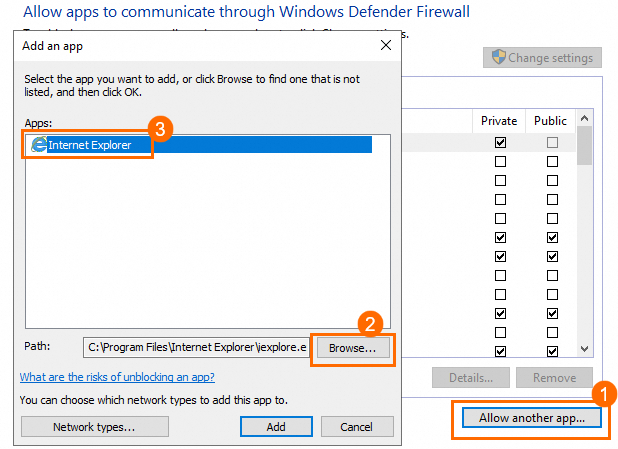
Click Allow another app.
In the Add an app dialog box, double-click the application that you want to add in the Apps section. If you cannot find the application that you want to add in the Apps section, click Browse. Find the file of the application in the file system and double-click the file.
Feature 2: Allow or block access to specific local ports
Connect to a Windows ECS instance by using Virtual Network Computing (VNC). For more information, see Connect to an instance by using VNC.
Choose .
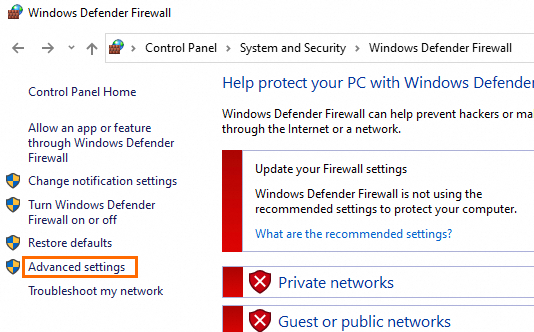
Click Advanced settings.
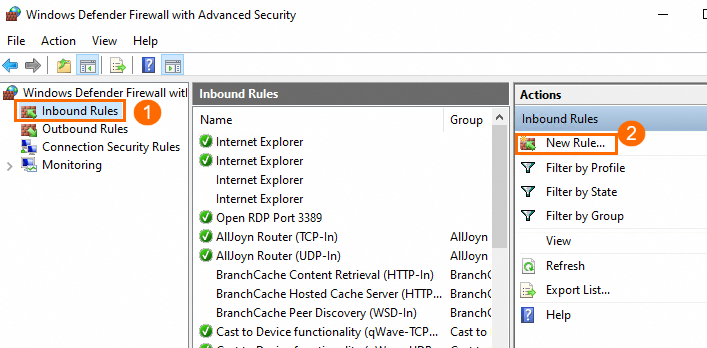
In the left-side navigation pane of the Windows Defender Firewall with Advanced Security window, click Inbound Rule. In the right-side Actions pannel, click New Rule.
Configure the rule.
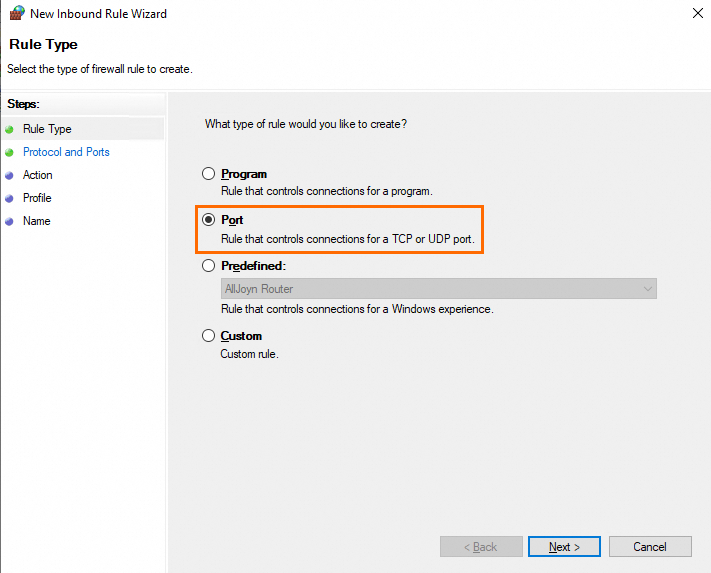
In the Rule Type step, select Port and click Next.
In the Protocol and Ports step, select TCP or UDP, select Specific local ports, and then enter an on-premises port to which you want to allow or deny access. Example:
8080. Click Next.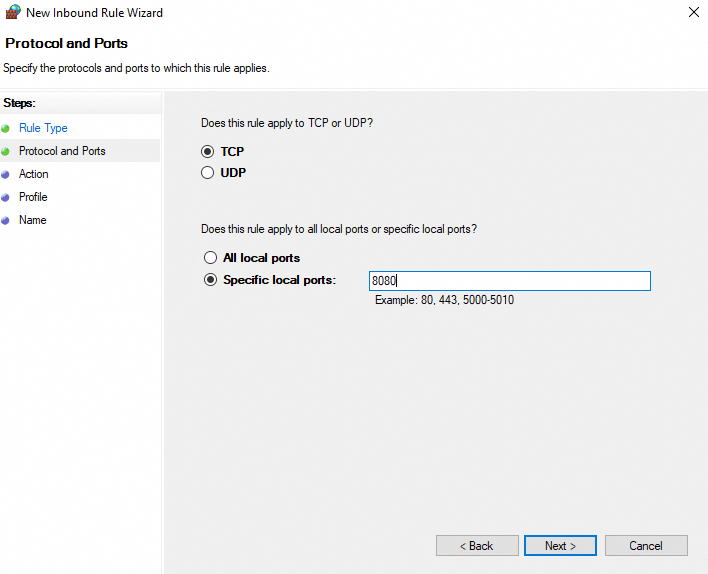
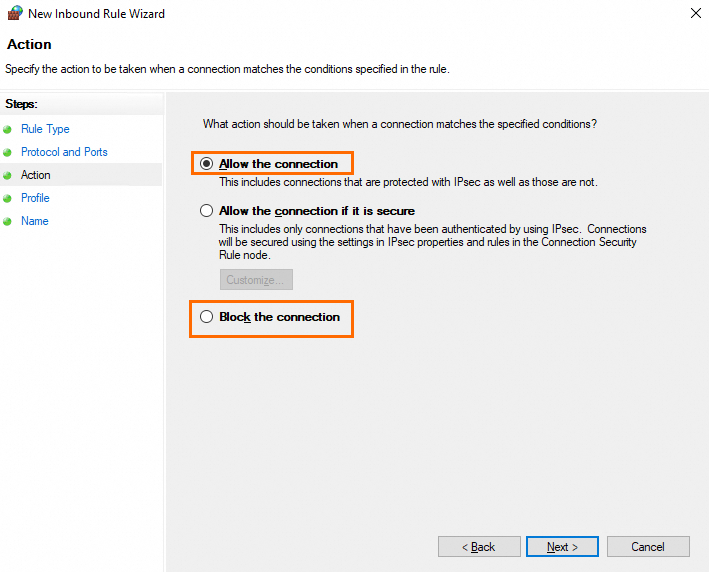
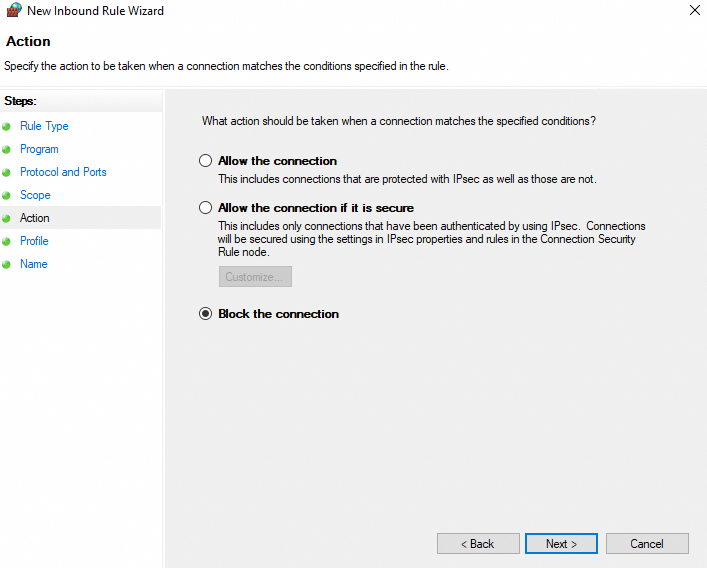
In the Action step, select Block the connection or Allow the connection. Click Next.
In the Profile step, select one or more appropriate profiles and click Next.
NoteBy default, all profiles are selected. Select profiles based on the on-premises network environment.
In the Name step, enter the rule name and description, and click Finish.
Feature 3: Allow or block access from specific IP addresses
Specify a scope of IP addresses to which the inbound rules apply. The inbound rules allow the IP addresses to access or block the IP addresses from accessing specific applications, services, or ports. You can specify a scope for an existing inbound rule or when you create a custom inbound rule.
In the Action step, if the action of an inbound rule is set to Allow the connection, the IP addresses are allowed to access the applications, services, or ports specified by the rule.
In the Action step, if the action of an inbound rule is set to Block the connection, the IP addresses are not allowed to access the applications, services, or ports specified by the rule.
Specify a scope for an existing inbound rule
Connect to a Windows ECS instance by using Virtual Network Computing (VNC). For more information, see Connect to an instance by using VNC.
Choose .
Click Advanced settings.
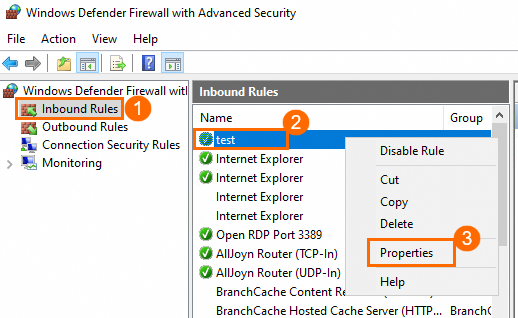
Click Inbound Rules. Find the inbound rule for which you want to specify a scope, right-click the rule, and then select Properties.
On the Scope tab, select These IP addresses in the Remote IP address section, and then click Add.
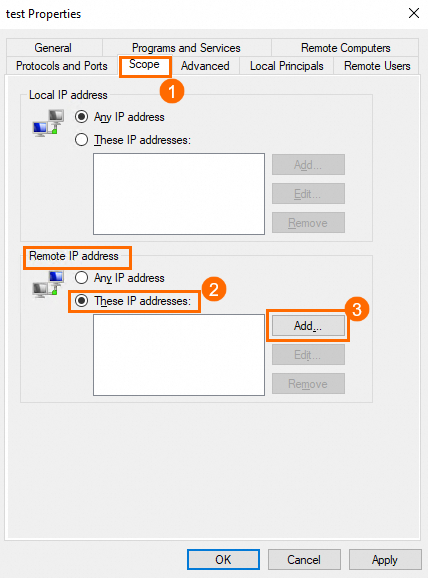
Enter an IP address or a CIDR block, such as the public IP address of your on-premises computer, and click OK.
NoteYou can click Add to add multiple IP addresses or CIDR blocks.

After you add IP addresses or CIDR blocks, click OK. The inbound rule takes effect on the specified IP addresses or CIDR blocks.
Create a rule and specify a scope for the rule
Connect to a Windows ECS instance by using Virtual Network Computing (VNC). For more information, see Connect to an instance by using VNC.
Choose .
Click Advanced settings.
In the left-side navigation pane of the Windows Defender Firewall with Advanced Security window, click Inbound Rule. In the right-side Actions pannel, click New Rule.
Configure the rule.
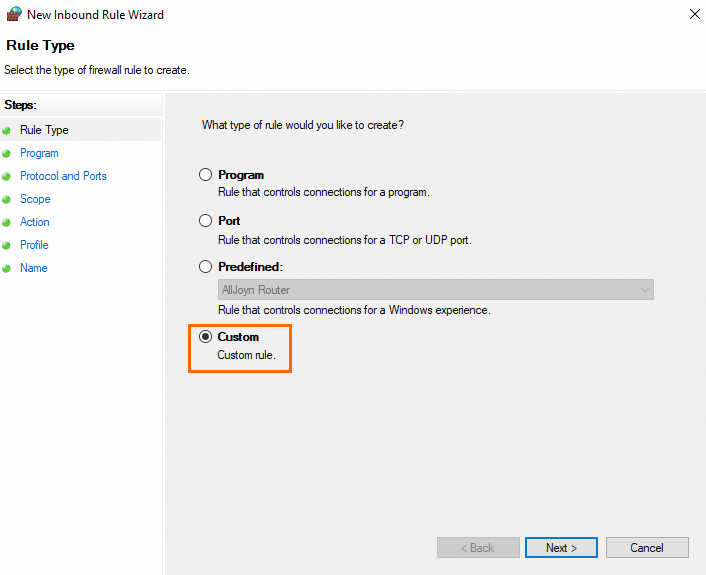
In the Rule Type step, select Custom and then click Next.
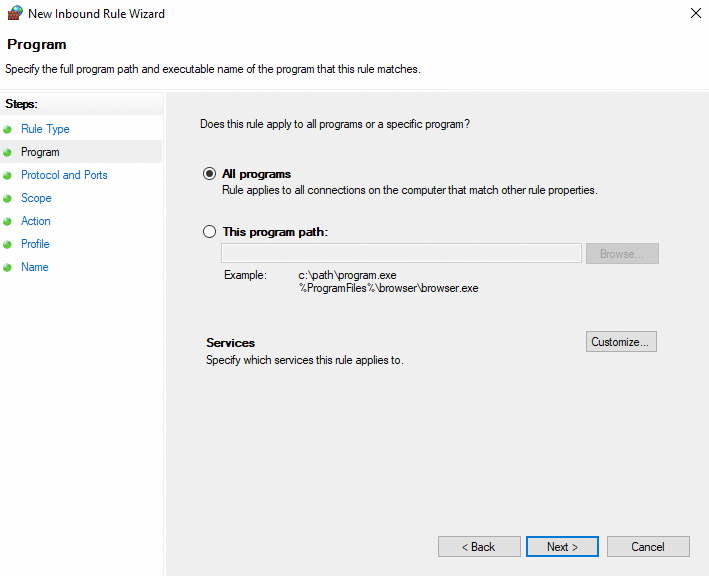
In the Program step, select All programs or This program path, and then click Next.
NoteAll programs indicates all programs on the on-premises machine. This program path indicates a specific single program.
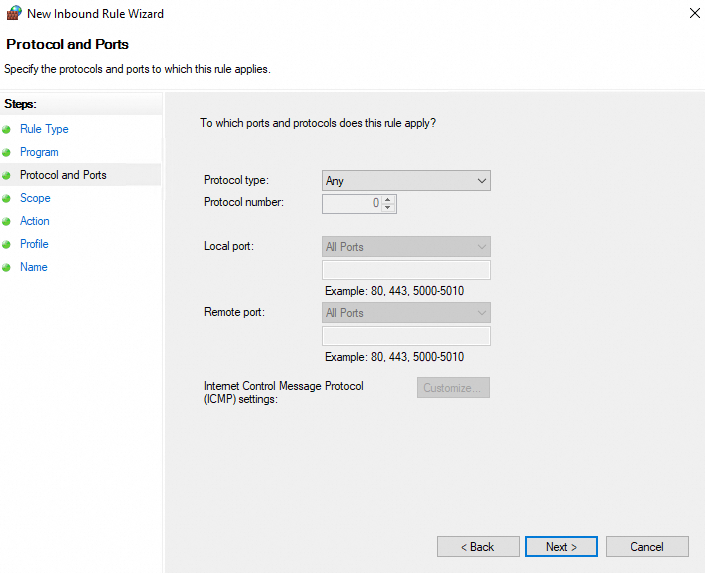
In the Protocol and Ports step, specify the ports and protocols to which the rule applies based on your business requirements.
In the Which remote IP addresses does this rule apply to? section of the Scope step, select These IP addresses and click Add.
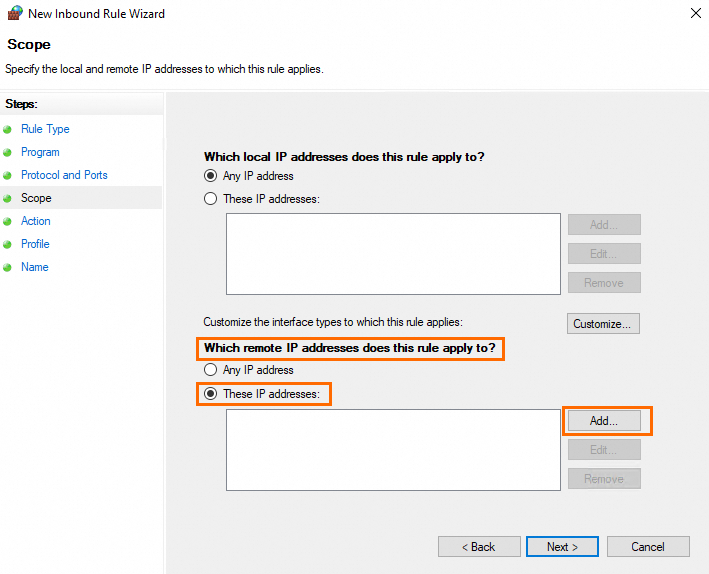
Enter an IP address or CIDR block, such as the public IP address of your on-premises computer, and click OK. Click Next.
NoteYou can click Add to add multiple IP addresses or CIDR blocks.
In the Action step, select Block the connection or Allow the connection and click Next.
In the Profile step, select one or more appropriate profiles and click Next.
NoteBy default, all profiles are selected. Select profiles based on the on-premises network environment.
In the Name step, enter the rule name and description, and then click Finish.
References
If you cannot connect to the instance, you can add a rule to allow remote connections for the system firewall. For more information, see Manage the system firewall of a Windows instance.
If you still cannot connect to the instance after you confirm that the system firewall is correctly configured, you can troubleshoot other issues. For more information, see What do I do if I cannot connect to a Windows instance? and RDP connection issues.