Data Security Center (DSC) scans images stored in Object Storage Service (OSS) and covers sensitive information — such as faces, ID card numbers, and license plates — with a gray rectangle. Masked images are saved to a separate folder in the same bucket. Your originals are never modified.
This topic describes how to enable image masking and create masking tasks.
Supported scope
Sensitive information types
ID card information (the Chinese mainland)
License plate information (the Chinese mainland)
Faces
Names (Simplified Chinese)
Addresses (the Chinese mainland)
Unified Social Credit Codes
Image requirements
Maximum size: 10 MB
Supported formats: PNG, JPG, JPEG, BMP, WEBP
Bucket coverage
All buckets under the current account are supported.
If you enable the multi-account management feature, buckets under your member accounts are also supported.
You can create only one image data masking task for each OSS bucket.
Where masked images are stored
Masked images are saved to the aliyun_dsc_desensitization folder in the source bucket, with the original file path preserved. The original image is not modified.
For example, an image at exampledir/test.png produces a masked copy at aliyun_dsc_desensitization/exampledir/test.png.
Prerequisites
Before you begin, make sure that you have:
An Alibaba Cloud account with access to OSS buckets containing images to mask
An active DSC subscription (Advanced Edition, Enterprise Edition, or Value-added Plan) with the Image Masking add-on enabled
Enable image masking
Image masking is a value-added add-on billed on a subscription basis. Follow the steps for your situation.
If you have not activated DSC
Go to the Data Security Center buy page.
In the Edition section, select Advanced Edition, Enterprise Edition, or Value-added Plan. For more information, see Purchase DSC.
In the Value-added Module section, click Enable next to Image Masking and enter the Image Masking Quota.
(Optional) To classify sensitive data by sensitivity level before masking, also enable Enhanced Image Identification and purchase an Enhanced Image Identification Capacity quota.
Select a Duration and click Buy Now. Complete the payment.
After the purchase, if this is your first time logging in to the Data Security Center console, grant the required permissions on your cloud resources as prompted.
If you have activated DSC but not image masking
Log in to the Data Security Center console.
On the Overview page, click Upgrade.
On the Upgrade/Downgrade page, in the Feature Extension Module section, turn on Image Masking and specify the Image Masking Quota.
(Optional) To classify sensitive data by sensitivity level before masking, also enable Enhanced Image Identification and purchase an Enhanced Image Identification Capacity quota.
Click Buy Now and complete the payment.
First-time use
The first time you navigate to Risk Governance > Image Masking, a welcome dialog appears.
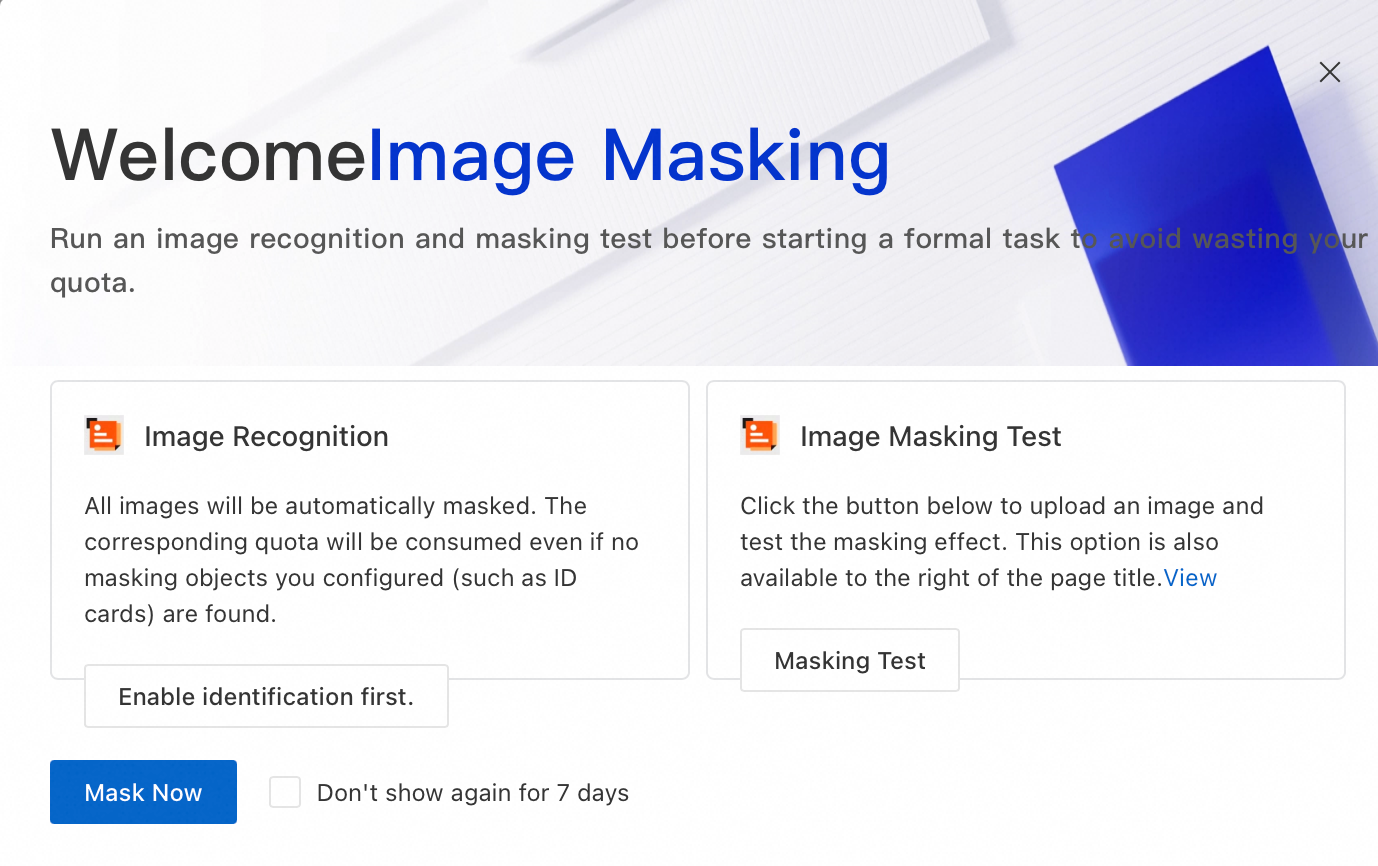
Select an option based on your goal:
Masking Test: Upload a test image to preview the masking effect. After closing this dialog, the Masking Test entry remains available in the upper-right corner of the page.
Enable identification first.: Enable the Classification and Grading switch for the bucket in Asset Center, so DSC can detect and classify sensitive data before masking. For more information, see Enable features.
Mask Now: Skip classification and go directly to static data masking.
Static data masking
Use static masking to scan an entire bucket on demand or on a schedule.
Create a masking task
Log in to the Data Security Center console.
In the left navigation pane, choose Risk Governance > Image Masking.
On the Static Desensitization tab, click Sync Bucket. Locate the target bucket and click Mask in the Actions column.
Configure the following parameters, then confirm to create the task.
| Parameter | Description |
|---|---|
| Masking Scope | The images to include in the scan. If left blank, DSC scans all eligible images in the bucket. To target specific images, set Match by Prefix or Match by Suffix and enter a matching value. For example, with all images example/dir01/test01.png, example/dir02/test02.jpg, testexample/testdir/testim.jpg, and test.jpg in the bucket: prefix example matches the first two; suffix jpg matches the last three. |
| Scan Type | Run Now: starts the scan immediately. Periodic Run: set a Scheduled Execution Time; DSC masks incremental images in the bucket at 00:00:00 on each scheduled cycle. To trigger the task immediately in periodic mode, select Run Again Now. |
| Image De-identification | Masking Object: select one or more sensitive information types to detect. De-identification Method: currently only Cover (gray rectangle) is supported. |
View masking results
After saving the configuration, the task appears in the task list. When the Masking Status changes to Finished, click View Details in the Actions column.
| Field | Description |
|---|---|
| Masked Images / Recognized Images | Number of images that were masked out of those recognized |
| Executions | Total number of times the task has run; a single image can be processed across multiple executions |
| Image Details | Click the number next to Executions to view masking details for each image |
Dynamic data masking
Dynamic masking lets you trigger image masking through the API, which is useful for on-demand or programmatic workflows.
In the left navigation pane, choose Risk Governance > Image Masking and click the Dynamic desensitization tab.
In the upper-right corner, click API and Permission Details to open the API documentation.
Specify parameters including
BucketName,ObjectKey,ServiceRegionId, andMaskRuleIdList, then call the API.Note Click Test in the API documentation to call the API directly in OpenAPI Explorer. On a successful call, OpenAPI Explorer automatically generates sample SDK code.After a successful call, the console displays Number of Masked Images, Masked Images, and Executions.
FAQ
| Question | Answer |
|---|---|
| Does masking overwrite my original images? | No. Masked images are saved to the aliyun_dsc_desensitization folder in the same bucket. Your originals remain unchanged. |
| How do I increase my image masking quota? | On the Risk Governance > Image Masking page, click Upgrade to purchase additional quota on the Upgrade/Downgrade page. You can also click Upgrade on the Overview page. 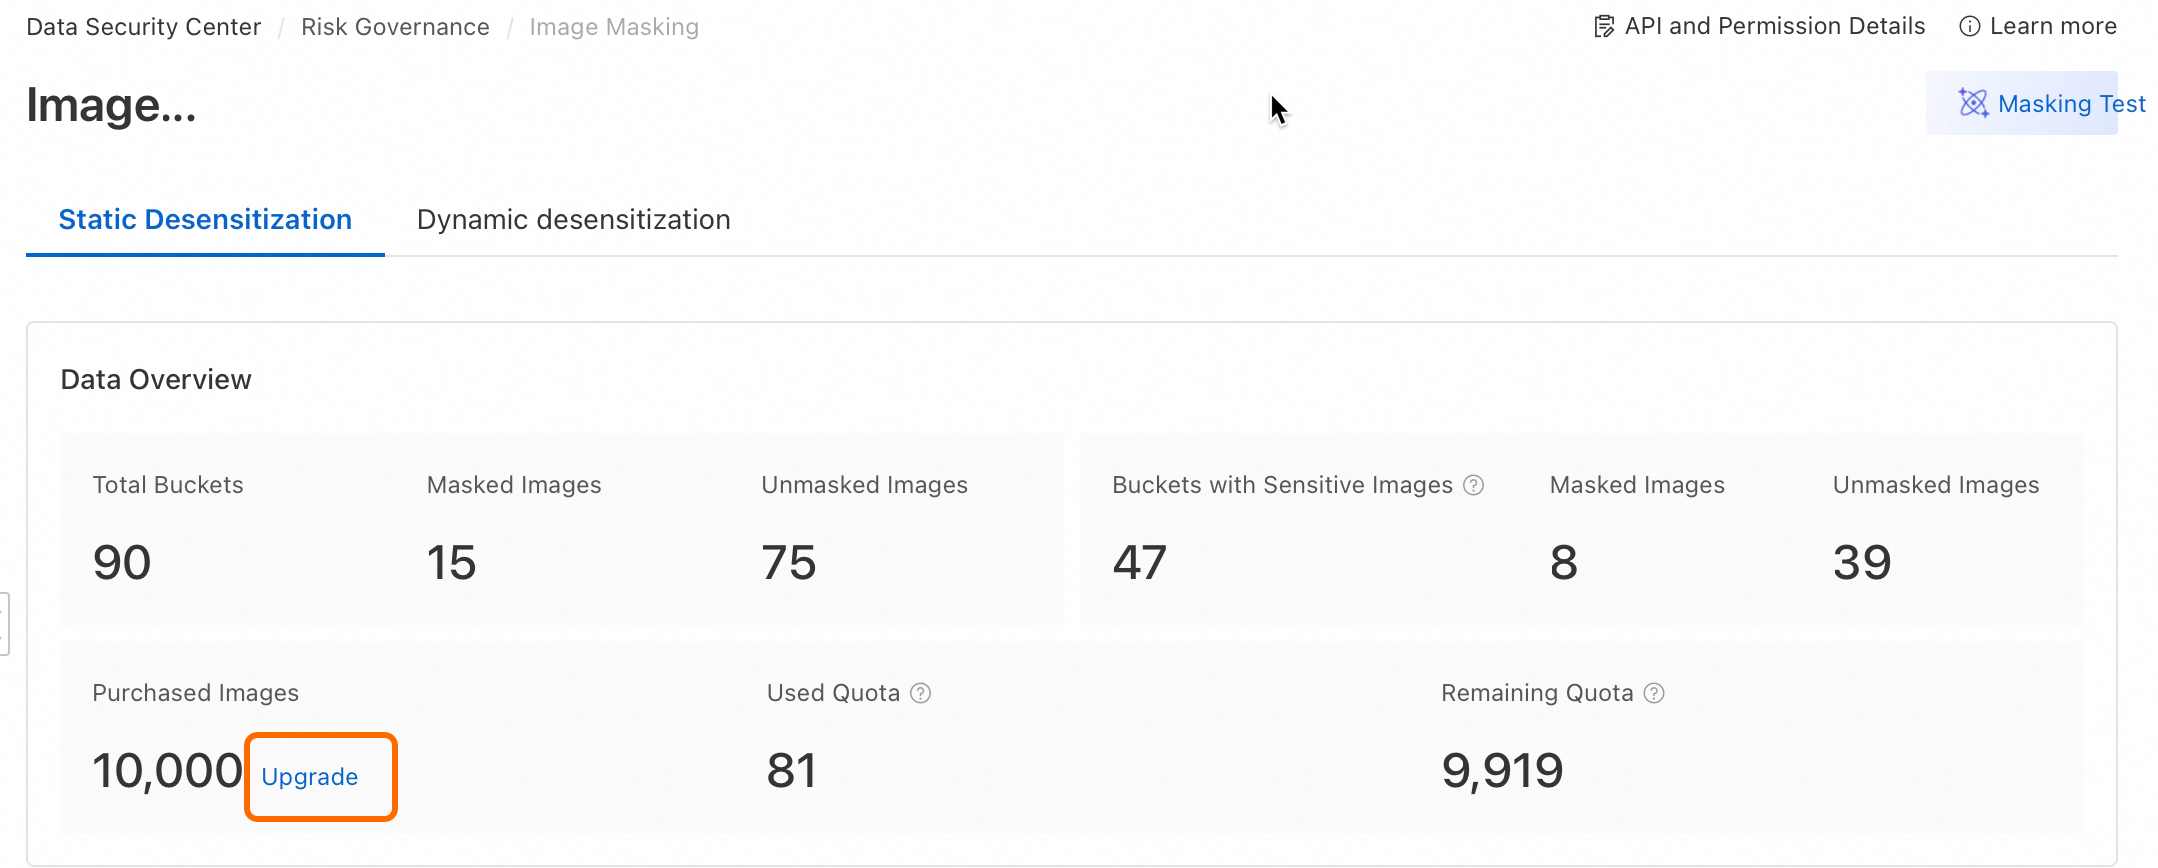 |
| Is Enhanced Image Identification required to use image masking? | No. Enhanced Image Identification is optional. It lets DSC classify images by Sensitivity Level before masking, so you can target masking based on data sensitivity. Without it, DSC masks all detected sensitive information types you select. |
| Can I run a masking task on a bucket that already has one? | No. Each OSS bucket supports only one image masking task. Edit or re-run the existing task instead of creating a new one. |