This topic describes how to optimize cache performance, enable the built-in query
engine for datasets that are created based on large-scale databases, and enable the
full table scan feature to optimize dataset performance.
Prerequisites
A dataset is created. For information about how to create a dataset, see
Create a dataset.
Background information
The dataset cache feature can accelerate report access and reduce database queries.
After you enable the cache feature for a dataset and a user queries a report that
is generated based on the dataset, the queried data is cached. When other users attempt
to query reports within the specified cache duration, Quick BI first requests data
from the cache. If the cache does not contain the requested data, Quick BI requests
the data from the database and then caches the data.
Specify a cache duration for a dataset
When you enable the cache feature for a dataset, you must specify a cache duration.
The following table describes the duration values supported by each Quick BI edition.
| Edition |
Cache duration |
| Quick BI Pro |
Personal workspace |
Valid values: 5 Minutes, 30 Minutes, 1 Hour, 2 Hours, 4 Hours, and 12 Hours. |
| Group workspace |
Valid values: 5 Minutes, 30 Minutes, 1 Hour, 2 Hours, 4 Hours, and 12 Hours. |
| Quick BI Enterprise Standard |
Personal workspace |
Valid values: 5 Minutes, 30 Minutes, 1 Hour, 2 Hours, 4 Hours, and 12 Hours. |
| Group workspace |
Valid values: 5 Minutes, 30 Minutes, 1 Hour, 2 Hours, 4 Hours, 12 Hours, and 24 Hours.
|
- After the cache duration elapses, the cached data becomes invalid. New cached data
can be generated when a user queries data on the report page. When the same SQL statement
is executed again within the cache duration, the system retrieves data from the cache.
- The system caches data based on datasets. When the cached data for a dataset is cleared,
the cached data for all charts that are generated based on the dataset is cleared.
Therefore, after the specified cache duration elapses, all chart caches for this dataset
are cleared.
Enable the precompute feature for a dataset
The precompute feature is suitable for datasets that produce data once a day.
You can enable the precompute feature for datasets that are created based on data sources from MaxCompute, ApsaraDB
RDS for MySQL, and ApsaraDB RDS for PostgreSQL.
After the precompute feature is enabled for a dataset, the system processes data in
the dataset. When users query reports that are created based on the dataset, the system
can return results in a short period of time. The precompute feature provides the
following benefits:
- Easy to use. You need only to select Turn on precalculation in the Speed up the cache dialog box to enable this feature. The system automatically
builds a model based on the dataset usage in the last seven days and then precomputes
data and aggregates result data. You can use this feature only for aggregate queries.
- High-performance and cost-effective. The precompute feature precomputes data and aggregates
result data to reduce the number of data dimensions that need to be queried. This
can significantly reduce query time and improve analysis efficiency for large-scale
datasets.
Configure cache acceleration
You can enable the cache feature and configure a cache duration, enable the acceleration
engine feature, or enable the precompute feature to accelerate report queries.
Before you enable the acceleration engine feature for a dataset, make sure that an
acceleration engine is configured. Only administrators can configure an acceleration
engine. For more information, see Configure an acceleration engine.
- In the top navigation bar, click Workspace. On the page that appears, click Datasets in the left-side navigation pane.
- On the Datasets page, find the dataset that you want to manage, click the
 icon in the Actions column, and then click Speed up the cache.
You can also right-click the dataset name and then click Speed up the cache.
- In the Speed up the cache dialog box, select and configure one of the following parameters:
- Enable caching: Select this option to enable the cache feature. After you enable the cache feature for the current dataset and a user queries a report that is generated base
on the dataset, the queried data is cached. When other users attempt to query reports
within the specified cache duration, Quick BI first requests data from the cache.
If the cache does not contain the requested data, Quick BI requests the data from
the database and then caches the data.
- Turn on acceleration: Select this option to enable the Data Lake Analytics (DLA) acceleration engine.
If a dataset has a large amount of data, you can enable this feature. After this feature
is enabled, the system automatically uses Alibaba Cloud DLA to accelerate chart queries.
This feature allows Quick BI to respond to queries on hundreds of millions of data
records in seconds. This way, the report query time is reduced.
- Turn on precalculation: Select this option to enable the precompute feature. After the precompute feature
is enabled, the system processes data in the dataset. When users query reports that
are created based on the dataset, the system can return results in a short period
of time.
Note
- You can enable the precompute feature for datasets that are created based on data sources from MaxCompute, ApsaraDB
RDS for MySQL, and ApsaraDB RDS for PostgreSQL.
- The precompute feature is suitable for datasets that produce data once a day.
- Turn on dimensional acceleration: Select this option to enable the dimensional acceleration feature. If the dataset
has a large amount of data, the query speed may be slow when you use the query widget
to query charts. As a solution, Quick BI provides this feature to accelerate queries
on dimensions in a dataset. When you enable this feature, you must specify the tables
and the fields from which the dimension values come. After the dimensional acceleration
feature is enabled and configured, the system reads data from the specified tables
based on the conditions that users configure in the query widget. This way, the system
does not obtain data by automatically parsing the source data.
- Click OK.
Optimize the performance of data queries on large-scale databases
For databases that have slow queries, such as MaxCompute databases and Hive-based
databases, Quick BI provides a built-in query engine to optimize query performance.
Enable the full table scan feature
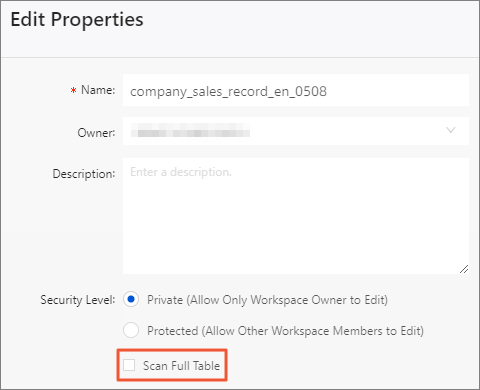
If you want to query data from a dataset that is created based on MaxCompute partitioned
tables, you must enable the full table scan feature. Otherwise, requested data cannot
be obtained.
- In the top navigation bar, click Workspace. On the page that appears, click Datasets in the left-side navigation pane.
- On the Datasets page, find the dataset that you want to manage, click the
 icon in the Actions column, and then click Edit Properties.
You can also right-click the dataset name and then click Edit Properties.
- In the Edit Properties panel, select Scan Full Table.
- Click Save.
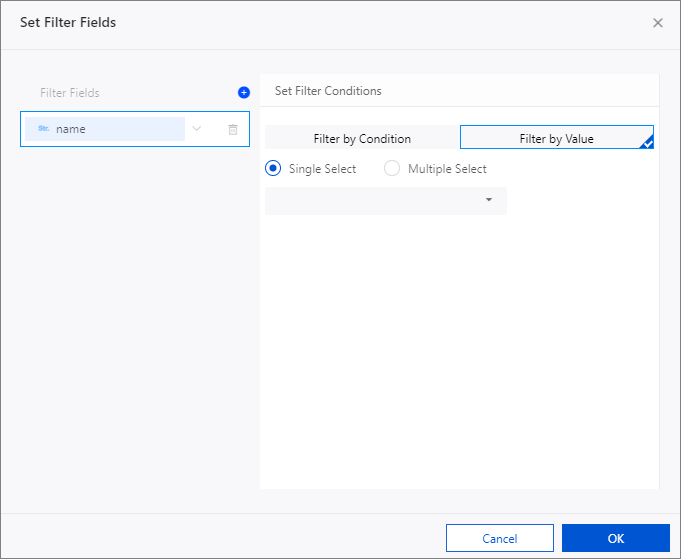
- Optional:If the scan efficiency is slow after you enable the full table scan feature, you can
use field-based filtering or SQL statement-based filtering to improve the scan efficiency.
Change the data source for a dataset
You can change the data source of a dataset to improve the performance of the dataset.
Notice Save the dataset configuration before you change the data source. Otherwise, unsaved
configuration changes are not retained after the data source is changed. Different
data sources support different syntaxes. After the data source is changed, check whether
the calculated field configuration is valid.
- In the top navigation bar, click Workspace. On the page that appears, click Datasets in the left-side navigation pane.
- On the Datasets page, click the name of the dataset that you want to manage.
You can also click the

icon in the Actions column.

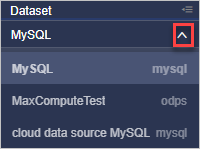
- In the left-side navigation pane of the dataset editing page, click the drop-down
icon in the data source field and select a new data source.

Note The drop-down list displays all data sources in this workspace.
- The left-side column displays the data source name.
- The right-side column displays the data source type.
- In the Switch data source message, read the message and click OK.
 icon in the
 icon in the
 icon in the Actions column.
