Set up Apache Airflow in DMS to orchestrate data workflows. This guide walks you through creating an Airflow instance, connecting a Git account, linking a code repository, deploying DAG code, and viewing execution results.
Billing
Fees are based on Workflow Specifications (the number of CUs consumed). The unit price is shown on the Configure Resources page.
Prerequisites
Before you begin, ensure that you have:
Completed the instance resource preparation described in Preparations. The Airflow instance depends on the VPC, vSwitch, security group, and OSS bucket configured during that step
An Object Storage Service (OSS) bucket in the same region as your workspace, with a storage path created for Airflow data
A Git repository (GitHub, Apsara Devops Codeup, or a private GitLab instance) that holds your DAG code
Step 1: Create an Airflow instance
Log on to the DMS console V5.0.
Go to the Workspace page. In the upper-left corner, click the
 icon, then choose All Features > Data+AI > Workspace.
If you are not using the simplified console, choose Data+AI > Workspace from the top menu bar.

Click the name of the target workspace to open it, or create a new workspace.
In the left navigation pane, choose
 > Airflow Instance, then click Create Instance.
Configure the instance. The following table describes the key parameters.
Parameter Description Workflow Specification Select a specification based on the scale and complexity of your workflows. Start with the smallest size that meets your current needs — you can change this later. For capacity comparisons, see Airflow specifications. Worker Node Extension Airflow automatically adjusts the number of worker nodes based on task load. The node count scales between 1 and 10. VPC ID No change needed. Defaults to the same VPC as the workspace. vSwitch Select the target vSwitch. Security Group Select the security group to control workflow network access. OSS Bucket Select an OSS bucket in the same region as the workspace. OSS Path Enter the storage path you created during the preparations. Click Submit. The instance is ready when its status changes to Running.
Step 2: Add a linked account
A linked account connects DMS to your Git service provider. Linked accounts are personal — other users in the same workspace cannot see the resources associated with your account.
In the upper-right corner of the workspace, click your profile picture, then click the
 icon to create a linked account.
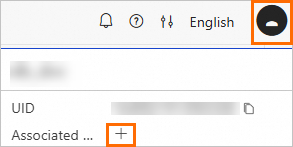
In the New Service Provider Account dialog box, select an account Type. DMS supports three account types: GitHub, Apsara Devops Codeup, and Private GitLab.
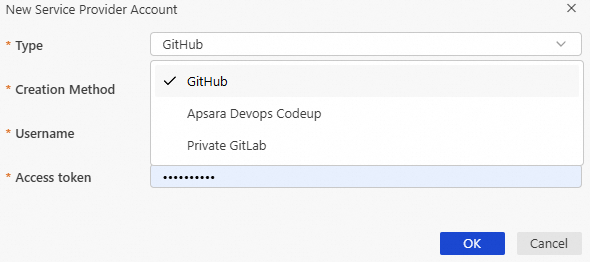
Select a Creation Method and enter the required credentials.
Username and password: Enter your Username and Password.
User token: Enter an Access token generated by your Git provider.
Click OK.
Step 3: Create a code repository
In the left navigation pane of the workspace, click the
 icon to open the EXPLORER panel.
In the CODE (Code Repository) area, click the
 icon and select Add existing git repository.
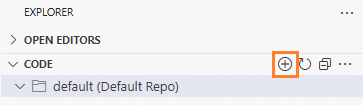
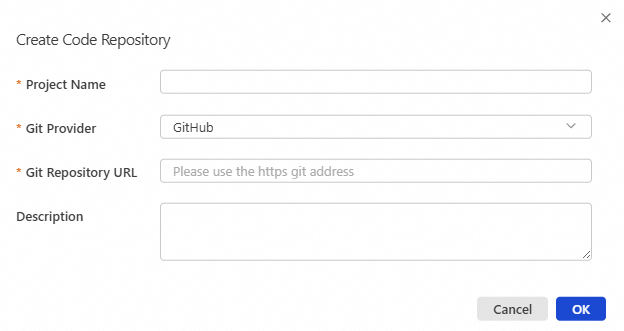
Enter a Project Name, select the Git Provider and Git Repository URL, then click OK. If you use Alibaba Cloud services, set Git Provider to CodeUp. DMS then selects a CodeUp linked account by default. After the repository is added, its name appears in the repository list.
Step 4: Develop and deploy code
To the right of the repository name, click the branch name (defaults to
master). From here you can switch branches, create new branches, edit code, and save your changes.Saving is equivalent to running
git push.Review the environment and parameter configurations. Hover over the repository name and click the
 icon to open the environment settings.
Deploy the code. Hover over the repository name, click the
 button, then click OK in the confirmation dialog.
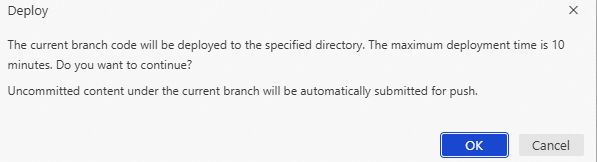
Step 5: View published tasks
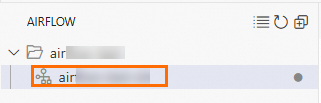
In the left navigation pane, click the
 icon.
icon.Click the Airflow instance under the target repository to see the published tasks.
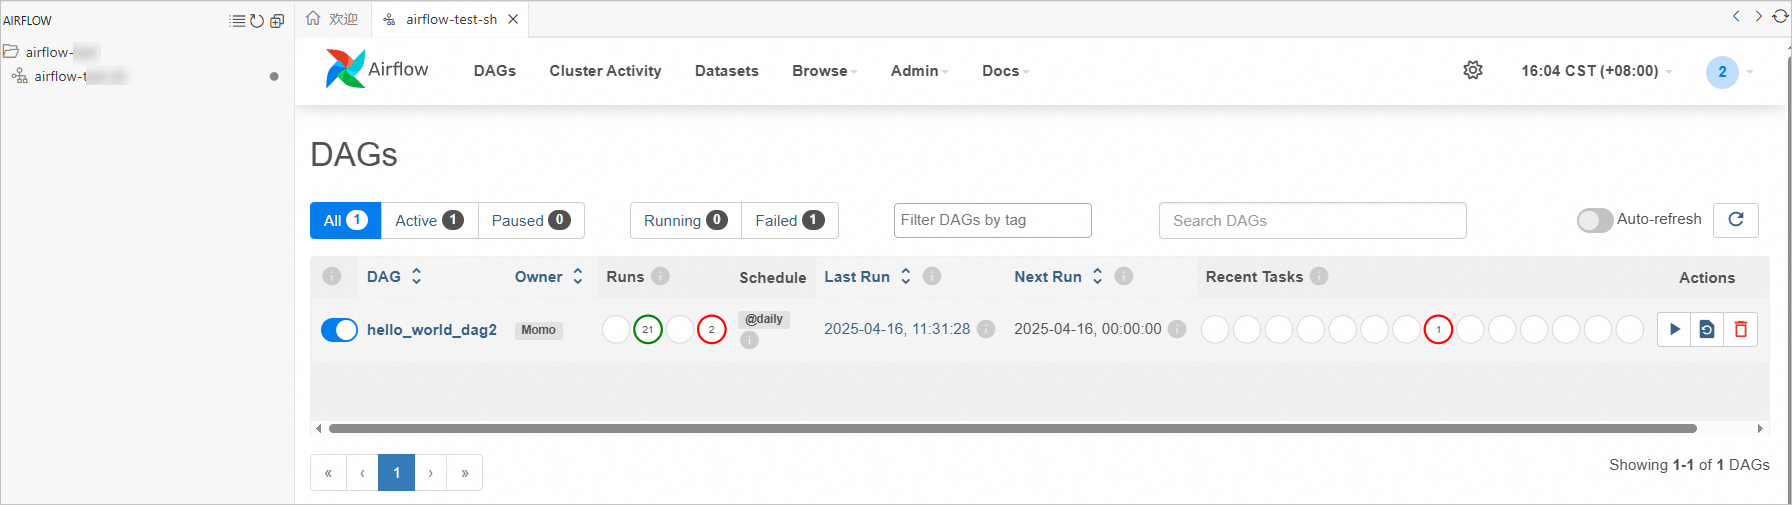
Click a Directed Acyclic Graph (DAG) name to view its execution results.
Airflow specifications
Both PostgreSQL and Redis run as high-availability (HA) instances across all specification tiers.
Start with the smallest specification that meets your current DAG count and parallelism needs. You can change the specification at any time as your workloads grow.
Both PostgreSQL and Redis are high-availability (HA) instances.
| Workflow specification | Web server | Worker | Scheduler | PostgreSQL | Redis | Web server replicas | Worker replicas | Scheduler replicas | Recommended DAGs | Worker parallelism |
|---|---|---|---|---|---|---|---|---|---|---|
| Small | 1 vCPU, 4 GB RAM | 1 vCPU, 4 GB RAM | 1 vCPU, 4 GB RAM | 2 vCPU, 4 GB RAM | 1 GB | 2 | 1 | 2 | Up to 50 | 5 per worker |
| Center | 1 vCPU, 4 GB RAM | 2 vCPU, 8 GB RAM | 2 vCPU, 8 GB RAM | 2 vCPU, 8 GB RAM | 2 GB | — | — | — | Up to 250 | 10 per worker |
| Large | 2 vCPU, 8 GB RAM | 4 vCPU, 16 GB RAM | 4 vCPU, 16 GB RAM | 2 vCPU, 8 GB RAM | 4 GB | — | — | — | Up to 100 | 20 per worker |
| Extra Large | 4 vCPU, 16 GB RAM | 8 vCPU, 32 GB RAM | 8 vCPU, 32 GB RAM | 4 vCPU, 32 GB RAM | 8 GB | — | — | — | Up to 2,000 | 40 per worker |
| 2XL | 8 vCPU, 32 GB RAM | 16 vCPU, 64 GB RAM | 16 vCPU, 64 GB RAM | 8 vCPU, 64 GB RAM | 16 GB | — | — | — | Up to 4,000 | 80 per worker |